|
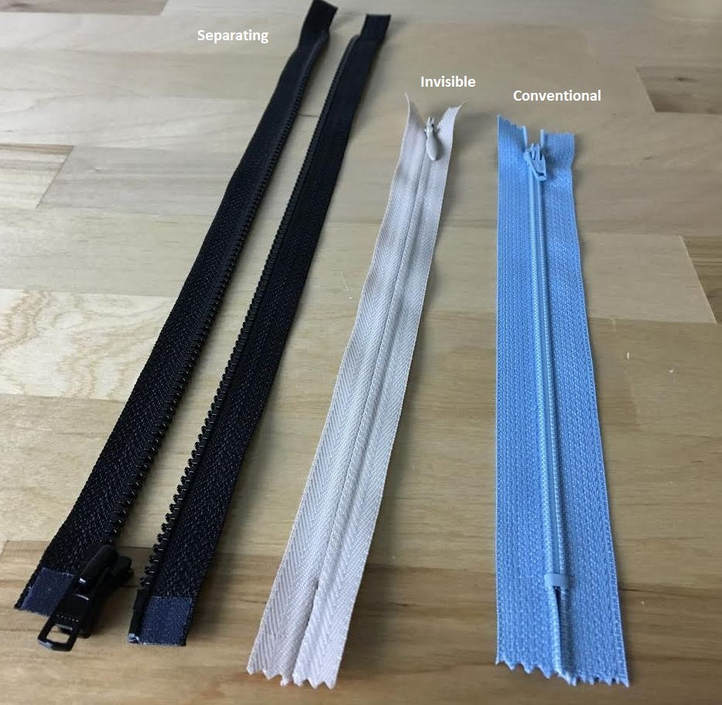
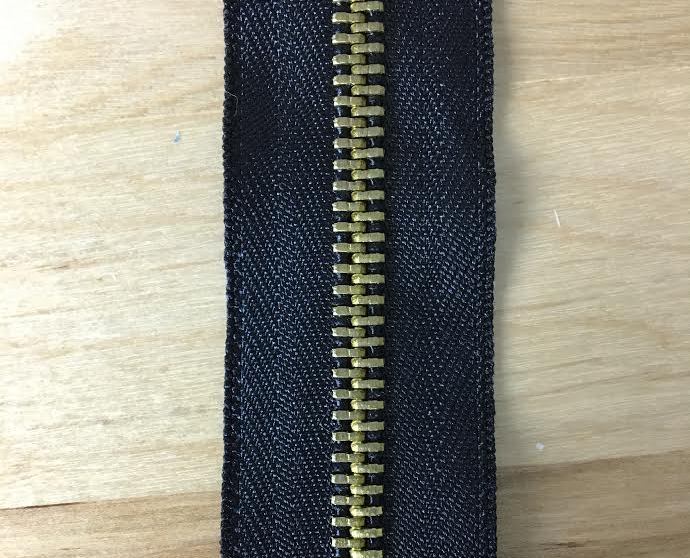
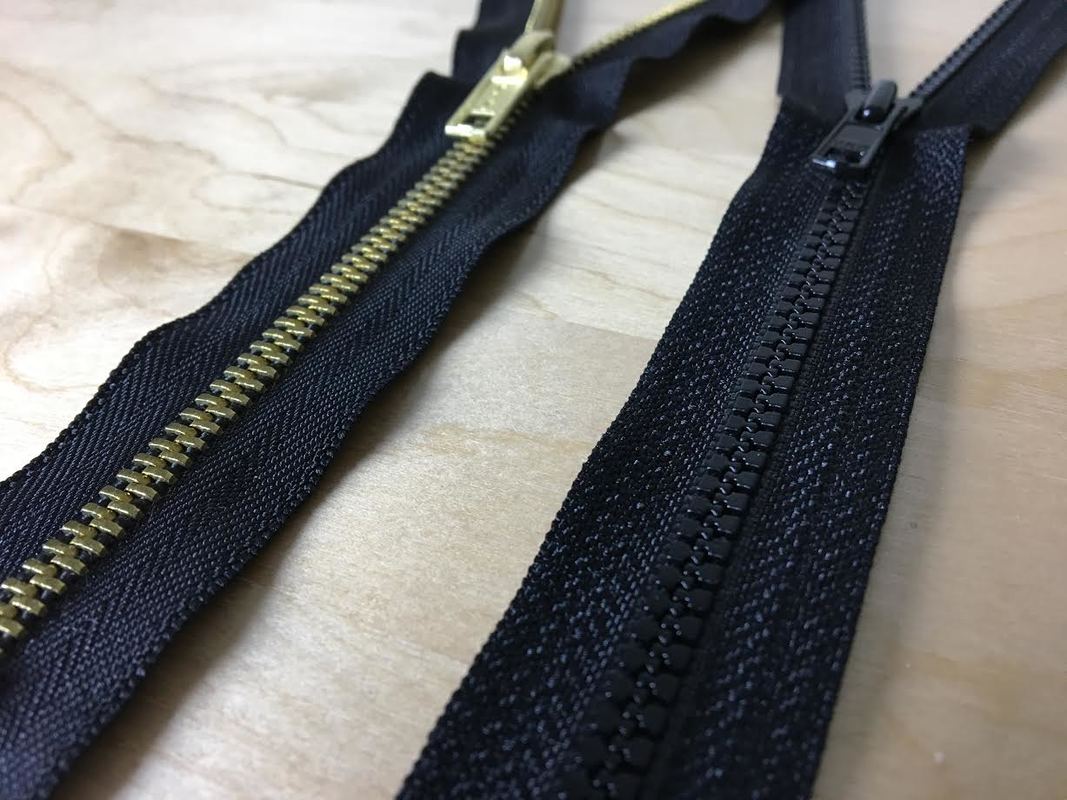
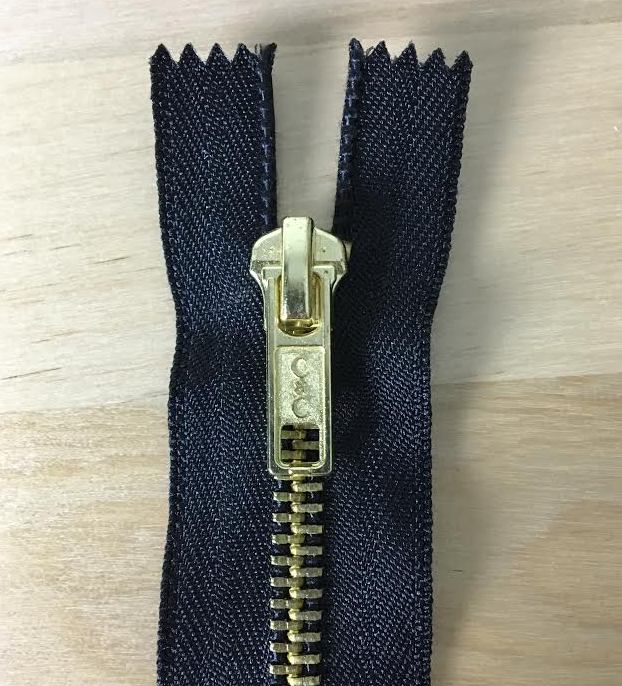
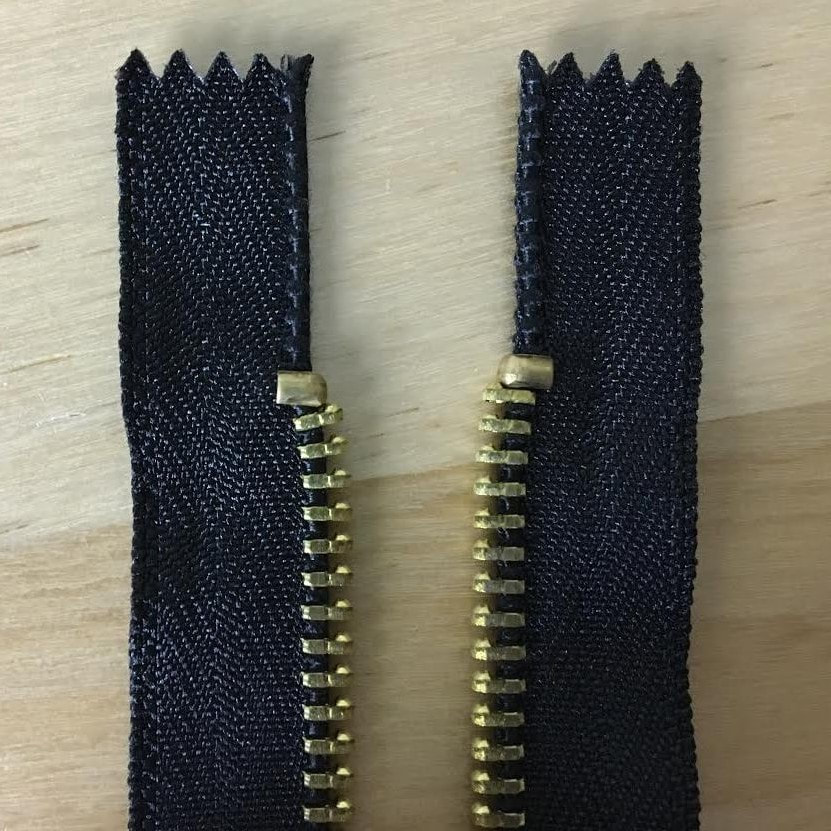
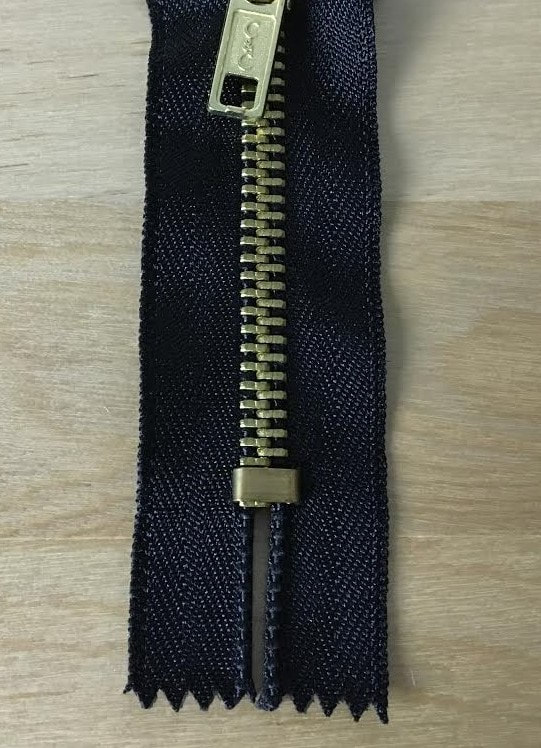
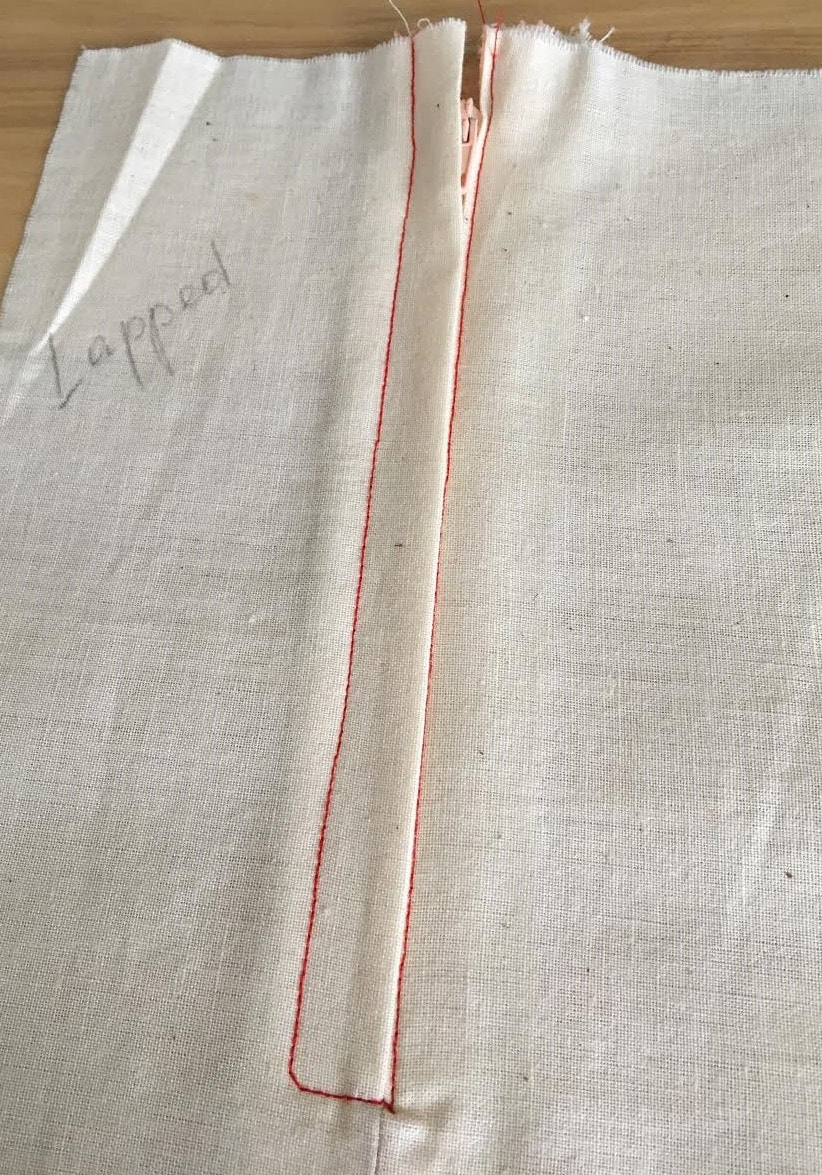
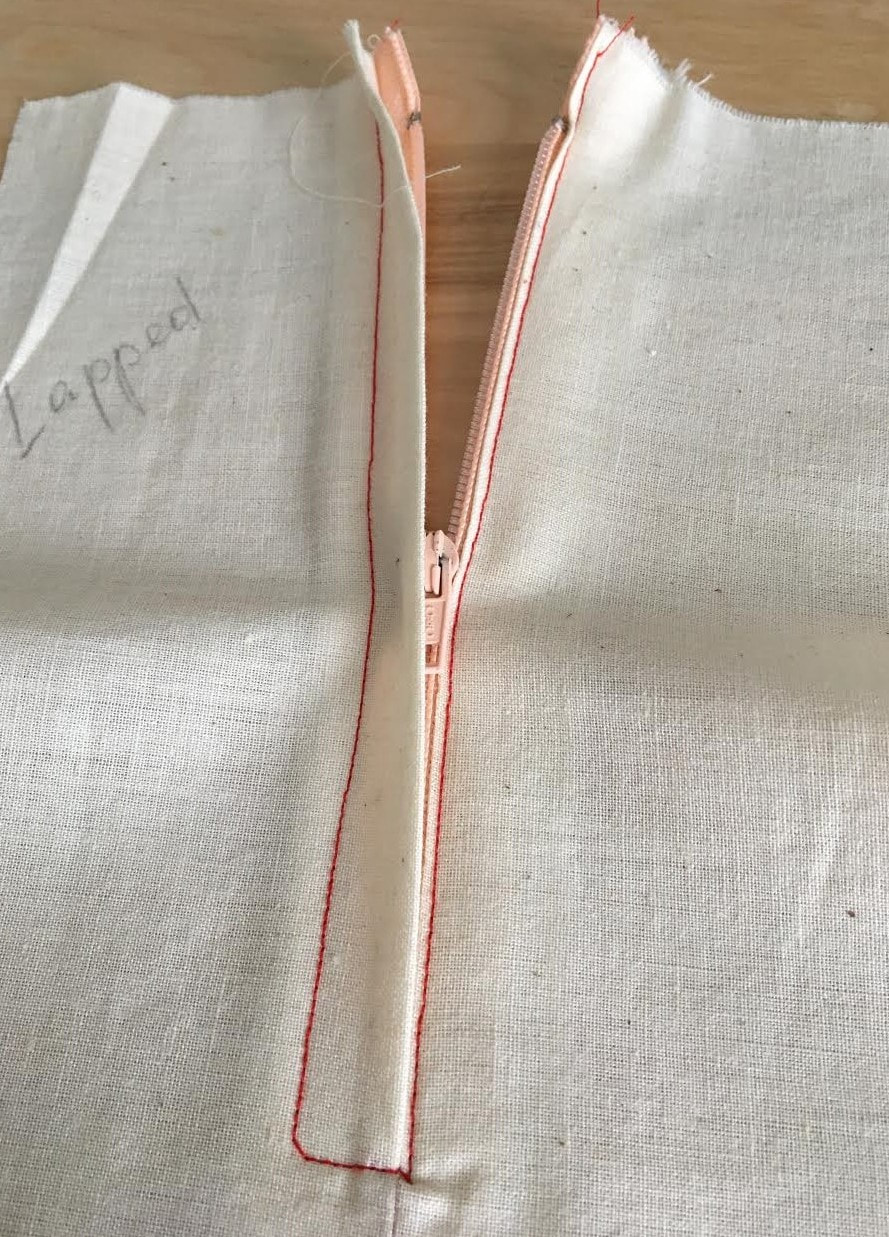
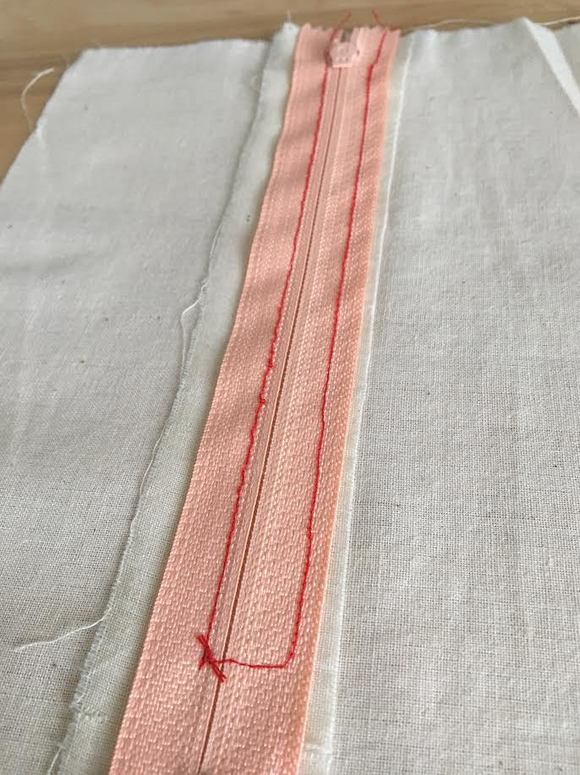
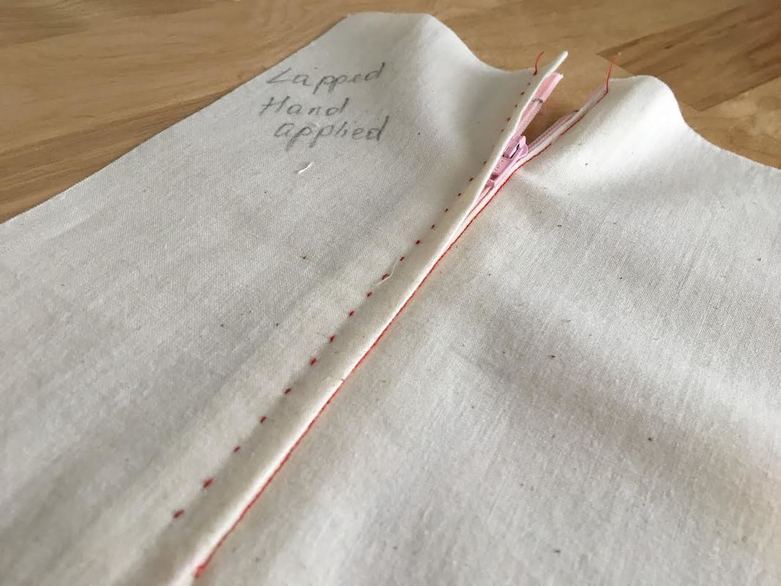
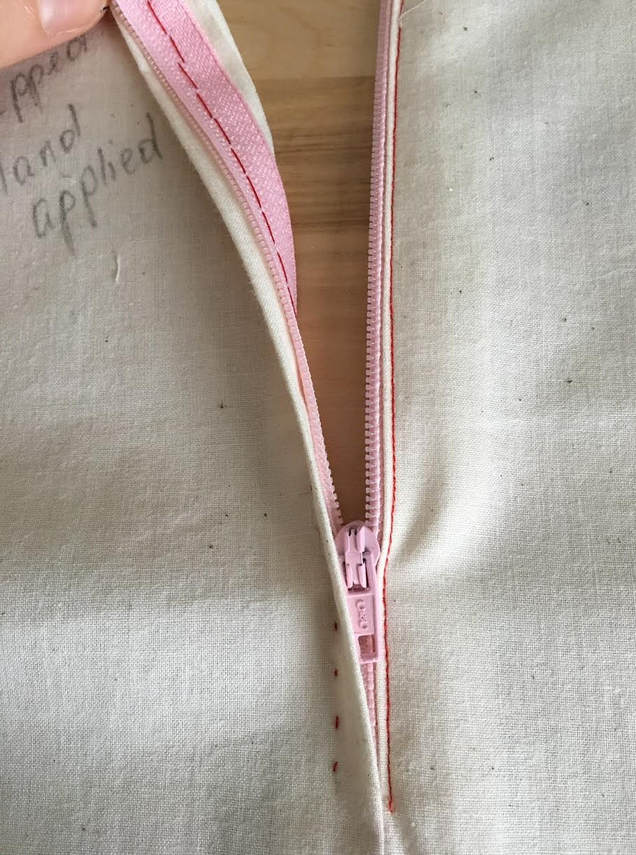
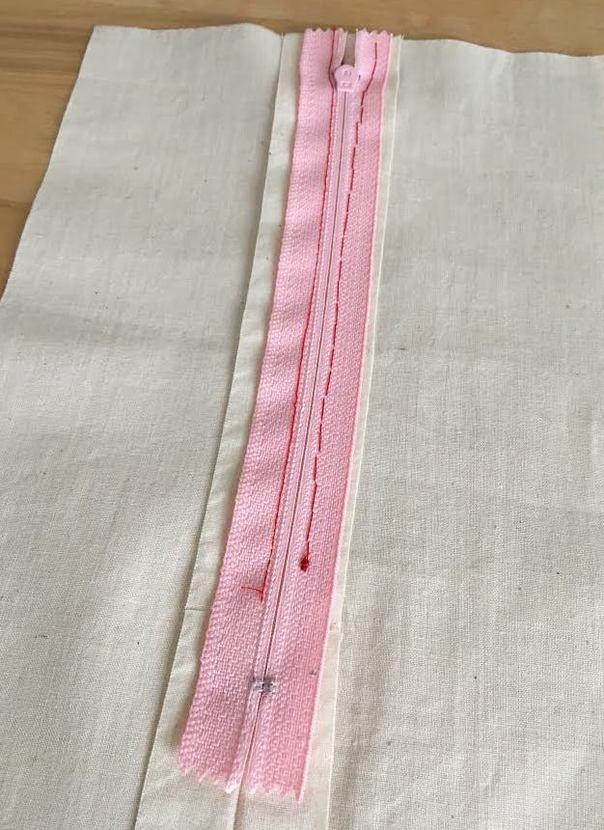
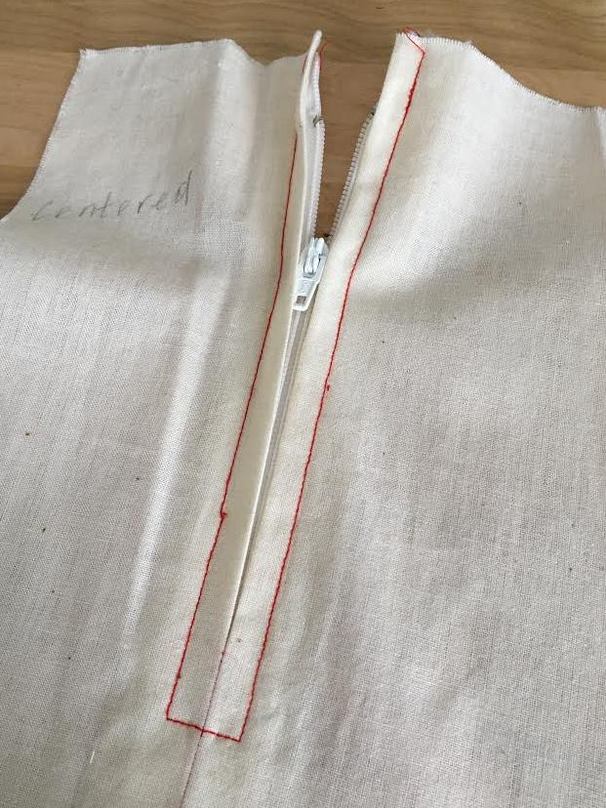
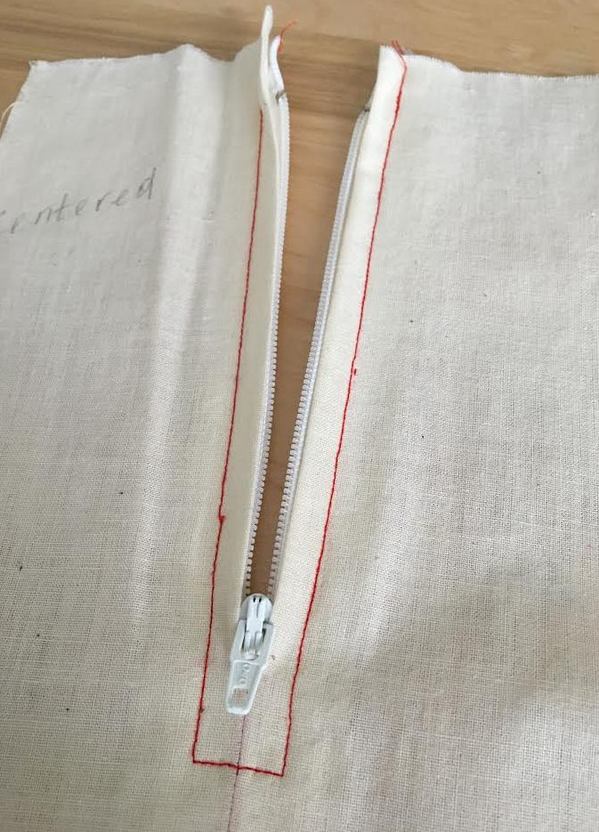
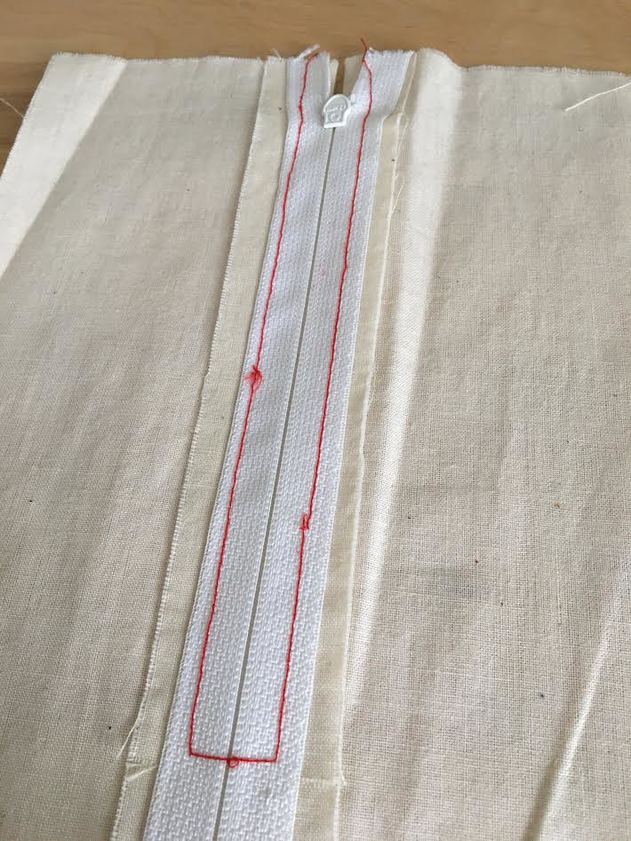
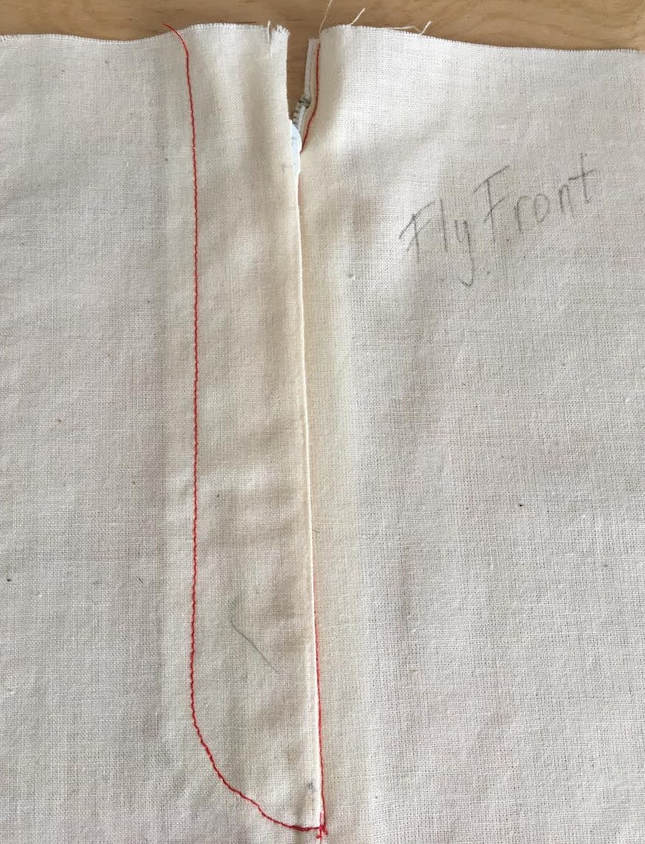
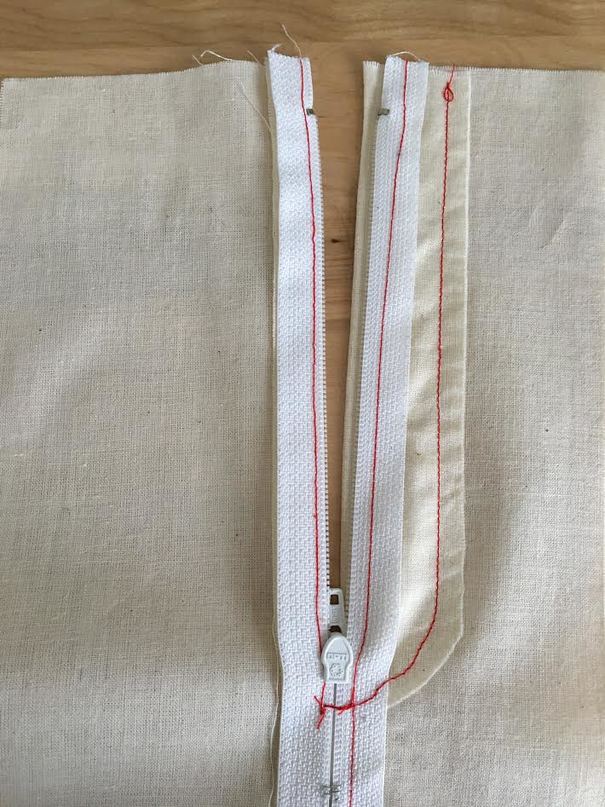
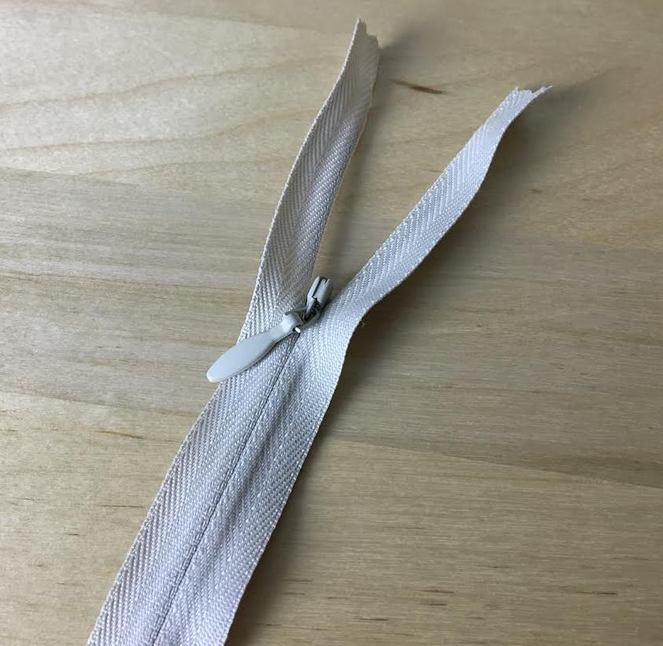
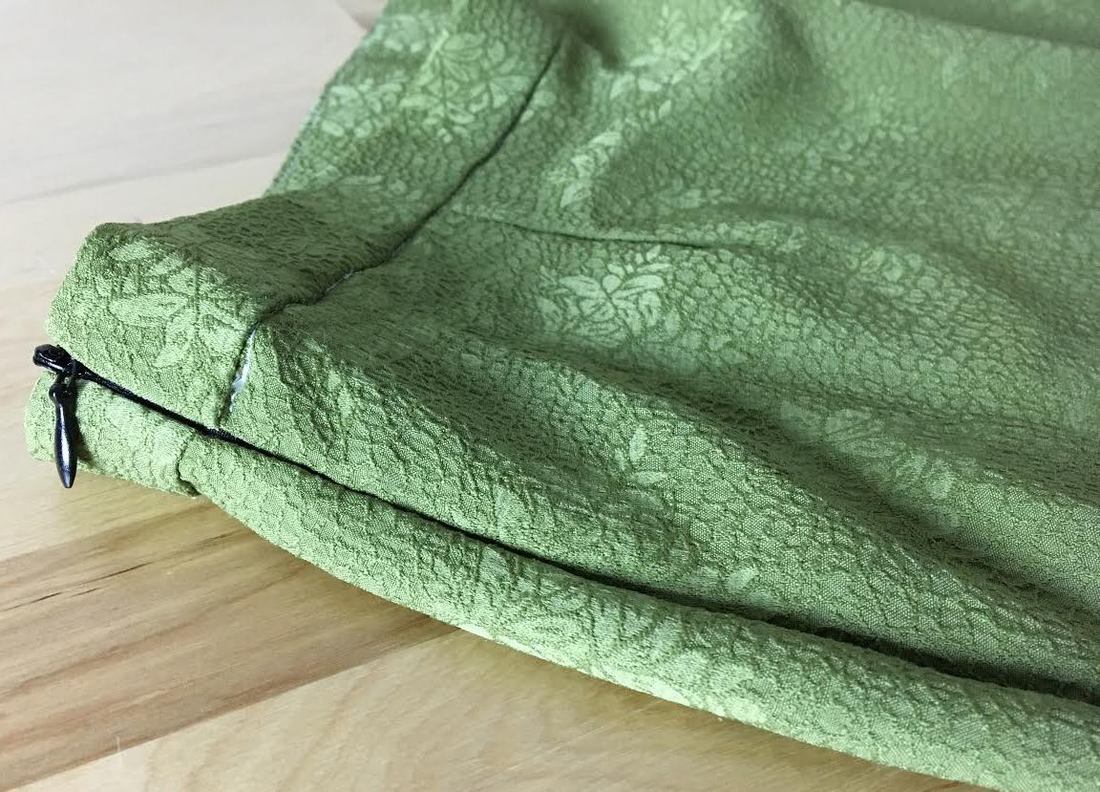
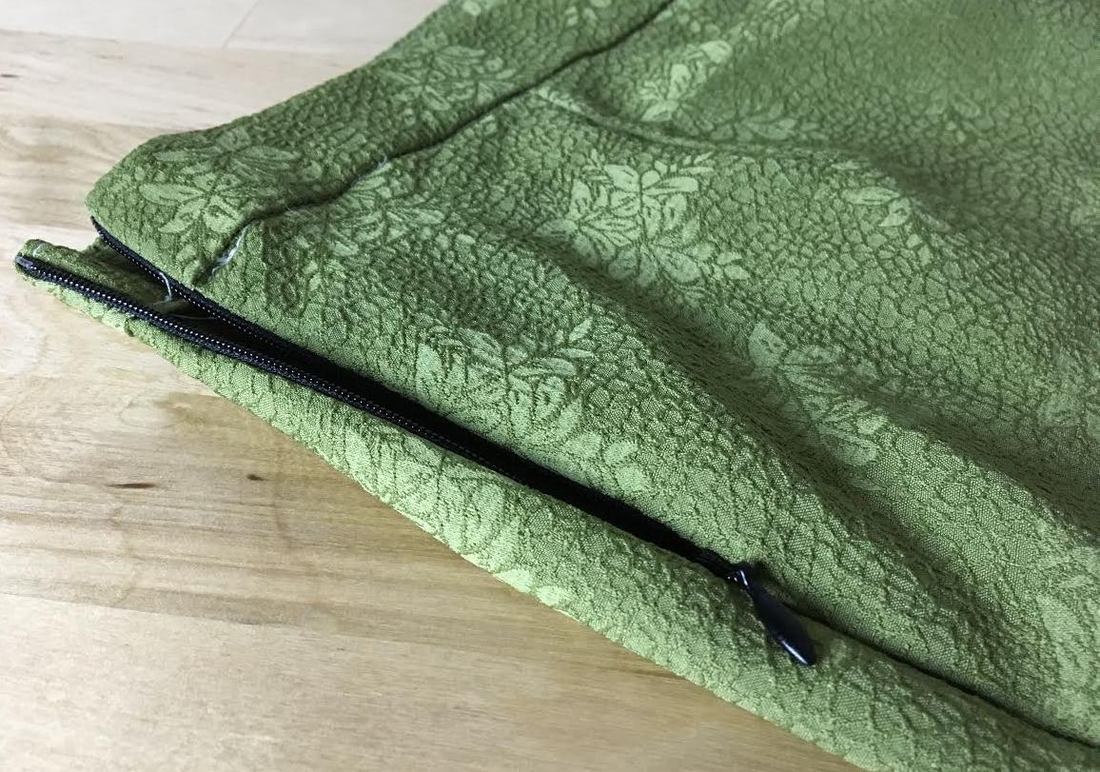
Zippers are perhaps the most intimidating to sew for beginners. Needless to say however, they are essential in ensuring the full functionality of a clothing item. Zipper closures come in a few different style variations and are mostly used with woven garments, especially those that are more formfitting. Knit garments do not usually require the use of a zipper closure as they are stretchy and flexible enough to be taken on and off without the need for closure. Before diving deeper into basic zipper application styles, it is important to understand the three main types of zippers available in dressmaking: Conventional zippers: Are closed on one end and sewn into a seam that doesn't fully separate. Invisible Zippers: Invisible zippers are always sewn into a seam and are designed to actually disappear into the seam with only the tab visible on the face of the garment. Although different in style and installation requirements, just like conventional zippers, invisible zippers are closed on one end. Separating Zippers: Separating zippers are open on both ends and sewn onto garment openings or into seams that separate completely. The 3 types of zippers described above are chosen based on the construction finish, design, fabric and functionality requirement of a garment. They are available in a variety of different lengths and weights, from very fine to heavy duty. All zippers, regardless of type, have these basic shared elements: Zipper teeth: The zipper teeth serve as a mechanism for physically closing and opening the zipper. They are usually constructed in the style of a chain made of metal or plastic, or coils made of synthetic materials like polyester and nylon. Both the metal and plastic options are equally durable so it is really a personal preference which option you choose. Generally, plastic zipper teeth are lighter in weight and available in more colors and sizes. The downside of plastic zipper teeth however, is that they are sensitive to high heat and steam so use precaution when ironing the garment. On the other hand, while metal zipper teeth can be a bit less flexible and prone to rusting, they can withstand heat from consistent ironing and steaming. Zipper tape: The zipper tape is usually a cotton blend or polyester/nylon blend and built to be durable and withstand long term wear. The zipper tape serves as the connection between the zipper teeth mechanism and the garment, thus serving as a flexible means to connect the two. In most cases, the zipper tape also features a vertical marked line at about 1/4" away from the teeth serving as a stitching guideline used in the sewing process. This mark makes the process of sewing and aligning a zipper much easier, especially since the process of installing zippers require a clean and precise alignment and the use of perfectly straight stitch lines. Slider with hand tab: The slider has a hand-tab attachment and is essential in easily opening and closing the zipper teeth. Conventionally, it is constructed of the same material as the zipper teeth. If the teeth are metal for example, you'll find that so is the slider and tab- the vise versa is true for plastic zipper teeth. The slider portion of the zipper is actually the part that does all the work. The attached tab on the other hand, serves as means for the user to easily move the slider up and down to close and open the zipper teeth. Keep in mind that almost all zippers, regardless of style or type have top stops and bottom stops to prevent the slider from gliding off the zipper teeth. Once it does, it can be quite difficult to insert it back and align it to work properly with the zipper mechanism again. Zippers should be chosen carefully in relation to their location on the garment and the type of zipper application used- The 3 types of zippers described above require distinct applications. Or example, the technique used for applying an invisible zipper is different than that of a regular/conventional zipper. On that same note, keep in mind that the weight of the fabric and style/design of the garment affects the type of zipper application and respectively the weight and style of the zipper necessary for the clothing item at hand. Needless to say, zippers are dependent on the various techniques used for sewing them. Below, we'll introduce you to 5 basic zipper applications you should be familiar with, especially if you are in the process of learning how to sew. You'll get a better understanding of how these applications relate to the type of zipper they require and the basics of incorporating them into the functionality of a clothing item. Although we talk about the actual step-by-step installation of each zipper throughout our blog, it is important to keep in mind that when it comes to sewing a zipper into a seam, the following rules apply for almost all basic applications: 1. Always finish the seam allowance edges before attaching the zipper. 2. The portion of the seamline that houses the zipper should be basted closed according to the seam allowance and pressed open during the zipper application process. This crucial step will ensure that the zipper teeth and the slider with tab remain hidden underneath the flap (once the zipper installation is complete) without distorting the seam allowance and fit of the garment. 3. In almost all instances of applying a conventional zipper, start with the zipper teeth in closed position such as to facilitate their alignment to the seamline. 4. Work on the wrong side of the garment unless the zipper application style requires a topstitch on the face side of the garment. 5. Staystitch vulnerable curved edges or add seam allowance extensions where necessary for a more durable, clean finish. 6. Adding a temporary hand baste, especially before topstitching on the face of the garment, is highly recommended in the zipper application process particularly for sewing beginners. While the hand basting stitch is removed once the zipper is fully installed, it is often crucial in preventing mistakes and misalignment in the sewing process. Lapped Zipper This is perhaps the first zipper application a sewing beginner will learn. It is simple to do and constitutes construction steps that are applicable to sewing most types of zippers. A lapped zipper has a visible topstitch on one side of the seamline (normally the left side), constituting a placket-like imitation or flap. This flap hides the zipper tab and teeth underneath for a clean look. Lapped zipper applications require a conventional zipper and a regular zipper presser foot (included with your sewing machine). They are usually used on more tailored styles of dresses, tops and some bottoms. It works best on medium weight fabrics that have enough structure to sustain its design. Due to the left opening characteristic of the zipper flap (placket), lapped zipper styles are usually incorporated into the left side of pants, skirts and dresses. The application steps are identical for all garments. However, the zipper should be placed properly in relation to the top of the garment. Allow for enough room at the top of the seamline if the garment requires a facing finish or a hook and eye addition. Although the flap portion looks as if it is overlapping the other edge at the seamline, this is actually an allusion created by the look of the flap. In actuality, both edges correspond to each other the same way they would if sewn into a regular seam. The zipper teeth are aligned to the side of the seamline corresponding to the flap such that when the zipper is closed, the teeth are underneath the flap as opposed to the seamline itself. The stitch applied closest to the zipper teeth on the opposite edge (hidden by the flap/placket) requires the use of a regular zipper foot (comes with almost all sewing machines). You'll also notice that this zipper style does not require the extension of seam allowance along the area of the zipper (unless the seam allowance is 5/8"or less). What this means is that a lapped zipper can be applied to a regular seam if it allows for enough excess for the signature top-stitching to be added properly. The best seam allowance for seams that house lapped zippers is 1". This is a standard seam allowance that allows for enough room for comfort and stability during sewing, also ensuring durability in the final zipper application. To better understand the construction of a lapped zipper or to sew one yourself, follow the step-by-step guide in our previous blog post: How To Sew a Lapped Zipper: The Easy Way. Hand Applied Lapped Zipper A hand applied lapped zipper follows the same construction process as the machine stitched version, but the topstitch visible on the face side of the garment is applied by hand . You might wonder why you would ever need to know this zipper style if you have a sewing machine? Well, some fabrics that have a finer weave and are more sensitive in nature (like silk) cannot withstand the harshness of a topstitch applied on the sewing machine. In this case, a hand applied stitch is more suitable. The hand-applied stitch featured on a lapped zipper resembles a prick stitch, thus it blends into the face of the fabric for a semi-invisible finish. When the color of the thread matches the color of the fabric, a hand applied lapped zipper can resemble a fully invisible finish. This is a great option for when using an actual invisible zipper (featured below) is not an option and you are only able to work with a conventional zipper style. Conveniently, it gives you the look and functionality of a lapped zipper flap, without having the noticeable machine top-stitch on the face of the garment. Although it resembles a prick stitch, the actual stitch style used on the face side of the garment is a type of basting stitch. If you look on the back of the garment, you'll notice that the wrong side of the stitch (on the zipper tape) consists of a longer stitch length alternating with short spaces in between. These short spaces create the small topstitches visible on the face side of the garment. For more durability and increased control you can use a backstitch as an alternative. A backstitch applied by hand doubles the stitch layers providing more strength and stability. To learn how to sew this useful hand stitch check out this tutorial: 4 Hand Sewing Techniques and Stitches You Should Know As a Sewing Beginner. If you turn the garment on its wrong side and take a closer look at the zipper tape, you'll notice that as opposed to a regular lapped zipper, the hand applied stitch is sewn closer to the zipper teeth. Just like a machine stitched lapped zipper, a hand applied one is positioned to the side of the seamline such that the zipper teeth remain underneath the flap. Noting the zipper position in relation to the seam allowance, there is more allowance visible on the left side than the right which further depicts this concept. Centered Zipper Just like a lapped zipper, a centered zipper application requires the use of a conventional zipper. The application follows most of the same steps as a lapped zipper, except a topstitched line is present on each side of the seamline allowing for two identical flaps on each side. Center zipper applications offer a semi-tailored look commonly used on woven dresses and tops usually along center front or center back. Their application is also common in some home decorations like pillowcases, covers and comforters. To achieve the proper finish, it is important that the position of the zipper in relation to the top of the garment is taken in consideration. For example, will the top of the garment be finished with a facing? Will it feature button closures or additional hooks and eyes? If so, then keep in mind that the zipper should be placed lower along the seam line (at about 1/2" below the top edge). A few basic construction rules: Always baste the portion of the seamline shut where the zipper will be sewn, and don't remove the basting until the zipper is fully installed. This not only prevents the zipper teeth and tab from showing in the final application, it also makes the sewing process easier and more comfortable. Work from bottom up and keep the tab on the slider pointing up: this will eliminate bulk and allow for more comfort during machine stitching. Work on the wrong side of the garment making sure to keep the teeth of the zipper and basted seamline aligned for most of the construction steps (aside form the top-stitching portion). The topsitching visible on the face side of the fabric should be applied while working on the face side of the garment, from bottom up. Be careful not to sew through the metal pieces of the bottom and top stops. As opposed to a lapped zipper application, the zipper teeth in a centered application are aligned directly on the seamline. To visually understand this, look at the seam allowance in relation to the zipper tape (pictured above)-the same seam allowance distance is visible on either side of the zipper tape. In addition, both sides of the zipper are sewn identically, featuring a topstitch on the face of the garment that maintains the zipper properly in place. Fly Front Zipper A fly front style is the most common zipper application used for bottoms, especially on skirts and trousers. It is actually the only application used on denim jeans both for men and women. Traditional, fly front styles are mostly found on men's trousers as opposed to womens. There is also a difference in placket direction defining whether it is used in menswear or womens wear. The rule is as follows: In womens wear, the placket laps right over left. Vise versa, menswear features a left over right placket direction. A fly front zipper requires a conventional zipper. However, keep in mind that due to the fact that fly front styles are often shorter in length, the zipper will sometimes require shortening. You can do this yourself by hand using a whip-stitch but keep in mind that this does add an extra step in the construction process. Needless to say, a fly front zipper application is not recommended for beginners. While the challenge of sewing one can be quite fun, the pattern pieces are often a bit confusing to align and understand. Some fly front applications, like those of jeans and men's trousers, require a fly shield (sewn on the back of a zipper) which can be quite intimidating to sew if you are still in the learning process. The example in the image above shows a simple version, without the addition of a fly shield. It is however recommended that if you are a sewing beginner, you start off with the other basic zipper applications described herein (and get good at them!) before attempting to tackle a fly front. Another reason a fly front application can get a bit confusing and complicated to sew for a novice is the fact that it also requires a special seam allowance extension at the back. This extension then blends back into the regular seam allowance in the rest of the seam. The point of this transition is often very curved or a sharp angle which requires some experience to clean finish. Invisible Zipper Invisible zippers are perhaps one of the best inventions in dressmaking. An invisible zipper application requires the use of an invisible zipper as opposed to a conventional one. An invisible zipper can be sewn into any regular seam and usually doesn't require very wide seam allowance- 5/8" to 1/2" is standard. For easiest installation, it is a good idea to use a specialized invisible zipper foot. Due to the fact that the stitch has to be applied very close to the zipper teeth in a folded crease, which is often difficult to keep open by hand, this specialized zipper foot allows for fast and easy application. However, many home sewing machines do not come equipped with this specialized invisible zipper foot. In this case, you can use a regular zipper presser foot to install the invisible zipper. To learn how to do this, check out this step-by-step sewing tutorial: How to Sew An Invisible Zipper Using a Regular Zipper Foot. As mentioned above, invisible zippers do not have any topstitching or zipper-teeth visibility on the face side of the garment. They work harmoniously on dresses, blouses and bottoms that are lightweight and require a smoother finish. Invisible zippers are often sewn into the side seam or the center back. Once installed, only the subtle hand tab should be visible on the outside of the garment. The zipper teeth are design to be fully enclosed in the seam. As a rule of thumb, always clean finish the raw edges of the seam allowance first, before applying the zipper. As opposed to other styles of zipper applications, the rest of the seam is not sewn until after the invisible zipper has been inserted. Both sides of the fabric have to be separated during the sewing process. In most cases, the seam allowance matches the zipper tape in width, which is why clean finishing the raw edges of fabric before the zipper is installed is highly recommended.
2 Comments
|
The Blog:A journey into our design process, sewing tutorials, fashion tips, and all the inspiring people and things we love. Doina AlexeiDesigner by trade and dressmaker at heart. I spend most of my days obsessing over new fabrics and daydreaming new ideas. Sadie
Executive Assistant & Client Relations Manager Archives
November 2019
Categories
All
|
-
Sewing Tutorials
-
Basics
>
- Aligning Pattern Grainlines To Fabric
- Preparing Fabrics For Sewing
- Pinning Sewing Patterns To Fabric
- Placing Sewing Patterns On Fabric For Cutting
- Rotary Cutters or Fabric Scissors?
- Cutting The Sewing Patterns
- What Are Notches And How To Use Them In The Sewing Process
- Transferring Notches From Pattern To Fabric
- Transferring Seamlines to Fabric
- Staystitching
- Backstitching: A Complete Guide
- Hand Basting: A Complete Guide
- Sewing Continuous Bias Binding
- Darts >
-
Sewing Seams
>
- The Basics Of Seams And Seam Allowance
- How To Sew A Straight Seam
- Sewing Curved Seams
- Sewing Corner Seams
- Trimming And Grading Seam Excess
- Notching/Clipping Seam Allowance for Tension Release
- Sewing Topstitched Seams
- Sewing Corded Seams
- Sewing A Slot Seam
- Sewing A Gathered Seam
- Sewing Bias Seams
- Sewing Seams With Ease
- Sewing Seams With Crossing Seamlines
- Sewing Unlike Fabric Seams
- How To Iron Seams: Ironing Tools And Conventions
- Sewing With Knit Fabrics
- Understanding Stitch Length And Tension
- Sewing Unique Fabric Seams
-
Seam Finishes
>
- Seam Finishing Techniques - Overview
- Applying A Pinked Seam Finish
- Applying A Bias Bound Seam Finish
- Serging And Zigzag Seam Finishes
- Sewing A Self-Bound Seam Finish
- Sewing A French Seam Finish
- Sewing A Hong Kong Seam Finish
- Sewing A Mock French Seam Finish
- Sewing A Turned-and-Stitched Seam Finish
- Sewing Overcast Hand-Applied Seam Finishes
- Sewing A Flat Felled Seam
- Sewing A Hairline Seam Finish
-
Hem Finishes
>
- Garment Hem Finishes: Overview
- Sewing A Double Fold Hem Finish
- Sewing A Single Fold Hem Finish
- Sewing Bound Hem Finishes
- Sewing An Exposed Double Layer Bound Hem
- Sewing A Folded-Up Bound Hem with Pre-folded Binding
- Sewing A Hong Kong Hem Finish
- Sewing A Band Hem Finish
- Sewing A Bias Faced Hem Finish
- Sewing A Twill Tape Hem Finish
- Sewing A Rolled Hem Finish
- Sewing A Shaped Hem Facing
- Using Fusible Hem Tape And Webbing
- Finishing A Lace Fabric Hem
- Finishing A Leather Hem
- Sewing Faced Hem Corners
- How To Finish Lining At The Hem
- Finishing Fabric Corners by Mitering >
- Interfacing A Hemline: Lined And Unlined Examples
-
Sewing Pockets
>
- Curved Patch Pocket With Flap
- Unlined Square Patch Pockets
- Lined Patch Pockets: Two Ways
- Extension On-Seam Pockets
- Separate On-Seam Pocket
- Front Hip Pockets
- Bound Double Welt Pocket
- Double Welt Pocket With Flap
- Self-Welt Pocket (Using Single Fabric Layer)
- Slanted Welt Pocket (Hand-Stitched)
- Faced Slash Pockets: Overview >
-
Sewing Zippers
>
- Sewing Zippers: General Information
- Sewing A Centered Zipper
- Sewing A Lapped Zipper
- Sewing An Invisible Zipper
- Sewing A Fly Front Zipper
- Sewing A Closed-End Exposed Zipper (No Seam)
- Sewing An Exposed Separating Zipper
- Sewing Hand Stitched Zipper Applications
- Sewing A Zipper Underlay
- Sewing A Placket-Enclosed Separating Zipper
- Sleeveless Finishes >
-
Neckline Finishes
>
- Sewing A Neck Shaped Facing
- Sewing An All-In-One Neck Facing
- Neck And Garment Opening Combination Facings >
- Sewing A Bias Faced Neckline Finish
- Sewing A Band Neckline Finish
- Bound Neckline Finishes: Overview >
- Sewing A Semi-Stretch Strip Band Neckline
- Ribbed Neck Band And Classic Turtleneck
- Decorative Neckline Finishes >
- Finishing Facing Edges >
-
Extras
>
- A Complete Guide on Interfacing
- Sewing Bound Spaghetti Straps
- Sewing Spaghetti Straps To A Faced Neckline
- Sewing Ruffles: Overview
- Patterning And Sewing A Circle Ruffle
- Sewing A Gathered Heading Ruffle
- Sewing Double Layer Gathered Ruffles
- Sewing A Gathered Ruffle Into A Seam
- Sewing A Gathered Ruffle To A Fabric Edge
- Sewing A Fabric Surface Slit
- Sewing A Slit Seam
- Hand-Applied Straight Stitches
- Hand-Applied Blind Stitches
- Hand-Applied Overedge Stitches
- Hand-Applied Tack Stitches
- Hand-Applied Decorative Stitches
-
Basics
>
- Custom Bridal
- Custom Apparel
- About
- Blog
Services |
Company |
|



 RSS Feed

