|
Sewing zippers can be one of the most intimidating and terrifying experiences for a sewing beginner! Here's the thing- If you really want to learn how to sew you have to be willing to make some (lots of..) mistakes, eliminate your fears of making these mistakes, and let go of perfectionism. Sewing is a craft that is learned best though the practice of making errors as opposed sewing classes and theory only. You'll breathe a sigh of relief when we tell you that a lapped zippers are actually quite simple to install. If done correctly, it only takes a few steps and the result of seeing a fully-functional lapped zipper will feel so gratifying! So let's get started. What is a lapped zipper? A lapped zipper application uses a regular zipper to create "the look" of a side placket overlapping the zipper. The reason why we refer to it as "a look" is that it does not require the construction of an actual placket but rather uses a stitch on one side of the seam-line to create the allusion of a flap over the zipper. Lapped zippers are the most common and simple to sew and most commonly used on medium to heavy weight tops, dresses and bottoms along center back, center front and sometimes side seam. A lapped zipper works best with more medium weight fabrics because it requires a bit more structure. The Easiest (and Correct) Way to Sew a Lapped Zipper There are a multitude of ways to apply certain sewing techniques and finishes, and you should always pick the one that works best for you! However, when it comes to zippers, we really recommend that you begin with learning the correct application steps before adopting sewing hacks that work best for you. Why? Well, as you dive deeper into learning zipper application techniques, the true-and-tried methods are the ones that will be the most time efficient and minimize mistakes and complications in the process. Three Most Common Misconceptions About Lapped Zippers 1. That the placket extends over the seam-line to cover the zipper: As a sewing beginner, it is common to look at a lapped zipper and get the impression that the placket extends over the seam-line to cover the zipper. In reality, that is simply an illusion. The seam-line always remains aligned properly, while the seam allowance underneath, on the opposite end of the placket side, extends slightly inward to hide the zipper teeth. 2. That you always clip the seam allowance of the fabric at the area where the zipper ends: It is common to think that you always need to clip the seam allowance at the bottom of a lapped zipper application but the good news is, that is rarely necessary. On a regular seam, you're seam allowance should lay nice and flat without needing to be clipped for movement and tension release. We always try to encourage that you try not to clip the fabric unnecessarily but only when required by specific finishes- this can result in weakening durability, especially over time. In the case of a vent or a specialized hem finish at the bottom of the same seam that houses a lapped zipper, clipping the seam allowance may be necessary. 3. That the zipper should be kept open when it is sewn in: Although you might find it easier and more comfortable to work with an open zipper, the correct way to apply a lapped zipper is keeping the zipper closed. That might come as a surprise, especially if you've already dabbled in zipper construction a bit. The benefits of keeping the zipper's teeth closed during application ensures that both sides of the zipper will be aligned accurately on both sides of the seam-line. If you work with a zipper that is open, you will have to first baste both zipper sides in and baste it's alignment before adding the final stitches- that adds a few unnecessary steps, so we'll show you how to get rid of them in the tutorial below by working with a closed zipper during the entire process! Sewing Steps For a Lapped Zipper Using A Regular Foot In this simple tutorial, we'll show you how to apply a lapped zipper to a center back seam with a 1" seam allowance. As a beginner, we recommend that you work with a 1" seam allowance for lapped zippers because it gives you enough excess to form the placket-like structure and comfortably attach the zipper during sewing. 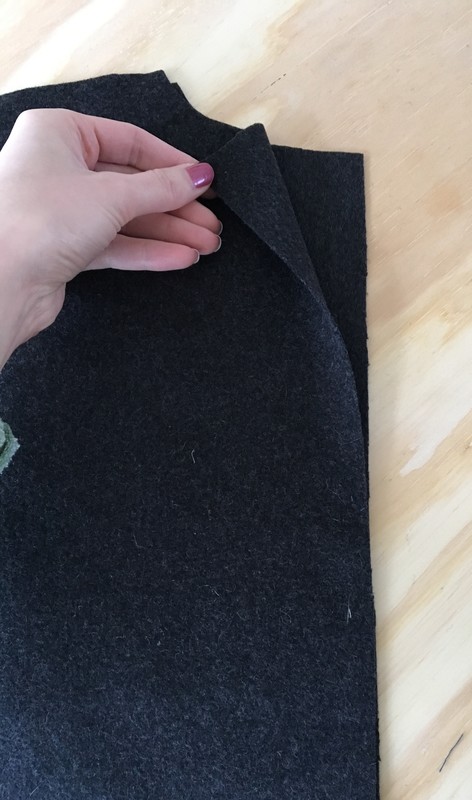 1. Mark the placement of the zipper on seam allowance.
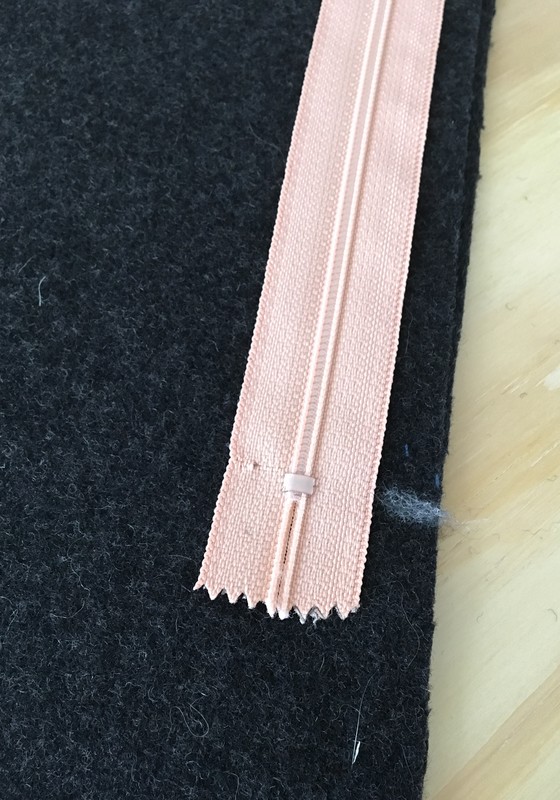
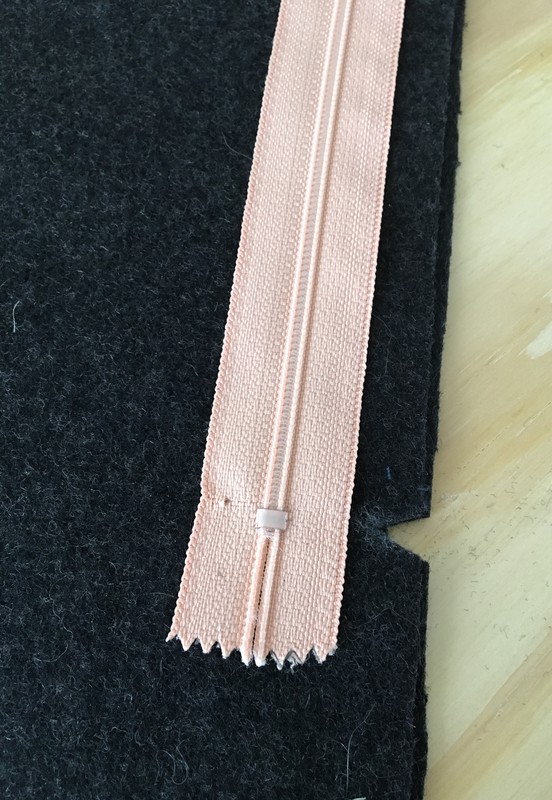
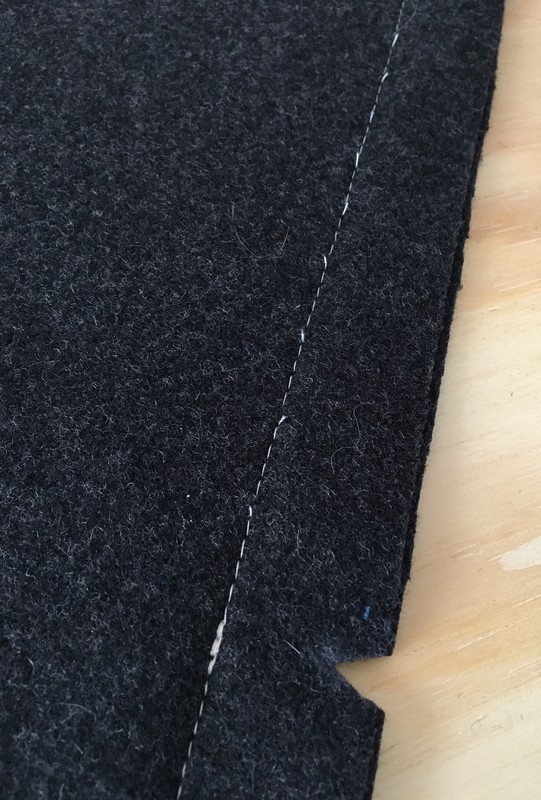
If your pattern has notches that mark the bottom of the zipper placement, make sure you transfer them to your pattern. If not, you can use the length of your zipper to mark where it's placement will end. Simply hold the zipper along the seam allowance and mark with a fabric marking pencil then a clipped notch, the location where the zipper's bottom hits. 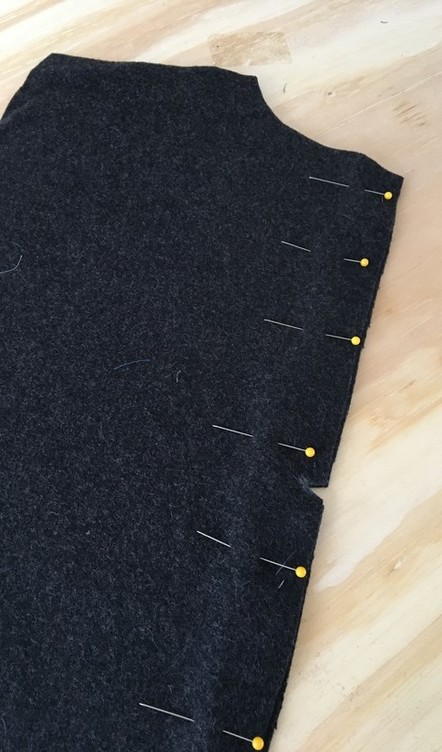 2. Pin the Center back seam together getting it ready for stitching. In the image bellow, you can see the notch along the seam allowance's edge noting where the zipper ends.
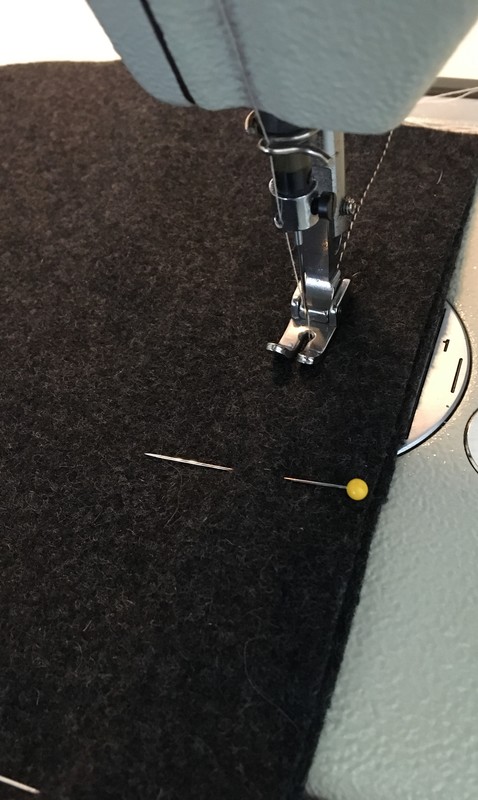
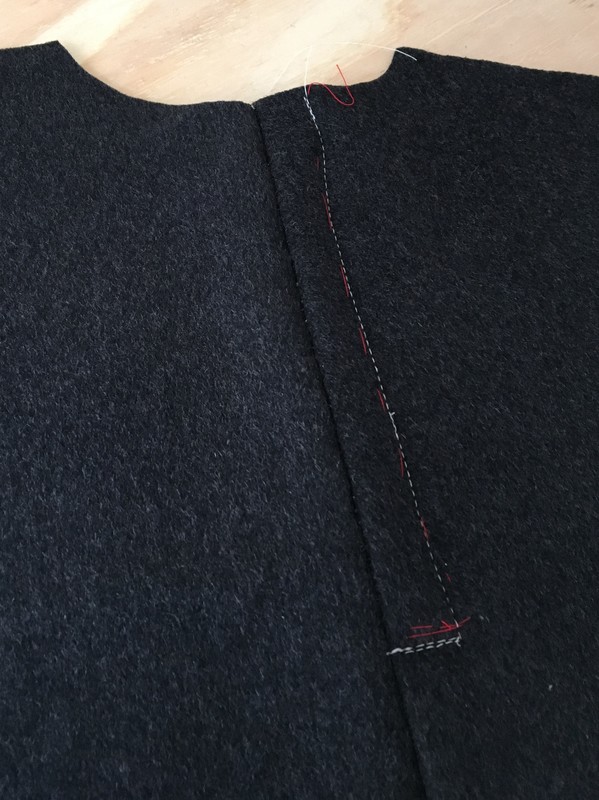
3. Switch to a basting stitch on your sewing machine and starting at the top (neckline in this case), begin stitching using a basting stitch until you get to the notch. Once you've arrived at the notch with your presser foot, apply a back-stitch and switch back to a regular machine stitch you would normally use to sew your fabric. Finish sewing the seam together all the way to the bottom. The reason why you need to use a basting stitch along the portion where the zipper will be applied is that you will actually remove this stitch with a seam ripper once the zipper is sewn in.
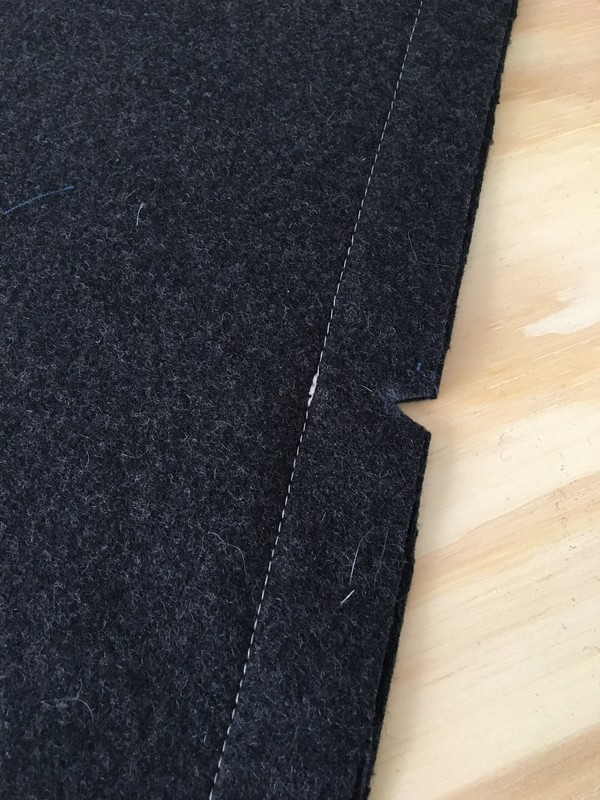
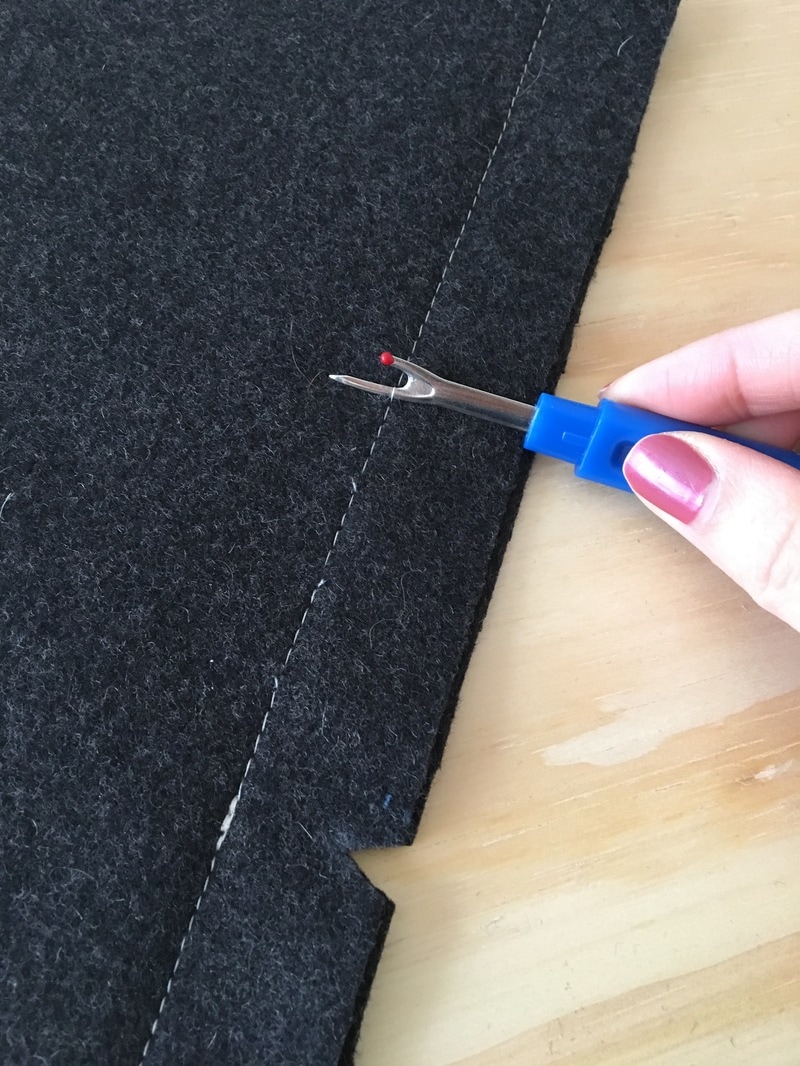
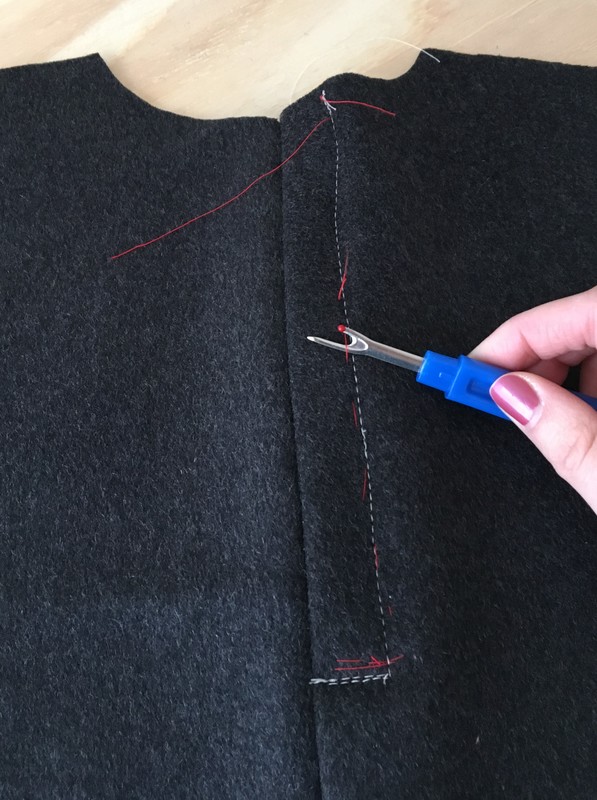
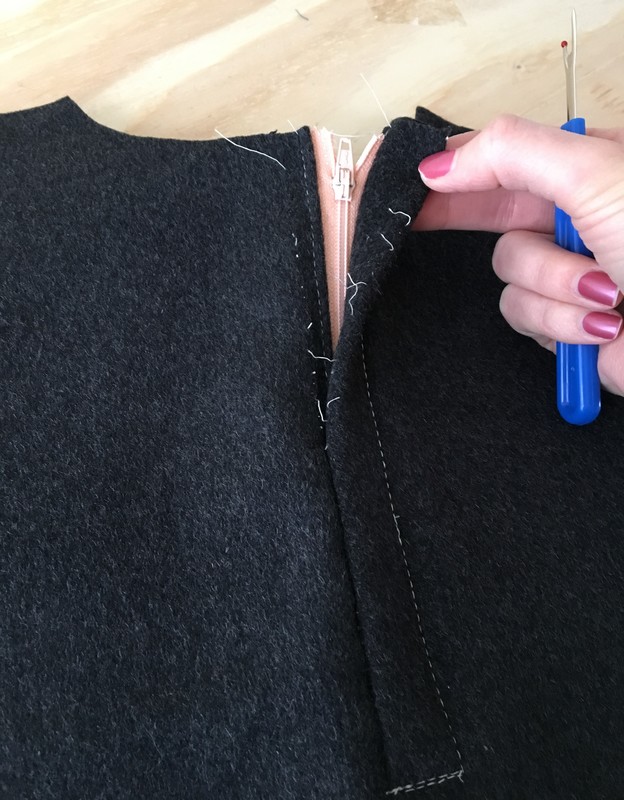
4. To make it easier for the basting stitch to be removed later, use your seam ripper and slit every 2-3 stitches without fully removing the thread as shown below. This will ensure that when your zipper is finished the temporary machine basting stitch comes out with one easy pull.
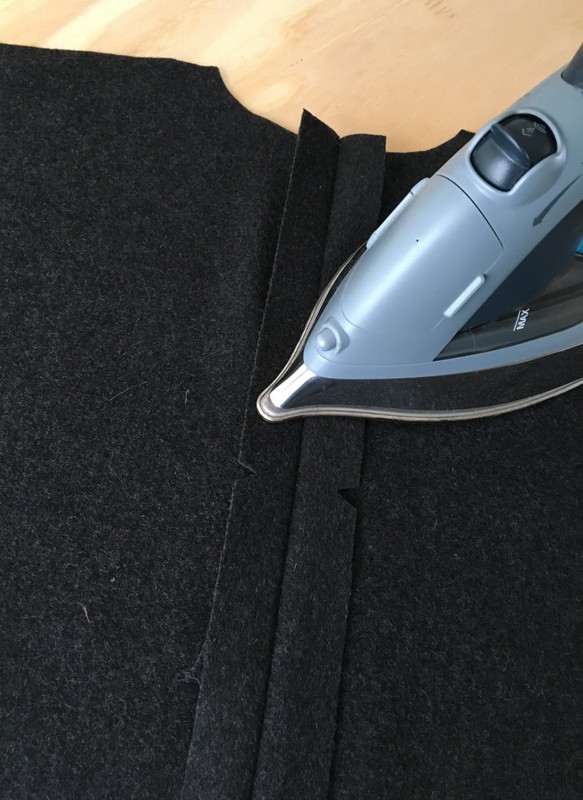
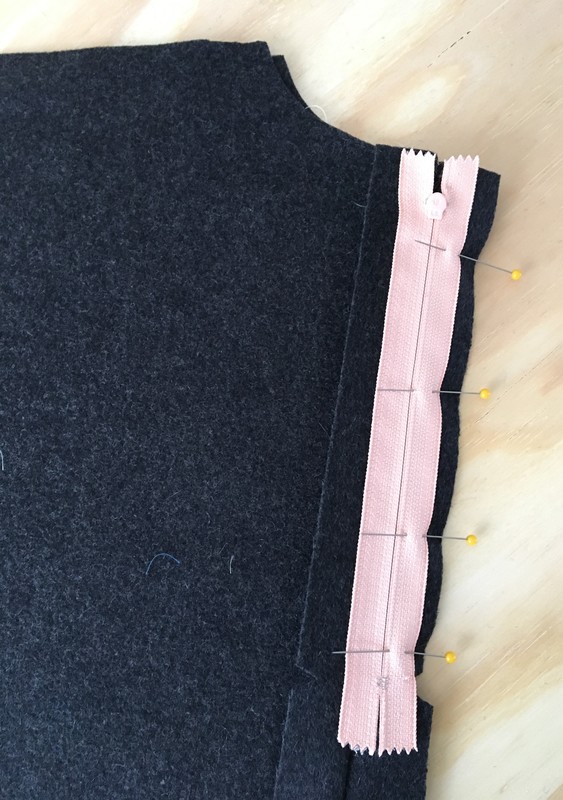
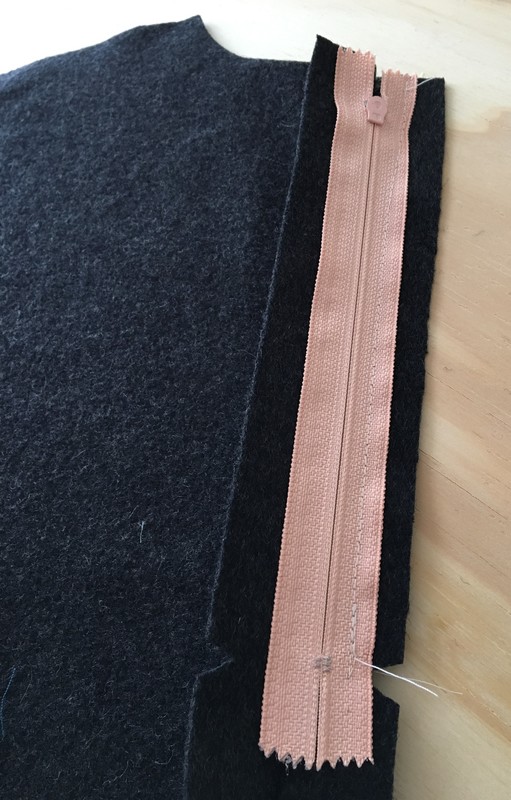
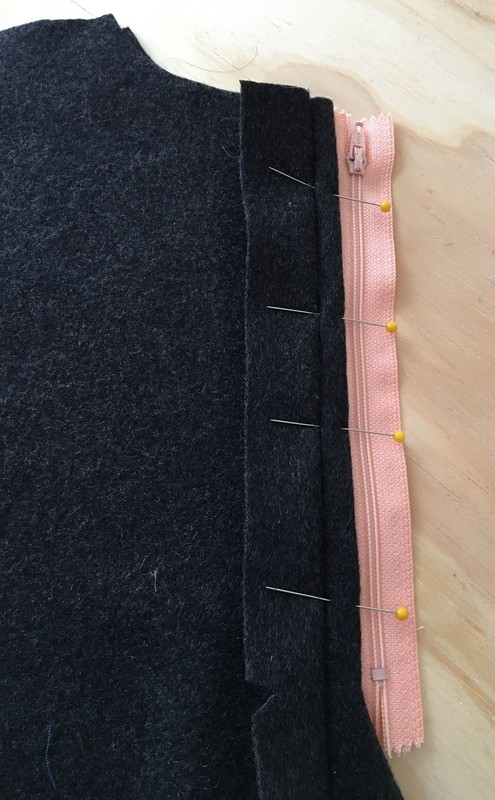
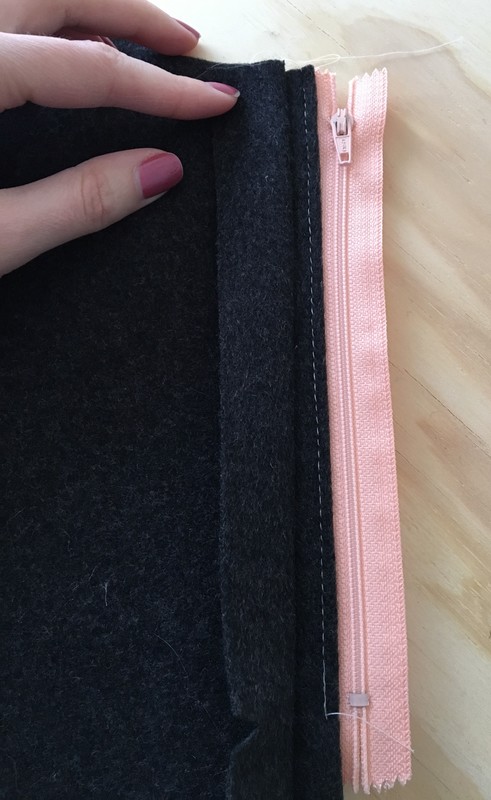
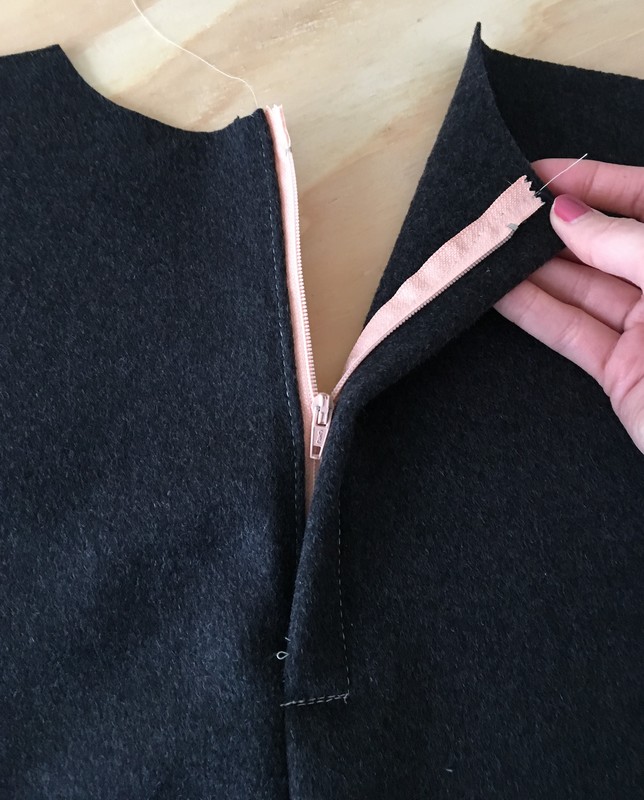
5. Gently iron the seam allowance open to make it easier to handle it's individual ends. 6. Move the fabric to the left side allowing only the right seam allowance to remain on the right as show bellow. Take your closed zipper and place it face down against the seam making sure the zipper teeth correspond to the actual seam. Pin the zipper's tape to the seam allowance as shown in the image bellow.
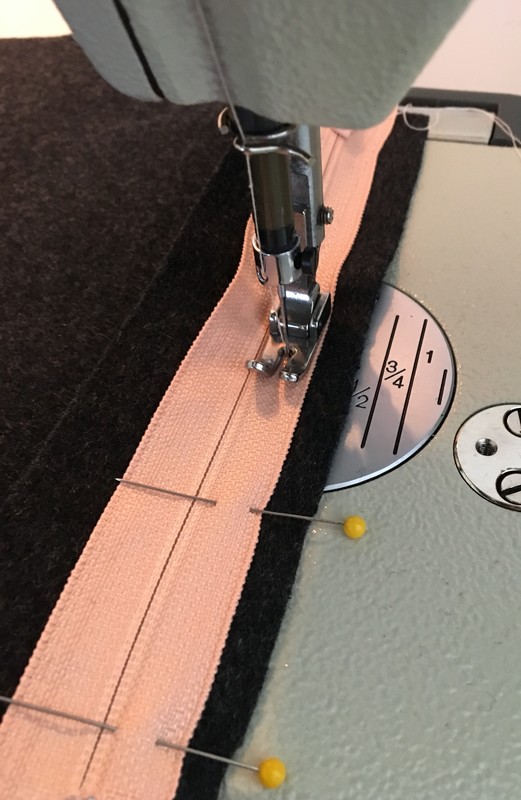
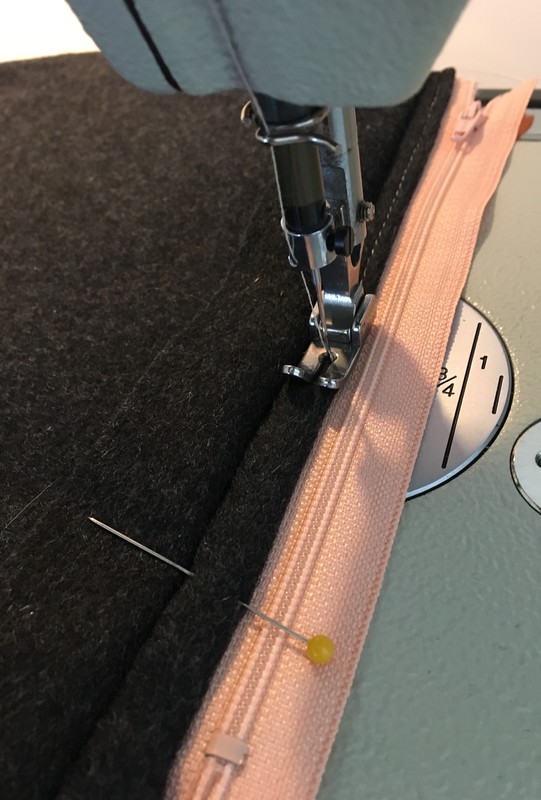
7. Starting at the top, machine stitch along the middle of the pinned zipper tape remembering to back-stitch when reaching the bottom (where the notch is). Your end result should be a zipper connected to just the right seam allowance.
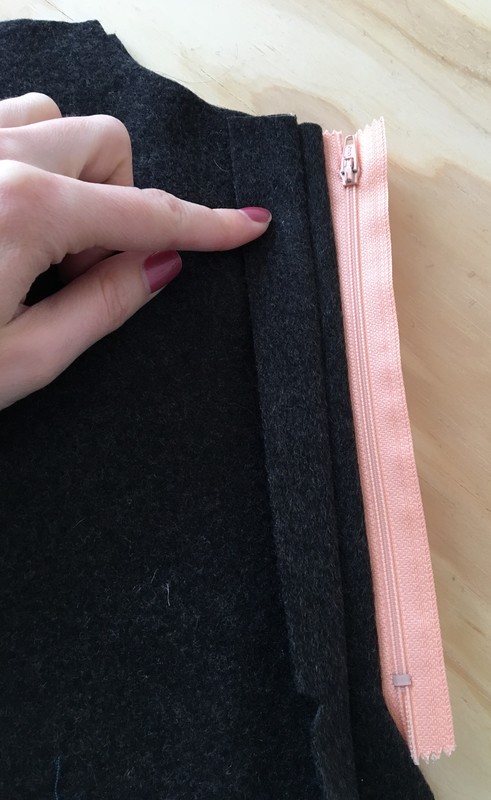
8. Turn the zipper facing up by moving the right seam allowance towards the left, facing the same way as the rest of garment. Pin this fold in place along the zipper tape as shown bellow.
9. On your sewing machine, stitch along about 1/8" away from the fold using it as a guide. Backstitch at the end of your stitch to secure. 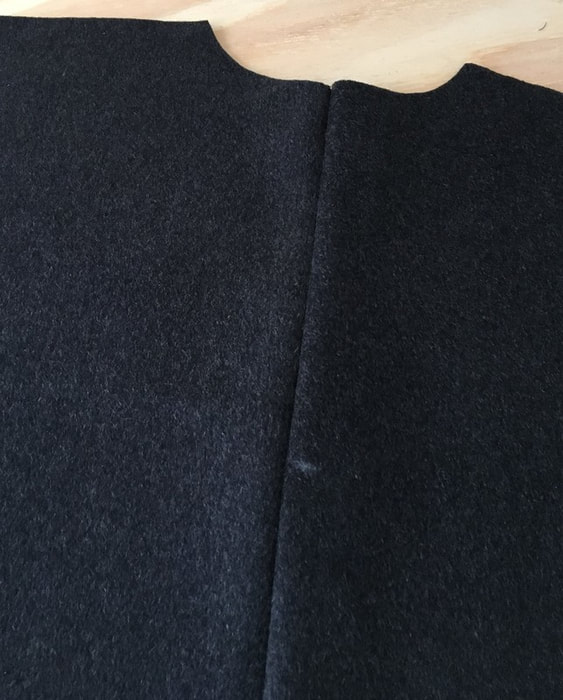 10. Turn your garment on its face side and using the notch on the back mark with a water soluble pencil or tailor's chalk where the zipper stops on the outside (face side of garment). Mark a little above the bottom metal stop of the zipper so that you don't accidentally sew on top of it and break your needle when adding the final top stitch. 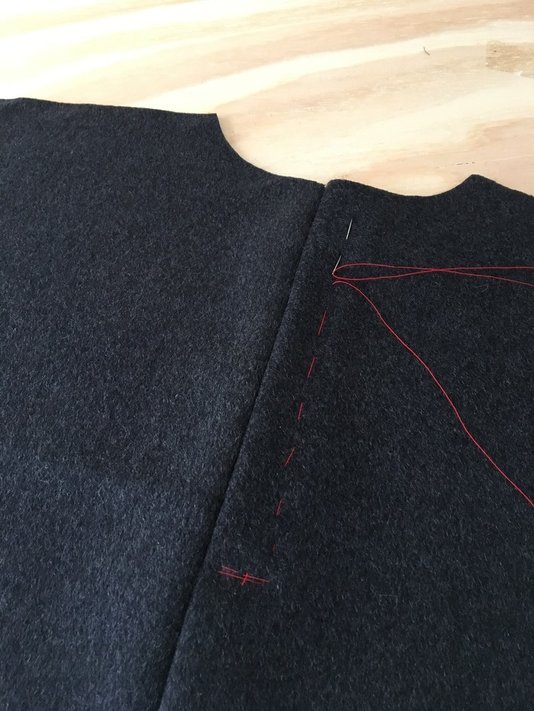 11. Using contrast thread and a hand-sewing needle, hand baste about 1/2"-3/4" away from the seam starting at the bottom up making sure you sew through every layer underneath- This includes the seam allowance and zipper tape.
12. Using the basting stitch as a guide, stitch on your sewing machine starting at the bottom horizontally, then at a straight angle up to the top as shown below. Once your final stitch is completed, use a seam ripper to remove the temporary hand basting. Note: Make sure you machine-stitch right next to the basting but not directly on top of it as this can make it more difficult to remove. 13. It's time to see your lapped zipper in action! Because your initial machine basting must be very loose and easy to remove due to the slit stitches we started with, you can gently pull on the seam to open it while also using your seam ripper to remove extra stitches. As a final step, remove the excess threads to clean up the opening and your lapped zipper is complete! Practice a few times and you'll be able to consistently apply a lapped zipper in a just a few minutes by using this easy method.
0 Comments
Leave a Reply. |
The Blog:A journey into our design process, sewing tutorials, fashion tips, and all the inspiring people and things we love. 
Doina AlexeiDesigner by trade and dressmaker at heart. I spend most of my days obsessing over new fabrics and daydreaming new ideas. 
Sadie
Executive Assistant & Client Relations Manager Archives
November 2019
Categories
All

|

-
Sewing Tutorials
-
Basics
>
- Aligning Pattern Grainlines To Fabric
- Preparing Fabrics For Sewing
- Pinning Sewing Patterns To Fabric
- Placing Sewing Patterns On Fabric For Cutting
- Rotary Cutters or Fabric Scissors?
- Cutting The Sewing Patterns
- What Are Notches And How To Use Them In The Sewing Process
- Transferring Notches From Pattern To Fabric
- Transferring Seamlines to Fabric
- Staystitching
- Backstitching: A Complete Guide
- Hand Basting: A Complete Guide
- Sewing Continuous Bias Binding
- Darts >
-
Sewing Seams
>
- The Basics Of Seams And Seam Allowance
- How To Sew A Straight Seam
- Sewing Curved Seams
- Sewing Corner Seams
- Trimming And Grading Seam Excess
- Notching/Clipping Seam Allowance for Tension Release
- Sewing Topstitched Seams
- Sewing Corded Seams
- Sewing A Slot Seam
- Sewing A Gathered Seam
- Sewing Bias Seams
- Sewing Seams With Ease
- Sewing Seams With Crossing Seamlines
- Sewing Unlike Fabric Seams
- How To Iron Seams: Ironing Tools And Conventions
- Sewing With Knit Fabrics
- Understanding Stitch Length And Tension
- Sewing Unique Fabric Seams
-
Seam Finishes
>
- Seam Finishing Techniques - Overview
- Applying A Pinked Seam Finish
- Applying A Bias Bound Seam Finish
- Serging And Zigzag Seam Finishes
- Sewing A Self-Bound Seam Finish
- Sewing A French Seam Finish
- Sewing A Hong Kong Seam Finish
- Sewing A Mock French Seam Finish
- Sewing A Turned-and-Stitched Seam Finish
- Sewing Overcast Hand-Applied Seam Finishes
- Sewing A Flat Felled Seam
- Sewing A Hairline Seam Finish
-
Hem Finishes
>
- Garment Hem Finishes: Overview
- Sewing A Double Fold Hem Finish
- Sewing A Single Fold Hem Finish
- Sewing Bound Hem Finishes
- Sewing An Exposed Double Layer Bound Hem
- Sewing A Folded-Up Bound Hem with Pre-folded Binding
- Sewing A Hong Kong Hem Finish
- Sewing A Band Hem Finish
- Sewing A Bias Faced Hem Finish
- Sewing A Twill Tape Hem Finish
- Sewing A Rolled Hem Finish
- Sewing A Shaped Hem Facing
- Using Fusible Hem Tape And Webbing
- Finishing A Lace Fabric Hem
- Finishing A Leather Hem
- Sewing Faced Hem Corners
- How To Finish Lining At The Hem
- Finishing Fabric Corners by Mitering >
- Interfacing A Hemline: Lined And Unlined Examples
-
Sewing Pockets
>
- Curved Patch Pocket With Flap
- Unlined Square Patch Pockets
- Lined Patch Pockets: Two Ways
- Extension On-Seam Pockets
- Separate On-Seam Pocket
- Front Hip Pockets
- Bound Double Welt Pocket
- Double Welt Pocket With Flap
- Self-Welt Pocket (Using Single Fabric Layer)
- Slanted Welt Pocket (Hand-Stitched)
- Faced Slash Pockets: Overview >
-
Sewing Zippers
>
- Sewing Zippers: General Information
- Sewing A Centered Zipper
- Sewing A Lapped Zipper
- Sewing An Invisible Zipper
- Sewing A Fly Front Zipper
- Sewing A Closed-End Exposed Zipper (No Seam)
- Sewing An Exposed Separating Zipper
- Sewing Hand Stitched Zipper Applications
- Sewing A Zipper Underlay
- Sewing A Placket-Enclosed Separating Zipper
- Sleeveless Finishes >
-
Neckline Finishes
>
- Sewing A Neck Shaped Facing
- Sewing An All-In-One Neck Facing
- Neck And Garment Opening Combination Facings >
- Sewing A Bias Faced Neckline Finish
- Sewing A Band Neckline Finish
- Bound Neckline Finishes: Overview >
- Sewing A Semi-Stretch Strip Band Neckline
- Ribbed Neck Band And Classic Turtleneck
- Decorative Neckline Finishes >
- Finishing Facing Edges >
-
Extras
>
- A Complete Guide on Interfacing
- Sewing Bound Spaghetti Straps
- Sewing Spaghetti Straps To A Faced Neckline
- Sewing Ruffles: Overview
- Patterning And Sewing A Circle Ruffle
- Sewing A Gathered Heading Ruffle
- Sewing Double Layer Gathered Ruffles
- Sewing A Gathered Ruffle Into A Seam
- Sewing A Gathered Ruffle To A Fabric Edge
- Sewing A Fabric Surface Slit
- Sewing A Slit Seam
- Hand-Applied Straight Stitches
- Hand-Applied Blind Stitches
- Hand-Applied Overedge Stitches
- Hand-Applied Tack Stitches
- Hand-Applied Decorative Stitches
-
Basics
>
- Custom Bridal
- Custom Apparel
- About
- Blog
 RSS Feed
Services |
Company |
|
