|
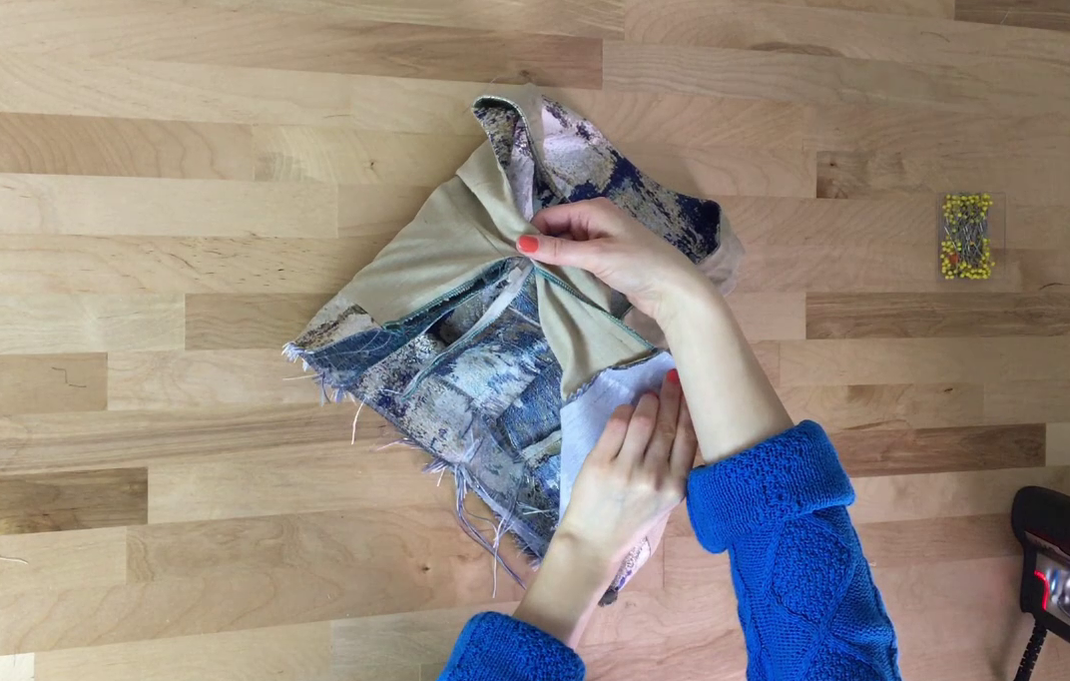
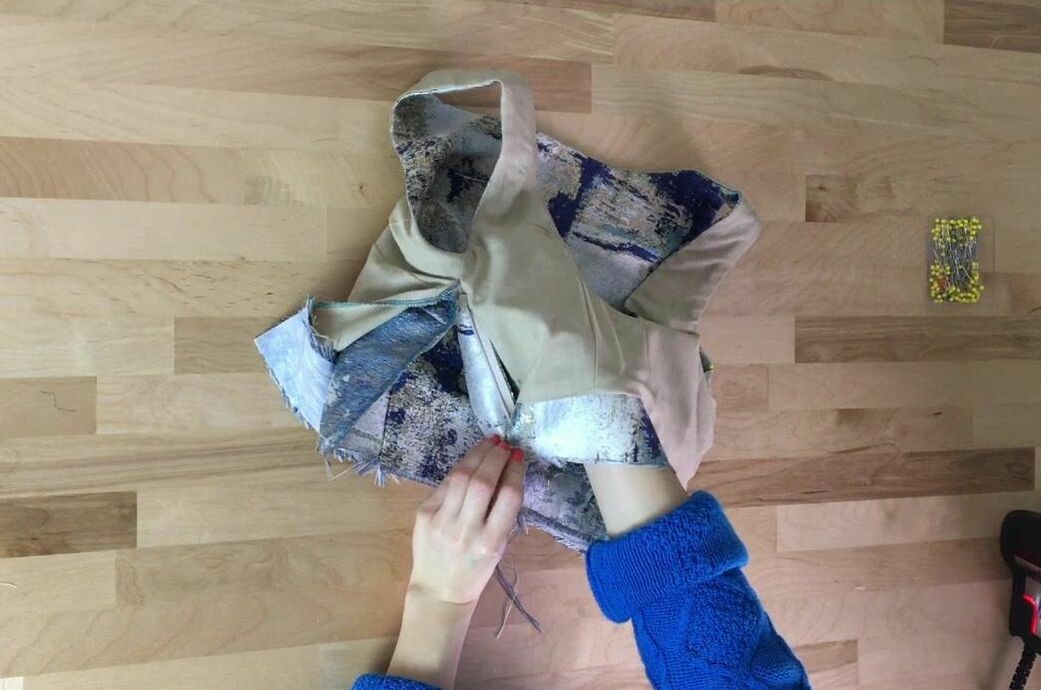
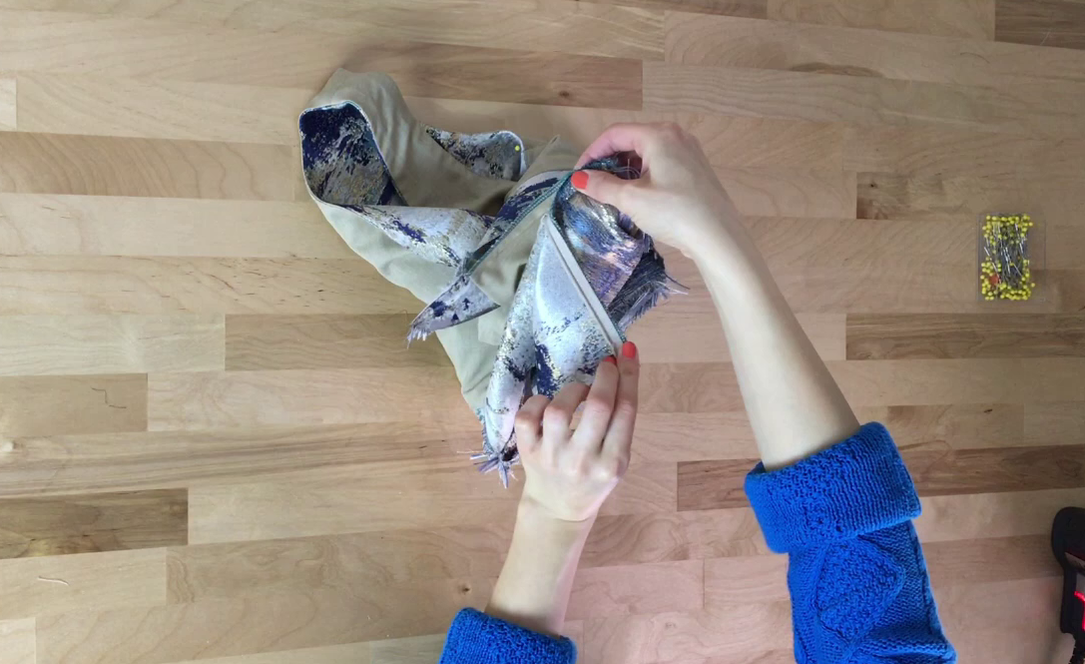
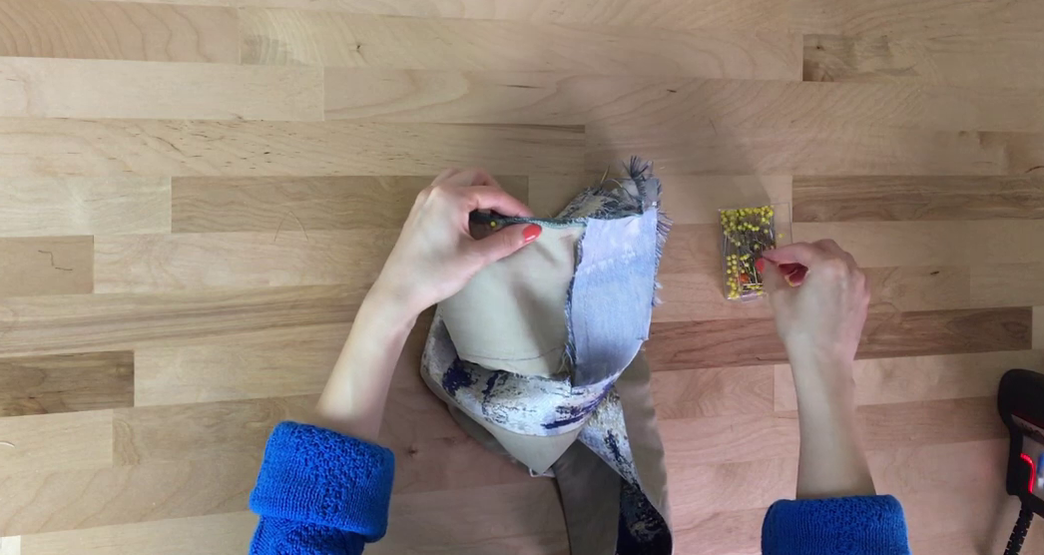
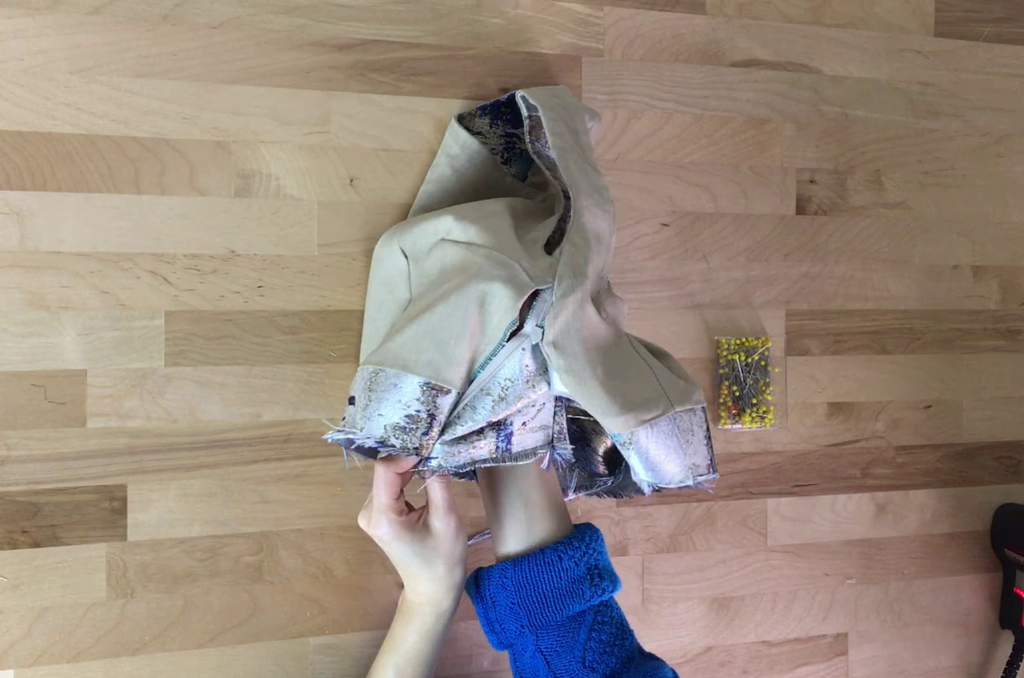
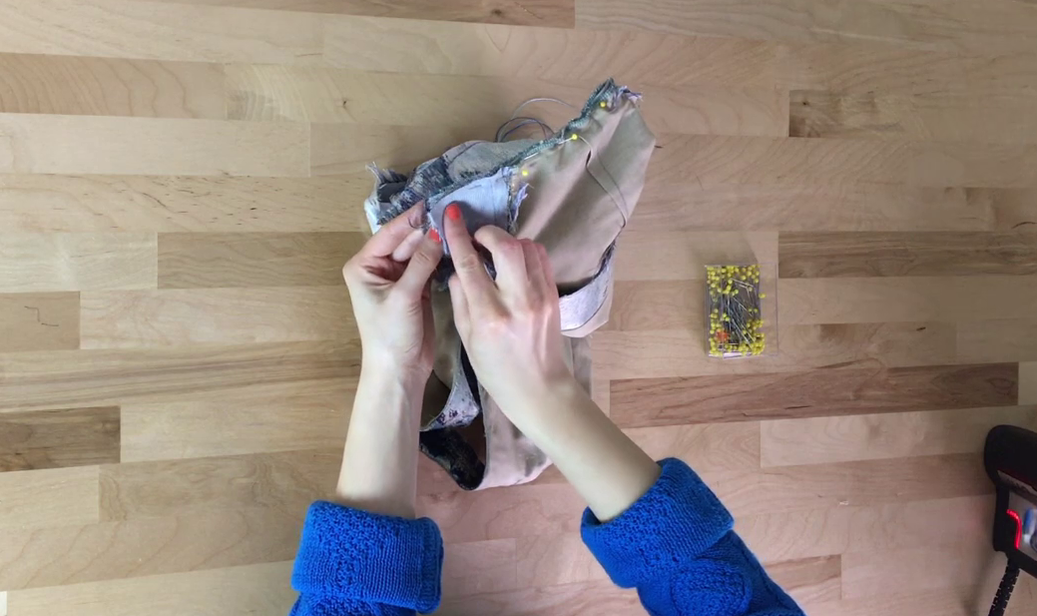
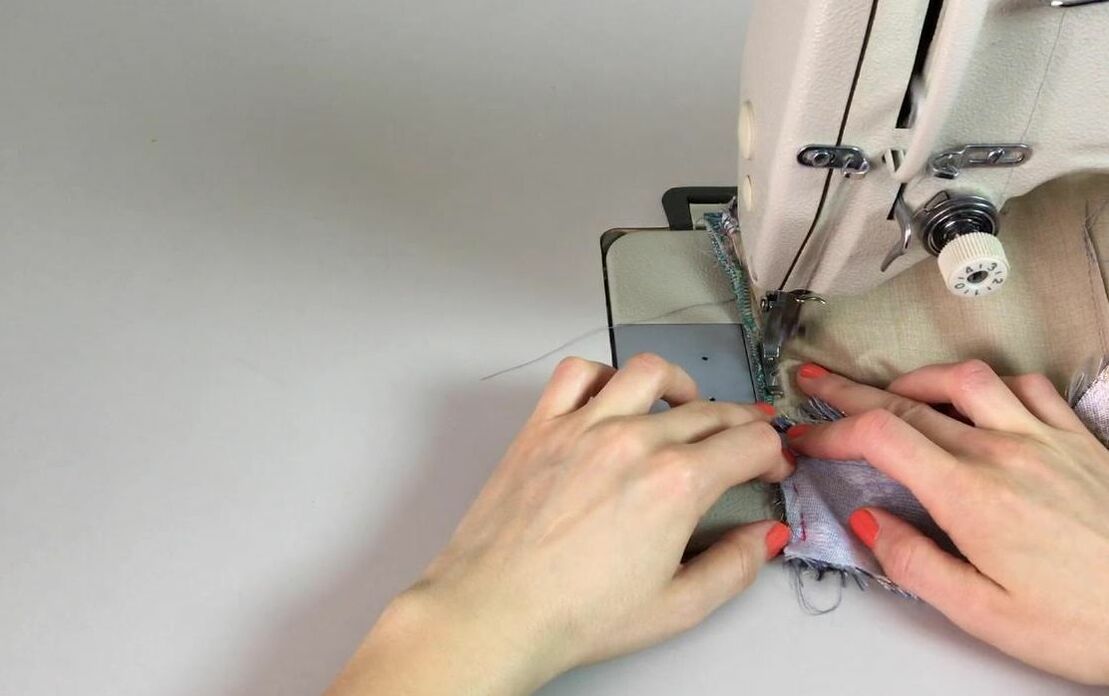
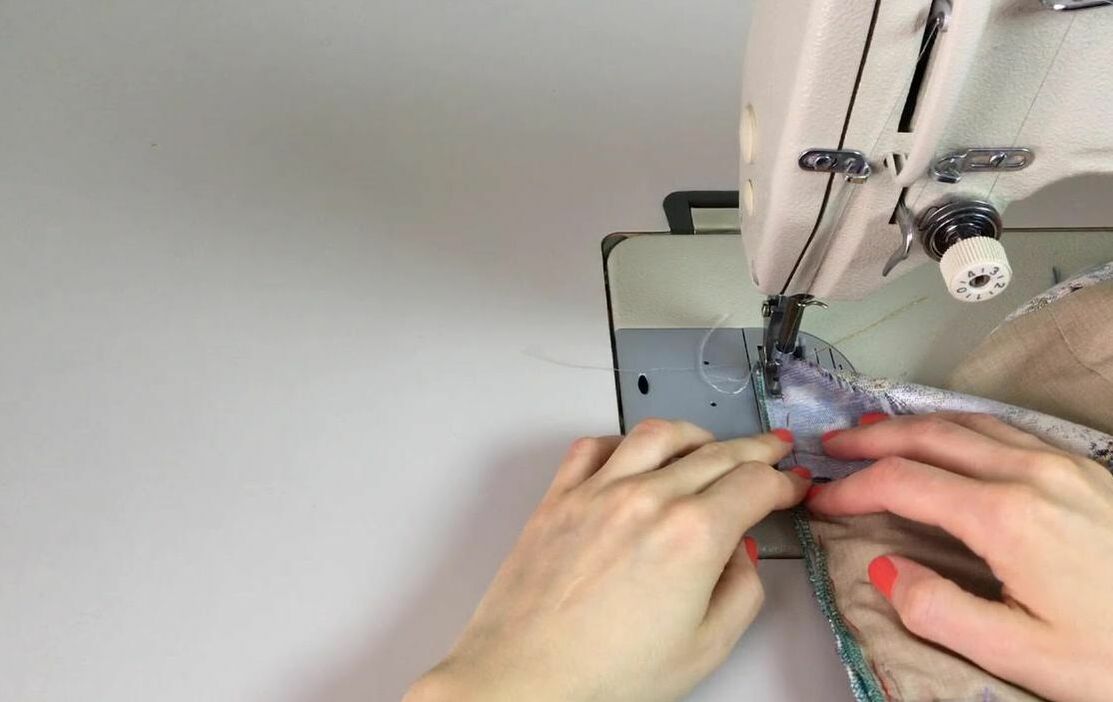
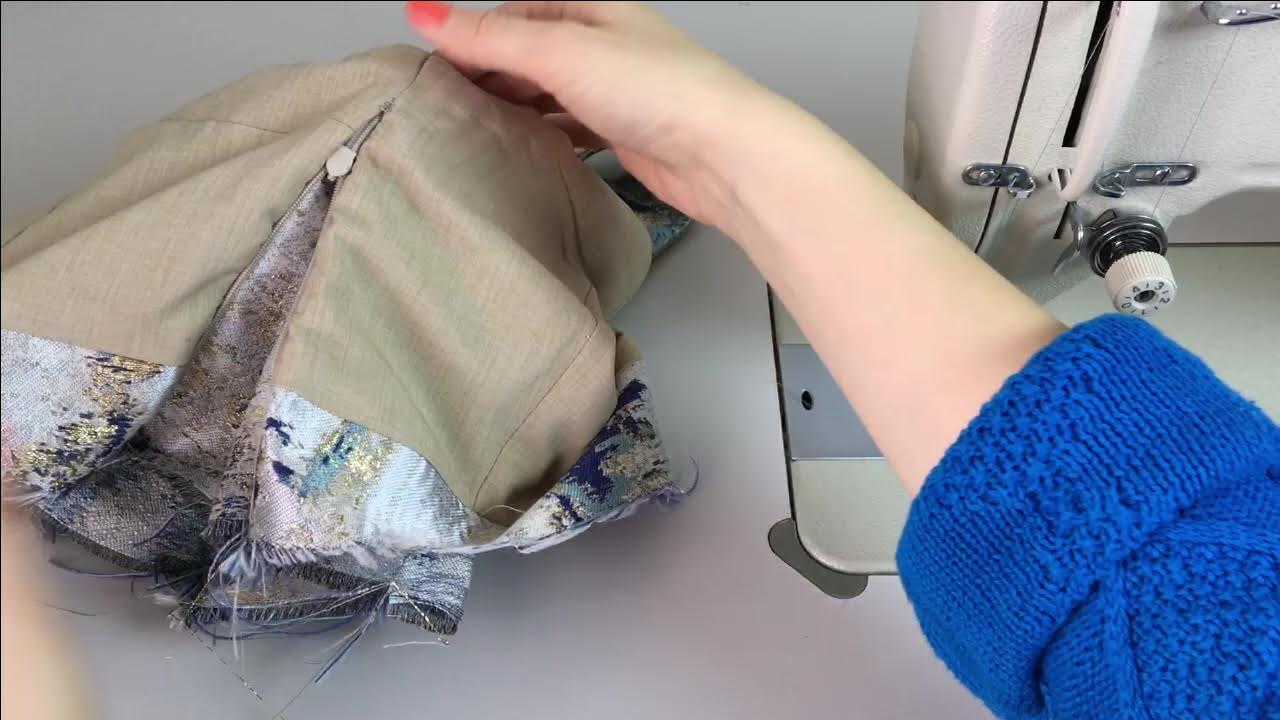
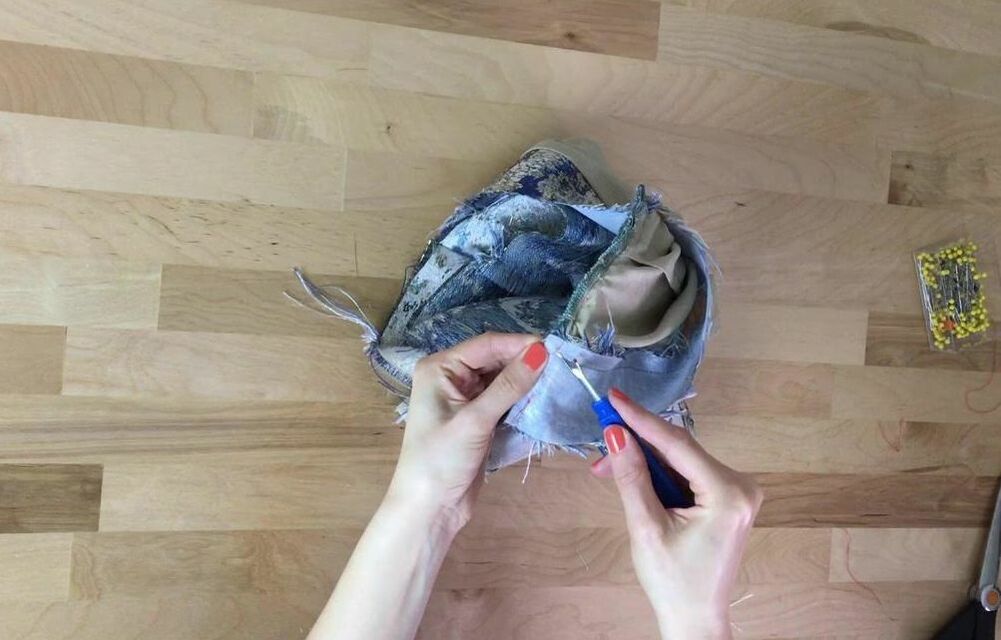
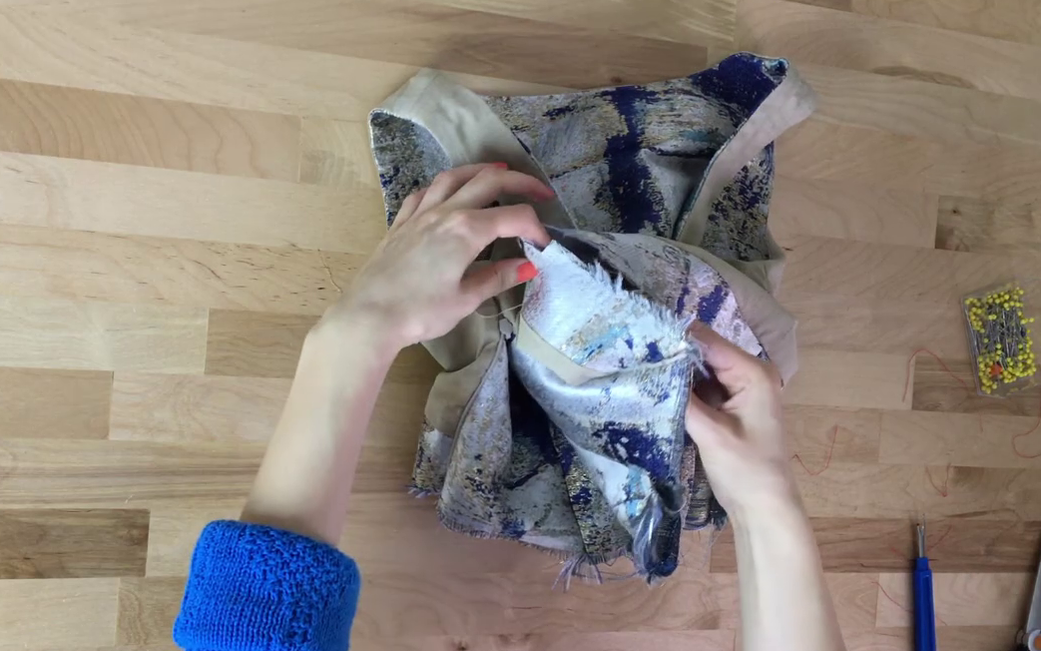
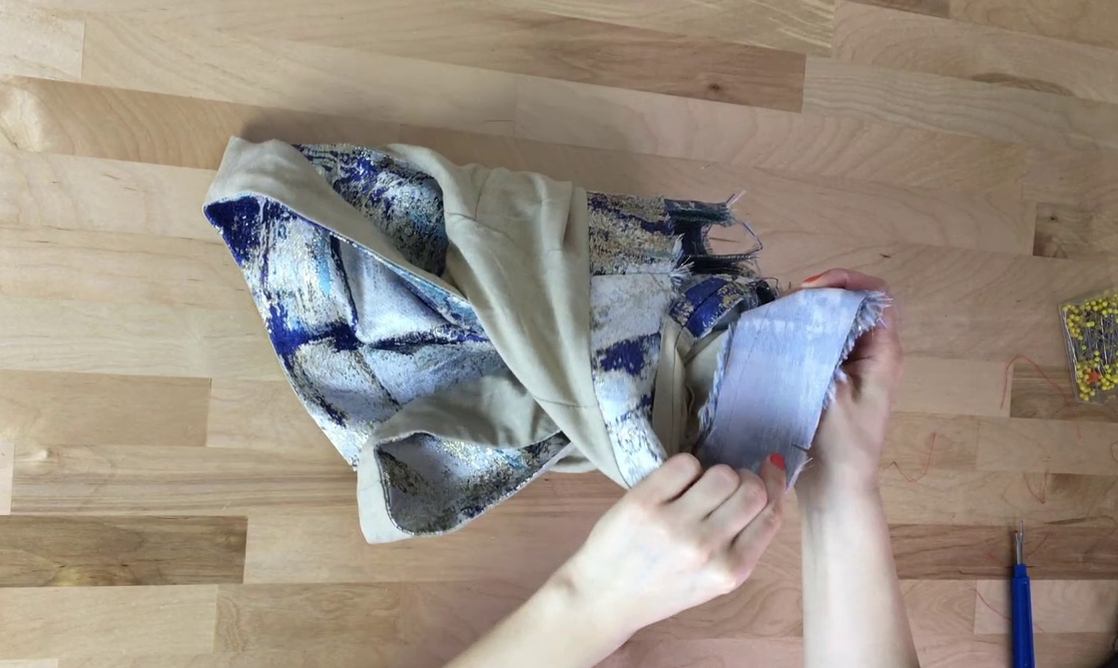
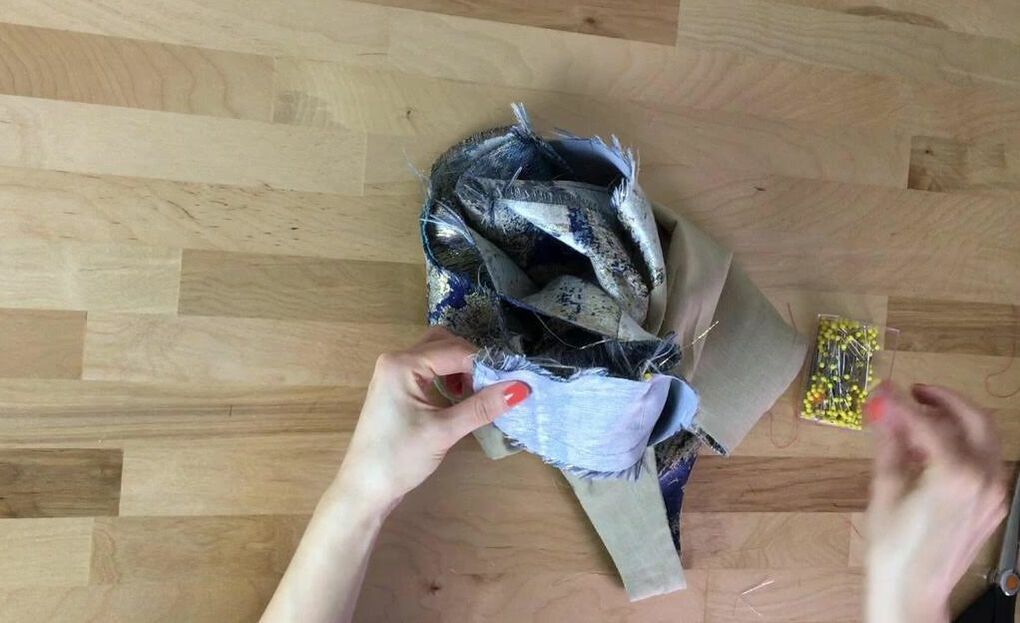
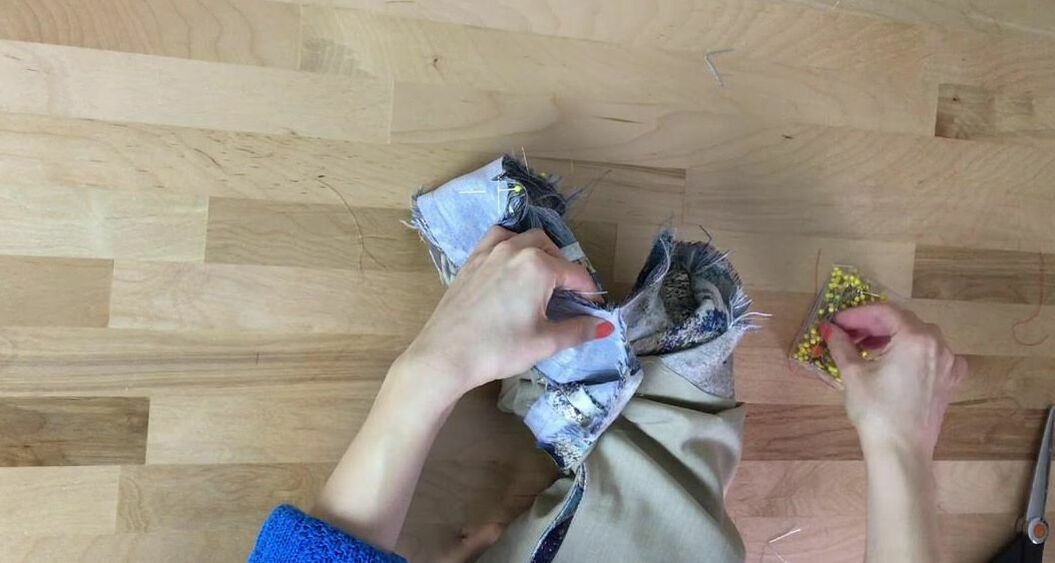
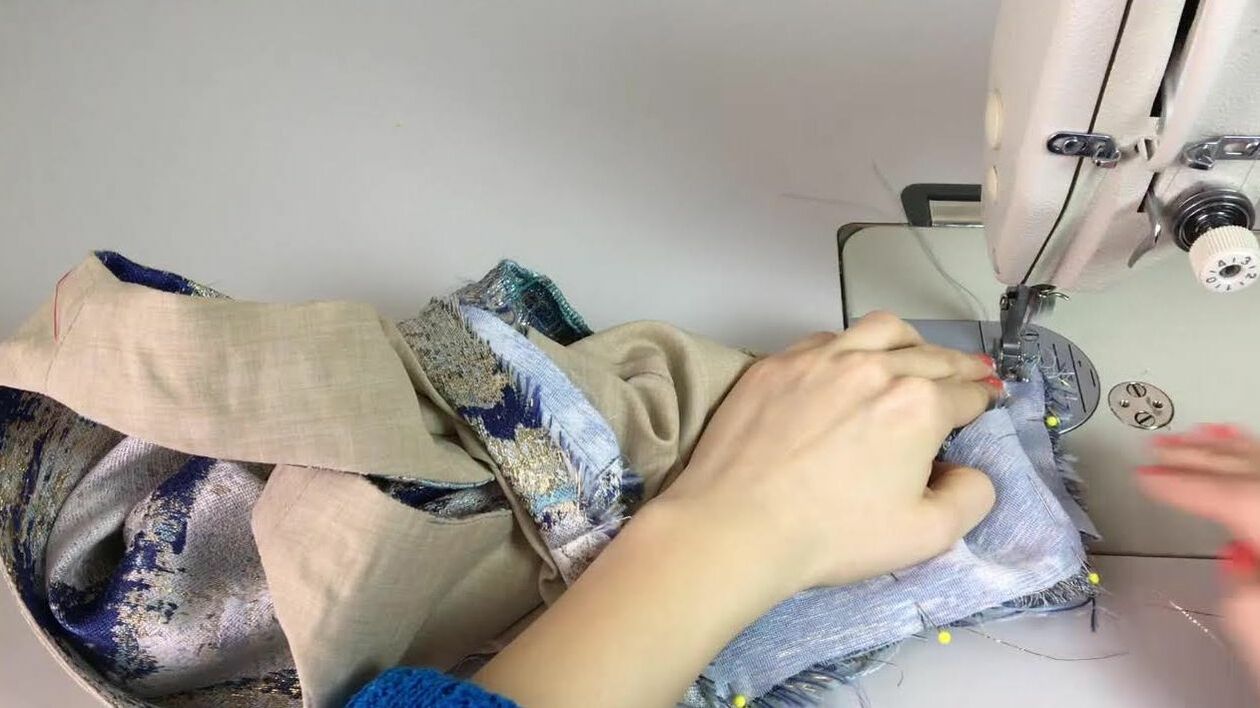
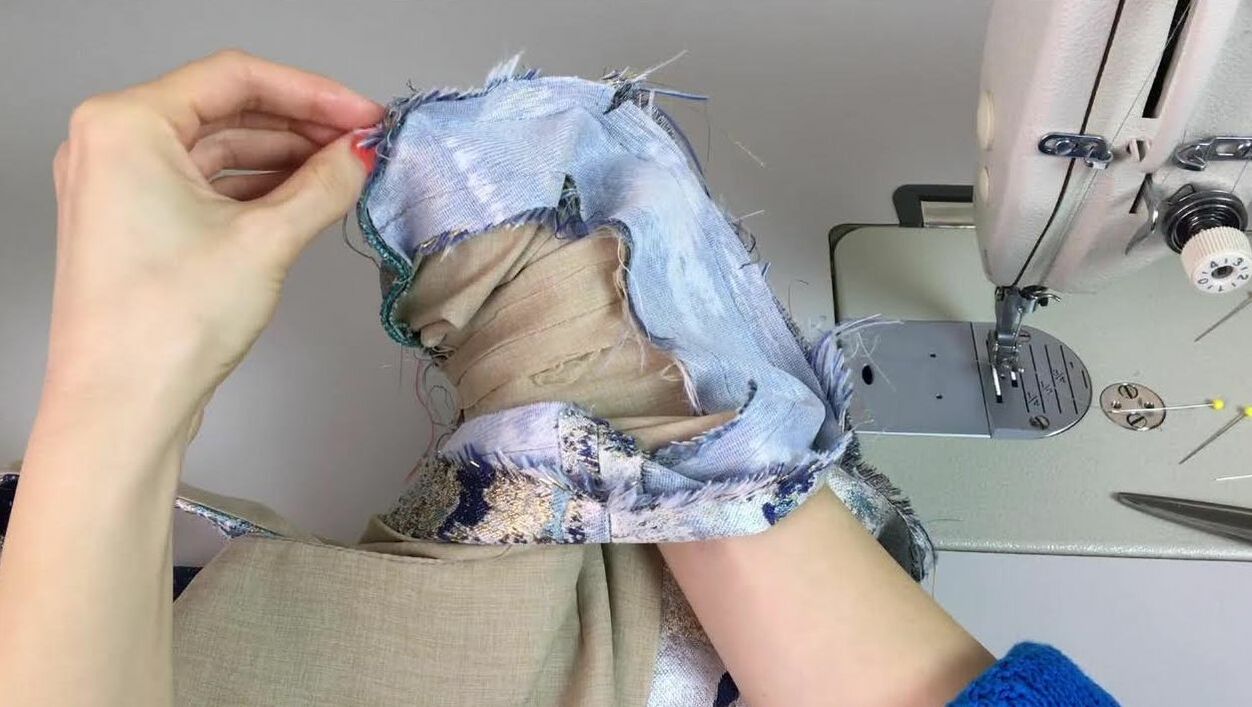
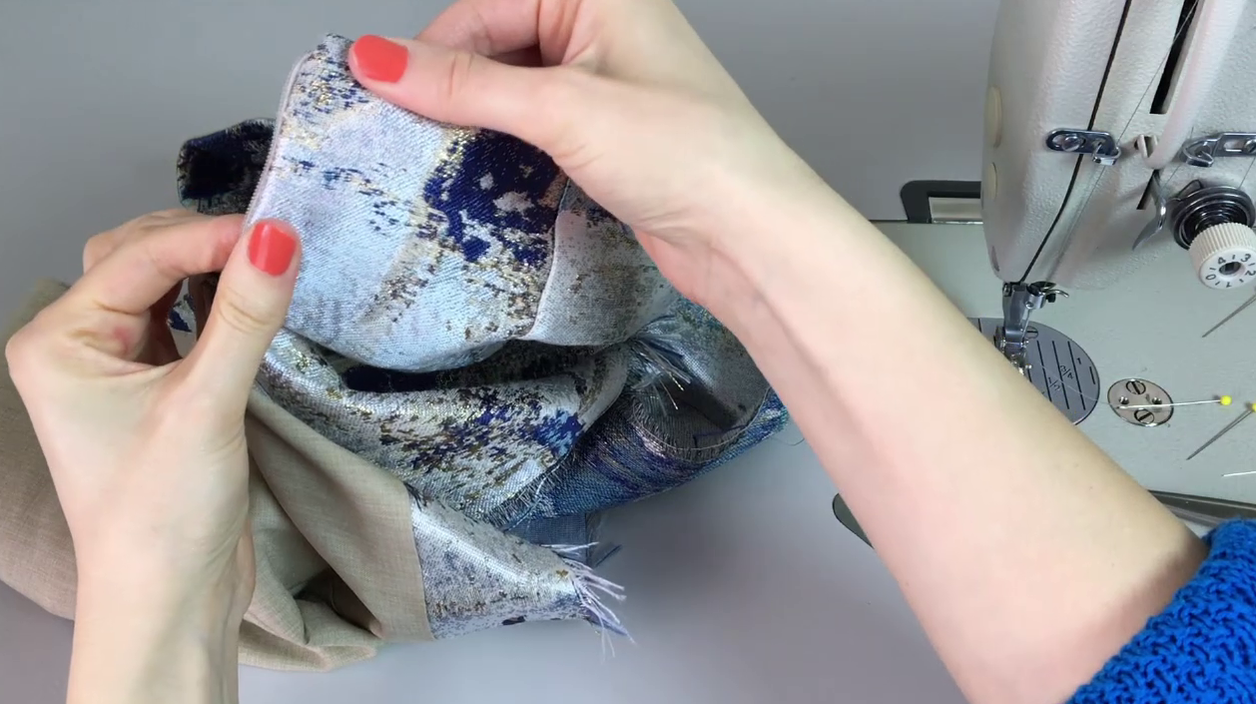
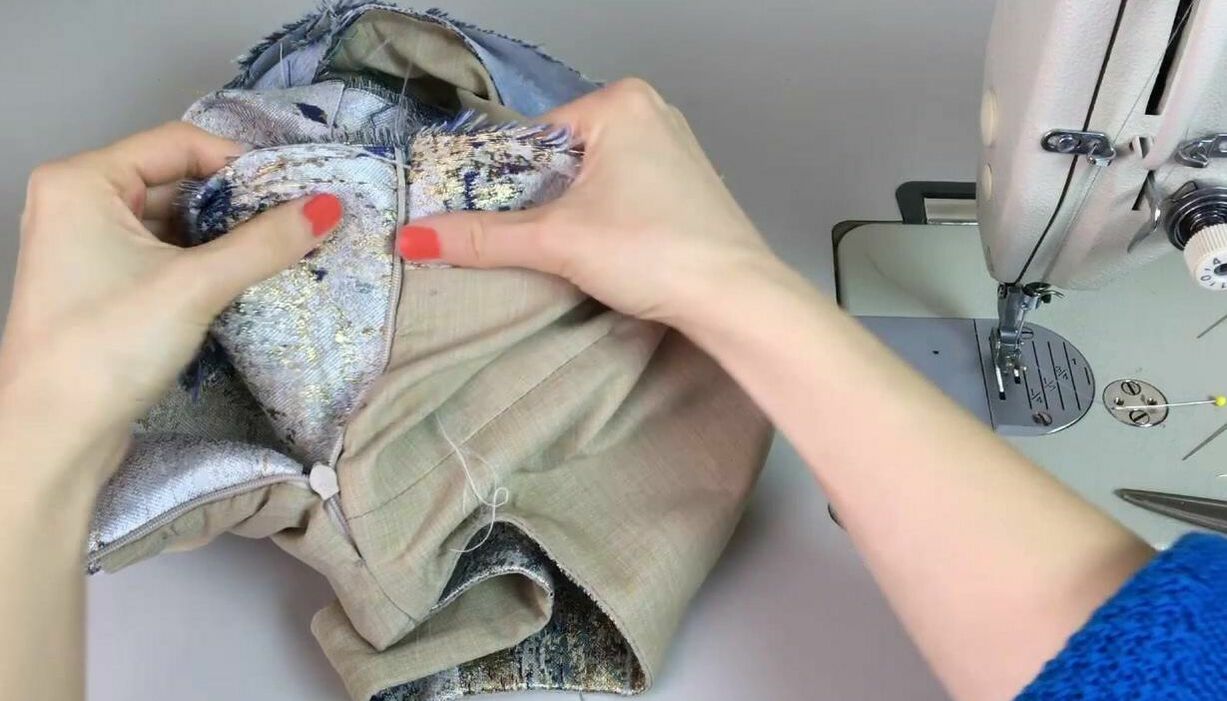
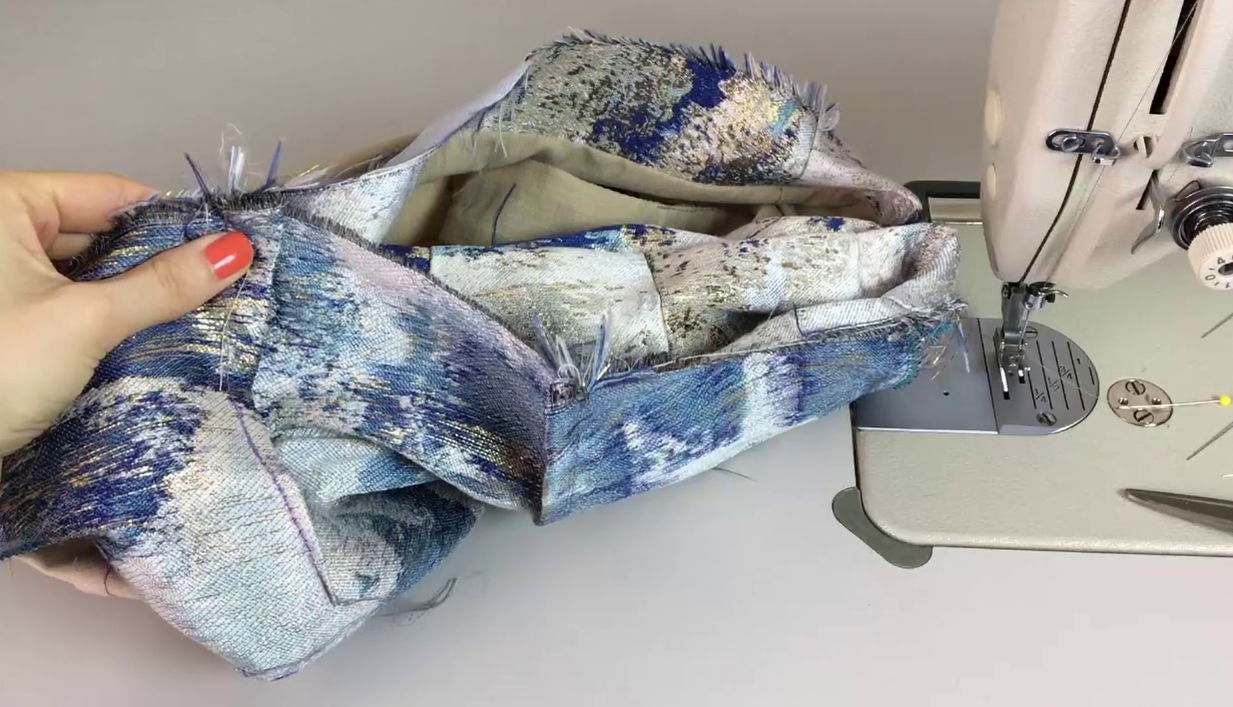
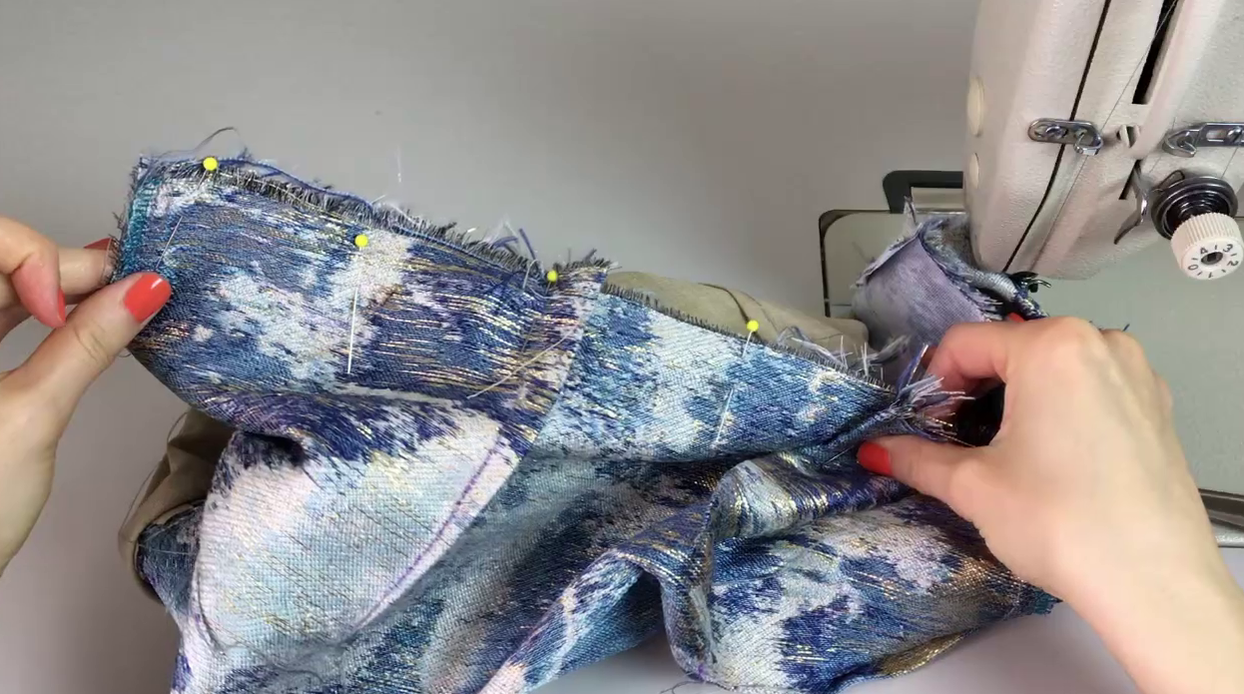
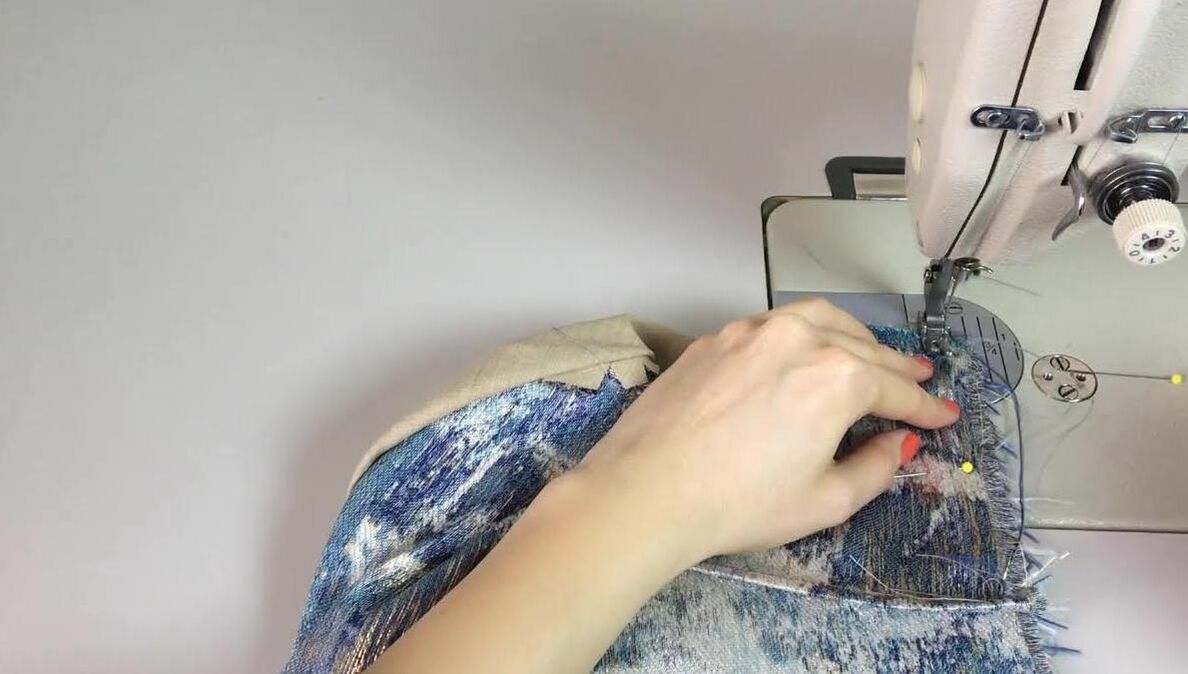
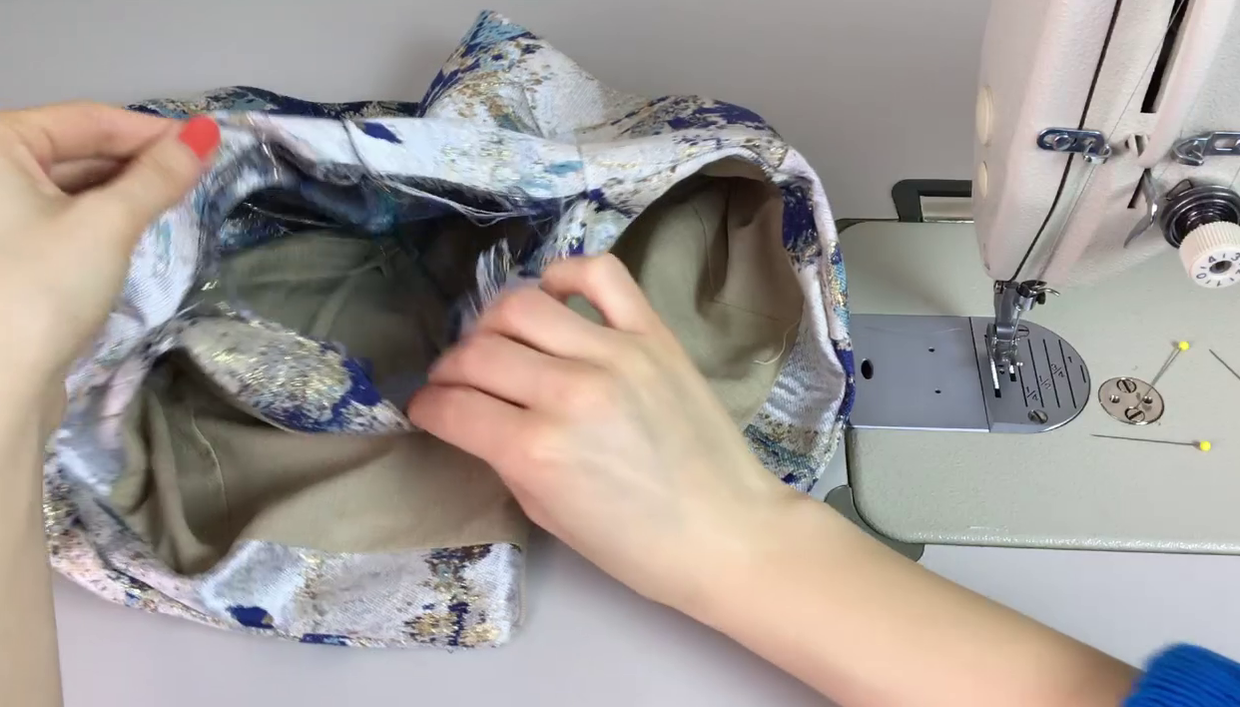
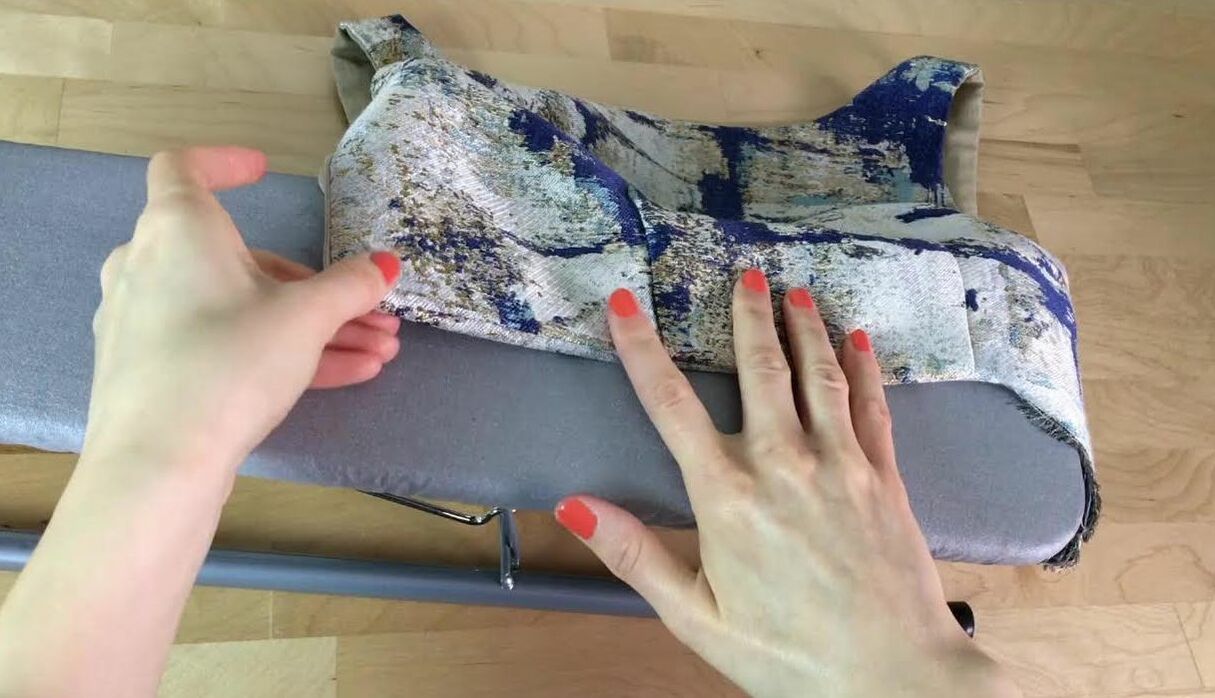
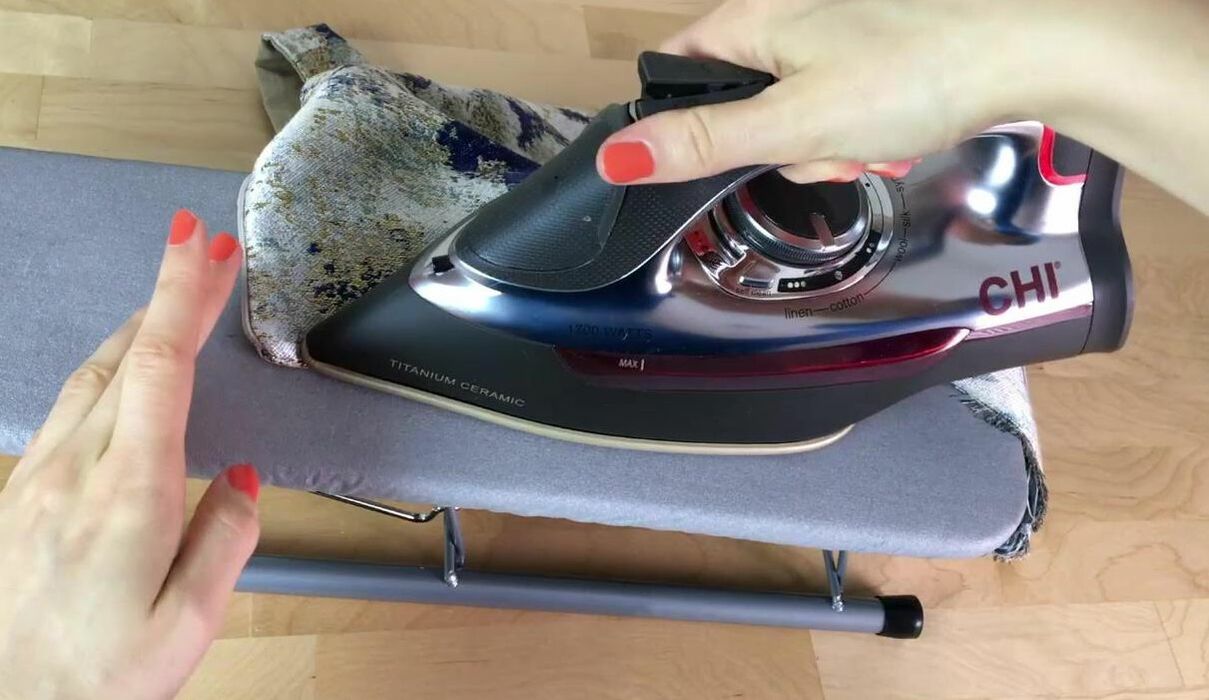
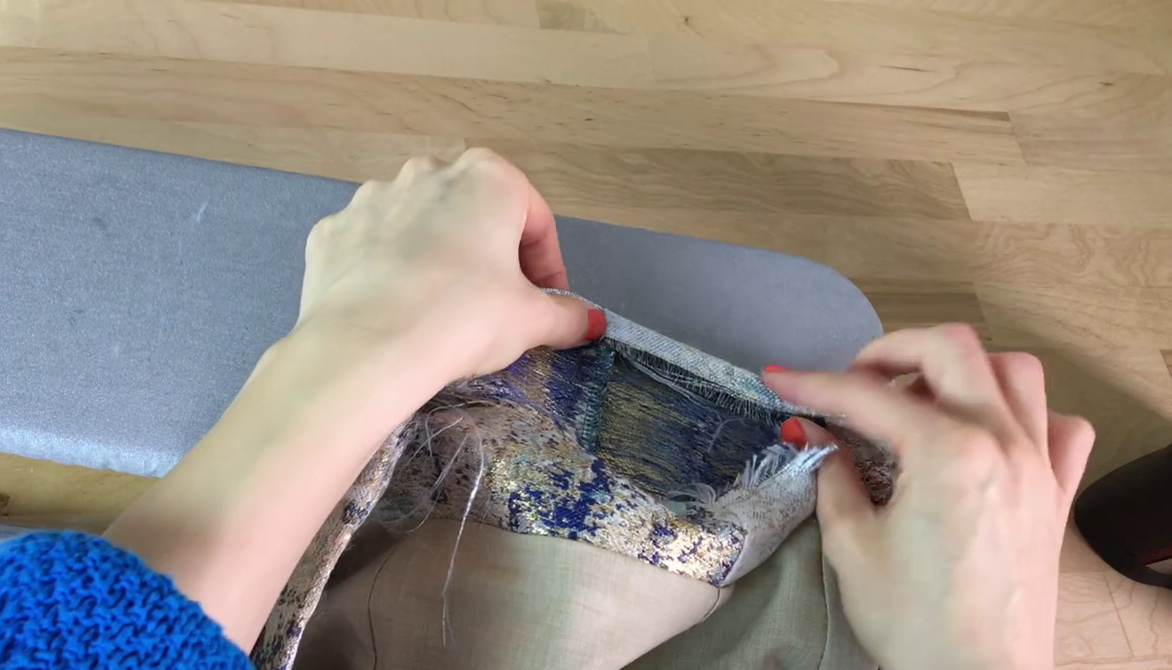
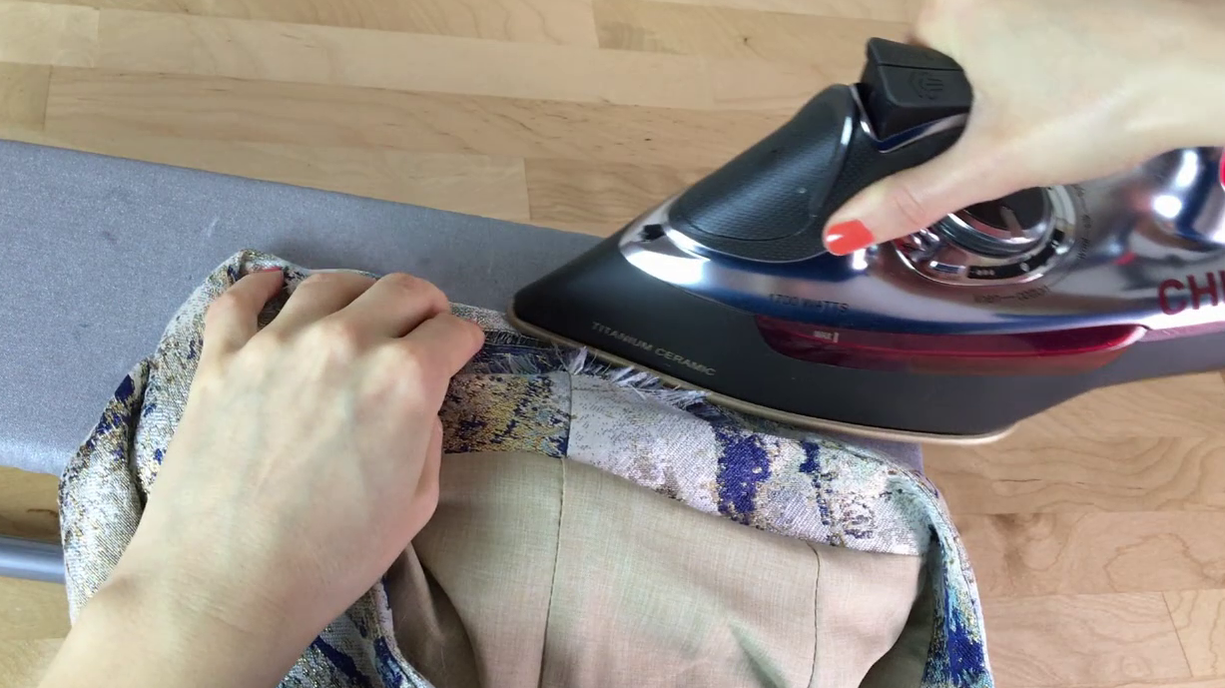
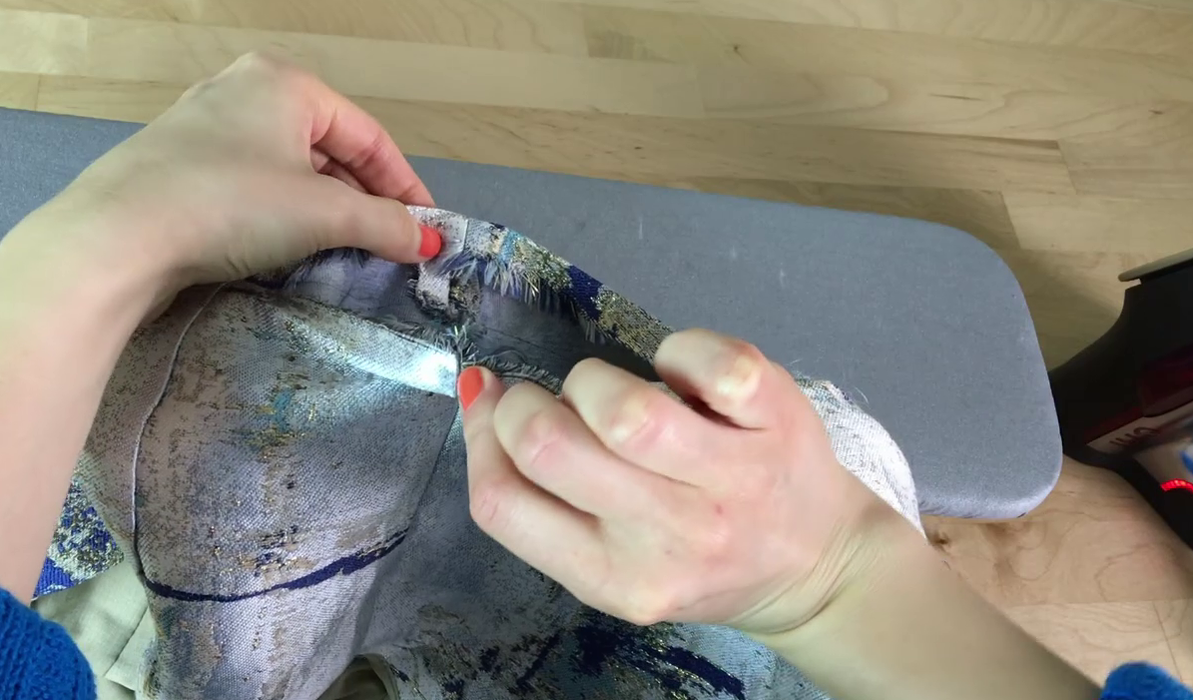
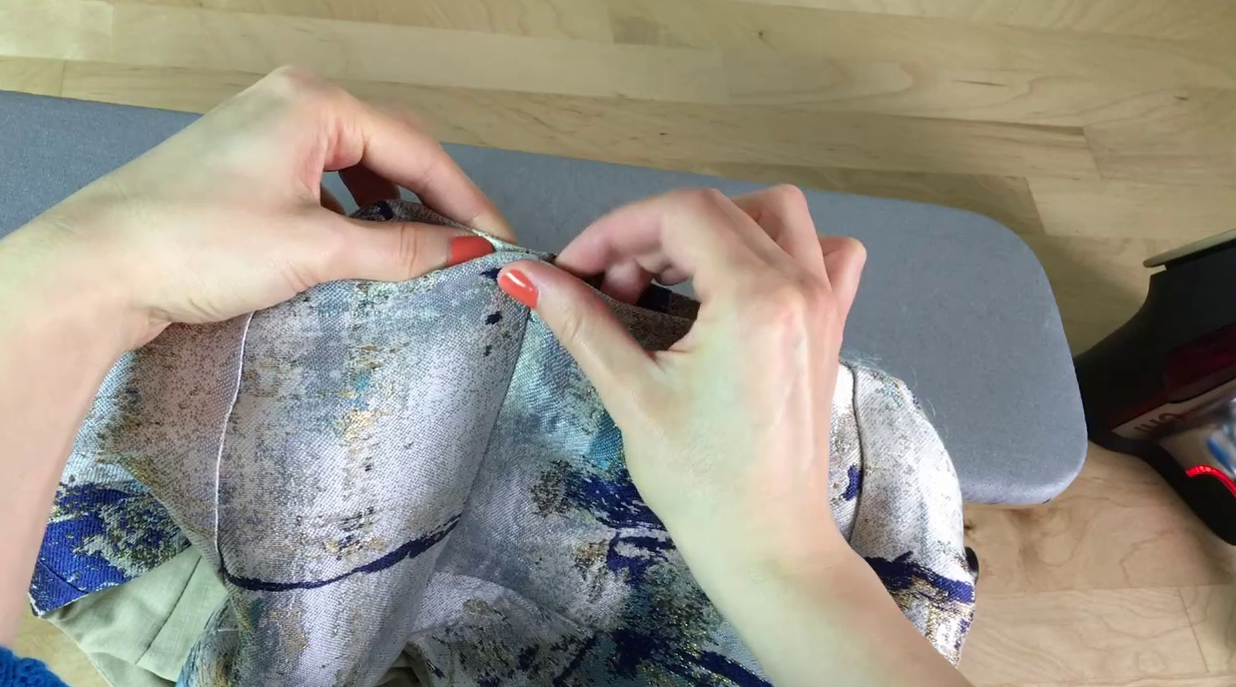
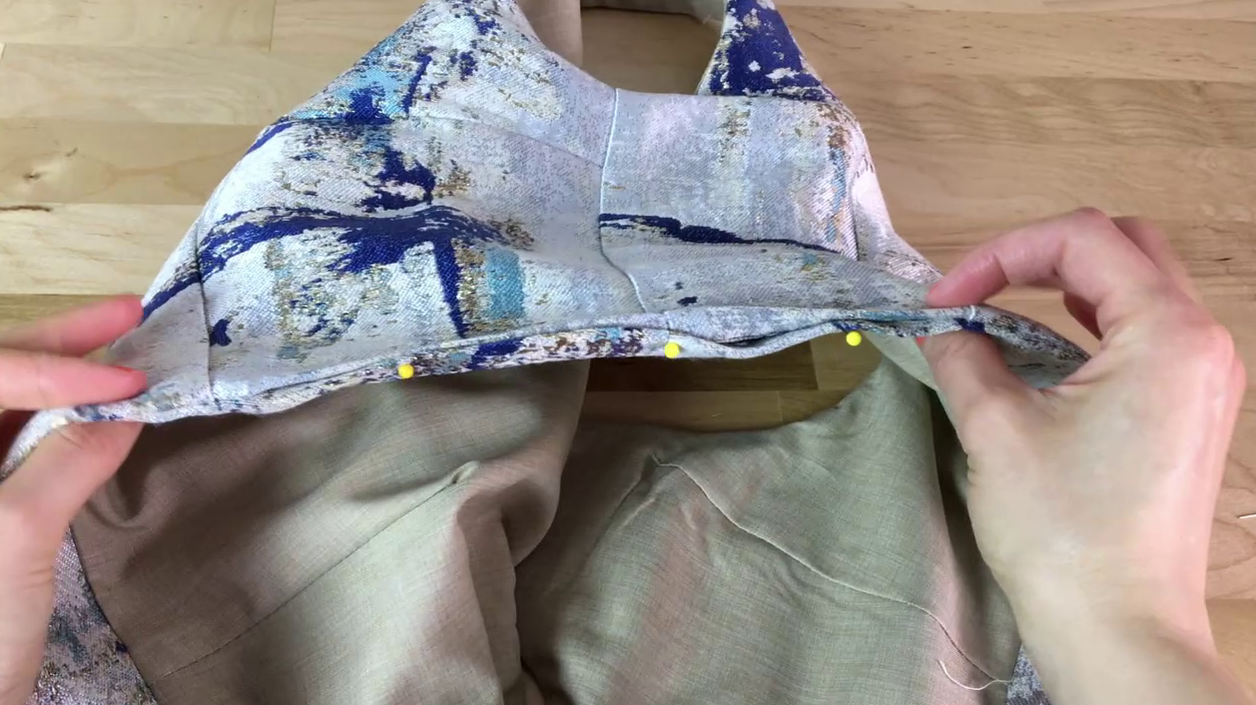
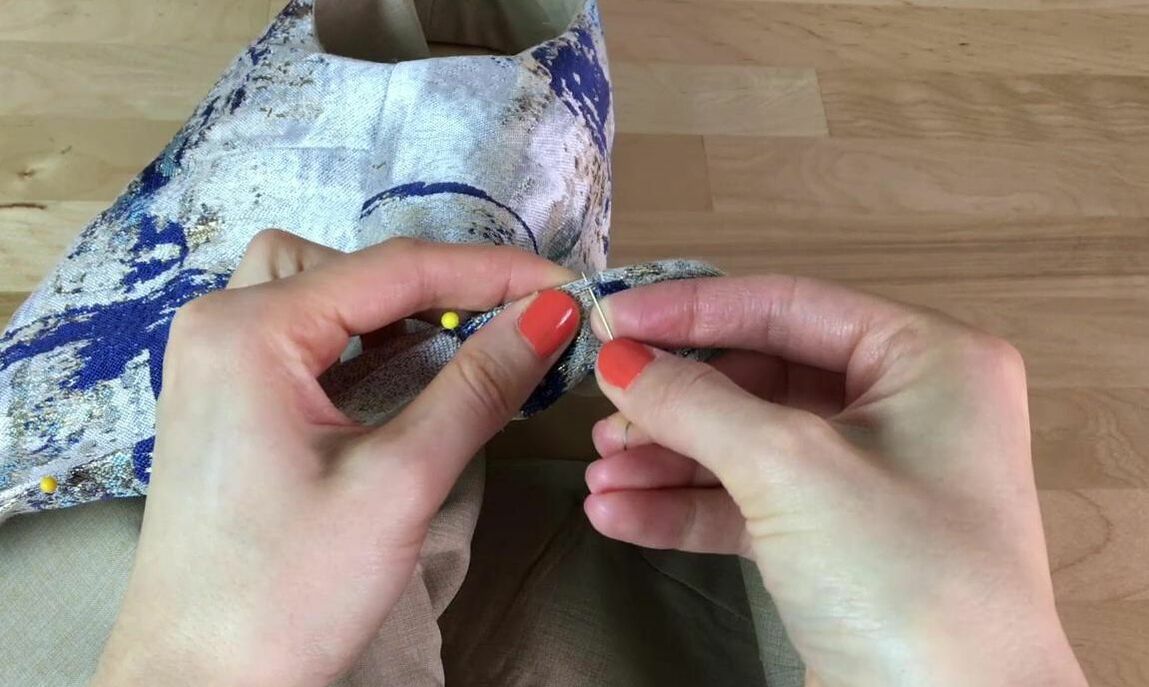
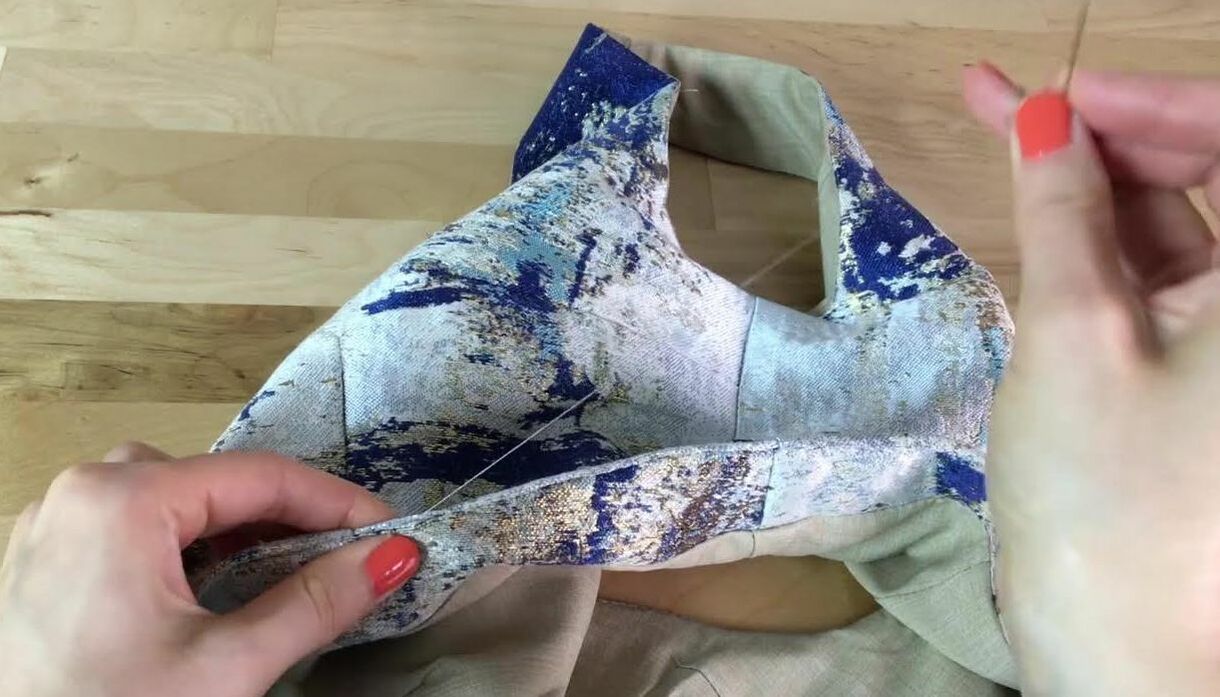
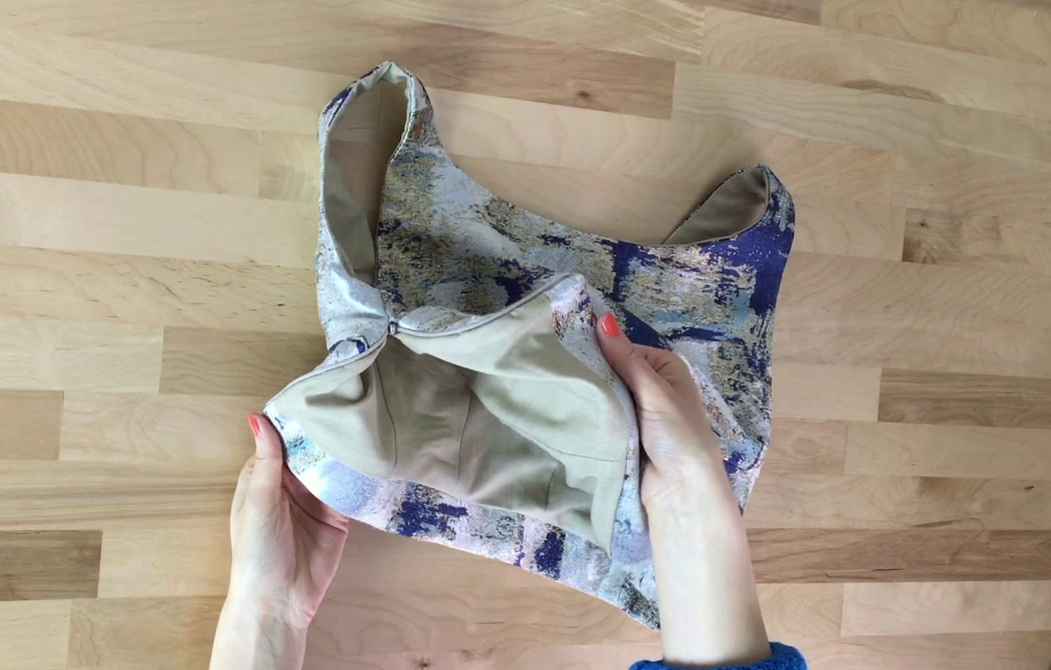
When I first started sewing years ago, I was completely perplexed (and intimidated) by the idea of finishing and sealing lining edges. You know the lining style I'm talking about? The kind where the lining is sewn shut without a visible sign or obvious opening. It used to confuse me to no end! Fast forward 10 years later, and sewing lining has become one of my favorite finishes due to both its simplicity and clean quality. Although this tutorial deals specifically with enclosing and sealing lining edges into a zippered blouse, it is imperative to first learn how to attach the lining itself. If you are unfamiliar with the process, check out this tutorial- Video Tutorial: How To Sew Full Lining To A Fitted Blouse With Darts The blouse I'm working with is fully lined and has a hem facing. Before finishing the blouse hem itself, I attached the hem facing to the lining layer at the bottom. As an alternative, if you have a hem facing, you can sew it into the bottom of the blouse first after which you can connect it to the bottom edge of the lining. Some may argue this is a better technique, but I find that sealing the lining to the very bottom edge of the blouse hem is a bit more simple On that same note, if your garment has a zipper, whether along the sides seam (like in this case) or any other seam (center back, center front, etc.) make sure the zipper is fully stitched into the blouse layer first before finishing the lining to the zipper tape. Some key factors to consider about most lined garments and the process of sewing lining:- Lining is typically a more costly finish as it requires additional fabric, and may sometimes call for more sewing steps. - Although considered a high quality finish, lining may not be appropriate for all garments and/or fabrics. A lined finish is normally used on more tailored clothing items, providing clean edges (no top stitching) and added structure. - Full lining is used a lot more commonly with non-stretch woven fabrics than with knits. Knit garments that are lined should use lining that is also knit/stretch. - Full lining is often used in combination with facings, usually along the neckline and armholes. Although this isn't always required (depending on the type of lining used), a lining-facing combination is regarded as a better quality finish providing more structure, less lining visibility, and enhanced durability during the garment's wear and care stages. As a rule of thumb, keep in mind that if you are working with a very light and flimsy lining, it's best to also have a facing along the area of the garment requiring the most structure (neckline, armholes, hem etc). If a facing isn't used in this case, the lining will roll towards the outside of the garment disrupting the shape and stability of the neckline, armholes, or hemline. Note: In this tutorial, I added a facing only along the hem of the blouse. The lining I am using is medium weight having some of its own structure. Thus, I've allowed myself to skip the neckline and armhole facing. I did however add interfacing directly on the back of the blouse layer along the curve of the neckline. This will provide additional reinforcement and maintain smooth edges in the finished garment. Keep in mind that anytime you use facings, they should be backed with interfacing for added structure and durability. True to form, my hem facing is fully backed with interfacing as you may have already seen in the video tutorial above (or if you follow the picture breakdown below). - It is not necessary to clean finish the raw edges of the lining or blouse individually unless one or both fabrics are highly fraying. In my case, the fabric used for the blouse layer (self) frays quite a lot, so I reinforced the edges sewn to the zipper with a serging stitch for more durability. For good measure, I did the same with the lining edges that will be sewn to the zipper opening. - Full lining that is sewn closed should have a little bit of ease at the bottom where it connects to the facing or directly to the hem of the garment. This prevents tension and/or pulling along the surface of the finished blouse. Although it sounds unnatural, you want your lining to be a bit longer than the self (blouse) layer. You'll see what I mean in next week's patterning tutorial for this lined blouse. - When enclosing lining to a garment that has a zipper, it is easiest to sew the lining to the zipper area first before finally, moving on to the hem. - Although I'll be using a machine stitch to sew most of the lining to the blouse hem, you can also connect the entire bottom edge of the lining to the garment hem using a blind stitch alone. You may actually find this method a bit easier of you are a sewing beginner. Tools you'll need for this lining tutorial: - Pins - Hand sewing needle and thread. I recommend using contrast color thread for temporary hand basting stitches, and matching color thread for blind stitching the hem shut as a final step in the lining process. - A regular zipper foot (should be provided with your sewing machine kit). - A seam ripper (recommended)- used to remove basting or machine stitching in case you make a mistake (happens to me all the time!) - An iron with the appropriate heat setting for your fabric. - A good pair of scissors. Before we get started, keep in mind that just as is the case with other sewing techniques, there is more than one way of finishing full lining. The method I'll show you below is one that requires the least amount of hand stitching. If you choose to go another route (maybe blind stitch the lining to the zipper tape by hand, for example), that is completely acceptable and by no means considered to be incorrect. Use the steps below as a reference but don't feel confided by replicating each step identically. If you find one of the steps too complicated, feel free to adjust it such that it works best for you! Well, as long the end result turns out how you'd like it, of course. Sewing The Lining Edges To The Zipper OpeningStart with sewing the lining to the zipper area before moving down to the hem. While the zipper has been sewn into the blouse (self) seam, the edges of the lining corresponding the seam are left open as shown above. They will be individually sewn to each side of the zipper, enclosing the seam allowance and zipper tape in between. 1. Keeping the zipper all the way open, fold one of the edges of the lining such that the face of the lining and face of the blouse layer are touching, and the zipper tape is sandwiched in between. Check out the video above for more clarity on this step. I like to insert my hand between the two fabric layers, and holding this alignment in place, I pull the entire edge on its wrong side, making sure the zipper tape remains sandwiched in between the two fabric layers as described. When you turn the entire edge on its wrong side, the face of the lining and the face of blouse should be touching as shown above. The zipper tape should be aligned right in between these two fabric layers, with all outer edges (including zipper tape) aligning. 2. Insert pins through all three layers along the entire seam to keep everything in place. These three layers will be machine stitched together. However, I highly recommend hand basting all layers together first as they do tend to shift during machine stitching. This occurs mostly due to the slippery nature of the zipper tape. Frankly, just a bit of misalignment in this process can cause issues when finishing the hem later. For that reason, hand basting all these fabric layers as I did in the video above, will save you lots of frustration in the stitching process (speaking from experience!). Note: In this tutorial, my zipper opening extends the entire length of the seam. In many cases, a side seam zipper will only extend to a specified portion of the seam and not necessarily go all the way to the armhole. Regardless of which application you are working with, you should align the entire lined seam as shown above, pinning the open ends of the lining to both the zipper tape and each seam allowance portion of the seam. 3. Next, repeat the step(s) described above on the other open edge of the zipper. Again, make sure all edges are aligned, and the hemline of both lining and blouse self layers are matched perfectly at the bottom. Again, turn the edge on its wrong side and pin the 3 layers (lining, blouse self and zipper tape in between) together as shown. As noted above, I highly recommend hand basting these edges together prior to machine stitching. These edges may be a bit tricky to stitch using a regular presser foot due the location of the zipper teeth, especially when working with an invisible zipper. To stitch close to the zipper teeth but avoid stitching through the coils, use a zipper foot instead of a regular presser foot. A zipper foot allows you to stitch right next to raised edges like zipper teeth, piping, and other hard materials without accidentally catching them with your machine needle. The good news is, a zipper presser foot is included in almost all home sewing machine kits, not to mention they are fairly easy to use! 4. To stitch the 3 edges together, simply align them such that the needle is positioned next to (but not too close) the zipper teeth underneath (you'll see and feel the coils through the fabric). Using a zipper foot will allow for this alignment to be quite natural. Starting on one end, straight stitch using the location of the zipper teeth as a guide. Repeat on the other edge of the zipper opening, aligning the machine needle according to the location of the zipper coils. Due to the fact that my zipper foot sews in a single direction, meaning I can't switch the position of the needle in relation to the foot, I stitched each edge starting at opposite ends (as you can see). Now for the rewarding part! Once both edges are stitched as displayed above, turn the blouse on its face side as shown. All seam allowance and both zipper tape edges are cleanly enclosed on the inside. If you used hand basting prior to machine stitching, make sure you remove it before moving on to finishing the hem. Use a seam ripper to facilitate this process. Sewing And Sealing Lining To The Blouse HemLast but not least, lets clean finish the hem. This technique is similar to the lining-zipper finish described above. There will be some twisting and pulling in the process but once you get the hang of it it is a fairly intuitive process. 6. Keeping the zipper all the way open and the blouse on its wrong side, take the bottom edge of the lining and flip it over the bottom of the zipper end such that it aligns with the blouse bottom edge. The face of the lining (or hem facing, if you have one), should touch the face of the blouse self, with both bottom edges aligning perfectly. This may feel a little awkward and unnatural but once the hemline stitch is applied and the blouse is turned back on its right side, it will all make sense! 7. Keeping both bottom edges (lining and self) aligned with the face sides touching, insert pins perpendicular to the edge as shown. Continue inserting pins about halfway through the hem length. During this process, you may find it more comfortable to push the rest of the blouse underneath as you pin. You want to keep the pinned edges straight and comfortable to machine stitch (next step). 8. Starting at the zipper end, stitch at the specified hem allowance for your garment. For me, the hem allowance is 1/2". Continue stitching until you reach about halfway, or the location where you stopped pinning in the step above. 9. Holding the corner from the right side (between the fabric layers) with one hand, fold the corner seam allowance over such that it creates a clean, straight corner, and pull this corner out from the right side of the blouse as shown. When the corner is finally turned on its right side, the zipper coils align beautifully along the edge. Additionally, the bottom of the zipper and the hemline are completely sealed with all raw edges enclosed on the inside forming a clean, straight angle. 10. Repeat the steps described above on the other side of the zipper opening. Keeping the zipper open, flip the lining over the bottom of the zipper such that the face of the lining and face of the blouse are touching and their bottom edges are perfectly aligned. Insert pins perpendicular to the edge through both fabric layers (as shown). Stop pinning at about 5-8 inches away from the existing hemline stitch (Step 8) on the opposite end. 11. Machine stitch the hem together following the hem allowance as required by your garment (mine is 1/2"). Stop stitching at the location of the last pin, about 5-8 inches away from the stitch on the other end. This will leave an opening in the hemline which will be used to turn the entire blouse on its right side. The size of this opening really depends on how much room you need to turn the entire garment back on its right side. Normally, the bulkier and thinker the garment, the wider the opening should be. For a lightweight, thin fabric, you can get away with a 3" opening in most cases. Of course, you want to keep this opening as small as you can since it will minimize the amount of hand stitching you'll have to do when fully sealing the lining in the final step. Turn the blouse inside out, making sure each corner is enclosed in a straight angle. You should have a 5-8 inch opening along the very bottom hemline edge as shown above. Straighten the hemline layers into a clean, flat edge and place it on an ironing board. I used a sleeve ironing board here. 12. Iron down the lined hemline using the appropriate heat setting for your fabric. To prepare the hemline opening for hand stitching, fold each edge in at the designated hem allowance (1/2" for me) Iron down the folded edge as shown above. Repeat the folding and ironing technique along both edges of the hemline opening as shown. When touching, these two folded edges should align perfectly and smoothly blend into the rest of the stitched hemline. 13. Insert pins perpendicular to the folded edge to keep the hemline gap closed. The pins will keep everything aligned in preparation for the blind stitch applied to completely seal the lining. Starting on one end of the opening, apply a slip stitch (or any style blind stitch you find works best) to connect the folded edges together and close the gap. If you want to learn more about applying a slip stitch, including other basic (yet essential) hand stitches, check out this full breakdown: 4 Hand Sewing Techniques And Stitches You Should Know As A Sewing Beginner. Remove the pins as you stitch. The slip stitch will durably seal the opening edges while blending into the machine finish applied along the rest of the hemline. Basically, the goal is hide the location of the hand stitching on the finished garment. If you play your cards right and apply the slip stitch carefully, you'll have a high quality finish with all seam and hem allowance edges completely enclosed in the lining. The lining is complete! As a finishing touch, I give the lined edges another round of ironing. It re-straightens and smooths the edges for a clean, professional finish. Similar Tutorials You May Like: How To Sew Lining To The Zipper Area (Invisible Zipper Example) Video Tutorial: How To Sew An Invisible Zipper Into A Seam How To Sew A Round Neckline Facing How To Sew An Armhole Facing 4 Ways To Clean Finish The Raw Edge Of A Curved Neckline 4 Practice Exercises For Getting Comfortable With Your Sewing Machine
1 Comment
|
The Blog:A journey into our design process, sewing tutorials, fashion tips, and all the inspiring people and things we love. Doina AlexeiDesigner by trade and dressmaker at heart. I spend most of my days obsessing over new fabrics and daydreaming new ideas. Sadie
Executive Assistant & Client Relations Manager Archives
November 2019
Categories
All
|
-
Sewing Tutorials
-
Basics
>
- Aligning Pattern Grainlines To Fabric
- Preparing Fabrics For Sewing
- Pinning Sewing Patterns To Fabric
- Placing Sewing Patterns On Fabric For Cutting
- Rotary Cutters or Fabric Scissors?
- Cutting The Sewing Patterns
- What Are Notches And How To Use Them In The Sewing Process
- Transferring Notches From Pattern To Fabric
- Transferring Seamlines to Fabric
- Staystitching
- Backstitching: A Complete Guide
- Hand Basting: A Complete Guide
- Sewing Continuous Bias Binding
- Darts >
-
Sewing Seams
>
- The Basics Of Seams And Seam Allowance
- How To Sew A Straight Seam
- Sewing Curved Seams
- Sewing Corner Seams
- Trimming And Grading Seam Excess
- Notching/Clipping Seam Allowance for Tension Release
- Sewing Topstitched Seams
- Sewing Corded Seams
- Sewing A Slot Seam
- Sewing A Gathered Seam
- Sewing Bias Seams
- Sewing Seams With Ease
- Sewing Seams With Crossing Seamlines
- Sewing Unlike Fabric Seams
- How To Iron Seams: Ironing Tools And Conventions
- Sewing With Knit Fabrics
- Understanding Stitch Length And Tension
- Sewing Unique Fabric Seams
-
Seam Finishes
>
- Seam Finishing Techniques - Overview
- Applying A Pinked Seam Finish
- Applying A Bias Bound Seam Finish
- Serging And Zigzag Seam Finishes
- Sewing A Self-Bound Seam Finish
- Sewing A French Seam Finish
- Sewing A Hong Kong Seam Finish
- Sewing A Mock French Seam Finish
- Sewing A Turned-and-Stitched Seam Finish
- Sewing Overcast Hand-Applied Seam Finishes
- Sewing A Flat Felled Seam
- Sewing A Hairline Seam Finish
-
Hem Finishes
>
- Garment Hem Finishes: Overview
- Sewing A Double Fold Hem Finish
- Sewing A Single Fold Hem Finish
- Sewing Bound Hem Finishes
- Sewing An Exposed Double Layer Bound Hem
- Sewing A Folded-Up Bound Hem with Pre-folded Binding
- Sewing A Hong Kong Hem Finish
- Sewing A Band Hem Finish
- Sewing A Bias Faced Hem Finish
- Sewing A Twill Tape Hem Finish
- Sewing A Rolled Hem Finish
- Sewing A Shaped Hem Facing
- Using Fusible Hem Tape And Webbing
- Finishing A Lace Fabric Hem
- Finishing A Leather Hem
- Sewing Faced Hem Corners
- How To Finish Lining At The Hem
- Finishing Fabric Corners by Mitering >
- Interfacing A Hemline: Lined And Unlined Examples
-
Sewing Pockets
>
- Curved Patch Pocket With Flap
- Unlined Square Patch Pockets
- Lined Patch Pockets: Two Ways
- Extension On-Seam Pockets
- Separate On-Seam Pocket
- Front Hip Pockets
- Bound Double Welt Pocket
- Double Welt Pocket With Flap
- Self-Welt Pocket (Using Single Fabric Layer)
- Slanted Welt Pocket (Hand-Stitched)
- Faced Slash Pockets: Overview >
-
Sewing Zippers
>
- Sewing Zippers: General Information
- Sewing A Centered Zipper
- Sewing A Lapped Zipper
- Sewing An Invisible Zipper
- Sewing A Fly Front Zipper
- Sewing A Closed-End Exposed Zipper (No Seam)
- Sewing An Exposed Separating Zipper
- Sewing Hand Stitched Zipper Applications
- Sewing A Zipper Underlay
- Sewing A Placket-Enclosed Separating Zipper
- Sleeveless Finishes >
-
Neckline Finishes
>
- Sewing A Neck Shaped Facing
- Sewing An All-In-One Neck Facing
- Neck And Garment Opening Combination Facings >
- Sewing A Bias Faced Neckline Finish
- Sewing A Band Neckline Finish
- Bound Neckline Finishes: Overview >
- Sewing A Semi-Stretch Strip Band Neckline
- Ribbed Neck Band And Classic Turtleneck
- Decorative Neckline Finishes >
- Finishing Facing Edges >
-
Extras
>
- A Complete Guide on Interfacing
- Sewing Bound Spaghetti Straps
- Sewing Spaghetti Straps To A Faced Neckline
- Sewing Ruffles: Overview
- Patterning And Sewing A Circle Ruffle
- Sewing A Gathered Heading Ruffle
- Sewing Double Layer Gathered Ruffles
- Sewing A Gathered Ruffle Into A Seam
- Sewing A Gathered Ruffle To A Fabric Edge
- Sewing A Fabric Surface Slit
- Sewing A Slit Seam
- Hand-Applied Straight Stitches
- Hand-Applied Blind Stitches
- Hand-Applied Overedge Stitches
- Hand-Applied Tack Stitches
- Hand-Applied Decorative Stitches
-
Basics
>
- Custom Bridal
- Custom Apparel
- About
- Blog
Services |
Company |
|



 RSS Feed

