|
Although I've done a set in sleeve tutorial before, this one is going to be a little different. In this week's video, I'll show you not only how to sew a basic jacket sleeve but also how to add lining to the sleeves individually, when the rest of the jacket is left unlined. Partially lining a garment can pose some technical challenges but will always result in a higher quality finish. Speaking of challenges, sleeves are one of those elements that can be a bit intimidating especially when they need to be lined. As you go through the process described below, take each step one at a time and you'll love the end result! So why not add full lining to the jacket? Wouldn't it be easier? The answer is yes. Full lining is basically the mirror image of the self garment and often times, does not require additional sewing patterns to be drafted. It is also undeniably easier to sew since you don't have to clean finish any of the seam raw edges individually as it self finishes on its own. There are however, many instances when full lining simply may not work due to a multitude of design and construction requirements. Examples of such situations include: - The overall garment will be too bulky if lining is added - The lining will affect the overall drape of the garment (if you are sewing a flowy blouse or dress, for instance) - In case of sewing a more casual style (lining usually adds a more formal, finished effect). In cases as such, adding lining to only the necessary portions of a garment is usually your best bet. Here are some instances when partial lining (as opposed to full lining) is ideal for finishing a garment: - Only a portion of the garment cannot be clean finished by any other means but lining. - A portion of a garment uses fabric that has a wrong side not suitable or comfortable enough to touch bare skin. - You need added thickness and coverage in certain areas but not others. For example, you may be using a thin or light color fabric and need an added layer at the bottom of a skirt or dress. - A garment's edge is too thick to be stitched when folded. In this case, lining it may provide the best finishing technique. - For design purposes. For example, a portion of the garment should not have any visible top stitching on its right side in which case, partial lining will provide the prefect clean finishing method. Almost all of the examples noted above apply to my jacket sleeves in this tutorial. I bought the fabric because it is thick, warm and doesn't fray when cut. For that reason, I am not finishing any of the jacket's edges in a conventional fashion but instead, leaving all the edges unfinished and adding just a double row of straight stitching for reinforcement (I still want to prevent the cut edges from stretching over time). By the way, a full sewalong tutorial for the jacket will be available next week! The sleeve however, is a different story. It is made of a contrast velvet quilted fabric (which I love!) but its back is honestly not the most pleasant to touch. Additionally, if I was to leave the sleeve unlined, I would have no way of clean finishing the sleeve-armhole seam itself since the seam allowance layers are way too bulky. That being said, the executive decision was made (by me!) to line just the sleeves and leave the rest of the jacket free flowing and unfinished as originally designed. For my sleeve lining I chose a dark blue cotton blend fabric that is durable, breathable and soft to the touch. Side note on choosing lining fabric: Make sure when you choose the partial lining fabric that it compliments and/or enhances the design. Stay away from anything that will add unnecessary bulk or stiffness to your garment but also keep in mind its durability and how easy it will be to work with in the seeing process. Choosing the right fabrics of course, comes with years and years of practice so don't put too much pressure on yourself if you don't have the perfect picks right away. Just keep practicing and you'll get there! Now that you have the scoop on partial lining, let's get sewing! In the steps below, the jacket body has already been sewn. Cutting The Sleeve Self And Lining Patterns: Cut two sleeve pattern pieces that are the mirror image of each other. To achieve this cut, fold the fabric with the right side corresponding to the inside of the fold. Pin and cut the two fabric layers carefully following the sleeve pattern as shown above. Keep in mind you need two sleeve self pieces (layers corresponding to the outside of the garment) and two matching lining pieces. The self in this case is the black quilted velvet fabric. The lining is the blue cotton fabric. 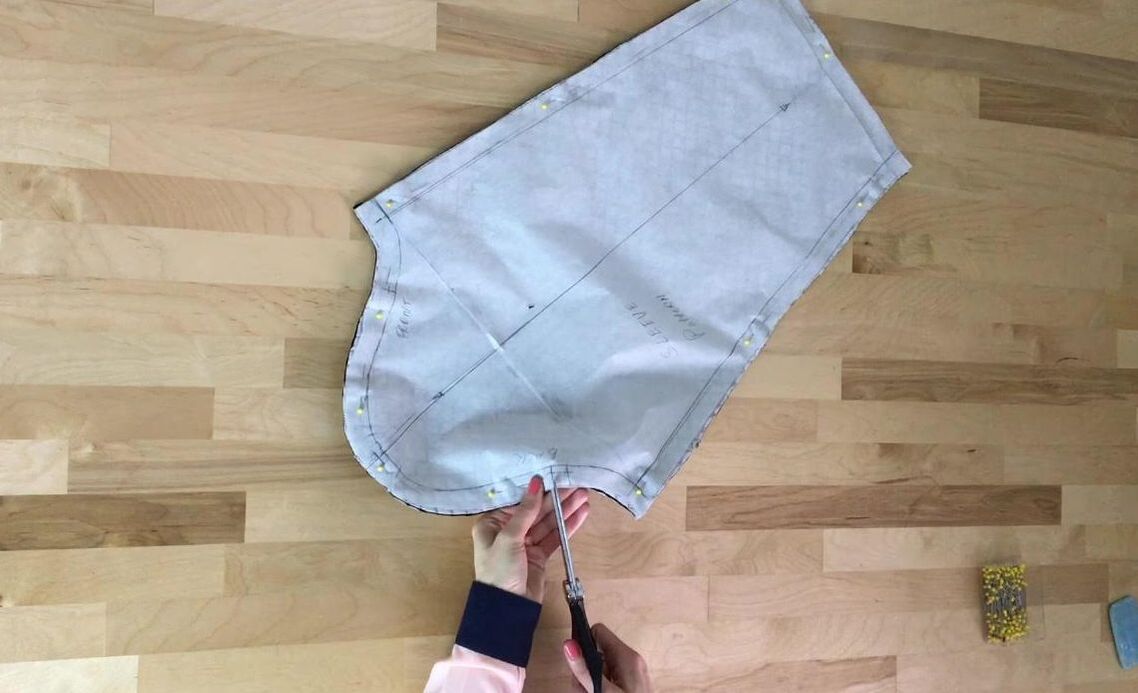 Transfer all the sleeve cap notches from the sewing pattern onto both fabric pieces before removing the pins. 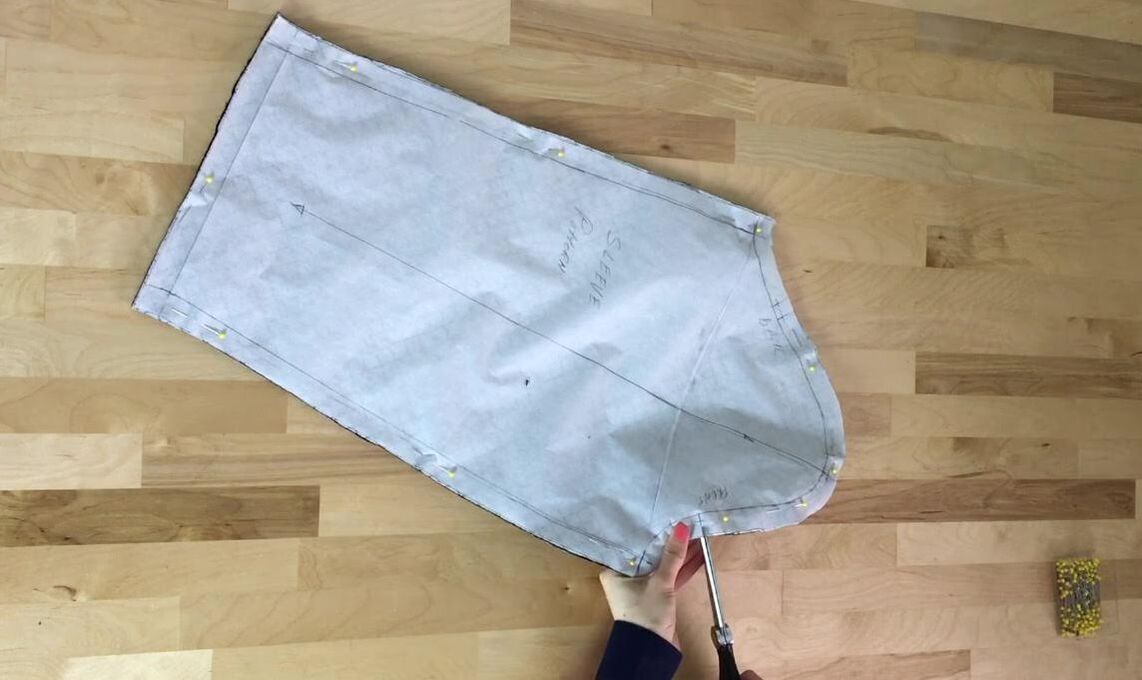 A sleeve should have 3 separate sets of notches along the sleeve cap: A single notch corresponding to the front of the sleeve, two notches to correspond to the back of the sleeve, and a single notch positioned in the middle of the two which aligns to the jacket's shoulder seam. 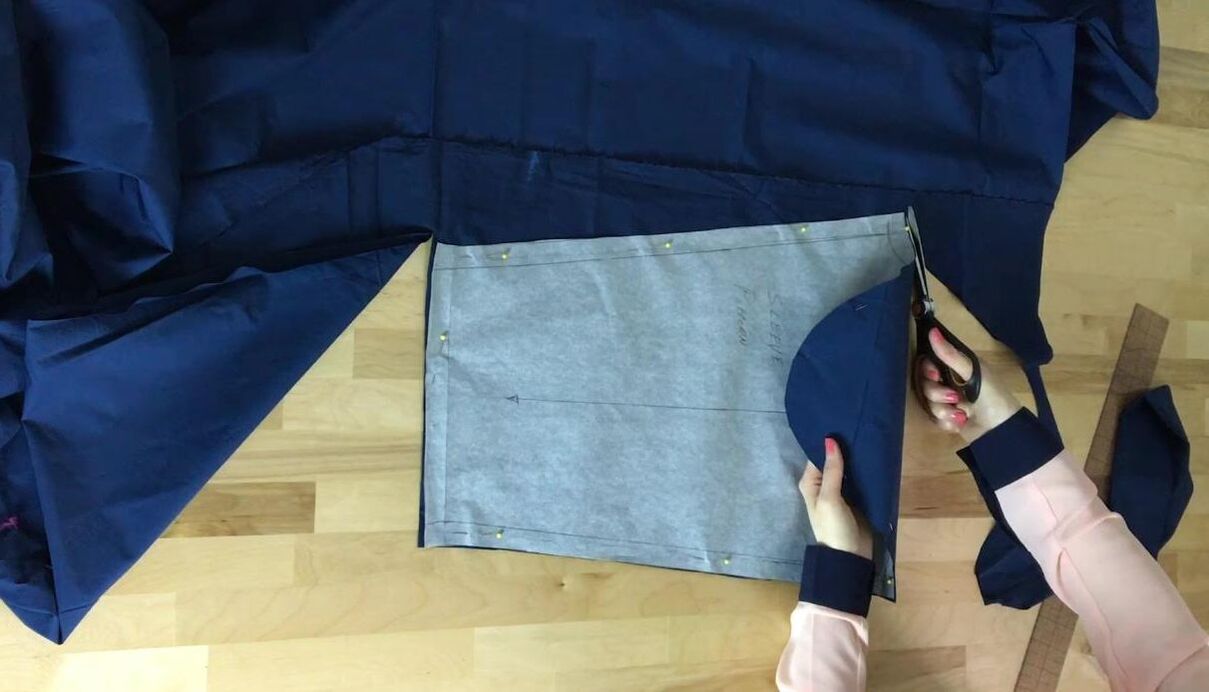 Repeat the cutting and notch transfer process described above for the lining pieces. Sewing The Lined Jacket Sleeve: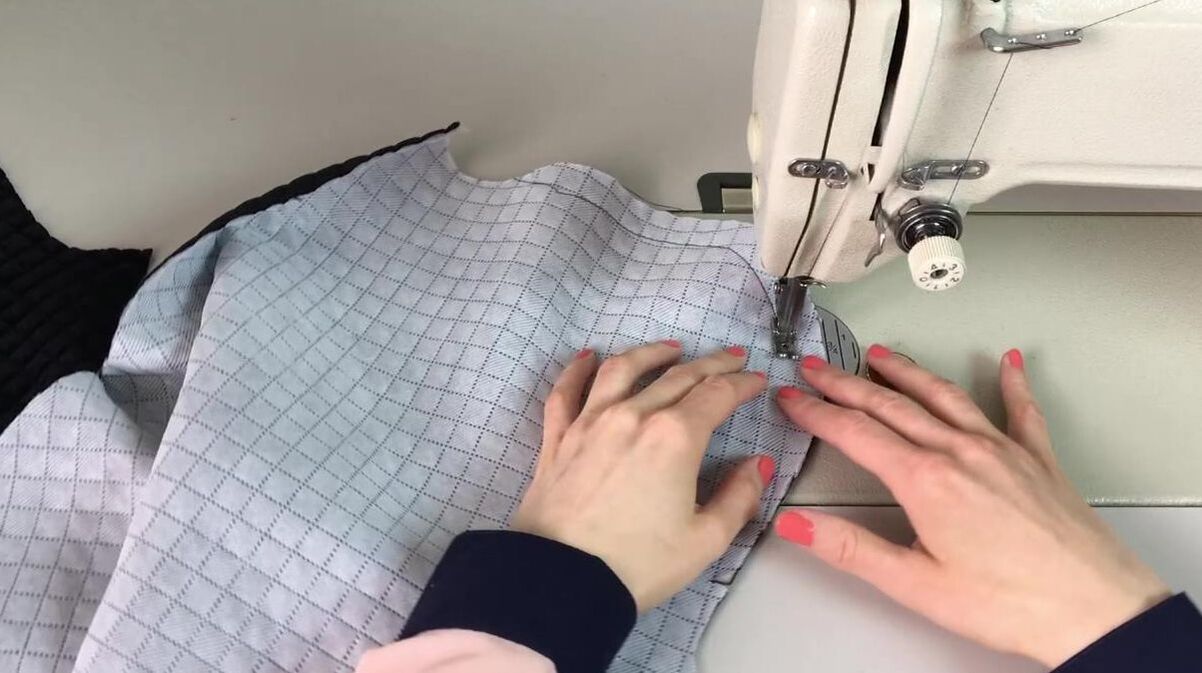 1. Apply a basting (longer) machine stitch around the curve of the sleeve cap about 1/8" up from the seamline. As a refresher, the seamline corresponds to the seam allowance distance from the fabric's edge in. In this tutorial, my sleeve has a seam allowance of 3/4" all around. That being said, I applied a basting stitch at about 3/8" from the sleeve cap's edge as shown (a little before the actual seamline). Start the stitch near one of the front or back notches and finish at the opposite front or back notch. 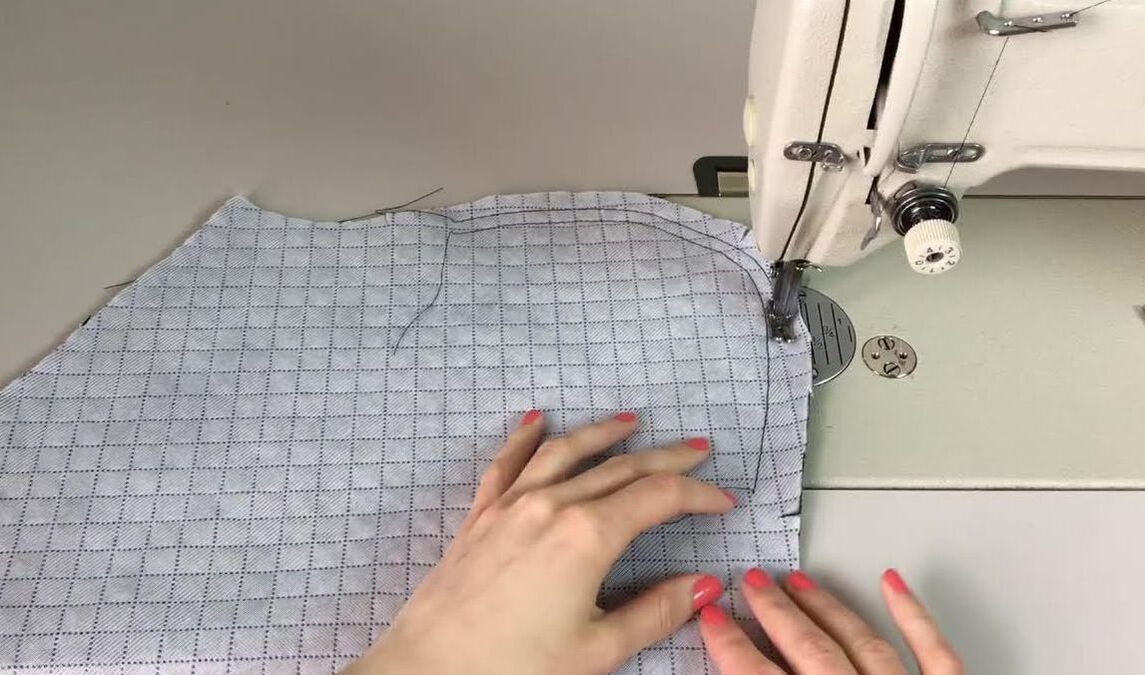 2. Apply a second row of basting at the halfway point between the fabric's edge and the first basting stitch in Step 1 above. Both of these stitches should correspond in placement and length. They will be used to create the needed fullness in the sleeve cap. The fullness serves as an essential element in a non-stretch sleeve's ultimate comfort and proper functionality. 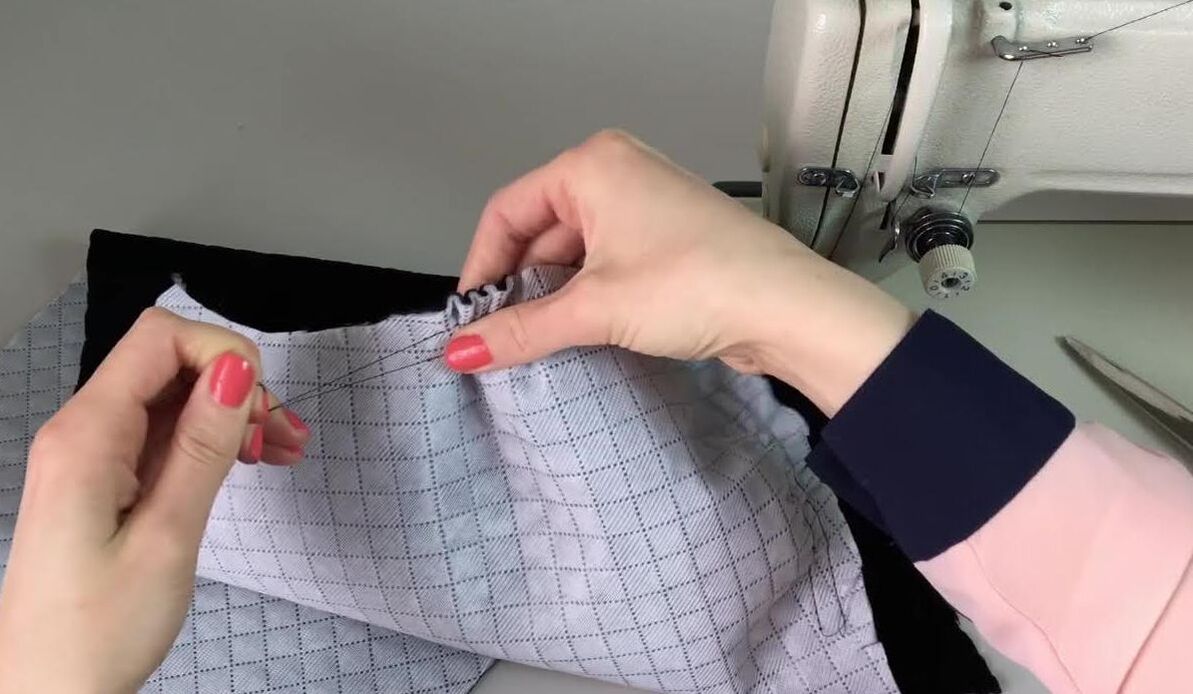 3. Grabbing both threads on one end, pull gently to form subtle gathers along the sleeve's cap. Doing so will start to form the natural 3-dimensional shape of the sleeve at the top. Keep in mind that the basting stitch should add curvature and fullness but not form actual gathers or puckers in the final seam. Follow the steps in the video above for more guidance on this step. 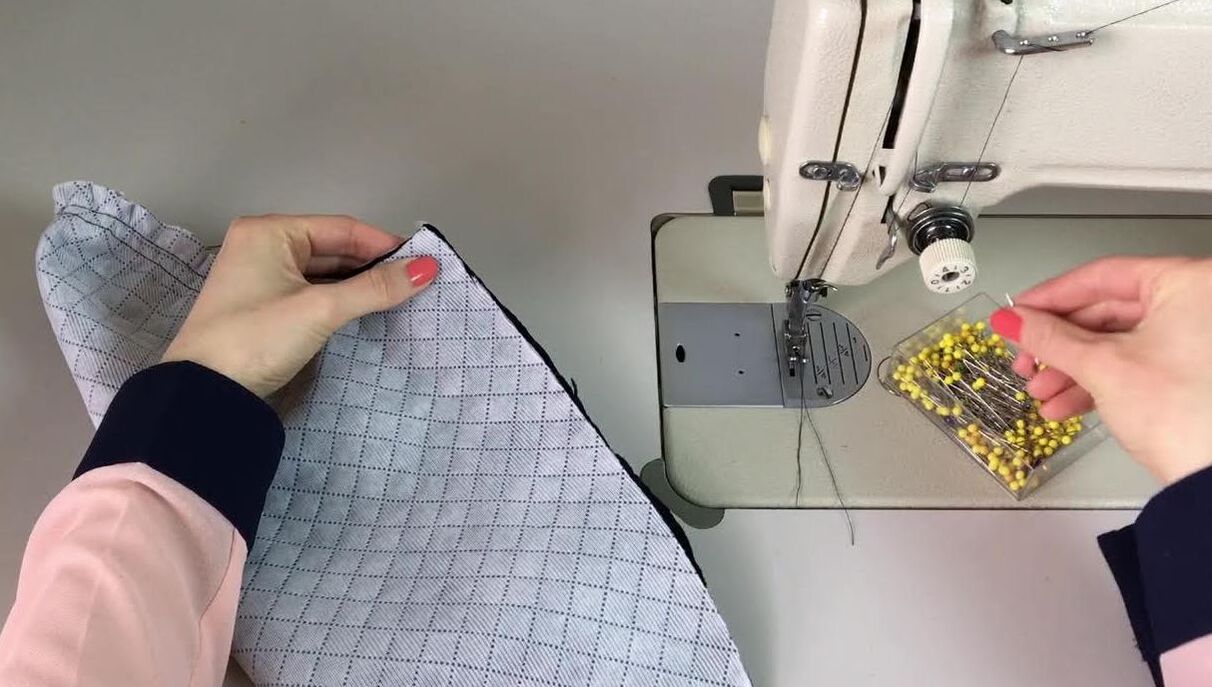 4. Fold each sleeve piece lengthwise such that the fabric's right side is touching (corresponding to the inside of the fold) and the wrong side is facing outwards. 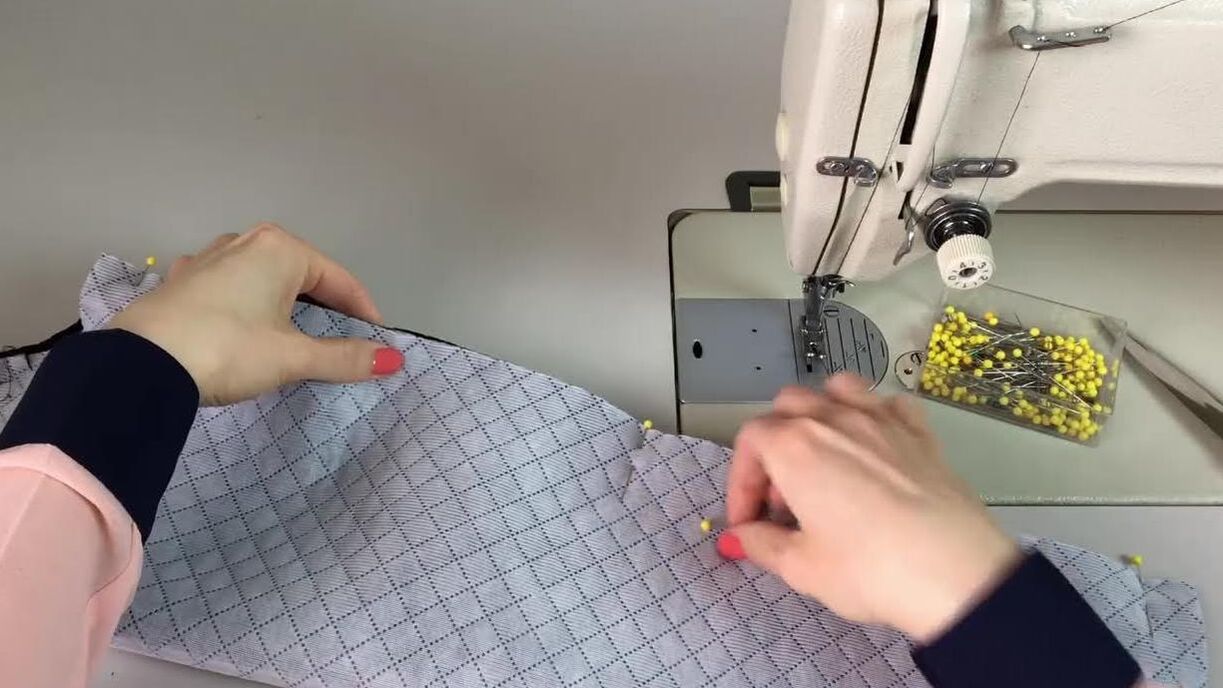 Pin the sleeve seam together as shown inserting the pins perpendicular to the edge for easy removal during machine stitching. Note: Before applying the permanent stitch, make sure both sleeves are matching each jacket/garment armhole correctly. You can do this by simply placing each sleeve next to the armhole and ensuring that the front notch on the sleeve aligns to the front of the jacket (or vise versa). Doing so is a great way to test if the pieces were cut correctly.  5. Stitch each sleeve seam at the designated seam allowance. 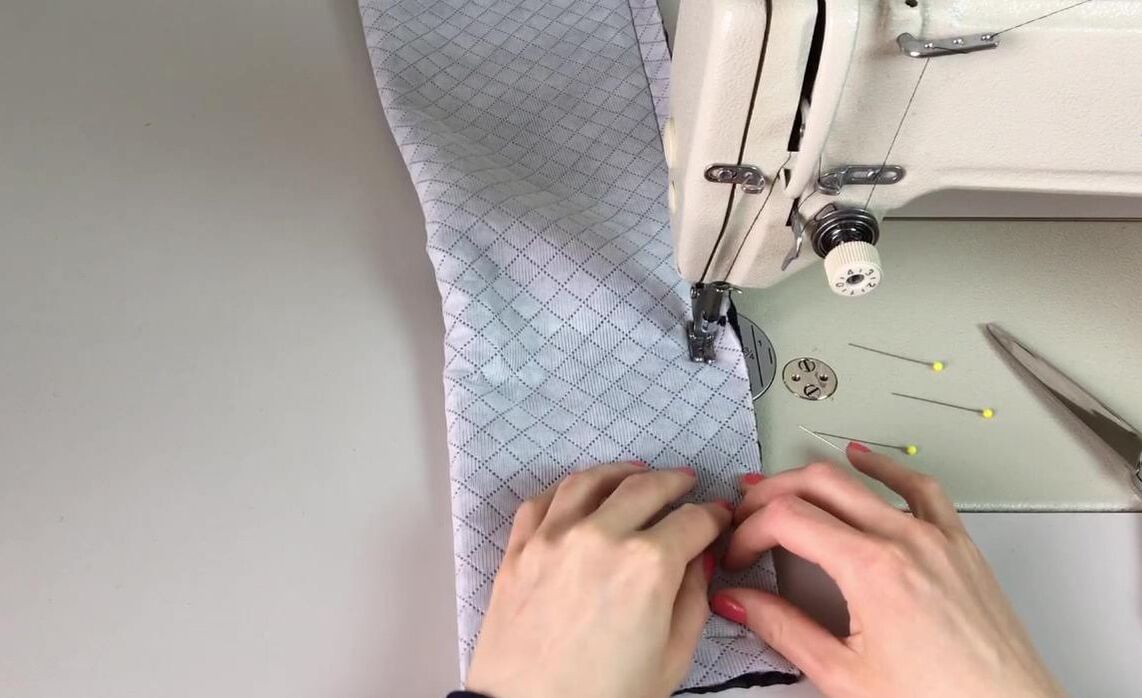 As noted above, my seam allowance is 3/4" in this tutorial.  6. Iron the seam allowance layers open as shown. Carefully iron down the seam to open the seam allowance. Make sure to iron out any creases inadvertently left by this process on the sleeve body. 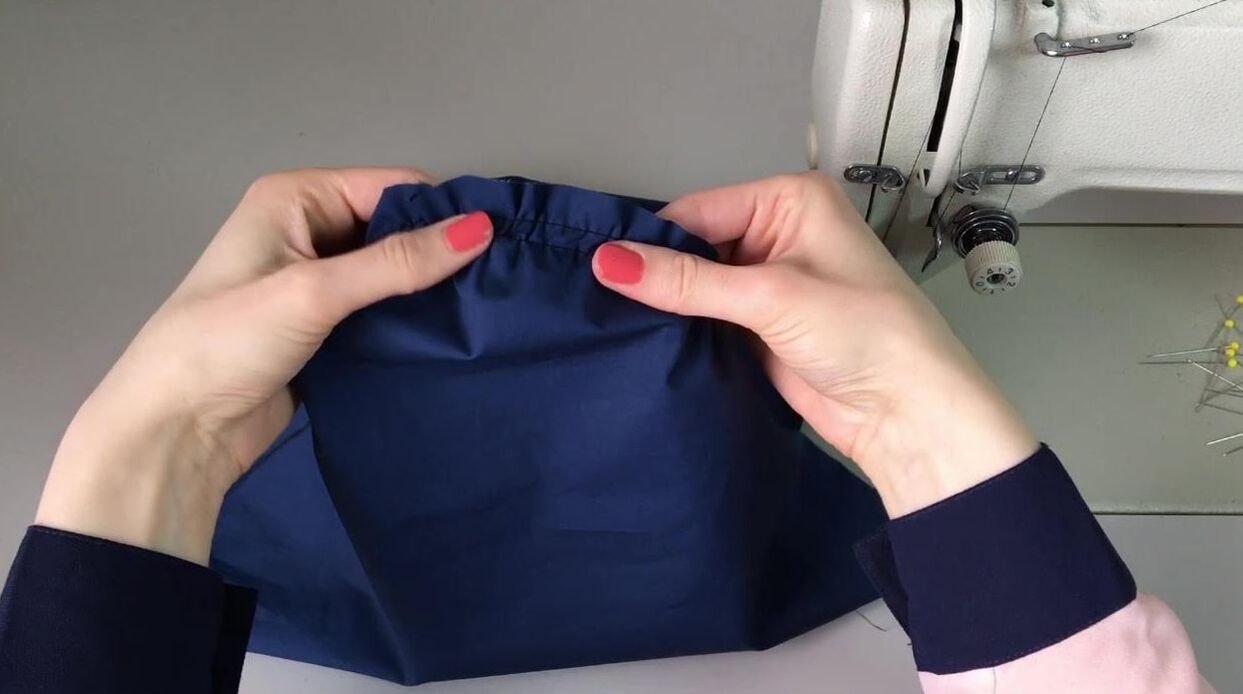 7. Add basting stitches to the matching lining sleeves following the same process described above. 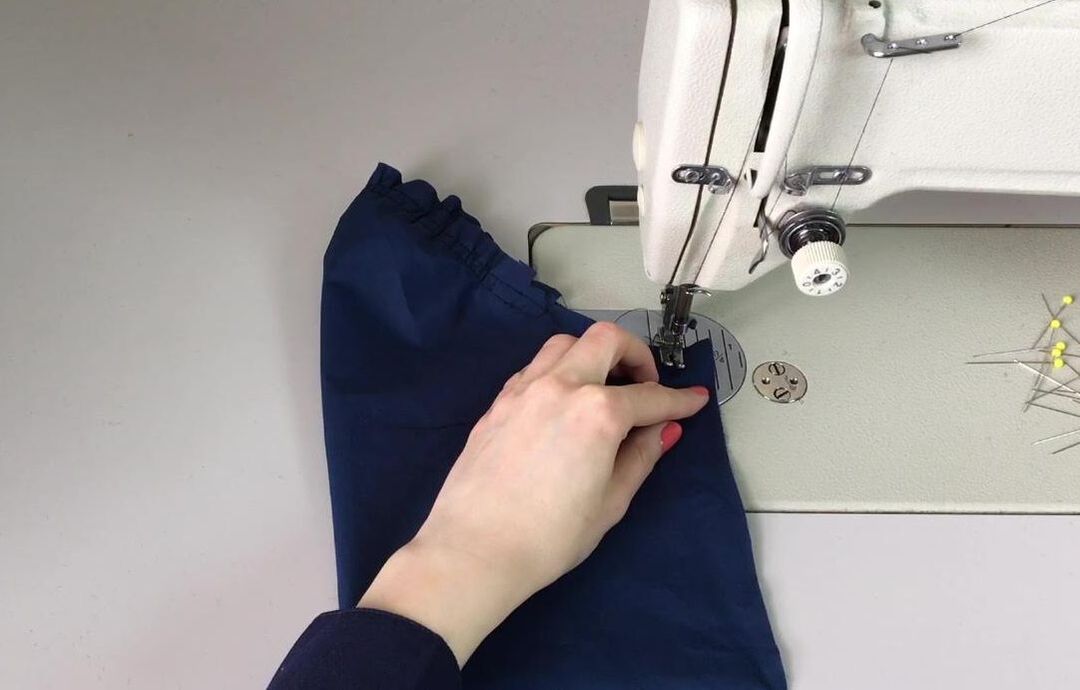 Follow the same process to prep the lining seam but instead of stitching the whole seam at once, only stitch through about 1" at the top (underarm area), leaving the rest of the seam open at the bottom. Doing so will allow you to connect the lining sleeve cap to the jacket in the steps to follow. If your lining, like mine, is identical on each side. be sure to double check twice that the front and back of each lining piece matches each corresponding sleeve. Keep in mind that when sewing lining, all raw edges should be enclosed in between the lining and self layers. In other words, the wrong sides of the seams should be touching one another in the finished garment. Set the lining pieces aside for now and lets focus on the actual sleeves (self). They are now ready to be sewn to the jacket!  8. First, align each sleeve to the corresponding jacket armhole using the sleeve cap notches as a guide. Remember, single notch for the front, double notch for the back and middle notch to match the shoulder seam. To pin the sleeves, turn the jacket on its wrong side but keep the sleeves on their right side. Working from the inside of the jacket, align the sleeve cap edge to the edge of the armhole such that the right side of both layers are touching. Here's are some basic rules for the easiest way to align each sleeve: 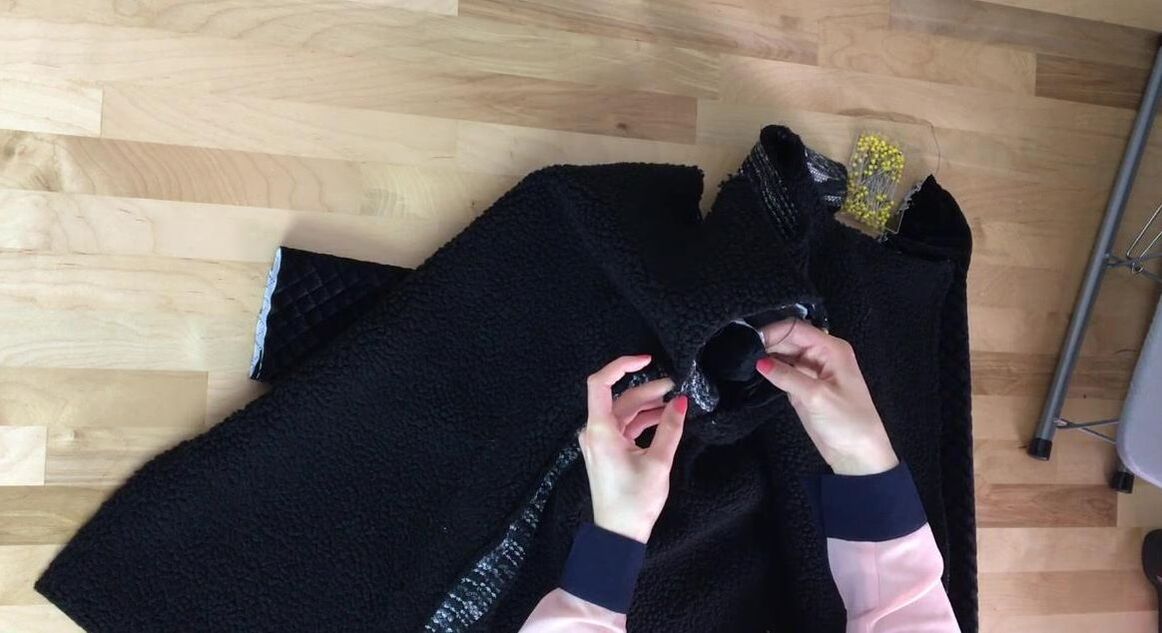 - The sleeve seam should match the jacket's side seam 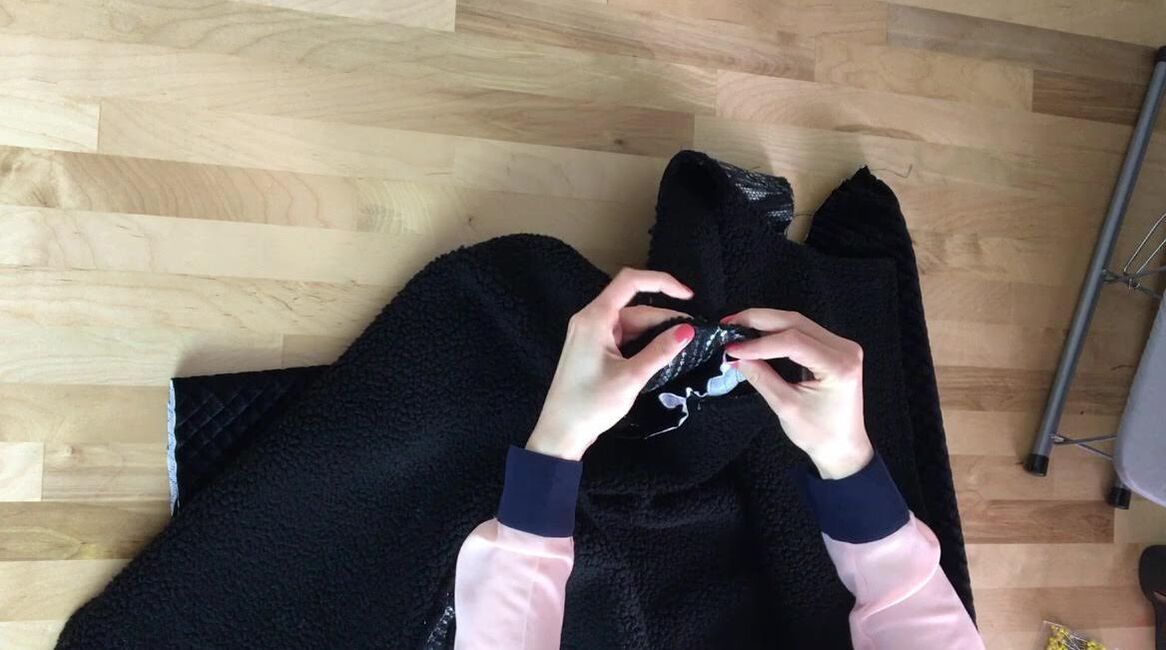 - The middle notch on the sleeve cap should be aligned to jacket's shoulder seam 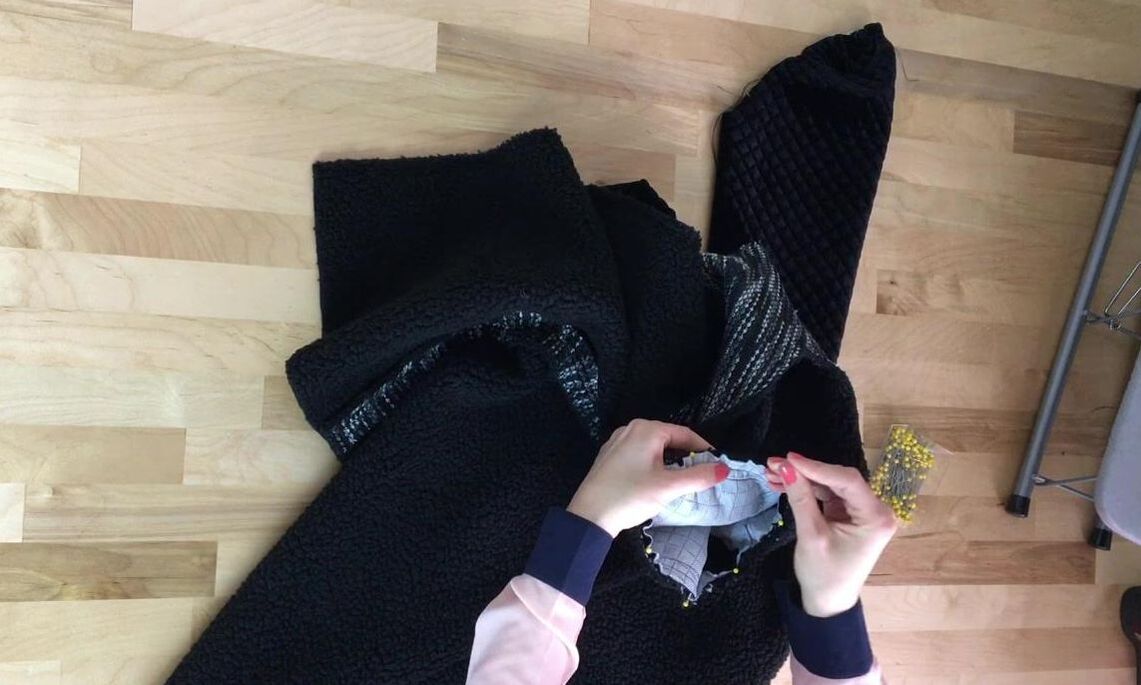 - The single notch should correspond to the jacket's front - The double notch should correspond to the back of the jacket. If you can check all the boxes above, your sleeve is most likely aligned properly. Pin the layers from the sleeve side, perpendicular to the edge as shown above. When you get to the gathered portion, pull the gathering either in or out as needed such that the length of the sleeve cap aligns to that of the armhole. Naturally, the sleeve cap will be slightly longer which is why the basting stitch gathers are used to manipulate it into a smaller length while adding the 3-dimensional volume needed for functionality. Insert as many pins as need to keep the sleeve in place. If you are not fully comfortable sewing sleeves yet, I highly recommend hand basting the sleeves in place to prevent the edges from shifting during machine stitching. 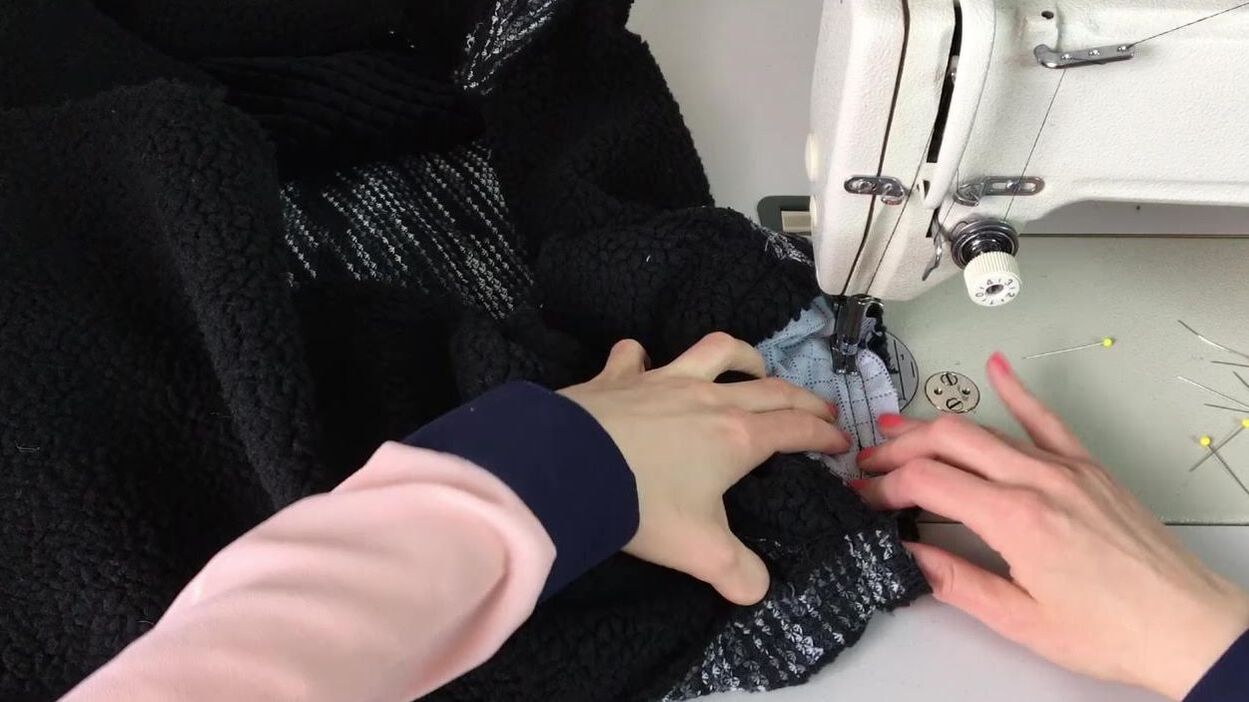 9. Starting at whichever end feels most comfortable to you, stitch the sleeve cap seam following the designated seam allowance throughout (3/4" for me). Always stitch this seam on top of the sleeve layer so that you can carefully follow the gathered basting stitches as shown. Stitching the sleeve cap portion takes a bit of practice. When you get to the basting, stitch directly to the side of the basting stitch and try to avoid creating actual puckers or gathers in the seam. The idea is to give the sleeve cap some 3-dimensionality without any evidence of this in the actual seam. Another important technique which will ensure long tern durability and movement is to stretch the underarm edge as you machine stitch it. Since this is the area that receives the most ware, you want to make sure the stitch will stretch in tandem with the arm movement. 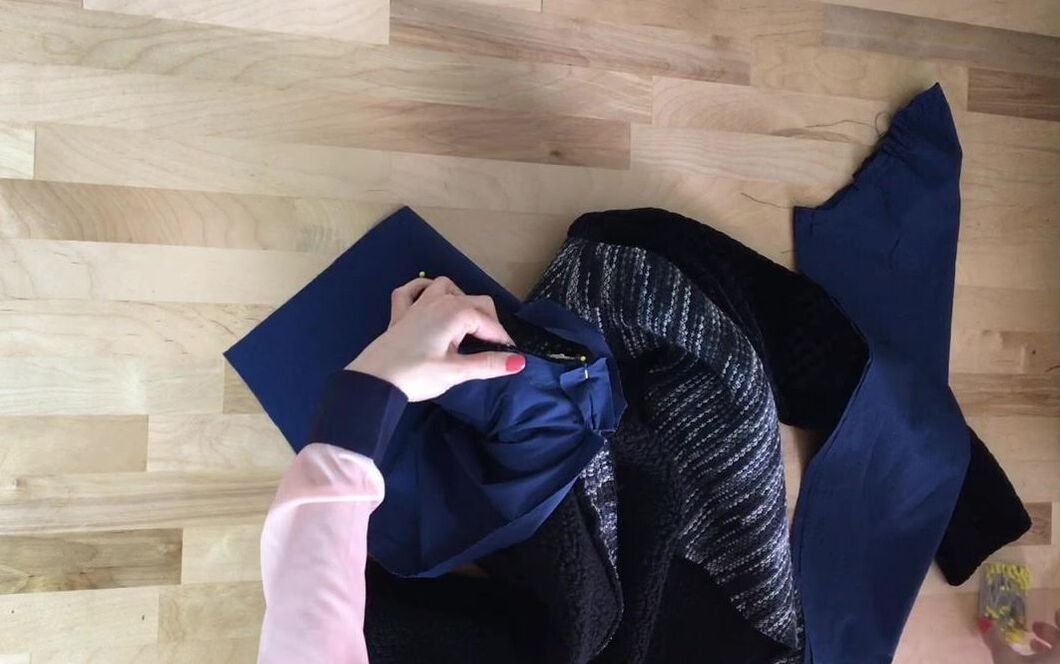 10. Once both sleeves are attached to the jacket, let's sew each corresponding lining piece! First, align the sleeve cap edge of the lining to the seam allowance edge on the jacket's sleeve such that the lining seam matches the jacket's side seam as shown above. The wrong side of the jacket sleeve should be touching the right side of the lining layer. 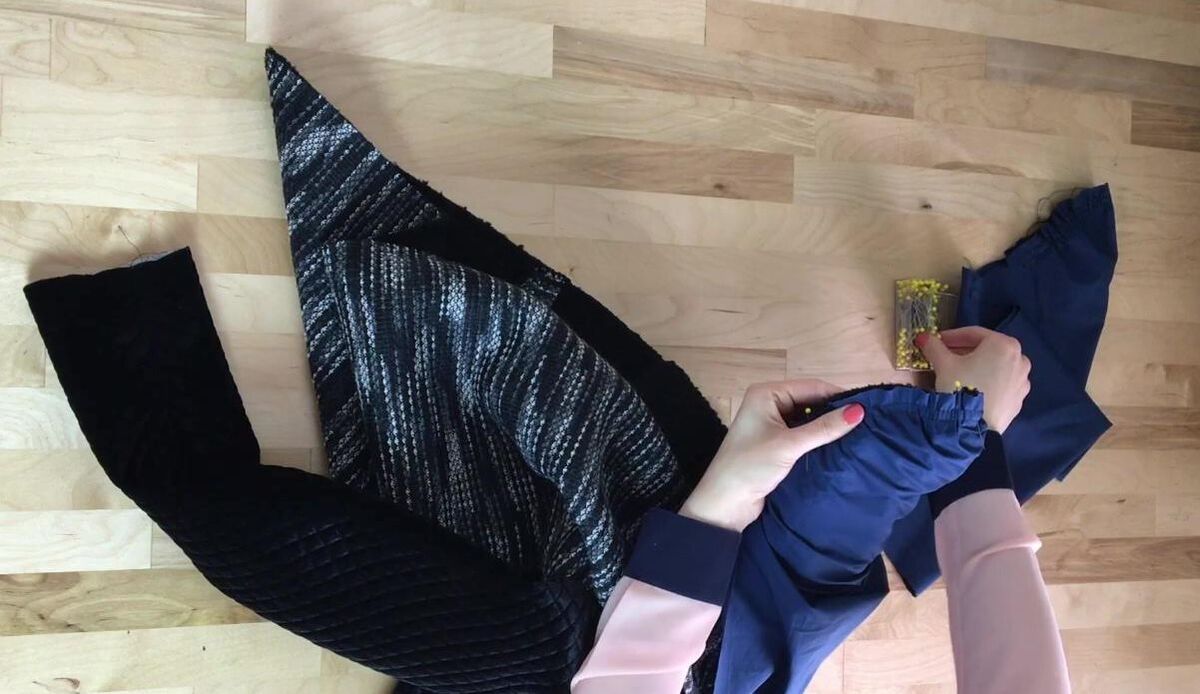 Pin along the curved armhole seam inserting the pins perpendicular to the edge as shown. The edge of the sleeve lining should correspond perfectly to that of the actual sleeve since they are identical in size and shape. 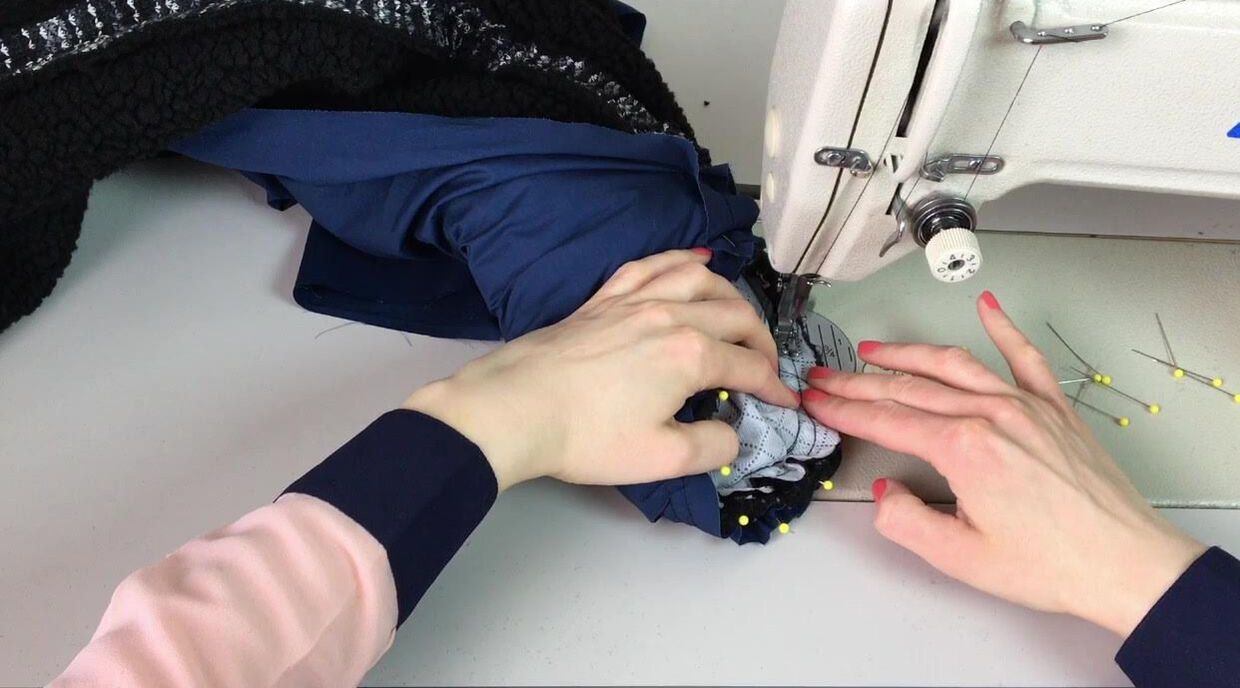 11. Machine stitch the sleeve lining to the jacket sleeve thorough all layers of the seam allowance (shown above). 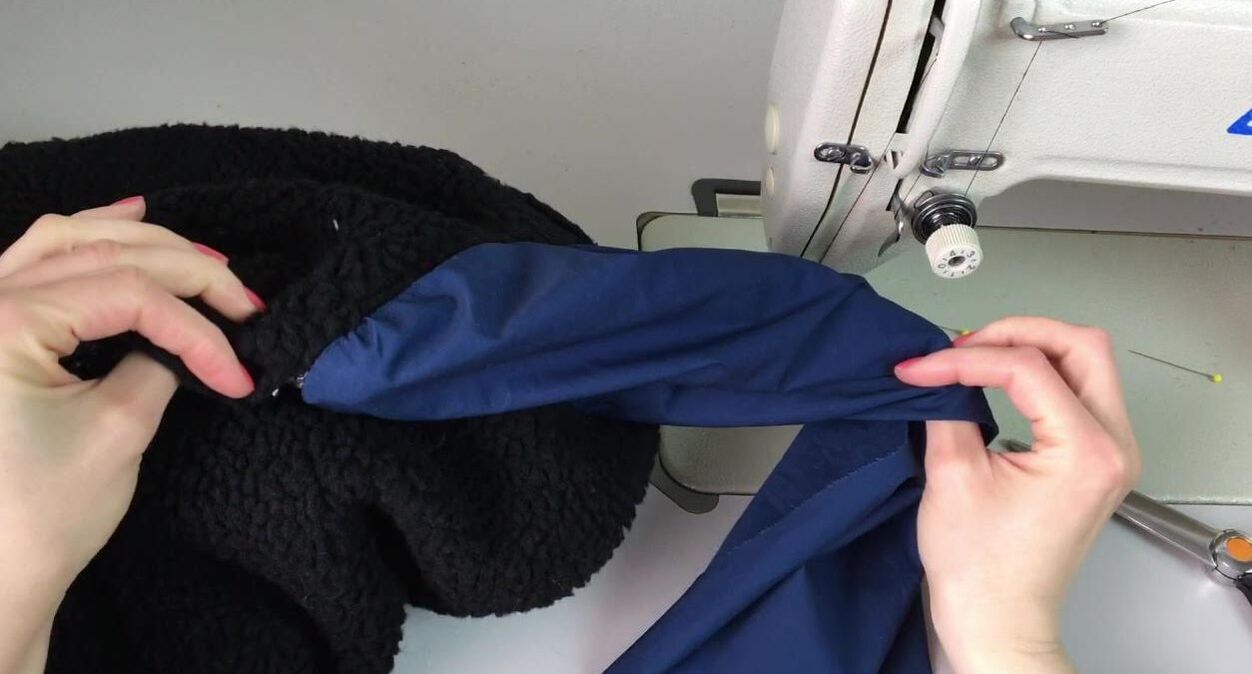 When the lining is permanently attached and pulled through the sleeve, it should completely hide the armhole's seam allowance edges. Repeat the steps described above to attach the lining to both sleeves. 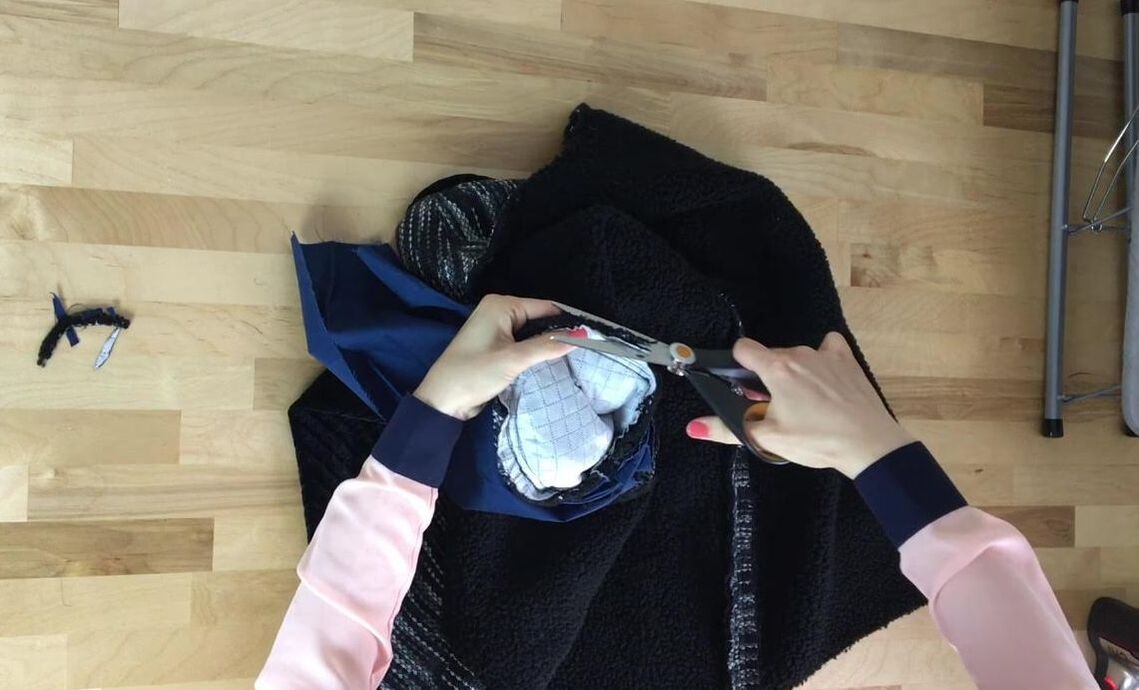 12. Due to the fact that my seam allowance is much wider than is acceptable for the curve of the armhole, it is a good idea to trim it a bit at the underarm area for added movement and comfort. The reason I decided to go with a wider seam allowance to begin with is because I'm working with a very thick fabric so I had to give myself enough seam allowance to comfortably stitch the thick layers together.  13. Next, pull the lining layers through the bottom of each sleeve as shown. 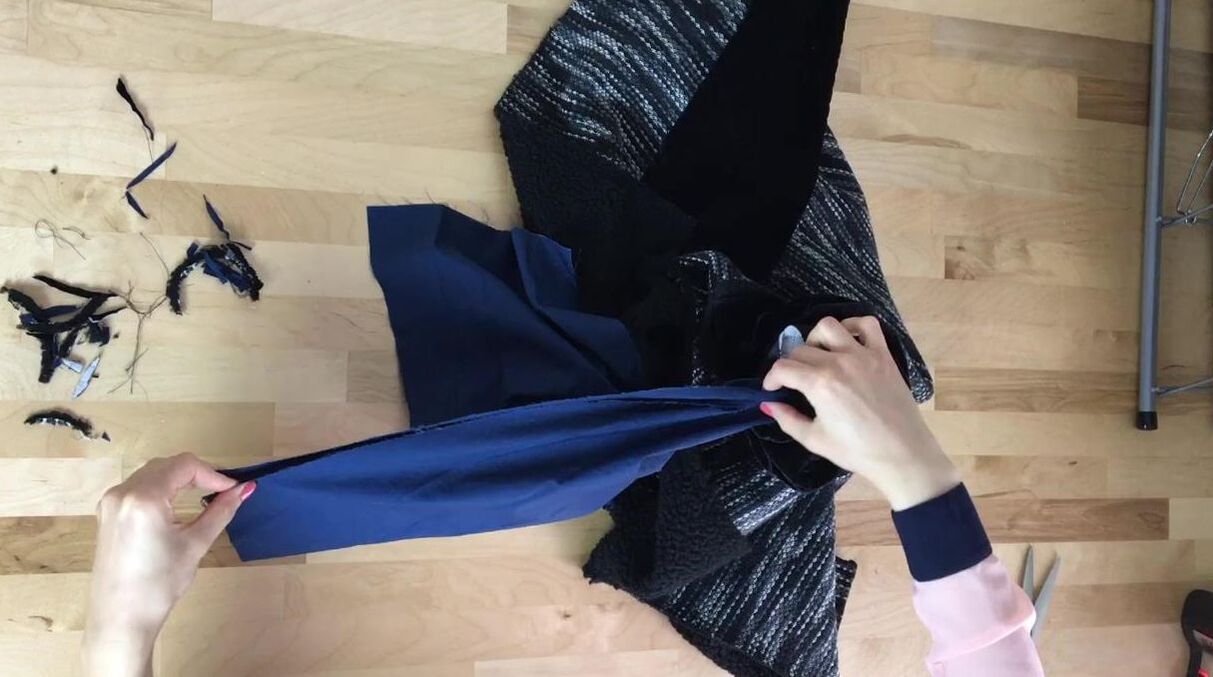 14. Align the lining edges to one another such that the right side of the fabric is touching. Think of it this way: when this seam is complete, its seam allowance raw edges should align perfectly to those of the jacket sleeve. Only the face of both seams should be visible on the outside. 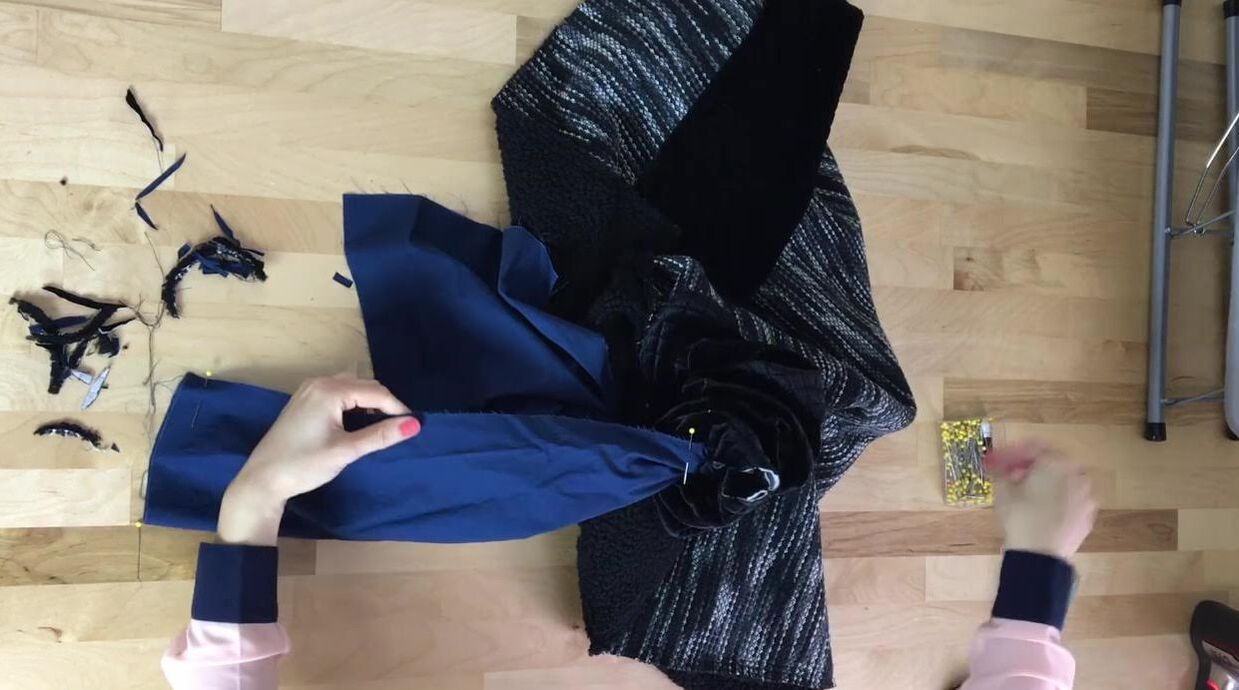 Pin the lining seam together, inserting the pins perpendicular to the edge for easy removal during stitching. 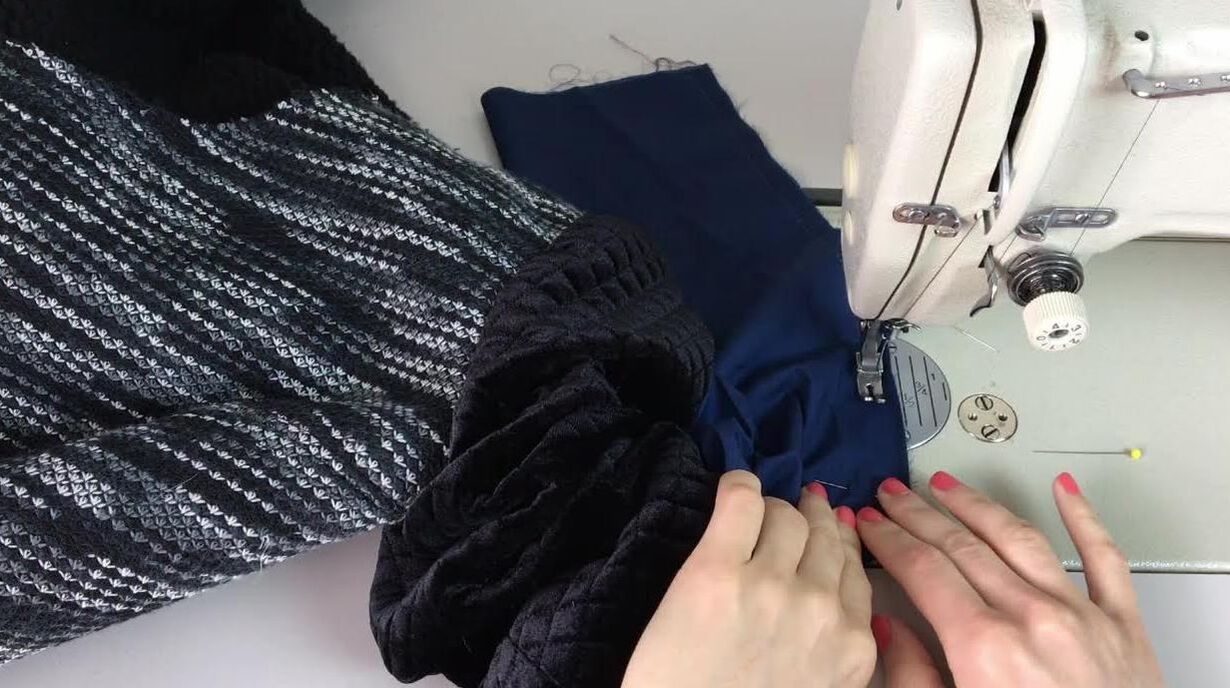 15. Starting at the lining hem, stitch at the designated seam allowance (1/2" in this tutorial) moving up towards the armhole. Stitch as close to the armhole as you can to complete the entire seam. 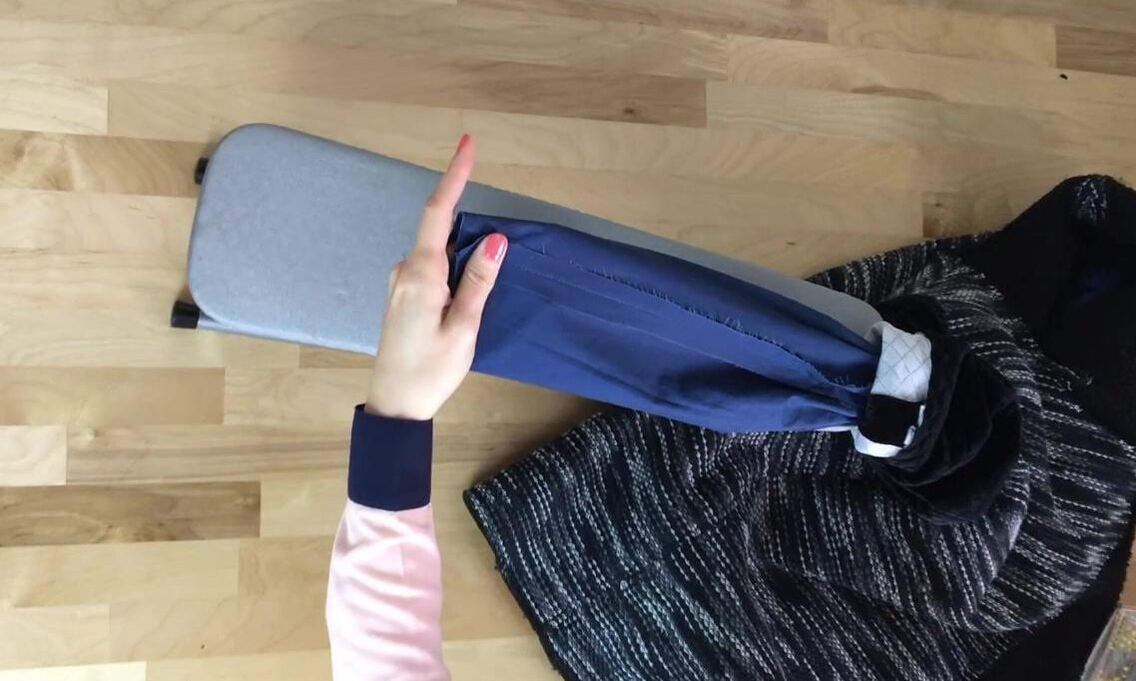 As you did on the sleeve seams, iron the lining seam allowance open as shown above. 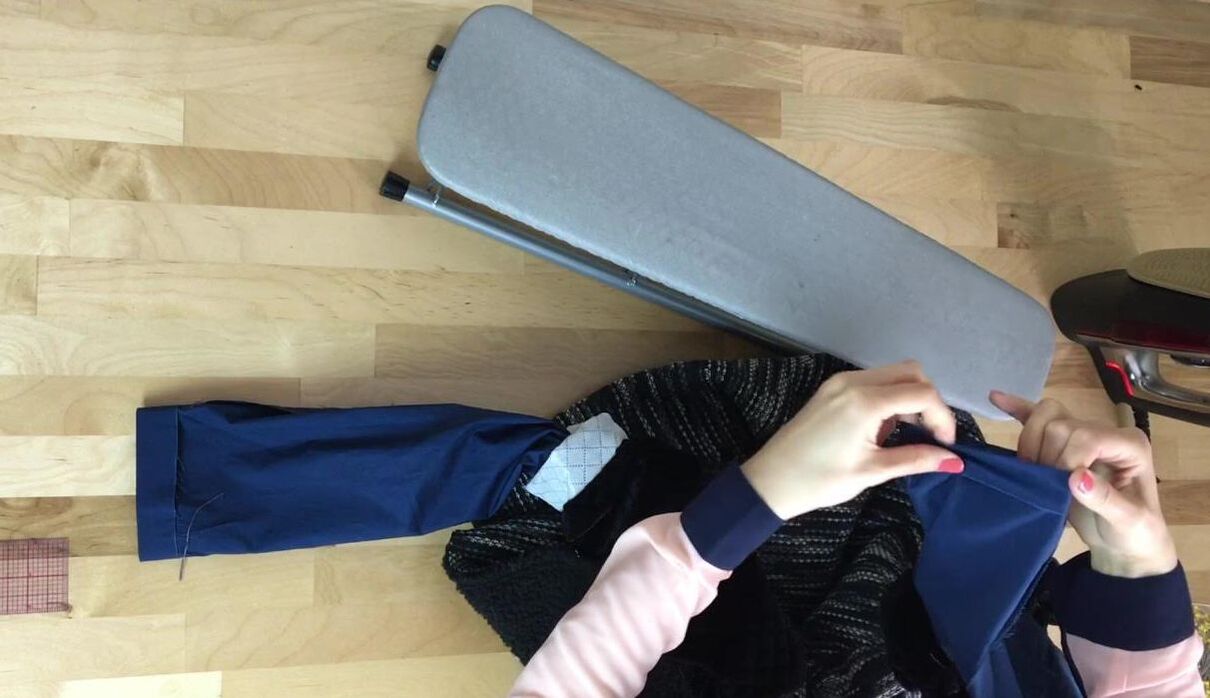 16. To seal and clean finish the lined hem, fold the bottom edge of the lining towards its wrong side at the designated hem allowance- 1 1/2" in my case. To know exactly where to fold, use a ruler to measure from the very bottom edge up as I did in the video above. 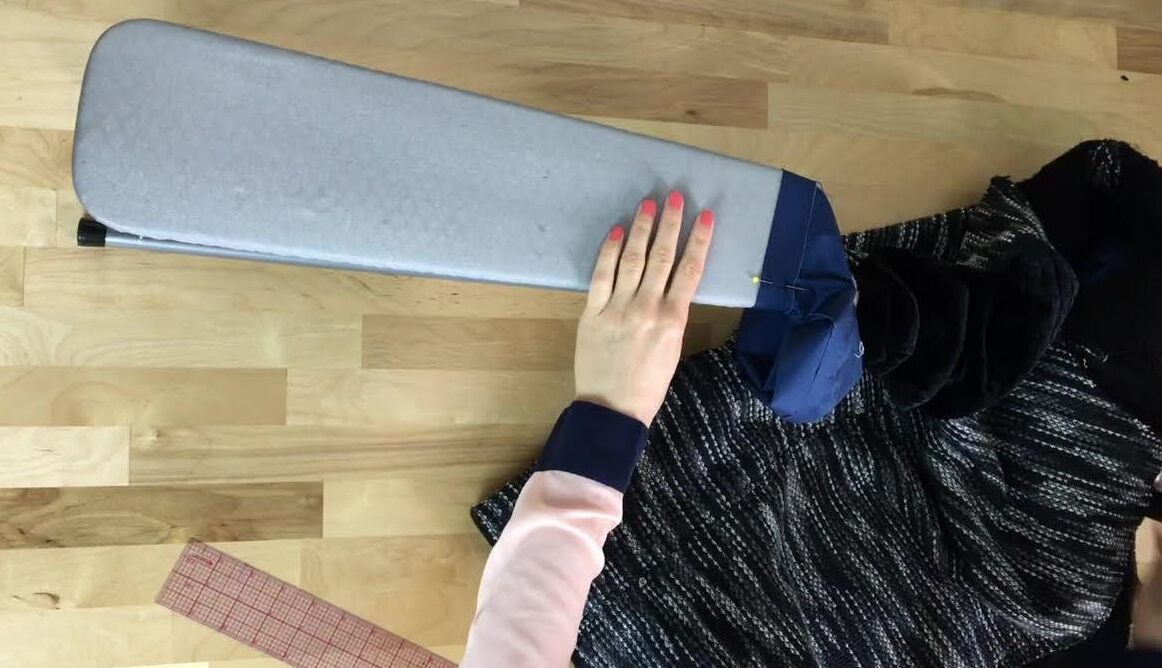 Fold evenly, iron the fold line, and insert pins to hold the folded hem in place. Repeat the process on both lining pieces. 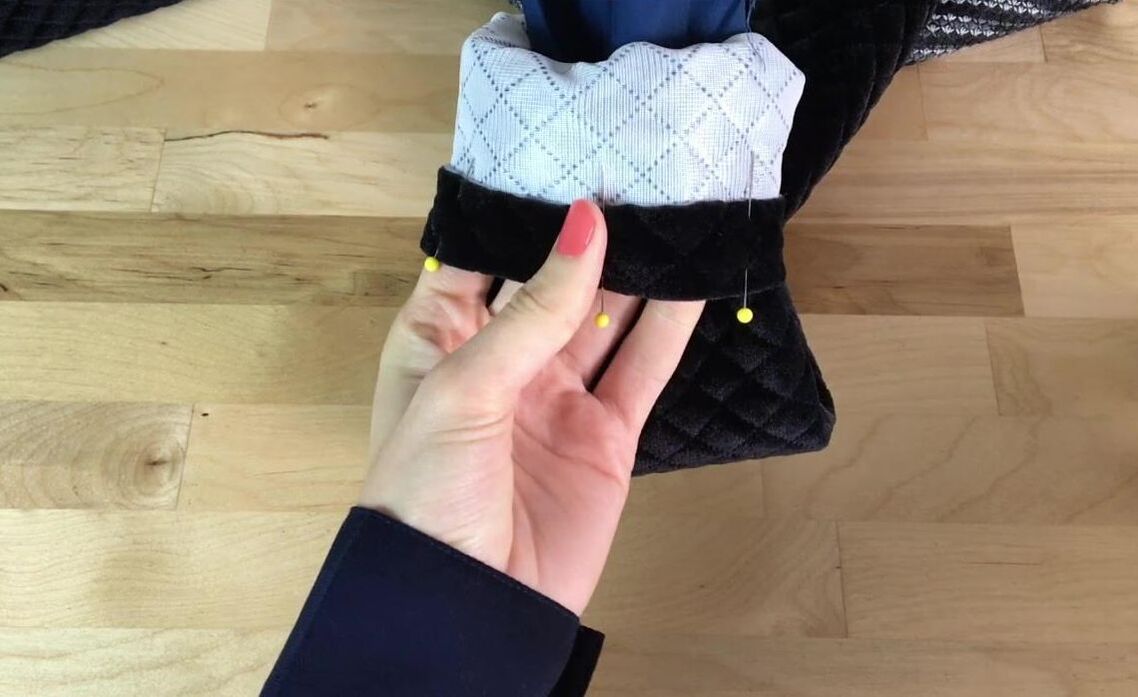 17. As you did for the lining above, fold the jacket sleeves in towards the fabric's wrong side at the designated hem allowance (also 1 1/2" in this tutorial) and insert pins perpendicular to the edge as shown. The fold line will mark the sleeve's final hemline. 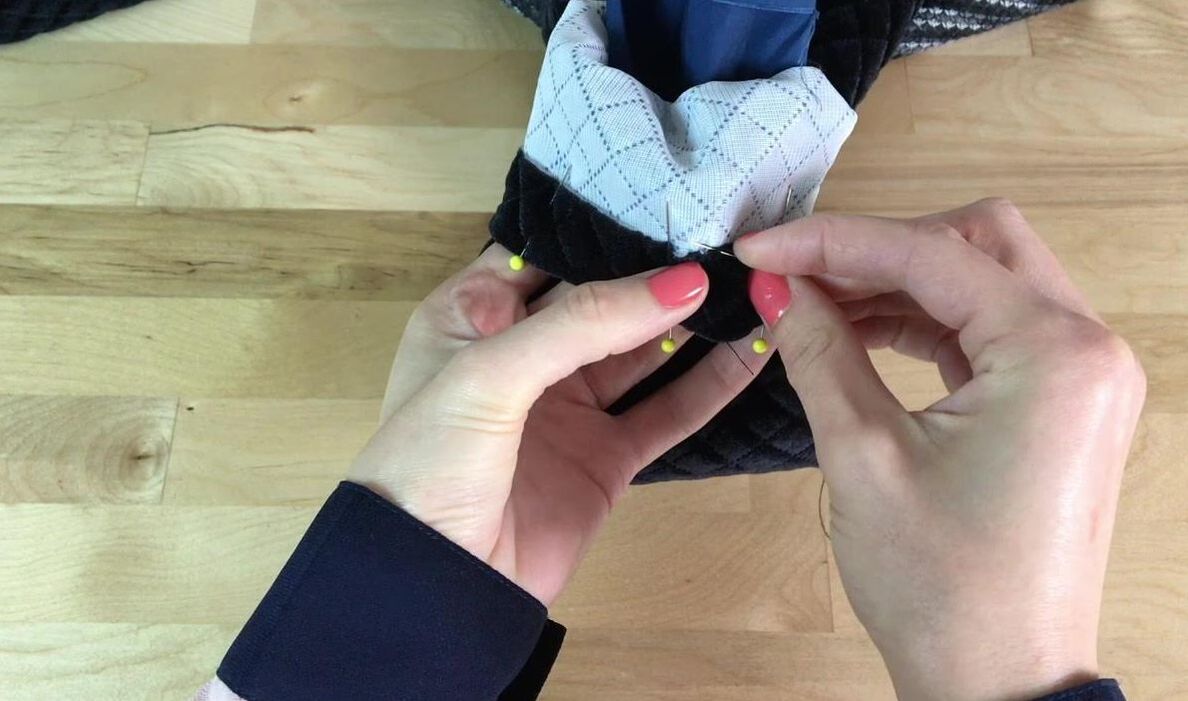 18. Slip stitch along the raw edge of the sleeve hem to permanently keep the folded hemline in place. A slip stitch is a form of blind stitching conventionally used to clean finish a hem with an invisible finish on the right side of the fabric. Once the blind stitch is applied, you should not see any stitches on the face of the garment. This is a higher quality technique that can also be done on a regular sewing machine using a specialized presser foot. I personally always prefer to do mine by hand! 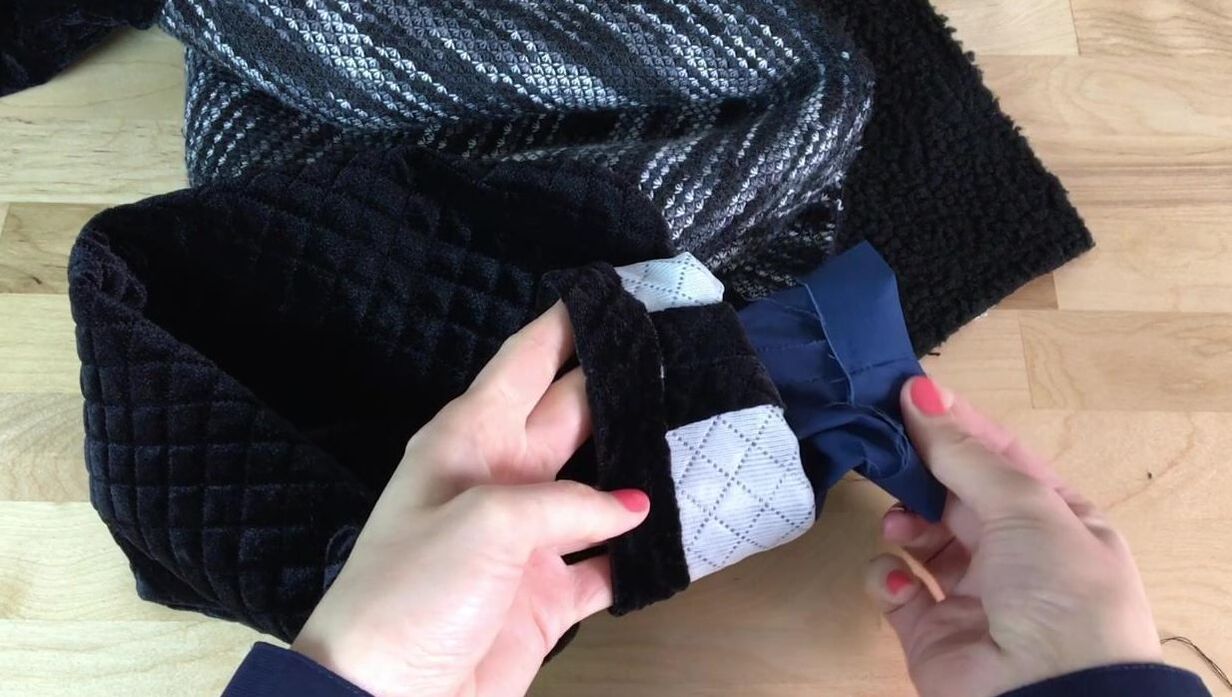 19. Once the sleeve hem is slip stitched, align the lining fold (lining hemline) such that both the lining and sleeve seams correspond to each other as shown above.  Align the lining fold to the sleeve, placing it about 1" away from the sleeve hemline as shown. The seamlines should be perfectly matched and overlap on top of each other as shown. 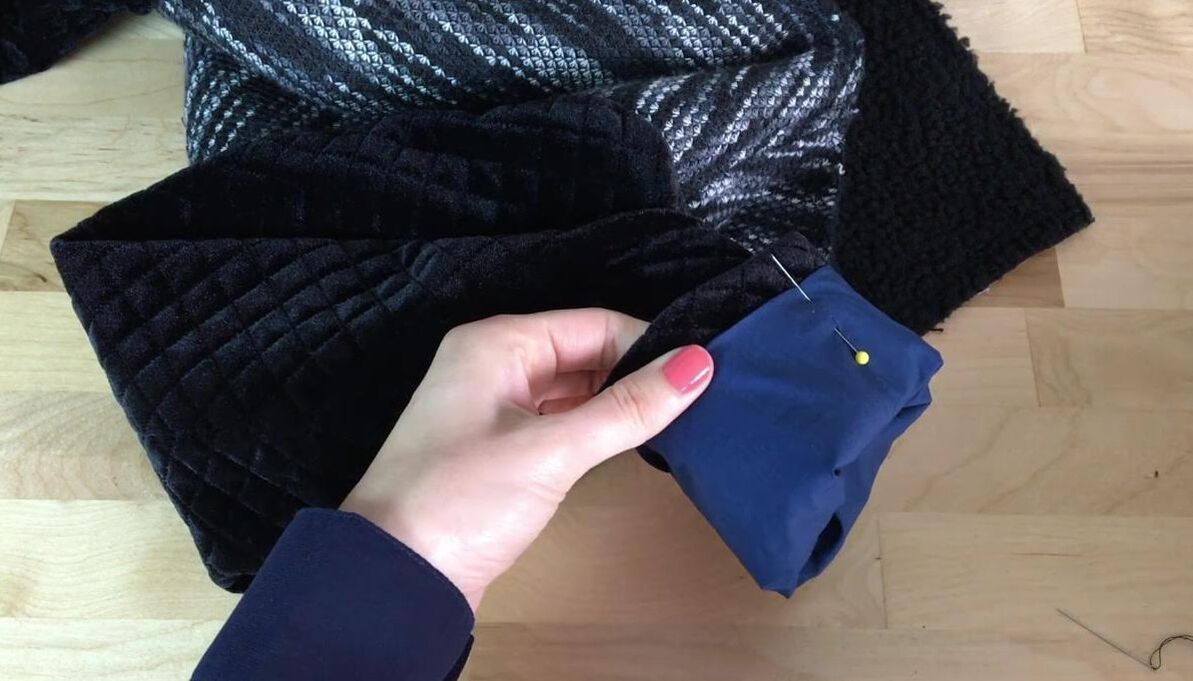 Pin the entire folded edge of the lining to the bottom of the sleeve as described in the Step above. Make sure that the placement is even throughout with all raw edges are enclosed on the inside.  20. Last but not least, blind stitch the folded edge of the lining to the sleeve. To do this, stitch through the lining fold then again through the sleeve hem allowance layer, alternating the stitches as you sew. Absolutely no stitching should be visible on the face side of the jacket. Follow the hand stitching process in the video above for more detail! 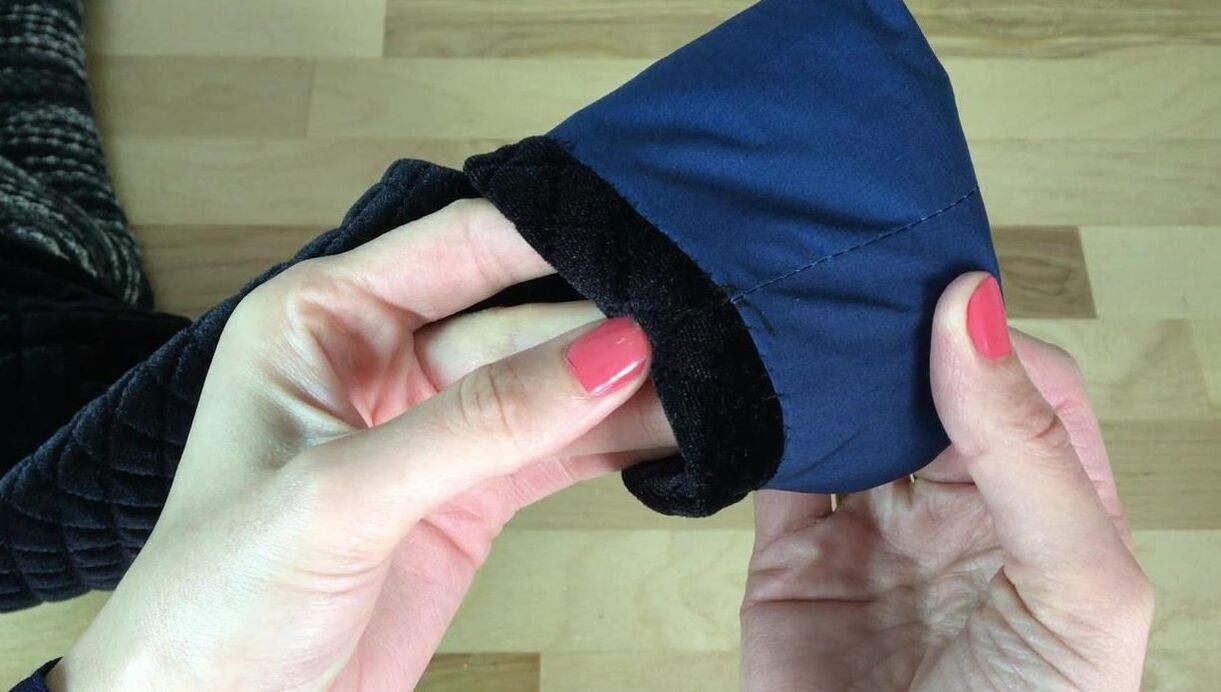 The raw edges of the sleeve hem are now fully sealed! The stitching should be clean and subtle and evenly distributed throughout. Repeat the process described above to clean finish both sleeves. 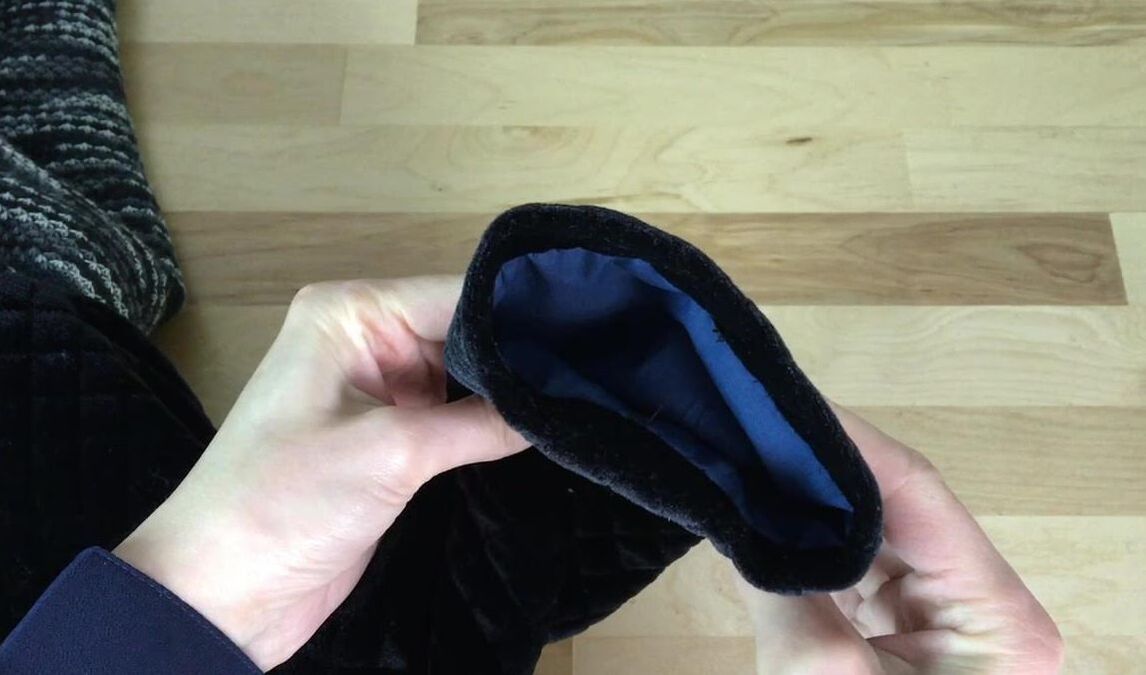 The lining should be fully enclosed on the inside without pulling or distorting the sleeve's fit and/or structure. No lining edges should be visibly poking at the bottom of the finished sleeve. 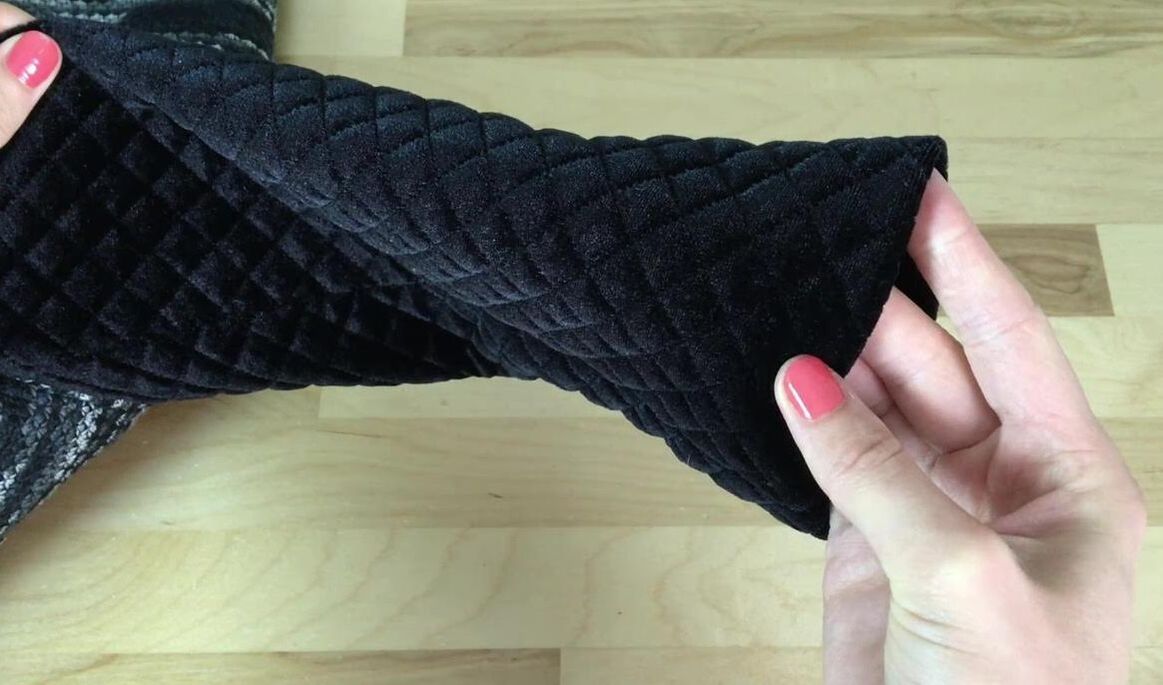 Thanks to the invention of blind stitching, the bottom of each sleeve is smooth and professionally finished with no visible stitches on the fabric's face side! Similar Tutorials You May Like: 25 Types Of Sleeves You Should Know As A Sewing Beginner How To Sew A Regular Set-In Sleeve: Step by Step Tutorial With Pictures How To Shorten Bound, Lined Jacket/Blazer Sleeves How To Remove Sleeves And Make A Dress Or Blouse Sleeveless What Are Notches And How Are They Used In Sewing 4 Hand Sewing Techniques And Stitches You Should Know As A Sewing Beginner
3 Comments
Kathleen Schovajsa
6/9/2020 06:19:21 pm
What a great technique! Thank you so much. I’ll look for more of Doina’s tutorials.
Lori
3/4/2023 09:23:54 am
Thank you for this great tutorial. I was wondering when hemming the sleeve and its lining, couldn't I trim the lining to end at the fold line of the sleeve? I need to turn my sleeve 1/4" and then another 1 3/4", and then edge stitching with a machine. I'm using flannel for the jacket and lining fabric for the lining. I might be rolling up the sleeves occasionally and thought I'd rather have the lining tucked into the hem. Thanks again! 4/22/2023 05:30:32 am
I'm happy I found this blog. Thank you for sharing with us,I too always learn something new from your post. we provide.<a href="https://luminousprinting.com.sg/">T shirt printing singapore</a> Leave a Reply. |
The Blog:A journey into our design process, sewing tutorials, fashion tips, and all the inspiring people and things we love. 
Doina AlexeiDesigner by trade and dressmaker at heart. I spend most of my days obsessing over new fabrics and daydreaming new ideas. 
Sadie
Executive Assistant & Client Relations Manager Archives
November 2019
Categories
All

|

-
Sewing Tutorials
-
Basics
>
- Aligning Pattern Grainlines To Fabric
- Preparing Fabrics For Sewing
- Pinning Sewing Patterns To Fabric
- Placing Sewing Patterns On Fabric For Cutting
- Rotary Cutters or Fabric Scissors?
- Cutting The Sewing Patterns
- What Are Notches And How To Use Them In The Sewing Process
- Transferring Notches From Pattern To Fabric
- Transferring Seamlines to Fabric
- Staystitching
- Backstitching: A Complete Guide
- Hand Basting: A Complete Guide
- Sewing Continuous Bias Binding
- Darts >
-
Sewing Seams
>
- The Basics Of Seams And Seam Allowance
- How To Sew A Straight Seam
- Sewing Curved Seams
- Sewing Corner Seams
- Trimming And Grading Seam Excess
- Notching/Clipping Seam Allowance for Tension Release
- Sewing Topstitched Seams
- Sewing Corded Seams
- Sewing A Slot Seam
- Sewing A Gathered Seam
- Sewing Bias Seams
- Sewing Seams With Ease
- Sewing Seams With Crossing Seamlines
- Sewing Unlike Fabric Seams
- How To Iron Seams: Ironing Tools And Conventions
- Sewing With Knit Fabrics
- Understanding Stitch Length And Tension
- Sewing Unique Fabric Seams
-
Seam Finishes
>
- Seam Finishing Techniques - Overview
- Applying A Pinked Seam Finish
- Applying A Bias Bound Seam Finish
- Serging And Zigzag Seam Finishes
- Sewing A Self-Bound Seam Finish
- Sewing A French Seam Finish
- Sewing A Hong Kong Seam Finish
- Sewing A Mock French Seam Finish
- Sewing A Turned-and-Stitched Seam Finish
- Sewing Overcast Hand-Applied Seam Finishes
- Sewing A Flat Felled Seam
- Sewing A Hairline Seam Finish
-
Hem Finishes
>
- Garment Hem Finishes: Overview
- Sewing A Double Fold Hem Finish
- Sewing A Single Fold Hem Finish
- Sewing Bound Hem Finishes
- Sewing An Exposed Double Layer Bound Hem
- Sewing A Folded-Up Bound Hem with Pre-folded Binding
- Sewing A Hong Kong Hem Finish
- Sewing A Band Hem Finish
- Sewing A Bias Faced Hem Finish
- Sewing A Twill Tape Hem Finish
- Sewing A Rolled Hem Finish
- Sewing A Shaped Hem Facing
- Using Fusible Hem Tape And Webbing
- Finishing A Lace Fabric Hem
- Finishing A Leather Hem
- Sewing Faced Hem Corners
- How To Finish Lining At The Hem
- Finishing Fabric Corners by Mitering >
- Interfacing A Hemline: Lined And Unlined Examples
-
Sewing Pockets
>
- Curved Patch Pocket With Flap
- Unlined Square Patch Pockets
- Lined Patch Pockets: Two Ways
- Extension On-Seam Pockets
- Separate On-Seam Pocket
- Front Hip Pockets
- Bound Double Welt Pocket
- Double Welt Pocket With Flap
- Self-Welt Pocket (Using Single Fabric Layer)
- Slanted Welt Pocket (Hand-Stitched)
- Faced Slash Pockets: Overview >
-
Sewing Zippers
>
- Sewing Zippers: General Information
- Sewing A Centered Zipper
- Sewing A Lapped Zipper
- Sewing An Invisible Zipper
- Sewing A Fly Front Zipper
- Sewing A Closed-End Exposed Zipper (No Seam)
- Sewing An Exposed Separating Zipper
- Sewing Hand Stitched Zipper Applications
- Sewing A Zipper Underlay
- Sewing A Placket-Enclosed Separating Zipper
- Sleeveless Finishes >
-
Neckline Finishes
>
- Sewing A Neck Shaped Facing
- Sewing An All-In-One Neck Facing
- Neck And Garment Opening Combination Facings >
- Sewing A Bias Faced Neckline Finish
- Sewing A Band Neckline Finish
- Bound Neckline Finishes: Overview >
- Sewing A Semi-Stretch Strip Band Neckline
- Ribbed Neck Band And Classic Turtleneck
- Decorative Neckline Finishes >
- Finishing Facing Edges >
-
Extras
>
- A Complete Guide on Interfacing
- Sewing Bound Spaghetti Straps
- Sewing Spaghetti Straps To A Faced Neckline
- Sewing Ruffles: Overview
- Patterning And Sewing A Circle Ruffle
- Sewing A Gathered Heading Ruffle
- Sewing Double Layer Gathered Ruffles
- Sewing A Gathered Ruffle Into A Seam
- Sewing A Gathered Ruffle To A Fabric Edge
- Sewing A Fabric Surface Slit
- Sewing A Slit Seam
- Hand-Applied Straight Stitches
- Hand-Applied Blind Stitches
- Hand-Applied Overedge Stitches
- Hand-Applied Tack Stitches
- Hand-Applied Decorative Stitches
-
Basics
>
- Custom Bridal
- Custom Apparel
- About
- Blog
 RSS Feed
Services |
Company |
|
