|
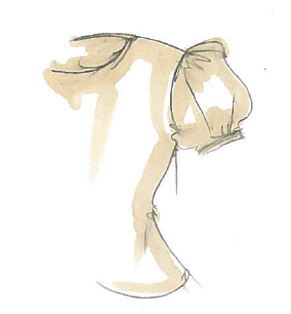
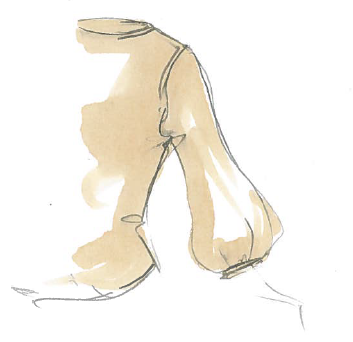
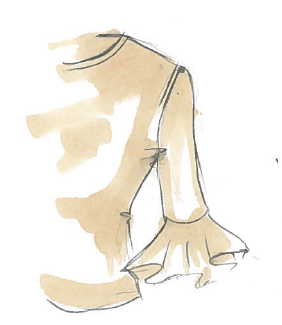
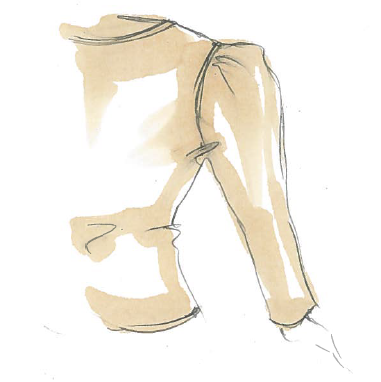
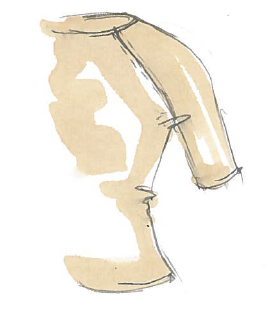
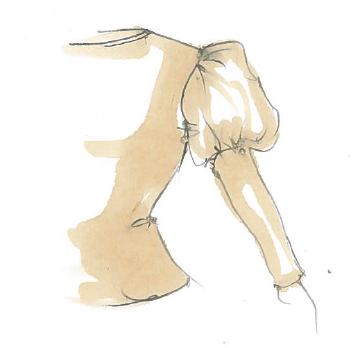
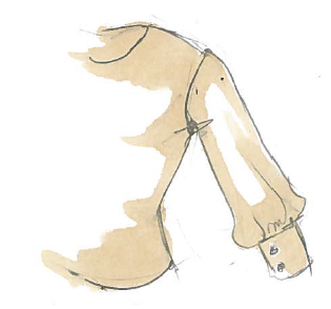
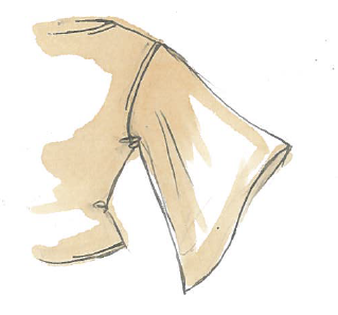
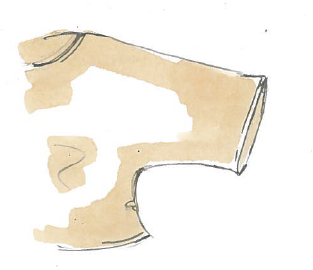
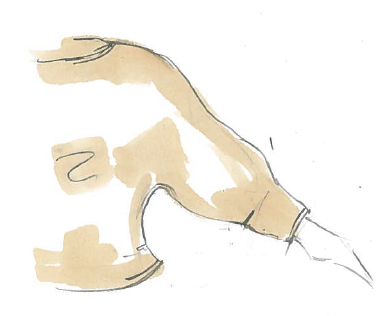
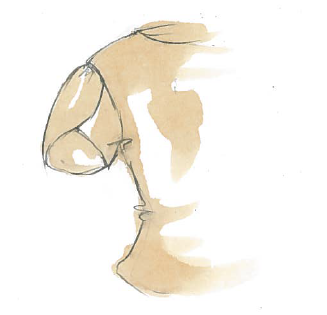
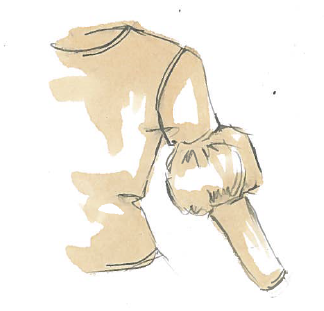
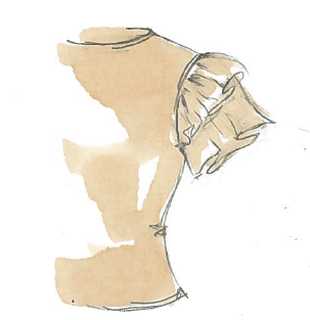
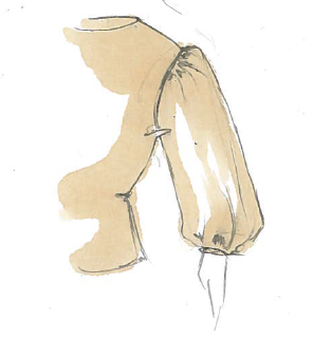
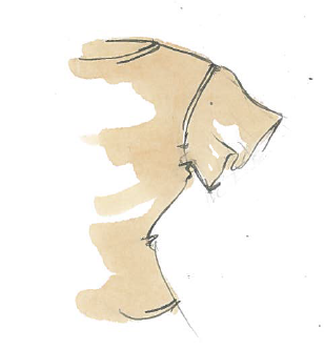
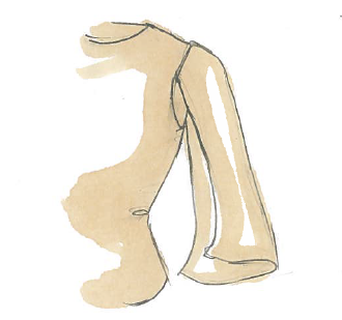
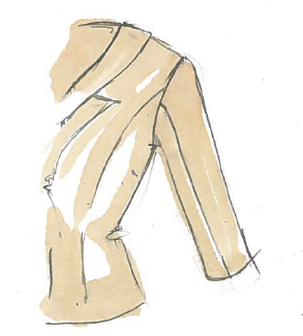
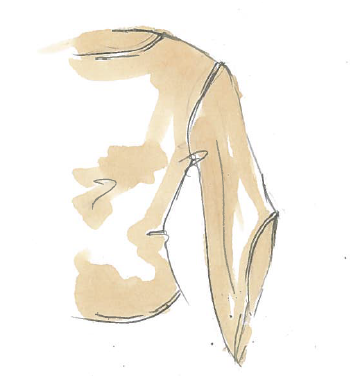
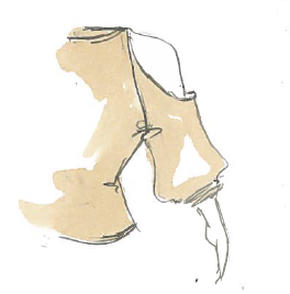
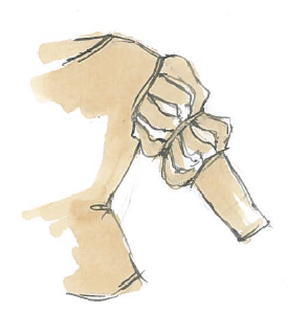
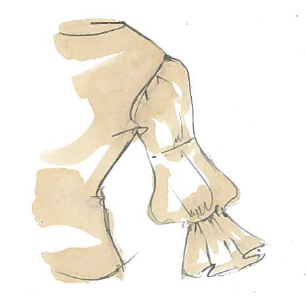
Sleeves can sometimes make or break a clothing item. Not only are they essential for comfort and functionality, their style has a huge impact on a garment aesthetically. There are a variety of different sleeve types out there ranging from simple to very unique in shape and design. No matter how complicated the design however, all sleeves are derived from just a few classic silhouettes. These basic silhouettes act as a building block both in the sewing as well as design process. From a construction standpoint, sleeves have always been a bit challenging to sew, especially for sewing beginners. Below, we'll introduce you to 25 sleeve styles you should know and the challenges you may face in their construction process. SleevelessAlthough sleeveless is not necessarily a type of sleeve, understanding what sleeveless means is a good place to start if you are trying to get a better grip on sleeve construction. Just as the name suggests, a sleeveless garment has no sleeves. A sleeveless garment has armholes that are clean-finished using a variety of different sewing techniques. Sleeveless clothing items can have different size armholes and be shaped in a range of styles. Some sleeveless garments feature very wide, deep curves at the armhole's bottom while others extended towards the neckline to form a thinner shoulder strap. Regardless of style, if a clothing item lacks sleeves or any form of arm coverage, it is safe to say that it can be classified as sleeveless. Sewing Difficulty: Thankfully, with a sleeveless clothing item, you don't have to worry about sewing in a sleeve which can prove to be quite challenging (especially for sewing beginners). Clean finishing armhole edges however does require some special attention along the more curved underarm areas. If you are a beginner, you should feel comfortable sewing a sleeveless garment and clean-finishing armhole edges first before tackling the unique task of sleeves. Clean finishing armhole edges will get you accustomed to working with the more challenging curved edges of a garment which will ultimately get you one step closer to sewing that perfect sleeve. The most common methods for clean finishing armhole edges are by using binding (for more casual, lightweight apparel), armhole facing, or applying trims and other decorative techniques. Set-In SleeveA set-in sleeve is the most common sleeve style used in apparel. It is what you may refer to as a regular sleeve. It is connected at the regular armhole and extends down in a straight or tapered line without any special silhouette features. A set-in sleeve comes in a few different lengths but the most common are: Short: stopping at about 3-6 inches from the shoulder, a set-in regular short sleeve is used on all T-shirts and short sleeve blouses. It is a plain, straight silhouette and does not flare out or taper in too much at the bottom. Three-quarter: extends to mid-forearm in a straight cut. Long: stops at the the wrist or bellow the wrist forming a regular straight silhouette. A long set-in sleeve is the most widely used sleeve in apparel. Sewing difficulty: While it is the most basic sleeve style used in apparel, sewing set-in sleeves is anything but easy, especially for a sewing beginner. The difficulty consists in the necessity to add ease along the sleeve cap in order to make it easy for the wearer to move his/her arms freely. Adding ease (or excess) along a sleeve cap requires the use of a gathering stitch that is applied along the upper curve of the sleeve cap (before the sleeve is sewn) such that when the sleeve is connected to the armhole edge the sleeve cap does not pucker or gather along the armhole seam. Providing ease around the cap sleeve is used to add a 3-dimensional nature to the upper arm which is essential for movement. When it comes to manipulating a gathering stitch into ease, the main challenge for a sewing beginner is achieving a smooth seam without any gathers or puckers. In addition, it takes some practice for the two sleeves to look even. Sewing set-in sleeves requires a bit of practice and making some mistakes before finding your rhythm. Once you do, sewing set-in sleeves can feel quite accomplishing. Cap SleeveA cap sleeve is a short sleeve that features an extension that resembles a little cap extending from the shoulder or armhole seam over the upper arm. The cap portion can either be connected to the garment at the armhole or extend out from the body of the garment without the necessity of an additional seam. A cap sleeve can be either gathered or pleated. It is very commonly added to dresses, blouses and kids-wear. You can think of it as half of a short sleeve because the underarm area is usually left bare and only a portion of the shoulder is covered. Cap sleeves add a feminine touch to any garment featuring a structured yet very gentle, young look. Sewing Difficulty: Depending on the style of the cap sleeve, it is usually not very difficult to sew. It can be however a bit challenging to pattern- It can be quite a task to achieve the correct ease and shape of the cap portion. The most problematic patterns are those that often result in a cap sleeve that is too tight at the shoulder causing the cap sleeve to lift up during movement. On the contrary, some sleeve pattern errors may result in the upper arm being too loose and shapeless thus jeoperdizing the correct proportions and structure of the garment. Bell SleeveA bell sleeve gradually flares out at the bottom in what resembles the shape of a "bell". It can be short, 3-quarter or longer in length and the flared-out portion is usually not separated by a seam but the sleeve rather flares out in one continuous piece. Bell sleeves are widely used with various types of fabrics from light to heavy weight and applied to a range of styles from casual/formal dresses and blouses to blazers and heavier coats. Bell sleeves can feature different flaring proportions from very subtle to quite pronounced. On the same note, the flared out portion of the bell sleeve can start from higher up on the arm or closer to the wrist as desired. Historically, a common bell sleeve style used to be known as pagoda sleeve during the Victorian and Renaissance areas. Pagoda sleeves were wider at the hem in the same fashion as a bell sleeve and featured embroidered trims and decorative finishes along the bottom of the sleeve. Sewing Difficulty: Bell sleeves are somewhat similar to set-in sleeves in construction. They do require the same attention to the sleeve cap area where the upper sleeve should have enough excess for movement. The body of the sleeve is not difficult to sew since the curve of the bell shape features a more gradual, smooth transition. In addition, hemming a bell sleeve uses the same methods as those of a set-in sleeve. Puffed SleeveA puffed sleeve flares out at the shoulder using gathers or pleats added along the armhole seam. Puffed sleeves are usually narrower towards the bottom such that the top, puffed shoulder is more pronounced. Just like most sleeve styles, it can be constructed in different lengths from short to long. A puff sleeve features different silhouettes in its body as long as the shoulder area maintains a puffed-out style. The puffed portion of the sleeve can be very subtle or quite pronounced. The size depends on how dense or how deep the pleating at the armhole is. Sewing Difficulty: It can get a little tricky to work with lots of gathers or pleats along the round armhole seam. Gathering and pleats can be quite challenging on a straight seam and they can prove to be even more difficult to sew along the curved edges of the armhole. In some instances, gathers leave some room for error which can actually makes it a bit easier for sewing beginners. As opposed to a set-in sleeve which requires the addition of gathered ease not visible on the outside of the seam, having actual gathers along the seam of the armhole allows for more even looking sleeves and perhaps an easier sewing experience. Bishop SleeveBishop sleeves start off as a regular set-in sleeve at the shoulder area, gradually balloon out as they reach the elbow area usually tapering in at the wrist. The sleeve bottom is commonly contained at the wrist using gathering or pleating which is sewn into a cuff or double folded binding. Bishop sleeves can also be designed in a three-quarter style and at times, short length (although short styles are more rare). It is a classic, feminine sleeve that works great with lighter weight fabrics especially sheers. Bishop sleeves are very commonly used with elegant dresses, blouses and evening wear. The gradual curved nature of the sleeve silhouette is gentle allowing for a soft addition to any garment. Sewing Difficulty: A bishop sleeve is very similar to a set-in sleeve in construction. However, it requires gathering or pleating at the bottom as well as additional steps for cuffing or adding binding along the sleeve hem. If you feel comfortable with gathering/pleating already, a bishop sleeve will be of medium difficulty to sew depending on how well you can handle sewing the sleeve cap. Circular Flounce SleeveCircular flounce sleeves are often confused with bell sleeves because of their resembling flared-out bottom. The difference however, is that while bell sleeves flare out in a more gradual nature in one long piece, a circular flounce sleeve has a horizontal seams that connects the flared-out portion to the rest of the straight sleeve. This results in a sudden transition from straight to flared out. The widened portion in a circle flare sleeve is constructed using the same sewing method as that of a circle ruffle. The flared portion is achieved by sewing the inside edge of the circle to the straight edge of the sleeve. This creates flowing ruffles that are soft and feminine used commonly on dresses and blouses in light to medium weight fabrics. Sewing Difficulty: A circular flounce sleeve is perhaps of medium difficulty to sew. It really depends on your skill level, but a less experienced person might have a harder time connecting the circle ruffle portion of the sleeve. It is highly recommended that if you are not quite comfortable sewing a straight edge to a circular edge that you temporarily hand baste the two layers of fabric together before machine stitching. A circular flounce sleeve might require some temporary basting techniques if you are not quite comfortable sewing ruffles yet. Leg of MuttonA leg of mutton sleeve puffs out from the shoulder (armhole seam) to the elbow area and extends into a straight or form fitting silhouette from elbow to the wrist. A leg of mutton sleeve becomes narrower as it extends towards the bottom either in a gradual fashion or a more sudden switch from puffed to straight. It can have a very subtle puffed top and include a very soft transition towards the bottom or feature a more dramatic puffy top with an immediate switch to a form-fitting silhouette at the bottom. These unique characteristics should make a leg of mutton sleeve fairly easy to recognize the moment you see it. Leg of mutton falls more into the vintage category of sleeves. A more exaggerated leg of mutton style is very often used in historic costume design. Nevertheless, this unique silhouette is still used today on sweaters, blouses and dresses. Sewing Difficulty: Sewing and especially patterning a leg of mutton sleeve can prove to be a challenge depending on the design. The more abrupt the transition from the puffy portion at the top to the form fitting portion at the bottom the more difficult it is to pattern and sew. It can be a bit difficult to draft the correct line transition in the sewing patterns so it might take a few tries until you get the sleeve to fit how you want it. Sewing a leg of mutton sleeve can prove to be a bit of a challenge when it features a more exaggerated silhouette. However, if the sewing patterns are drafted correctly, you shouldn't have too many issues in the sewing process. You should however feel comfortable with sewing pleats or gathers if you are to tackle the sometimes complex task of sleeve construction. Raglan SleeveRaglan sleeves are often used with long sleeve t-shirts and more casual knit items, sport jackets, and blouses. As opposed to most sleeve that normally get sewn into the circle of the armhole, raglan sleeves extend into the neckline edge forming a straight or semi-curved seam from the underarm area to the neckline. These seams are present on both the front and back of the garment. Raglan sleeves are often color blocked where the sleeve is a different color than the rest of the clothing item. The color contrast creates a unique, more sporty look that is so typical to raglan sleeves. The reason they work best with stretchy fabrics is due to the fact that raglan sleeves don't have any added ease through gathering at the sleeve cap thus using stretchy fabrics achieves more comfort and movement. Raglans sleeves, especially those in a non-stretch garment, are sometimes gathered at the neckline. This ensures that there is enough excess fabrics at the upper arm for easy movement during wear. Sewing Difficulty: You can't really know how difficult it is to draft the pattern for a raglan sleeve from scratch, until you try. It is perhaps one of the most difficult patterns to draft correctly due to the fact that it requires manipulation of the garment's front and back shoulder seams. If you have the sewing patterns readily available, you are in luck because sewing a raglan sleeve is not a very difficult task. It does not require the addition of ease during sewing because some excess fabric is accounted for in the sewing patterns. It can however be a bit confusing to match the front and back seams correctly so make sure you keep track of each pattern piece as you cut it. Juliet SleeveA juliet sleeve is very similar in look to a leg of mutton. It transitions from a puffed, gathered top to a form fitting bottom in a more abrupt transition. There is usually a seam where the transition from gathered to straight occurs which accounts for a more pronounced puffed top. It is very common for a juliet sleeve to be gathered both at the armhole seam and the horizontal seam that connects it to the straight portion. The main difference between a leg of mutton sleeve and a juliet sleeve is that the leg of mutton has a more gradual transition from puffy to straight/form-fitting without the need for a seam. A juliet sleeve however, requires a seam for this transition because it is more abrupt. A classic juliet sleeve is often puffed out from armhole seam down to mid-bicep area after which it extends down to the wrist in either a fitted or straight silhouette. Sewing Difficulty: Just as it is similar aesthetically, a juliet sleeve is similar in sewing difficulty to a leg of mutton sleeve. Nevertheless, it can be a bit more challenging due to the addition of the extra horizontal seam in the body of the sleeve. Patterning a juliet sleeve can also be quite challenging if you are attempting to achieve a more form-fitting bottom portion. Cuff SleeveCuff sleeves are the most common addition to men's shirts and women's button-down blouses and dresses. Just as the names suggests, a cuff sleeve is finished with the addition of a cuff at the hem. This can either be a french cuff or a regular plain cuff depending on the design. In addition, a cuff sleeve can either be gathered or pleated into the cuff. Some sleeves also feature darts and other fit additions at the cuff area. Cuff sleeves come in different lengths from short to three quarter and long. You have most likely come across most of these as they are so widely-used in classic blouses, dresses and menswear. The cuff usually features a slit and buttons or other means of closure. Sewing Difficulty: A cuff sleeve's sewing difficulty depends on the style of the cuff. Sleeves that feature plain cuffs with no slits are a bit more simple to sew. On the other hand, french cuffs, bound cuffs and other closures can prove to be quite challenging even for a more advanced sewer. Classic cuff sleeves with slits and closures are not recommended for a sewing beginner until a more intermediate sewing level is achieved. Button placement alone can prove to be a challenge thus it is a good idea to work your skill level up slowly before tackling more complex projects like a french cuff. Angel SleeveAs the name might suggests, an angel sleeve tapers out into somewhat of a triangle shape from the armhole seam down to the hem. It features an uneven hem with one of the hem portions extending lower on the inseam. When the arms are moved away form the body, the sleeves form shapes reminiscent of wings, hence the name "angel sleeve". As opposed to bell sleeves, angel sleeves tapper out right from the armhole seam in somewhat of a straight line. A bell sleeve on the other hand, is a gradual transition which tapers out as it get to the bottom of the sleeve instead. Angel sleeves range in length from short to long and are easily recognizable by the fact that they are very wide when extended laterally. Sewing Difficulty: Angel sleeves are fairly easy to sew. The seams are straight and depending on how much they taper out (and the fabric you are working with), you can sometimes avoid the extra step of adding ease at the sleeve cap. Nevertheless, the hem could get a little challenging to clean finish if it is too pointy on one end. Kimono SleeveThe best example of a kimono sleeve is of course is that of a traditional Japanese kimono gown which is where the name derives from. A kimono sleeve does not connect to the garment through a seam but is rather built into the body of the garment. For functional and comfort purposes, it has a wide arm opening that is either rounded or more squared at the underarm seam. Speaking of seams, a classic kimono sleeve has two seams: the inseam is the continuation of the garment's side seam at the underarm, and the top seam extends form the shoulder seam out. Kimono sleeves come in a few different styles from a more bell-shaped silhouette to square. Just like all other styles discussed above, kimono sleeves are also available in different lengths. Keep in mind that the one thing that sets a kimono sleeve apart from others is the lack of an armhole seam. Traditionally, it features a wide, straight silhouette in the body of the sleeve. Sewing Difficulty: A classic kimono sleeve is not difficult to sew since you do not have to attach the individual sleeve to the curve of the armhole. Some beginners might have a hard time sewing the underarm curve which curves more abruptly in a kimono style. Kimono sleeve sewing patterns are also not too difficult to draft and require the use of a front bodice pattern. There are a few tricky parts however: Figuring out the placement of the underarm curve such that there is enough room for movement is a more complex issue at hand. In addition, cutting out a kimono sleeve requires a larger work surface which might become a challenge for an amateur dressmaker. Dolman SleeveJust like kimono sleeves, dolman sleeves do not have an armhole seam but are rather built into the bodice of the garment. As opposed to a kimono sleeve, a dolman sleeve has a more round, smooth curve at the underarm and the sleeve often looks like it is tapering in towards the bottom. If you look at a kimono sleeve for example, you will notice that the sleeves look straight both at the inseams and outer seams. By contrast, a dolman sleeve is drafted on a slight downward curve at the top, and the underarm has a wider curve that is not as abrupt as that of a kimono sleeve. Think of a dolman sleeve as a softer version of a kimono sleeve. It is widely used on blouses and dresses especially lighter-weight knit fabrics. Some dolman sleeves are short in length while others are longer and tapered into a fitted silhouette at the bottom. There a lot of different designs you can achieve with a dolman sleeve but its main characteristic is that the sleeve is not connected to the body of the garment through a seam but rather incorporated into the garment at the pattern drafting stage. Sewing Difficulty: A dolman sleeve is not difficult to sew. Like the kimono sleeve described above, dolman sleeves have just two seams: One extends from the garment's shoulder seam while the inseam is the extension of the side seam of the garment. Both feature very gradual soft curves which are easy to machine stitch. For that reason, dolman sleeves fall into the less-challenging category to sew. Drafting the pattern for a dolman sleeve has its ups and downs. It is important to know where to place the underarm curve such that it allows for enough movement in the sleeve and the rest of the garment. In addition, the top seam of a dolman sleeve has to be drafted at a slight downward slant which takes some trial an error when drafting the pattern from scratch. Petal SleeveA petal sleeve is usually made of two layers of fabric overlapping in a crossing motion, each layer featuring a softly curved edge. The reason it is called a petal sleeve is because these overlapping layers of fabric resemble flower petals. A petal sleeve works well with a wide range of fabric types and weights. It is a feminine style that can be more flared out like a ruffle or tapered in towards the bottom. Petal sleeves are more commonly incorporated into short or three quarter sleeves. Shorter sleeves work better with the crisscrossing nature of the two fabric layers, keeping them more aligned and structured. They can be gathered or subtly pleated at the armhole seam for a more puffy, flared-out look. Petal sleeves make a great addition to lightweight chiffon blouses and dresses. Sewing Difficulty: Petal sleeves are certainty a bit more tricky to sew and will require that you have at least a background understanding of sleeve construction. When sewing a petal sleeve, the hem is finished first. Depending on the style, you will still need to add shoulder cap ease along the armhole seam despite the fact that a petal sleeve has somewhat of a built in slit. Sewing a petal sleeve also requires that you have a good understanding of notches as they will be essential in aligning the sleeve when sewing it to the armhole edge. Lantern SleeveA lantern sleeve features a portion of the sleeve that flares out then tapers in to form a round, 3-dimensional enclosure. The name perhaps gives away the sleeve style in the fact that the puffed portion or enclosure resembles the shape of a lantern. Achieving this 3-dimensional puffed enclosure usually requires the use of gathering or pleating. If it occurs in the body of the sleeve, there is normally a horizontal seam that allows for an abrupt transition form the straight portion of the sleeve to the puffed enclosure. This lantern-shaped portion can start at the armhole seam and extend down to the hem of the sleeve in shorter styles. It can also be positioned anywhere along the body of the sleeve including at the bottom or center at the elbow. Some lantern sleeves feature special horizontal seams along the puffy, 3-dimensional portion which gives the sleeve a rounder, more structured look. Sewing Difficulty: Lantern sleeves are perhaps medium to higher difficulty to sew depending on the style and design at hand. The main challenges arise if you do not feel comfortable sewing gathers or pleats. In some cases, special seams are used to make the puffed section more structured or pronounced. These cases require some trial and error as it can be difficult to manipulate fabric to withstand a 3-dimensional shape. Ruffle SleeveAs you can probably guess by the name, a ruffle sleeve is a sleeve featuring one or more layers of ruffles. The ruffles can be sewn into the body of the sleeve or start directly from the armhole edge to form the actual sleeve. They can feature either gathered or circular ruffles and include just one layer or multiple layers of fabric. The ruffles can be short and dense or long and layered depending on the design. Ruffle sleeves are quite versatile and add a playful flare to women's blouses and dresses. They are widely used in women's apparel especially with spring/summer styles. Ruffle sleeves work in unison with fabrics that feature a fluid drape especially those of lighter weight quality. Sewing Difficulty: Ruffle sleeves can get a bit tricky to sew when featuring multiple layers of fabrics. A beginner dressmaker can certainly handle sewing a simple ruffle sleeve if he/she is familiar with sleeve and ruffle basics. Nevertheless, it can get a little tricky reading the sewing patterns of a ruffle. Additionally, knowing which edges to align requires a good basic understanding of notches and seam matching. Peasant SleeveA peasant sleeve is softly curved from the armhole seam down to the bottom of the sleeve forming a semi-curved silhouette. While it looks very similar to a bishop sleeve, a peasant sleeve has volume in the entire body of the sleeve starting at the armhole down to the hem. In contrast, a bishop sleeve flares out as it moves towards the bottom and is usually gathered or pleated at the bottom of the sleeve. Peasant sleeves are a great addition to lightweight blouses and dresses because the round sleeve shape drapes beautifully when the fabric is thinner. Truthfully, they can look a bit bulky/boxy if the fabric used is of a stiffer, heavier nature. Peasant sleeves are often gathered or pleated at the bottom into cuffs or double folded binding. It is also common for peasant sleeves to be gathered at the armhole seam as well. This gives more flare and widens the body of the sleeve. Sewing Difficulty: Depending on the style, peasant sleeves are not too difficult to sew especially if they are gathered at the armhole seam. It can get a bit more tricky to sew a peasant sleeve that has intricate details and trims. Overall, peasant sleeves are perhaps of easy to medium sewing difficulty based on style and your skill level. Butterfly SleeveButterfly sleeves become wider as they move from the armhole down, creating a circular ruffle look in the body of the sleeve. Butterfly sleeves become gradually wider in shape starting right at the top, where the armhole seam meets the body of the garment. As you might have guessed, the reason it is called a butterfly sleeve is because it closely resembles the shape of a butterfly wing when extended. Butterfly sleeves are designed in multiple layers or a single fabric layer and feature anywhere from very little to a large amount of fullness. This sleeve style is used very often with lightweight fabrics that have a high draping quality. Chiffon and silk fabrics work great with butterfly sleeves which is why this combination is commonly used with dresses and blouses. A butterfly sleeve is highly versatile, withstanding the ability to compliment more casual designs as well as more formal, evening gowns. Butterfly sleeves are usually of shorter length although three-quarter and long lengths are common. Some styles are wider at the top where it covers the upper arm and become gradually thinner when moving towards the bottom. In some cases, a butterfly sleeve is sewn along the top and sides of the armhole opening and further extends onto the side areas of the bodice forming a ruffle-like structure along both sides. Sewing Difficulty: Butterfly sleeves are not difficult to sew. They do not require additional gathering or pleating and the sleeve cap ease is often built into the sleeve due to it's wider nature. Cape SleeveA cape sleeve resembles a cape consisting of two panels of fabric individually placed on both sides of the shoulder. The most common cape sleeve style is one that features a slit or an opening usually connected to just the top or top and back portion of the armhole. In order to achieve the look of a classic cape, a cape sleeve cannot be fully sewn into the entire armhole opening as this will not allow the sleeve fabric to stay open in the style of a cape. Cape sleeves are widely used in elegant evening wear dresses and gowns. Blouses and dresses that feature a compatible drape quality work harmoniously with the unique style of a cape sleeve. Sewing Difficulty: Although not difficult to sew, it can be a bit challenging to clean finish the edges of an armhole that houses a cape sleeve. Cape sleeves might not always require ease along the sleeve cap and upper arm, but it is important to pay attention to how a cape sleeve lays on the arm during wear. If there is not enough room for movement at the top, a cape sleeve will pull towards one side or lack a smooth, relaxed drape that is so particular to a cape sleeve. Two-Piece SleeveA two piece sleeve is a tailored sleeve used both in womens wear and menswear on blazers, business suits, coats and jackets. A two piece sleeve is classically used in combination with more structured clothing items that feature princess seams. You can recognize it by the fact that compared to a regular set-in sleeve that has a single vertical inseam, it features two seams- one at the back and one at the front. Two piece sleeves allow for a more structured look with a clean, tailored finish. Because they are so commonly used in suiting and coating, two piece sleeves are often lined. They usually have a straight silhouette or taper slightly at the bottom. Sewing Difficulty: Two piece sleeves can prove to be a bit difficult to sew, especially if you don't have any tailoring experience. Not only do you have to worry about adding the sleeve cap ease at the top, you should also feel comfortable using notches and differentiating between the sleeve's front and back sides. As mentioned above, two piece sleeve are quite often fully lined which adds an extra challenge to the sewing process. As a little side note: the greatest challenge with lining sleeves is clean-finishing the hem. Hanging SleeveAt first glance, some hanging sleeves have a slight resemblance to cape sleeves. They are however, quite different in construction: A hanging sleeve is usually connected to the armhole like any other regular sleeve but as opposed to most sleeves, it features a long extension at the bottom often accompanied by a slit. A hanging sleeve is a more historic, vintage sleeve style commonly used in the Victorian and Renaissances eras. The extension of a hanging sleeve can be long and exaggerated or quite short and subtle- it all depends on the design. However, in order to be categorized as a hanging sleeve it should clearly feature an extension at the bottom, usually positioned at the back of the arm. The extension itself can be squared, pointy, round or of any shape considered by the designer. The sleeve can feature a separate slit or be open at the sleeve seam to form the extension. This opening can start pretty high up on the arm closer to the armhole seam or bellow the elbow for more arm coverage. Regardless of where the slit opens along the length of the arm, the sleeve extension hangs down to form an elegant, feminine look reminiscent of regal historic costumes. Sewing Difficulty: A hanging sleeve is not too challenging to sew if you have some experience sewing regular set-in sleeves. A simple hanging sleeve doesn't normally feature any gathering or complicated pleating which makes it less challenging to sew. However, if the bottom extension (hanging portion) is too pointy, it can be a bit tricky to sew. You should feel comfortable with a few different clean-finishing hemming techniques before attempting to sew a more complicated hanging sleeve. Cold-Shoulder SleeveA cold shoulder sleeve features a cutout or opening at the sleeve cap that allows the top of the arm or shoulder to poke through. It is a very common addition to summer/spring blouses and dresses and used often with lightweight fabrics. A cold-shoulder sleeve's opening can be curved and actually cut out of the sleeve cap, or feature a lengthwise seam that simply opens at the sleeve cap to form a slit. Regardless of how it is constructed, a cold-shoulder sleeve will always expose the upper arm or a portion of the shoulder. In addition, the actual opening can range from very small for a more subtle look to large, allowing for a more relaxed, dramatic sleeve style. Sewing Difficulty: There are really two main challenges when sewing a cold-shoulder sleeve: First, positioning the opening correctly along the armhole curve will require good knowledge of notch placement and solid understanding of the armhole curve. Secondly, it is important to clean finish the inner edges of the sleeve opening before sewing it to the armhole edge (unless the design doesn't call for it). Clean finishing a round edge can prove to be a bit of a challenge if you don't feel comfortable working with curved fabric edges. In this case, sewing a cold shoulder sleeve should be done by using a slit as opposed to a cutout for achieving the sleeve cap opening. Paned SleeveAs one of the most unique sleeve styles out there, a panned sleeve is one that falls in the historic, vintage category. It is rare to find this sleeve style in modern apparel but you can most certainly come across it in costume design. A panned sleeve, also called "puff and slash" sleeve, is constructed of multiple strips of fabric or panes which are sewn into the armhole seam. The sleeve is then bunched up and reinforced horizontally with twill tape (or other decorative trims) in order to achieve a 3-dimensional, round volume thus keeping the panes open and separated. A paned sleeve can feature multiple rows of horizontal trims which allows for the formation of groups of open panes each puffed in layers of open fabric strips (panes). Sewing Difficulty: If you are a sewing beginner, we commend you do not start with a paned sleeve. Unless you are interested in exploring costume design, you might really never have to tackle the construction of a paned sleeve. If you do however, keep in mind that the fabric strips (or panes) will need to be connected to another layer of fabric underneath in order to offer a surface for the horizontal trim/twill to reinforce too. As described above, the horizontal twill tape (or other trim) is what keeps the fabrics strips open maintaining a spherical, 3-dimensional structure. This means that aside from the paned portion of the sleeve you will also need to sew a regular sleeve underneath proving itself to be double the challenge (especially if you're not 100% comfortable with sewing apparel yet) Poet SleeveA classic poet sleeve features a straighter silhouette from armhole to elbow and puffs out somewhat dramatically from elbow to wrist. It is also quite common for a poet sleeve to have one or more layers of ruffles along the bottom. You can think of a poet sleeve as a more stylistically exaggerated mix of the bishop and peasant sleeve. It often uses gathering at the armhole and especially the wrist area to contain the wider portions of the sleeve. Quite commonly, the ruffle-like structure on a poet sleeve is achieved by the use of elastic which bunches the bottom of the sleeve horizontally to create a gathered ruffle at the wrist. Some styles also include the addition of elastic horizontally along the body of the sleeve thus forming separated puffed sections. A poet sleeve is usually a long sleeve style although some modern adaptations include three-quarter lengths. Sewing Difficulty: Although of medium difficulty to sew, the ruffle detail at the wrist can prove to be somewhat of a challenge for those with less sewing experience. Elastic is the best option to achieve a poet sleeve's ruffle structure because it allows the bottom portion to be form-fitted at the wrist while the stretch helps it get past the hand. While a sewing beginner could construct a simple poet sleeve without too much frustration, if it includes more detailed features like multiple layers of ruffles and elastic, it can become a bit of a challenge for those with less sewing experience.
2 Comments
|
The Blog:A journey into our design process, sewing tutorials, fashion tips, and all the inspiring people and things we love. Doina AlexeiDesigner by trade and dressmaker at heart. I spend most of my days obsessing over new fabrics and daydreaming new ideas. Sadie
Executive Assistant & Client Relations Manager Archives
November 2019
Categories
All
|
-
Sewing Tutorials
-
Basics
>
- Aligning Pattern Grainlines To Fabric
- Preparing Fabrics For Sewing
- Pinning Sewing Patterns To Fabric
- Placing Sewing Patterns On Fabric For Cutting
- Rotary Cutters or Fabric Scissors?
- Cutting The Sewing Patterns
- What Are Notches And How To Use Them In The Sewing Process
- Transferring Notches From Pattern To Fabric
- Transferring Seamlines to Fabric
- Staystitching
- Backstitching: A Complete Guide
- Hand Basting: A Complete Guide
- Sewing Continuous Bias Binding
- Darts >
-
Sewing Seams
>
- The Basics Of Seams And Seam Allowance
- How To Sew A Straight Seam
- Sewing Curved Seams
- Sewing Corner Seams
- Trimming And Grading Seam Excess
- Notching/Clipping Seam Allowance for Tension Release
- Sewing Topstitched Seams
- Sewing Corded Seams
- Sewing A Slot Seam
- Sewing A Gathered Seam
- Sewing Bias Seams
- Sewing Seams With Ease
- Sewing Seams With Crossing Seamlines
- Sewing Unlike Fabric Seams
- How To Iron Seams: Ironing Tools And Conventions
- Sewing With Knit Fabrics
- Understanding Stitch Length And Tension
- Sewing Unique Fabric Seams
-
Seam Finishes
>
- Seam Finishing Techniques - Overview
- Applying A Pinked Seam Finish
- Applying A Bias Bound Seam Finish
- Serging And Zigzag Seam Finishes
- Sewing A Self-Bound Seam Finish
- Sewing A French Seam Finish
- Sewing A Hong Kong Seam Finish
- Sewing A Mock French Seam Finish
- Sewing A Turned-and-Stitched Seam Finish
- Sewing Overcast Hand-Applied Seam Finishes
- Sewing A Flat Felled Seam
- Sewing A Hairline Seam Finish
-
Hem Finishes
>
- Garment Hem Finishes: Overview
- Sewing A Double Fold Hem Finish
- Sewing A Single Fold Hem Finish
- Sewing Bound Hem Finishes
- Sewing An Exposed Double Layer Bound Hem
- Sewing A Folded-Up Bound Hem with Pre-folded Binding
- Sewing A Hong Kong Hem Finish
- Sewing A Band Hem Finish
- Sewing A Bias Faced Hem Finish
- Sewing A Twill Tape Hem Finish
- Sewing A Rolled Hem Finish
- Sewing A Shaped Hem Facing
- Using Fusible Hem Tape And Webbing
- Finishing A Lace Fabric Hem
- Finishing A Leather Hem
- Sewing Faced Hem Corners
- How To Finish Lining At The Hem
- Finishing Fabric Corners by Mitering >
- Interfacing A Hemline: Lined And Unlined Examples
-
Sewing Pockets
>
- Curved Patch Pocket With Flap
- Unlined Square Patch Pockets
- Lined Patch Pockets: Two Ways
- Extension On-Seam Pockets
- Separate On-Seam Pocket
- Front Hip Pockets
- Bound Double Welt Pocket
- Double Welt Pocket With Flap
- Self-Welt Pocket (Using Single Fabric Layer)
- Slanted Welt Pocket (Hand-Stitched)
- Faced Slash Pockets: Overview >
-
Sewing Zippers
>
- Sewing Zippers: General Information
- Sewing A Centered Zipper
- Sewing A Lapped Zipper
- Sewing An Invisible Zipper
- Sewing A Fly Front Zipper
- Sewing A Closed-End Exposed Zipper (No Seam)
- Sewing An Exposed Separating Zipper
- Sewing Hand Stitched Zipper Applications
- Sewing A Zipper Underlay
- Sewing A Placket-Enclosed Separating Zipper
- Sleeveless Finishes >
-
Neckline Finishes
>
- Sewing A Neck Shaped Facing
- Sewing An All-In-One Neck Facing
- Neck And Garment Opening Combination Facings >
- Sewing A Bias Faced Neckline Finish
- Sewing A Band Neckline Finish
- Bound Neckline Finishes: Overview >
- Sewing A Semi-Stretch Strip Band Neckline
- Ribbed Neck Band And Classic Turtleneck
- Decorative Neckline Finishes >
- Finishing Facing Edges >
-
Extras
>
- A Complete Guide on Interfacing
- Sewing Bound Spaghetti Straps
- Sewing Spaghetti Straps To A Faced Neckline
- Sewing Ruffles: Overview
- Patterning And Sewing A Circle Ruffle
- Sewing A Gathered Heading Ruffle
- Sewing Double Layer Gathered Ruffles
- Sewing A Gathered Ruffle Into A Seam
- Sewing A Gathered Ruffle To A Fabric Edge
- Sewing A Fabric Surface Slit
- Sewing A Slit Seam
- Hand-Applied Straight Stitches
- Hand-Applied Blind Stitches
- Hand-Applied Overedge Stitches
- Hand-Applied Tack Stitches
- Hand-Applied Decorative Stitches
-
Basics
>
- Custom Bridal
- Custom Apparel
- About
- Blog
Services |
Company |
|




 RSS Feed

