|
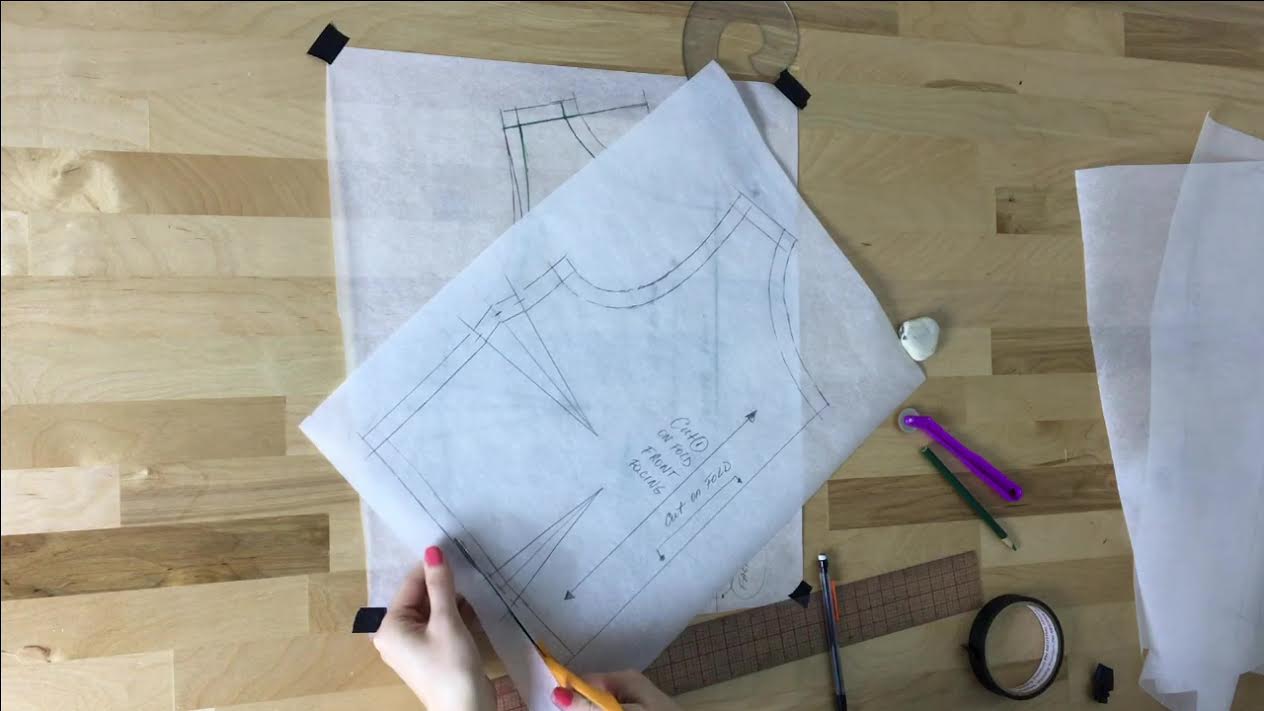
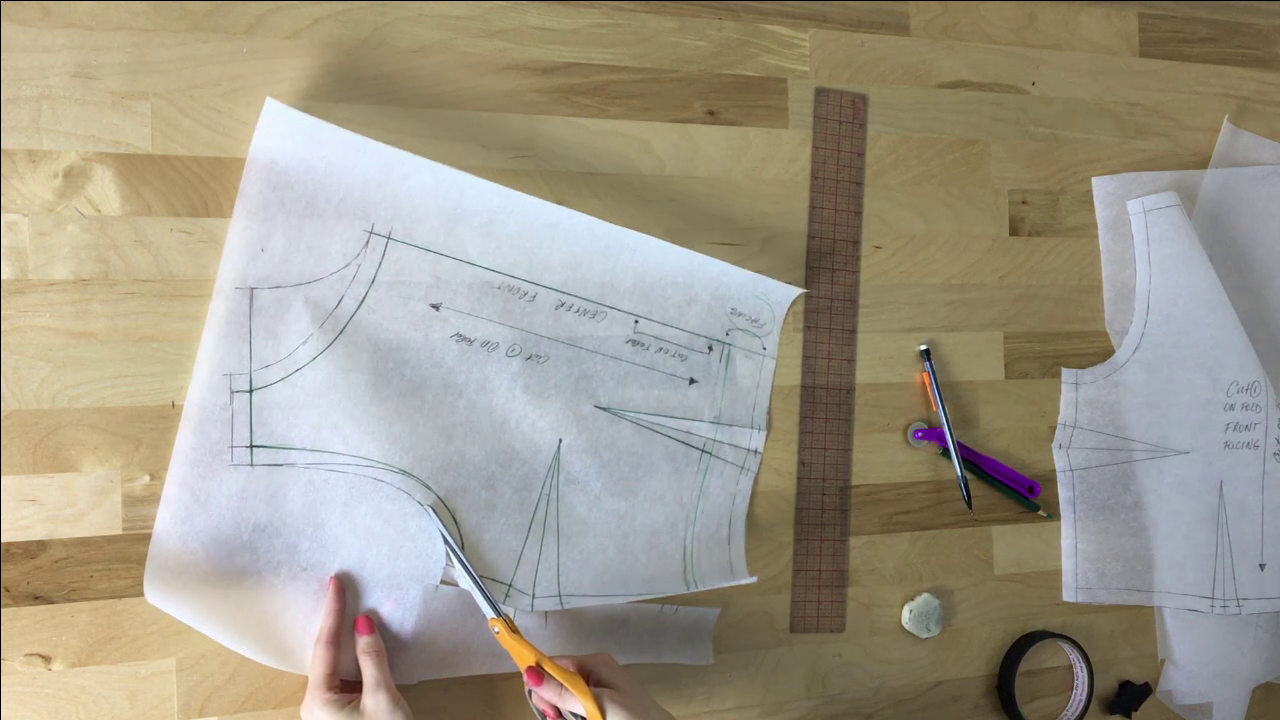
As is true for many elements in the sewing process, the starting point of drafting a sewing pattern from scratch really depends on you. Mainly, how you like to work, and what basic patterns you have on hand to use for generating the updated patterns. The more basic the original sewing patterns are, the easier it will be to draft the new design (depending on what said design is, of course). Drafting a Sewing Pattern From Scratch: Where And How To StartI personally work from a very basic set of patterns called blocks or slopers (in the industry). These are very simple, basic patterns that are form fitted to size (a Medium is usually a good starting point). Conventionally, slopers include darts, a high unaltered neckline and separate matching sleeve patterns. You can then manipulate these basic blocks into whatever design you want either by the slash and spread method or simply generating new seamlines from the existing ones. I've mentioned this before, but I like to work with a basic dress pattern (fitted with darts) that is size adjusted to fit me perfectly. A basic dress pattern that is form fitted can be separated at the waistline to create a separate bodice and skirt pattern. There seems to be a bit more flexibility with working from dress patterns, for me anyways. Conversely, you can work with just a basic blouse or skirt pattern to manipulate into new designs. Regardless of what patterns you choose to work from and how you choose to do the work, it is very important that all original patterns are first transferred onto a separate piece of paper before making the permanent changes. Never work directly on your original basic patterns! Keep the originals intact by transferring an outline of them on your work surface first. Once you have the copy, you can sketch on it, cut it, and apply any patterning techniques needed. The best part is that if you make a mistake you can't fix, simply trace another copy of the original and start all over. In this patterning demo, I transferred my basic front and back blouse patterns onto a separate sheet of tracing paper. The basic blouse I'm working with is fitted with bust and waist darts. The neckline sits at the natural position at the base of the neck. This pattern is as original and basic as you can get! By the way, I like to work with tracing paper due to its transparency and lightweight quality. As you start drafting your own sewing patterns, you'll really benefit from the paper being semi-transparent as it allows for transferring marks much faster and easier. Some pattern drafting tools you'll need (recommended): - A marked, clear plastic ruler like the one used in this tutorial. I am obsessed with this ruler, not to mention completely reliant on it! It is marked down to the 1/16" for incredible precision. Its transparent feature allows you to easily add seam allowance and manipulate seam lines. - A mechanical pencil (recommended). Of course you can use any style pencil but I personally prefer a mechanical one. It is cleaner, more precise and doesn't require constant sharpening. - Frosted scotch tape. If you plan on making your own patterns, invisible scotch tape will be almost as important as the clear plastic ruler mentioned above. Invisible tape is used in the slash and spread method, to add additional length/width and seam allowance, or simply to correct miss-cuts. With scotch tape you'll rarely feel like you need to start all over if you make a mistake- almost everything becomes fixable! -A plain french curve. I always stress the importance of using simple tools, especially if you are a sewing beginner. The french curve is a great example since there are so many complicated versions on the market. I prefer a plain, unmarked armhole french curve like the one used in this tutorial. You should be able to find this exact one at your local fabric/craft store, but if you don't, I recommend getting the most simple one you can find. - Pattern paper or a substitute. I used to work with professional marked pattern paper but recently fell in love with regular tracing paper. It is transparent and lightweight providing a great canvas for marking more precise lines. - Paper scissors. Don't use your fabric ones! Now that we have the tools and logistics out of the way, let's get started on drafting the front blouse pattern! Drafting The Front Blouse Sewing Pattern And Hem Facing1. Transfer your basic front blouse pattern onto a separate piece of paper. Make sure you transfer all notches, darts, and style lines even if you don't plan on using them in your design. These elements will provide an important blueprint for measuring and adding new markings. You will use this copy as a blank canvas to essentially draw your new pattern lines! I want my final blouse to be cropped and form fitted clean finished with a hem facing and full lining. The hem on the original pattern stops right at the waistline so I'll trim about 1 and 1/2" off the bottom. To maintain the blouse's form fitted style, I'm keeping all the original darts. Speaking of darts, keep in mind that since the bottom will get shortened, so will the vertical waist dart. 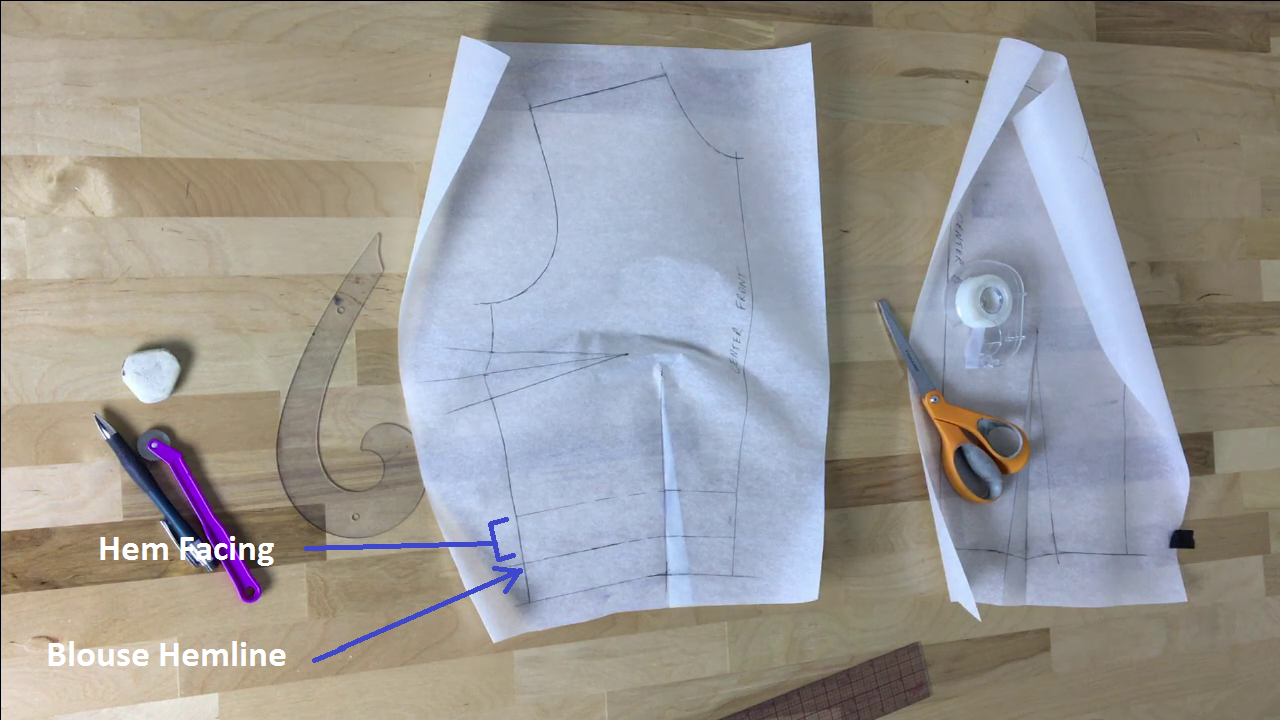 2. To start with, close the bottom dart as you would when sewing the final garment. Use a piece of tape to keep the dart closed. This may feel a little awkward with paper as it doesn't lay completely flat. It's OK if the paper wrinkles a bit. Keeping the dart closed, measure up with your ruler and draw the new desired hemline for the cropped blouse following the original hemline as a guide. 3. Before we move on any further, let's draft the hem facing at this point. From the new hemline measure up the desired facing width and add another horizontal line identical in shape to the hem as shown in the image above. It's almost like you keep moving the original hemline up, altering its location without changing its shape. Keep in mind that throughout this entire process, the dart should remain closed. 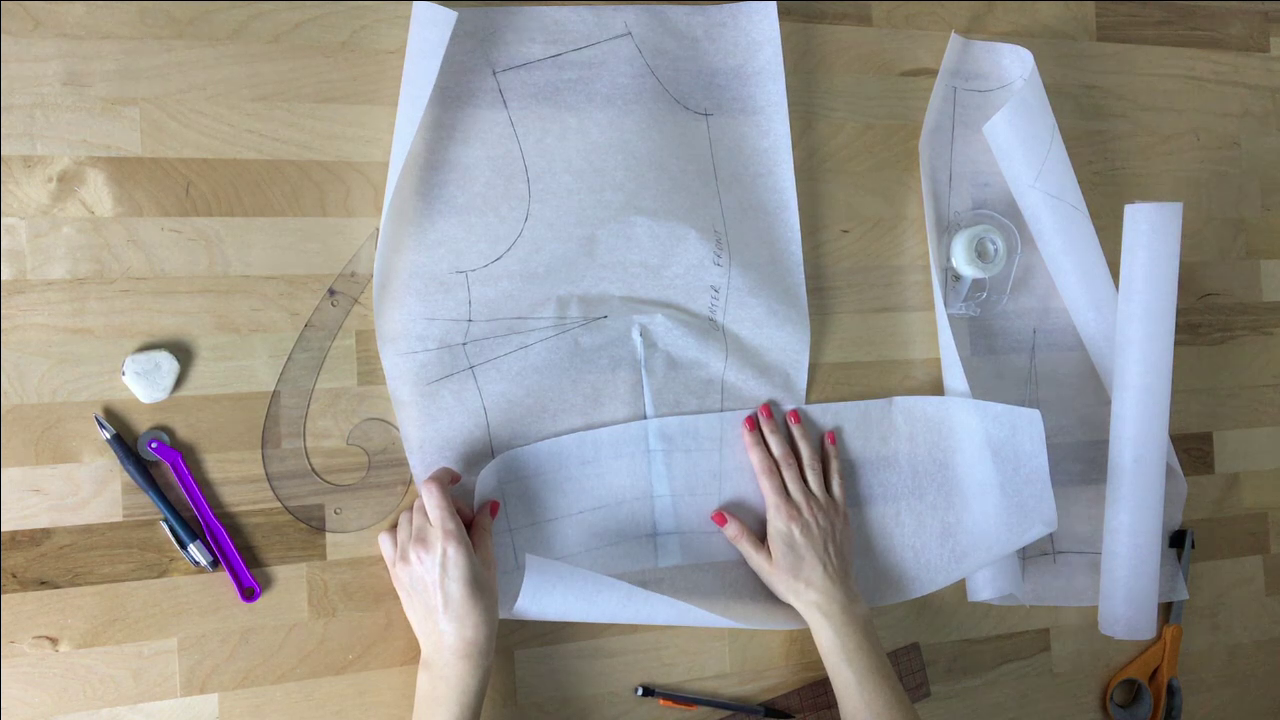 4. Place a separate piece of paper, one that is big enough to hold the full hem facing, on top of the hem facing lines on your blouse pattern. Give yourself enough room lengthwise for the paper to go past the center front edge as shown above.  5. Transfer the lines corresponding to the hem facing onto the new sheet of pattern (or tracing) paper. 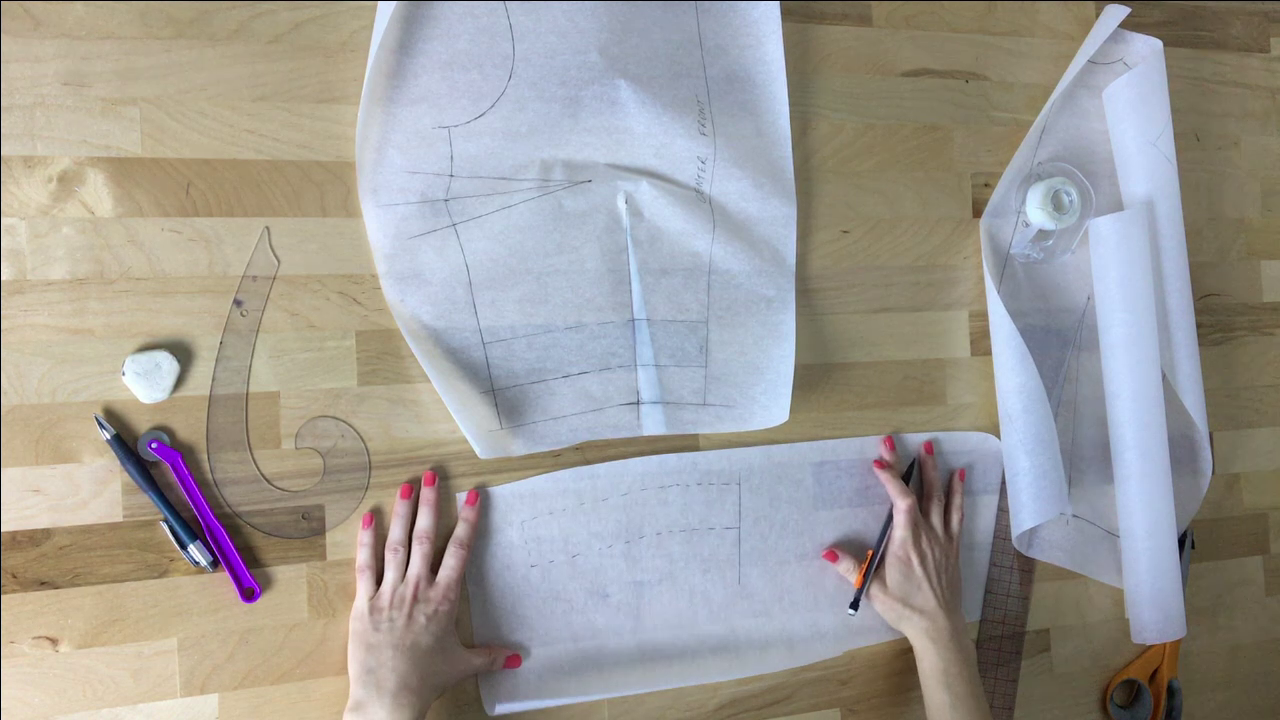 I like to use a dash line when transferring pattern markings. To finalize the transfer, I smooth everything out with my ruler and french curve. 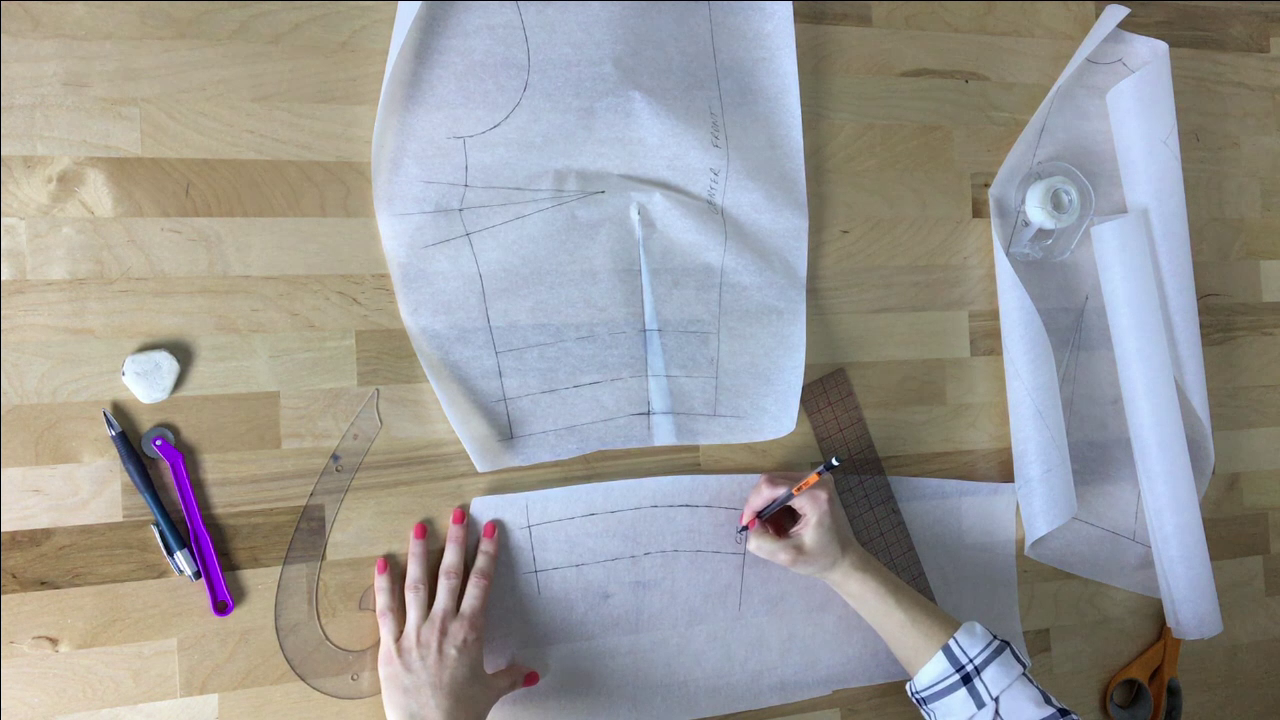 My front blouse pattern is cut-on-fold style with the cut-on-fold line corresponding to the center front. For that reason, I only have half of the hem facing transferred at this point (from center front to one of the side seam).  To complete the full hem facing pattern, fold the facing perfectly down the center front line. 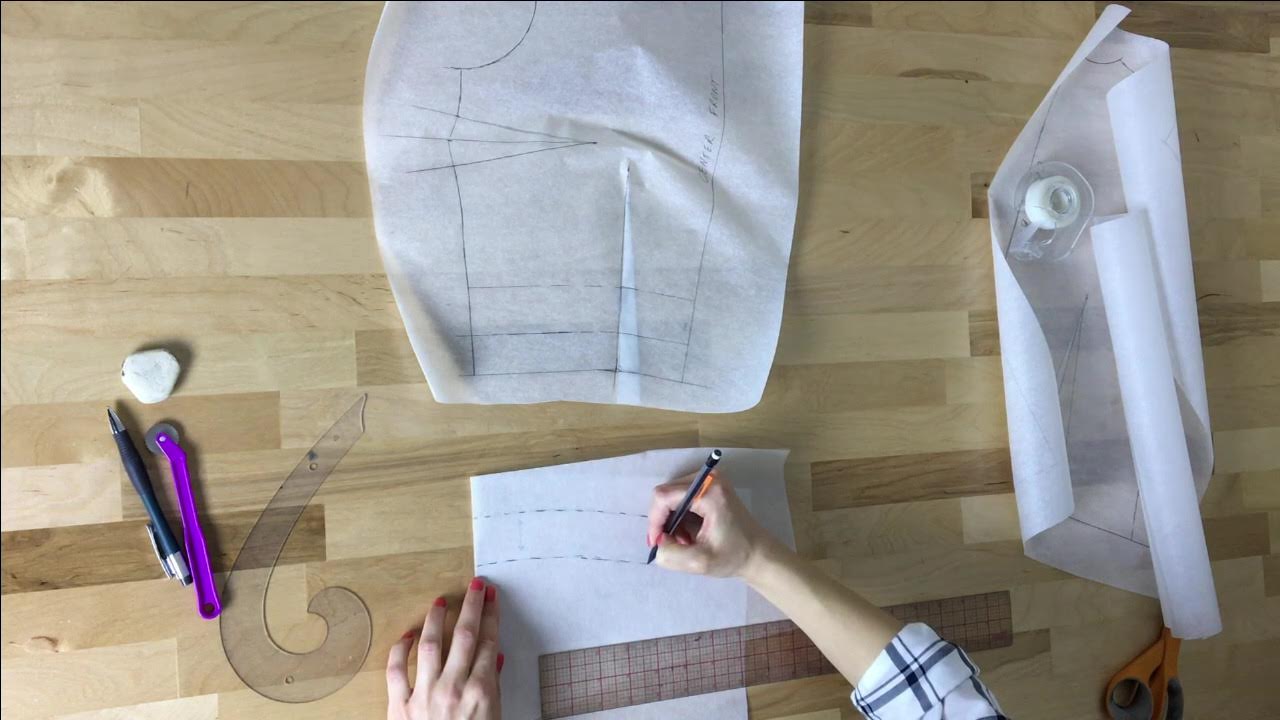 Transfer the facing lines to the other side as shown below. 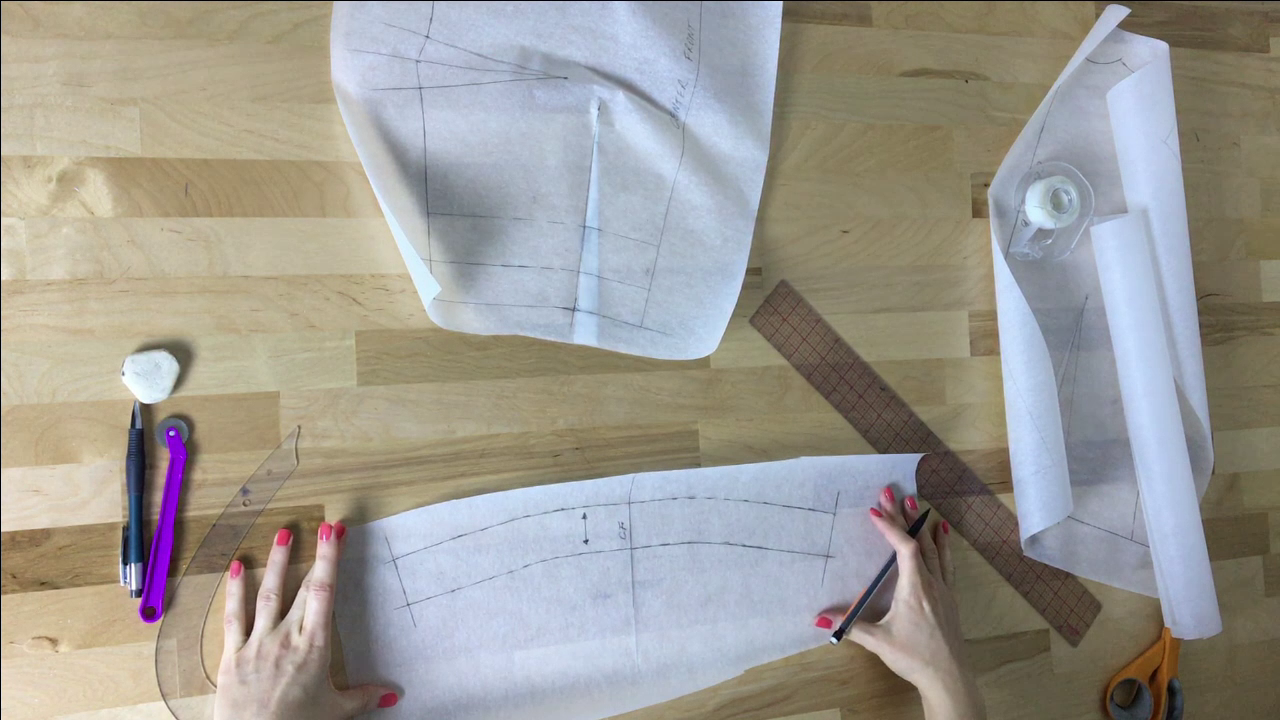 If you used a dash lines (like I did) smooth everything into a continuous line using a ruler and french curve.  6. Transfer the location of the closed dart from the blouse pattern to the hem facing using a vertical dash as shown. This mark will become a notch on the final hem facing pattern.  Be sure to transfer the notch from the step above to the other side of the hem facing. Remember, the hem facing should be identical on both sides of the center front line. 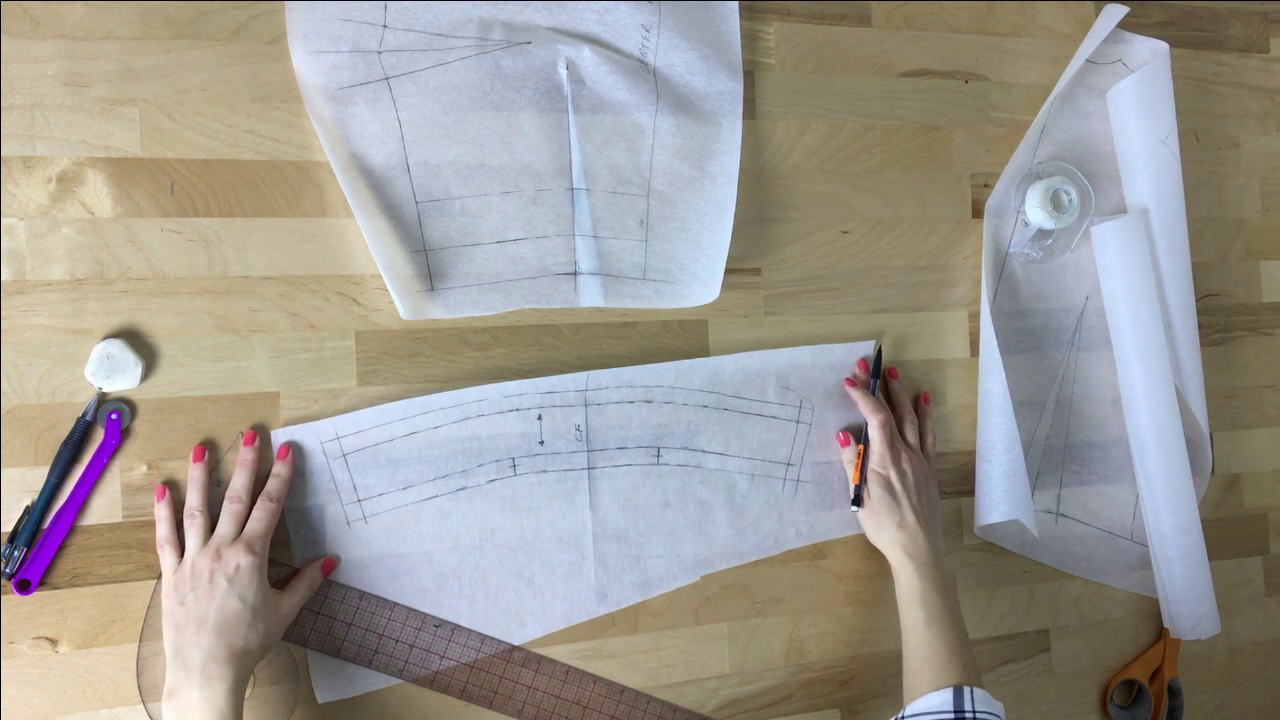 7. Once the full facing is complete, add seam allowance to each edge. Keep in mind that the seam allowance added along the bottom and top edges should match the seam allowance on each corresponding pieces these edges will be sewn too. In this case, the bottom of the hem facing (edge with notches) will be sewn to the hem of the blouse while the top will be sewn to the hem of the lining. Seam allowances should be identical for these two sets. At the transferred location of each dart, marked with a vertical line in the step above, add a T-shaped notch to complete the facing pattern. These two notches will be critical in matching the hem facing to the bottom of the blouse in the sewing process. 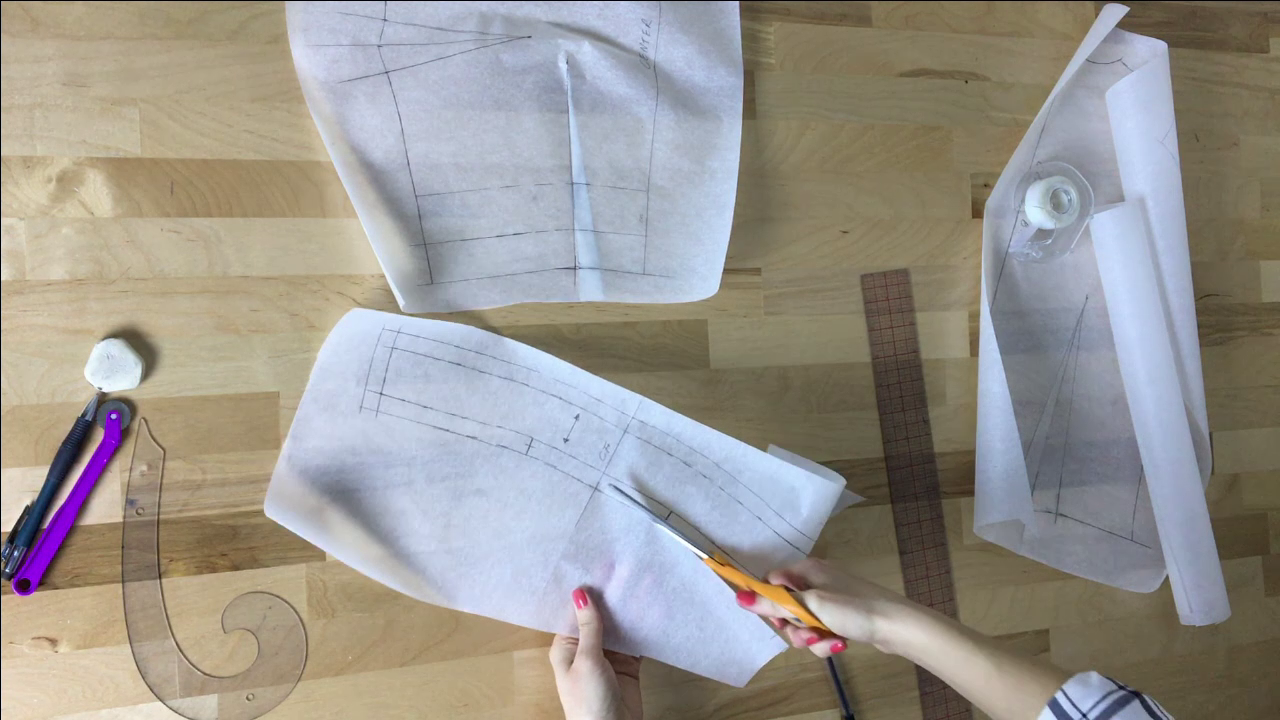 8. Cut the final hem facing carefully following the outer seam allowance lines. 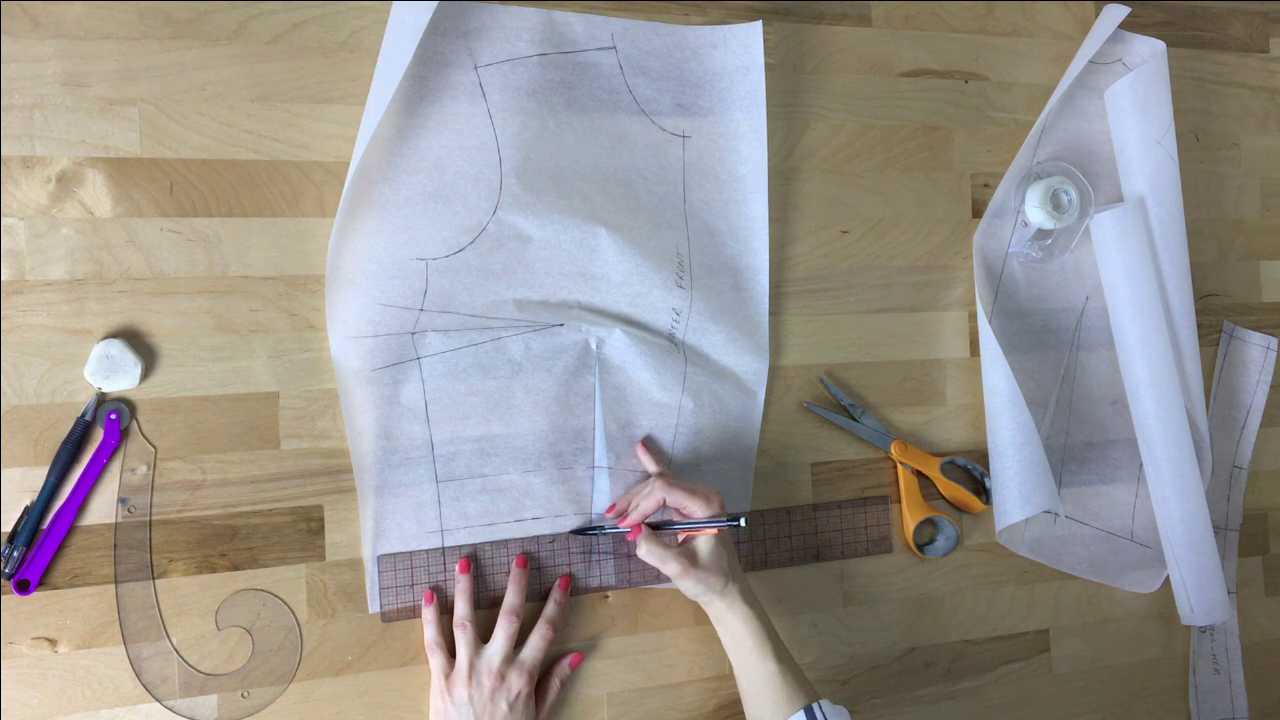 Now that the front hem facing is complete (whew!) let's come back to the original front blouse pattern and add the rest of the alterations, starting with the new hemline. 9. Using your ruler, add seam allowance to the new hemline while continuing to keep the dart closed in the process. Don't forget that this seam allowance should be identical to that of the hem facing's bottom edge as these two corresponding edges will be sewn together. For this blouse, my seam allowance is 1/2".  If you look at the image above, you will see the two horizontal lines at 1/2" away from each other: The top line is the new blouse hemline while the newly added bottom line is the very edge of the seam allowance. Ignore the closed dart and the top hem facing line for now. 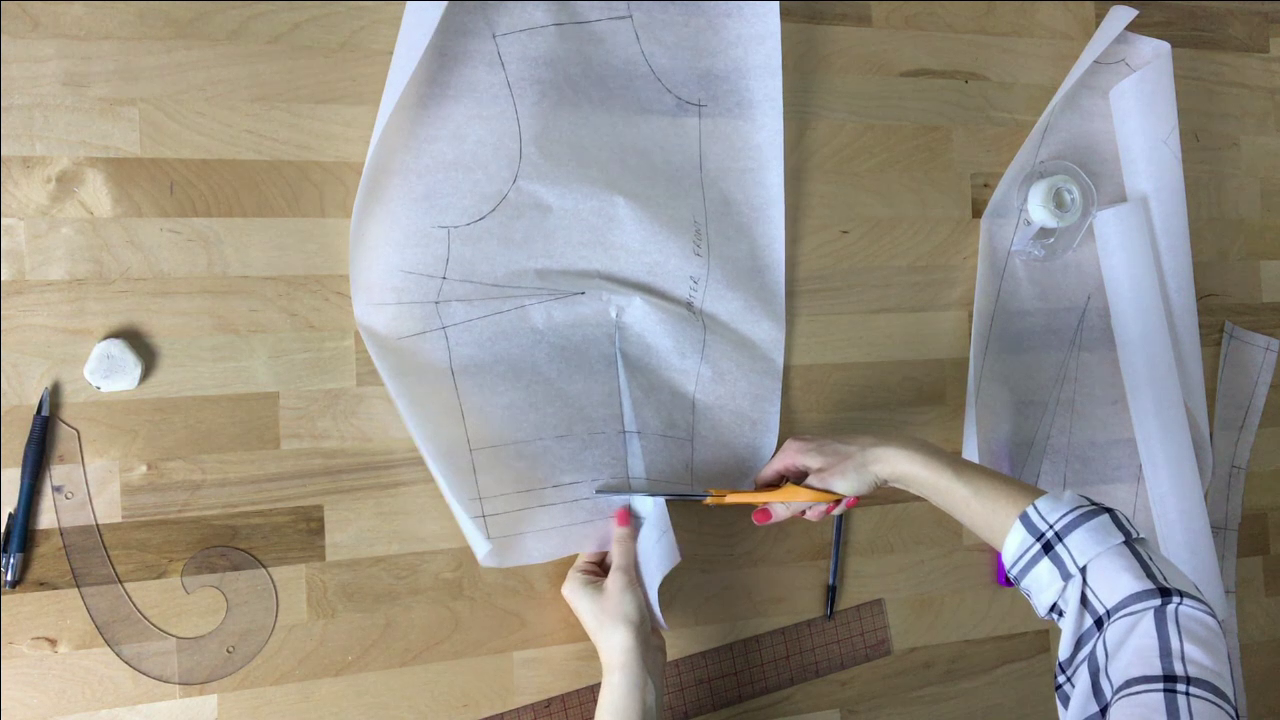 10. To complete the hem of the new blouse pattern, cut along the edge of the seam allowance line through the closed dart as shown above. 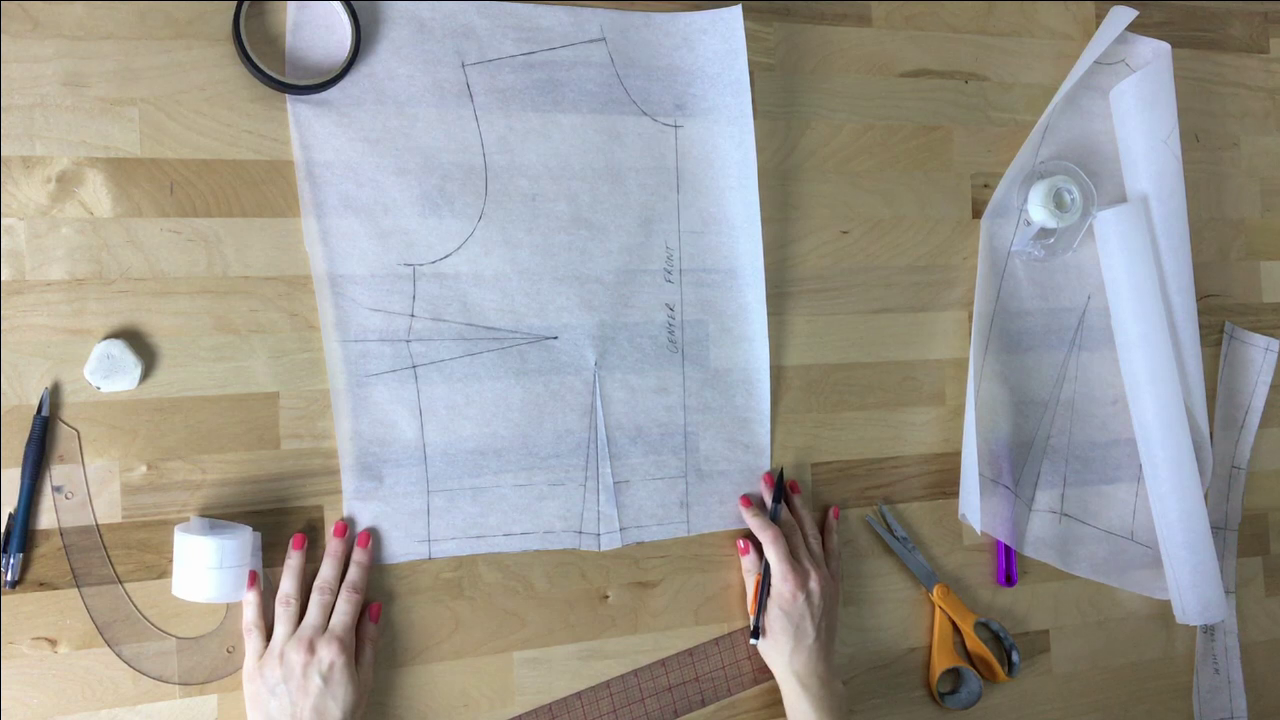 You can finally open the dart! Draw a continuation of the hemline along the bottom edge of the dart as shown above. 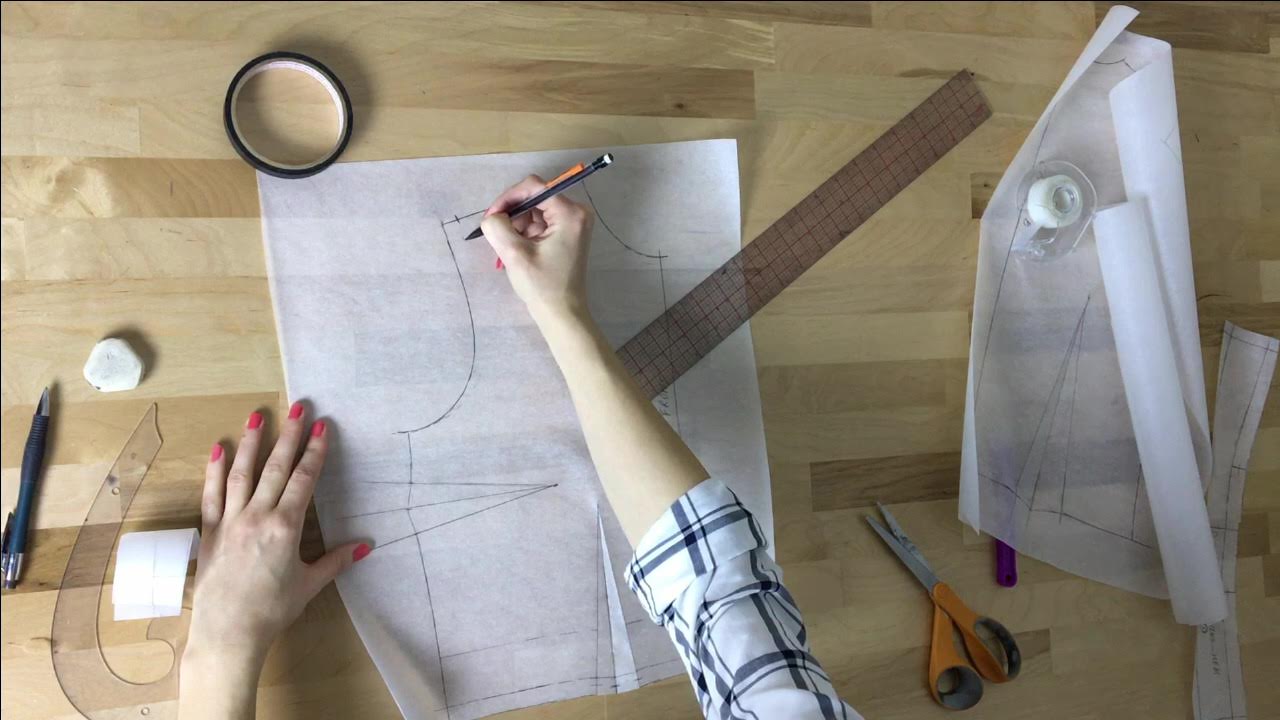 11. Next, alter the neckline and armhole to match your design. My design has a small shoulder seam, with a boat neckline style at the front. Starting with the armhole curve, measure down the shoulder seam the length you'd like to remove from the armhole side. 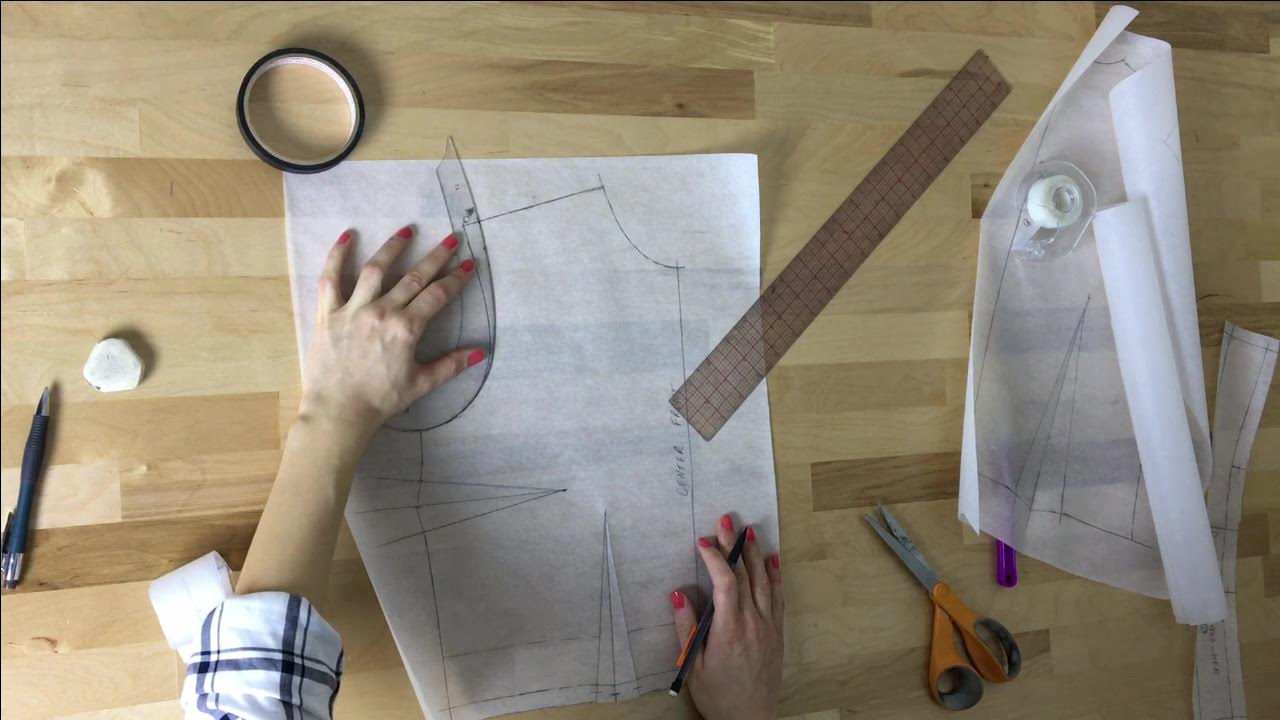 Blend the curve of the armhole to the new mark in the step above using your french curve. 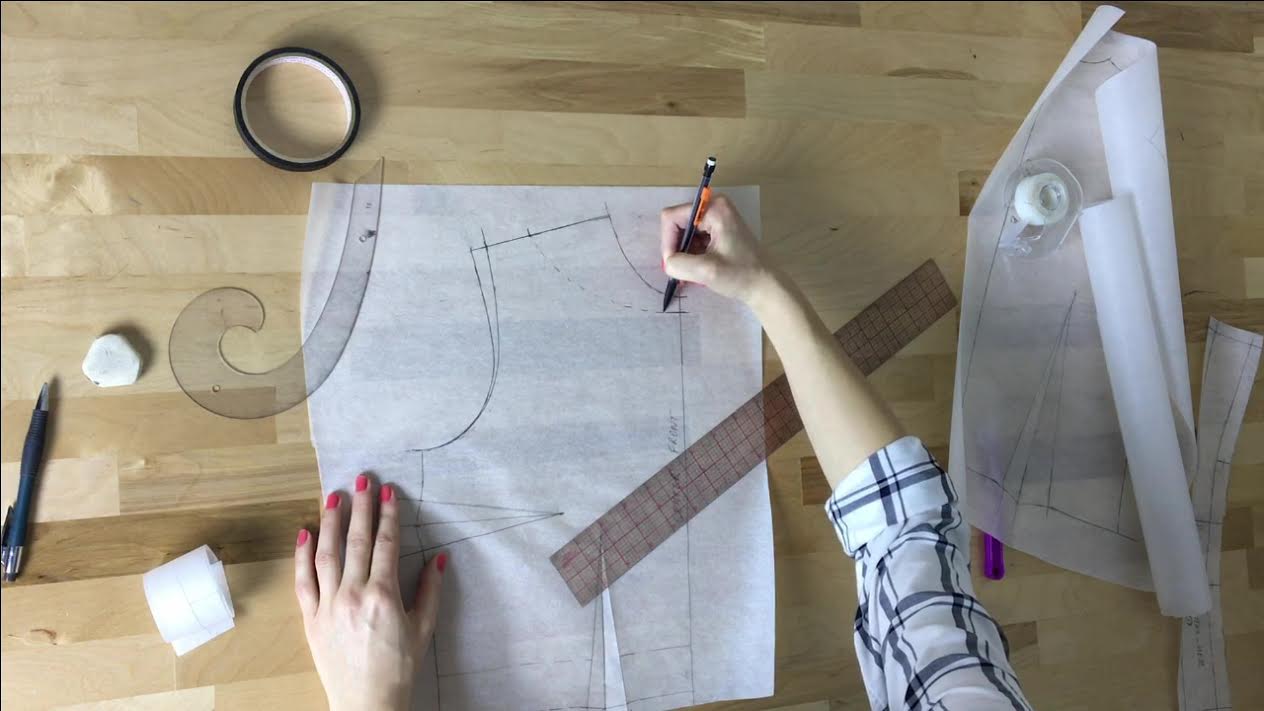 Since this blouse has an open back, I lowered the neckline by only about 1" at the front and shortened the shoulder seam from the neckline area in by 3". Sketch out the new neckline using a dash line. Use your french curve to connect the dots into a smooth, continuous curve. 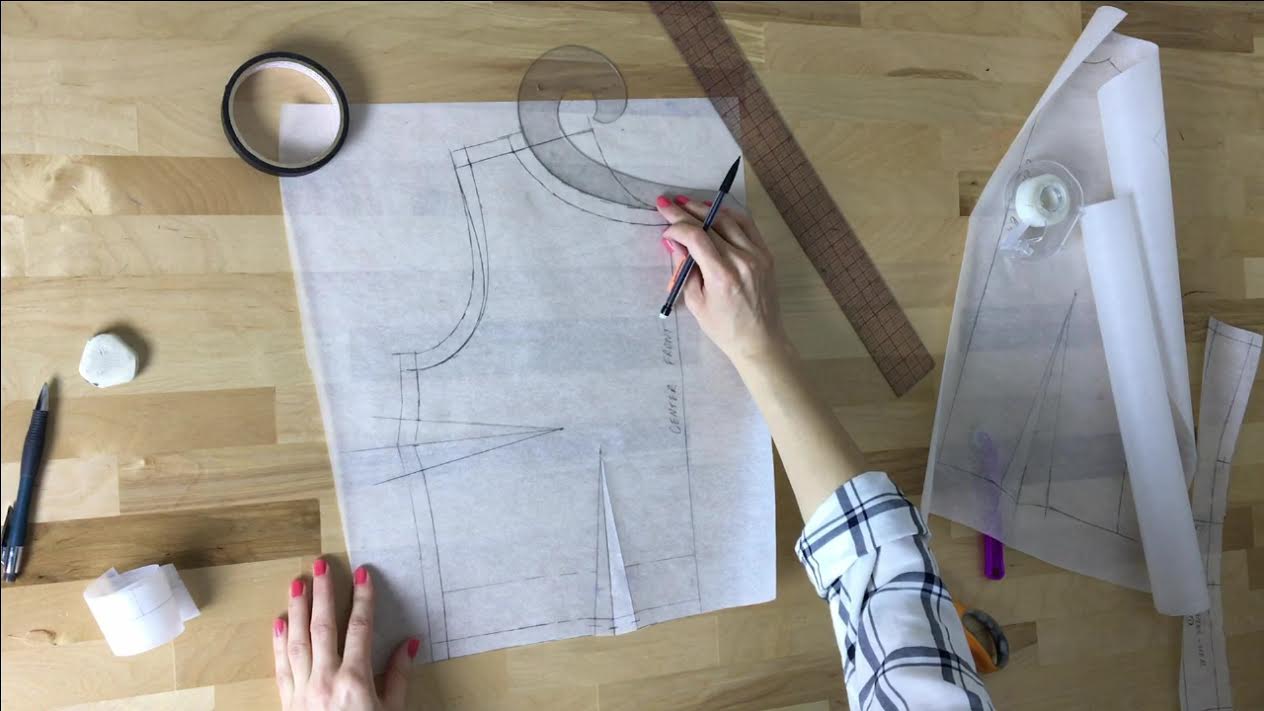 12. Add appropriate seam allowance to the edges of the final blouse (1/2" all around in this case). Drafting A Pattern For The Front Blouse LiningNow that the blouse self pattern is practically done, let's use it as a blueprint for the front lining. The lining pattern will essentially be a mirror duplicate of the blouse pattern. There is however a small difference. To ensure that there is no pulling and tension in the final garment, the lining should be slightly longer than the blouse layer. This will allow for enough ease to prevent the lining from pulling the actual hem of the blouse up. 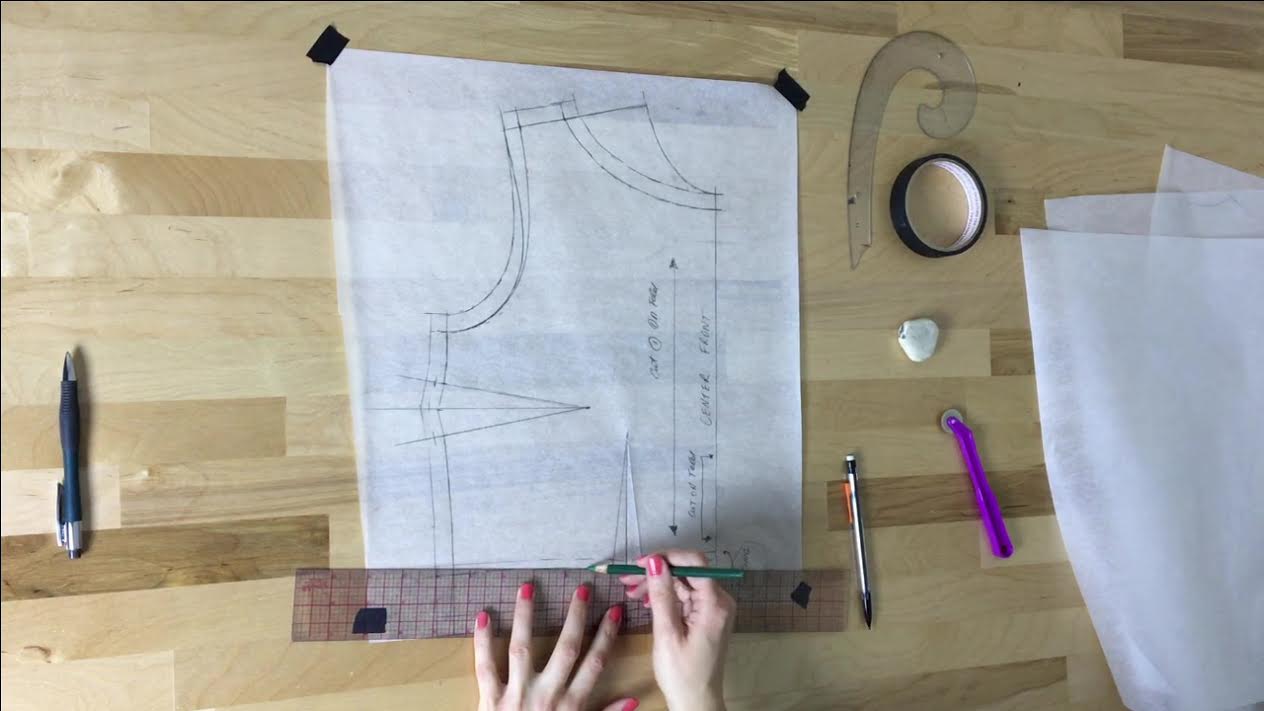 The bottom edge of the lining in this case is the line on the pattern corresponding to the top edge of the hem facing (which we already transferred above). To add some ease to the lining's bottom edge, measure down at about 1/4"-1/2" along the hem's top edge line and mark a new line that is identical in shape. Use the video or image above as a guide. 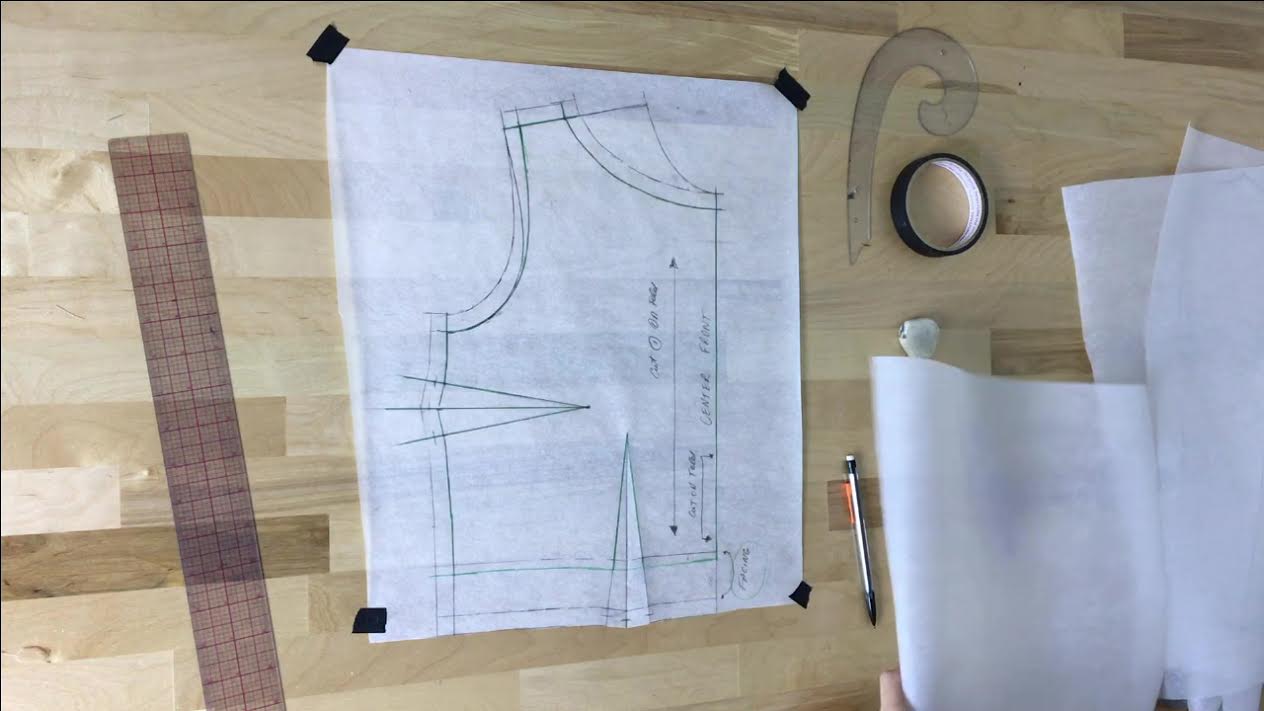 To clarify which lines correspond to the lining, I traced them in green. As you can see, the lining pattern is identical to the blouse pattern with the exception of the bottom. The lining's bottom edge has some added excess, and will be sewn to the top edge of the hem facing. Thus, the lining is shorter than the blouse itself. 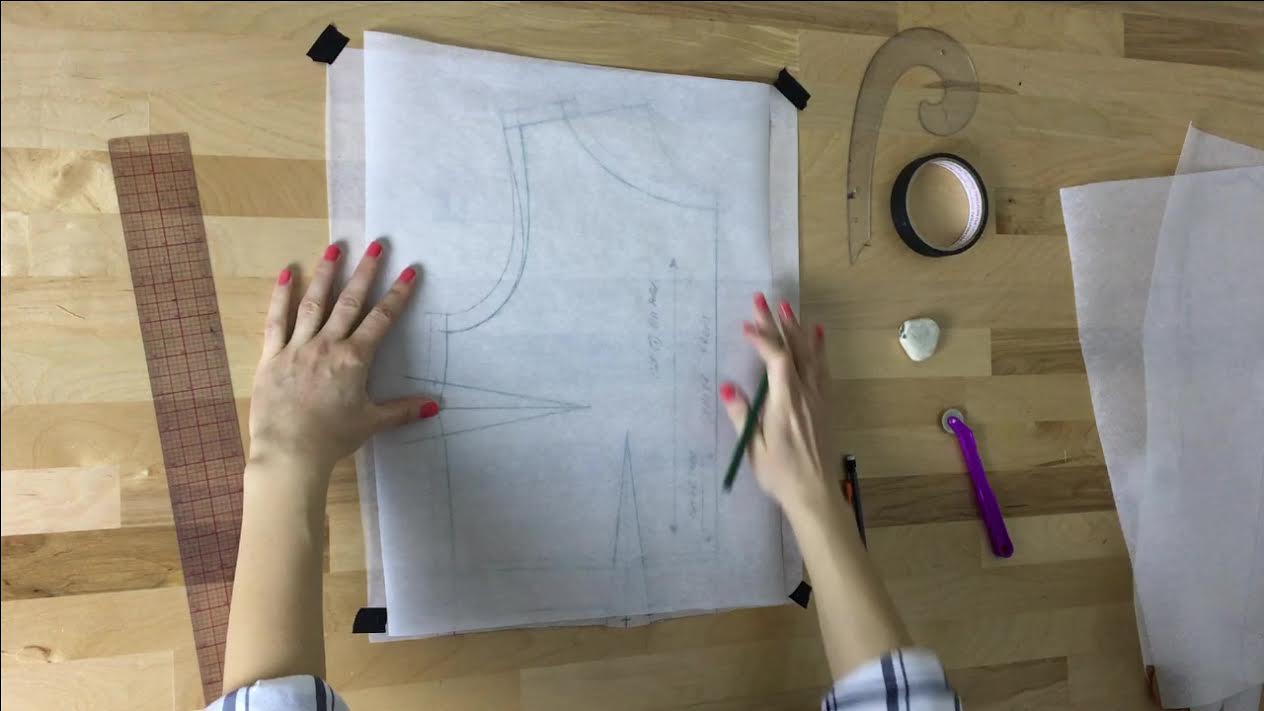 All you have to do now is transfer the lines corresponding to the lining to a separate piece of pattern paper. 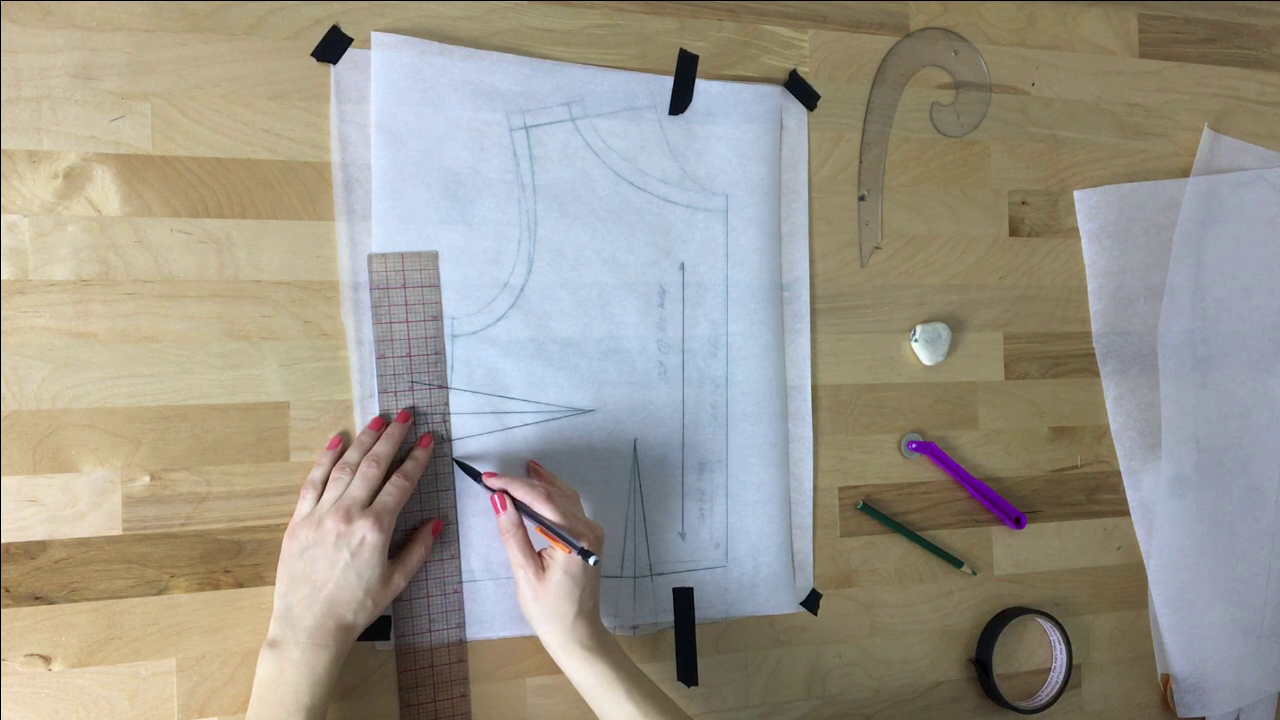 When transferring the lining, make sure you transfer all corresponding darts, notches etc. Your lining pattern will have the same grain line as the blouse self. It is important that you add this grain line to your lining pattern as it will be imperative in the cutting process. 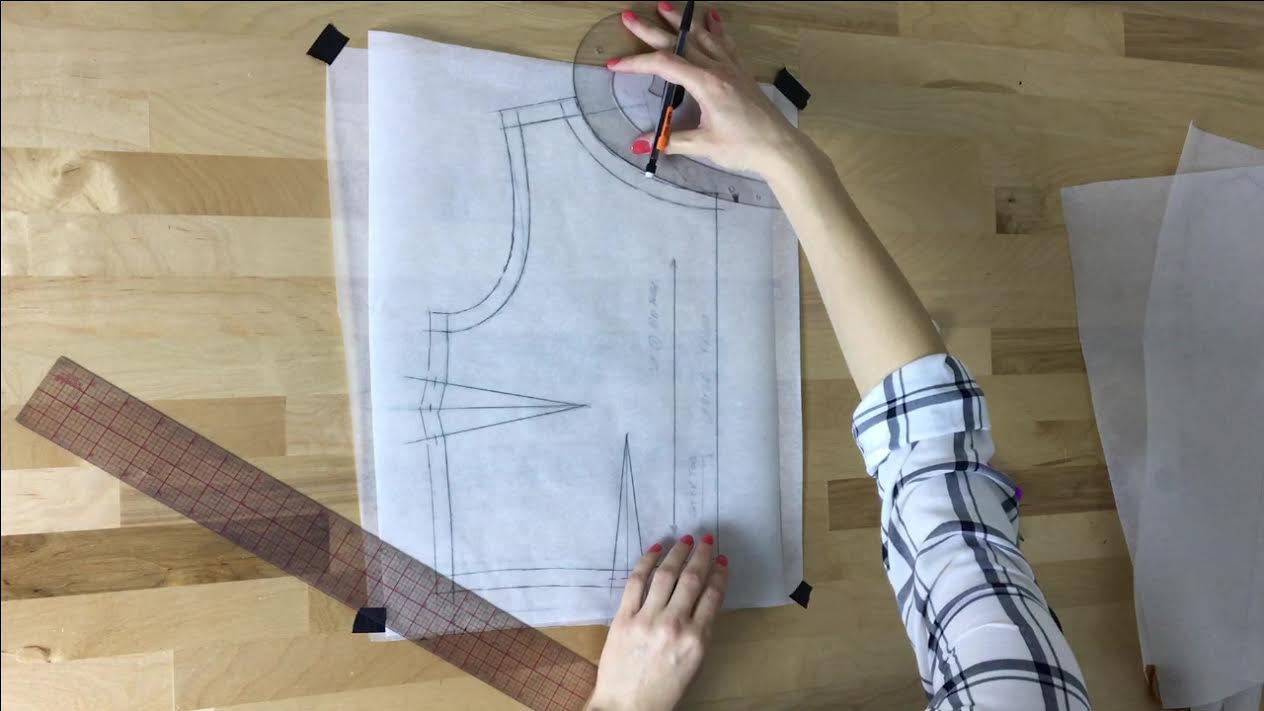 Once transferred, add corresponding seam allowance (1/2" in this case).
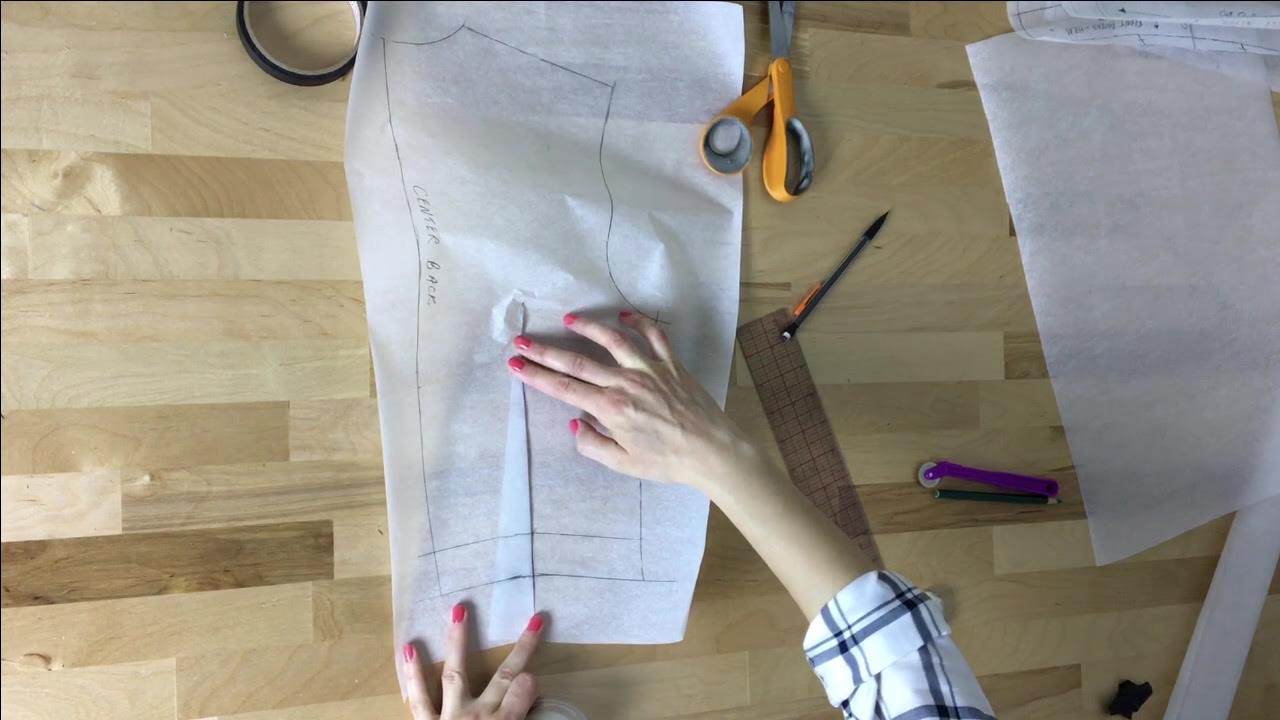
Cut the lining pattern and self blouse patterns carefully along the outer edge of the seam allowance as shown. 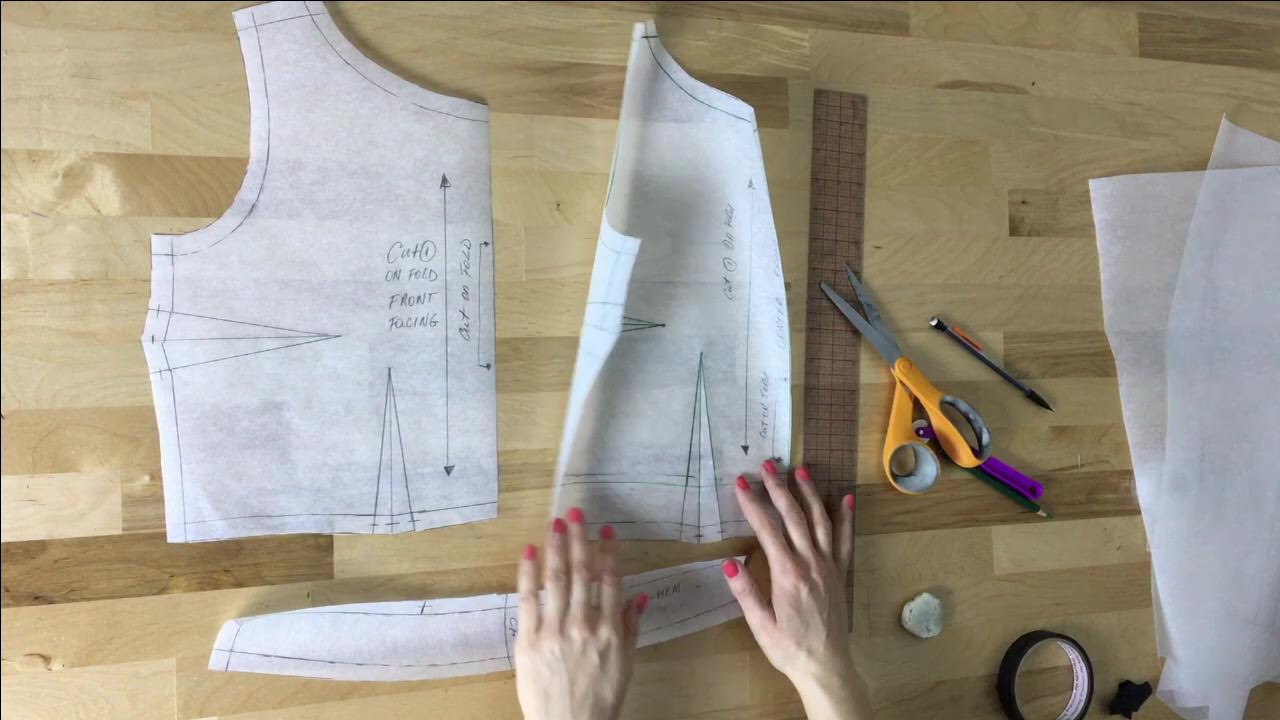 You should now have 3 separate patterns for the front portion of the blouse: 1 hem facing, 1 lining (cut on fold) and 1 blouse self (cut on fold). 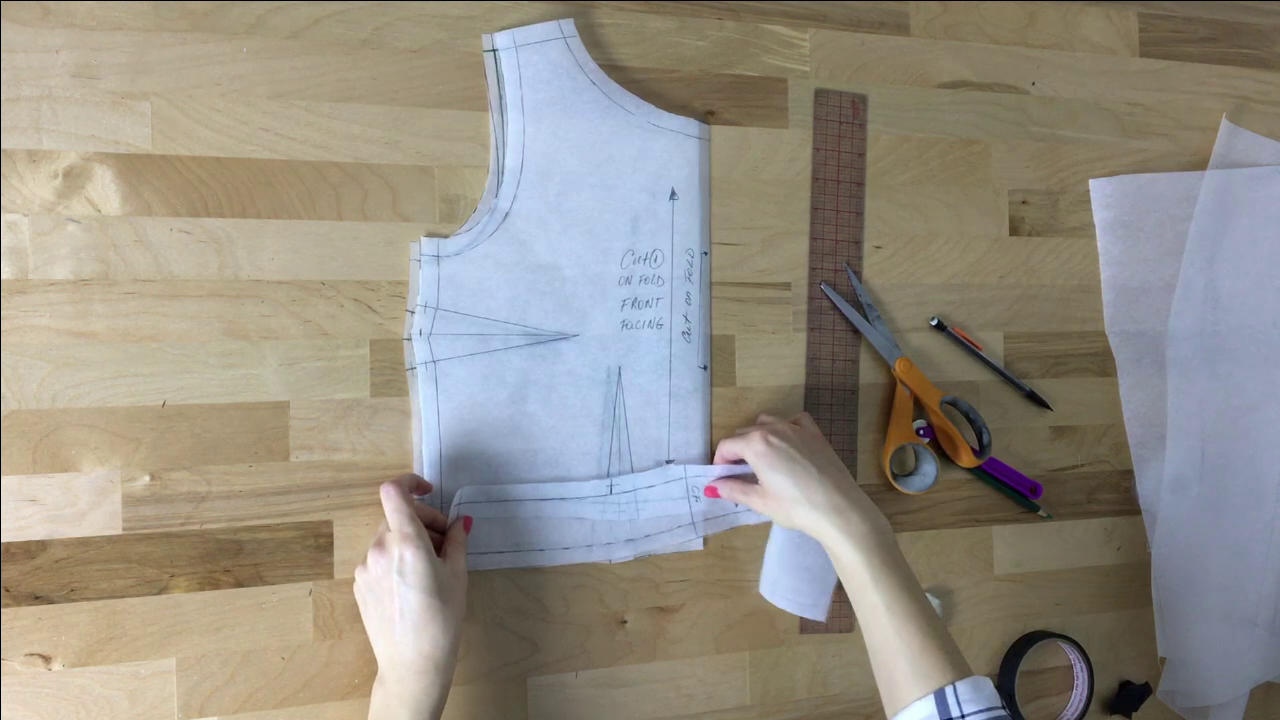 Let's replicate these steps for the matching back blouse pattern below! Drafting The Back Blouse Pattern With A Hem FacingDrafting the back pattern follows almost the identical steps as the front with just a few minor differences. As you're drafting the matching back pattern, it is important to use the front as a reference especially for those seams that will eventually be sewn together. For the most part, the shoulder seams and side seams of both front back should have the same seam allowance and have the same length. You'll get a better idea of this concept as you go through the steps below! 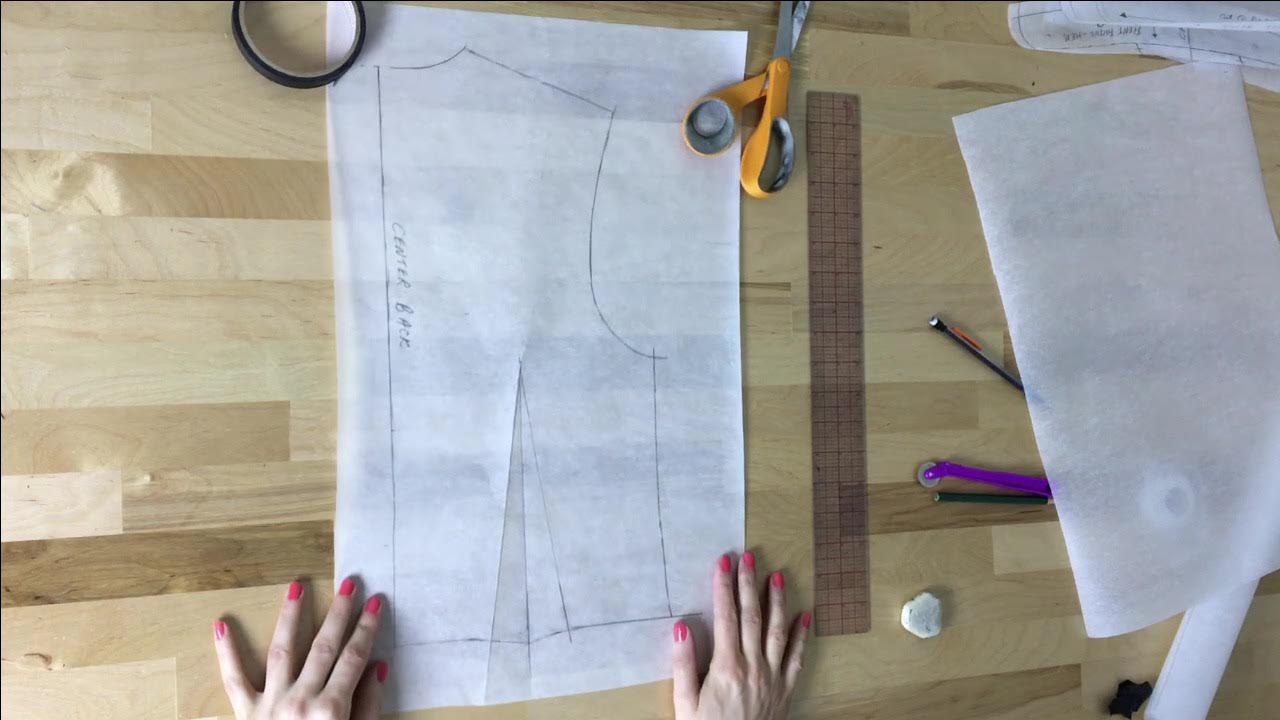 Transfer a copy of the basic back pattern onto a separate sheet of tracing/pattern paper. 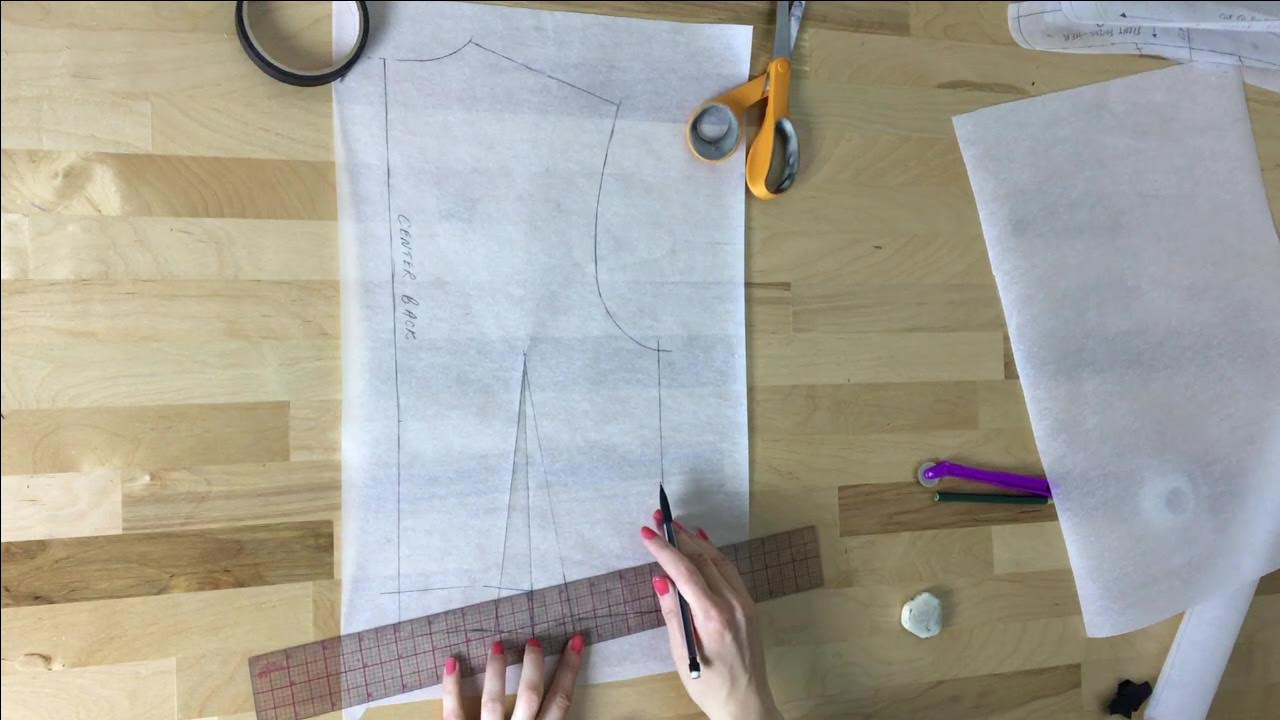 1. Measure up from the original hemline the width you’d like to remove from the bottom. For my cropped blouse this measurement is 1 ½” . Draw the new hemline at this exact distance throughout, exactly as you did on the front blouse pattern. 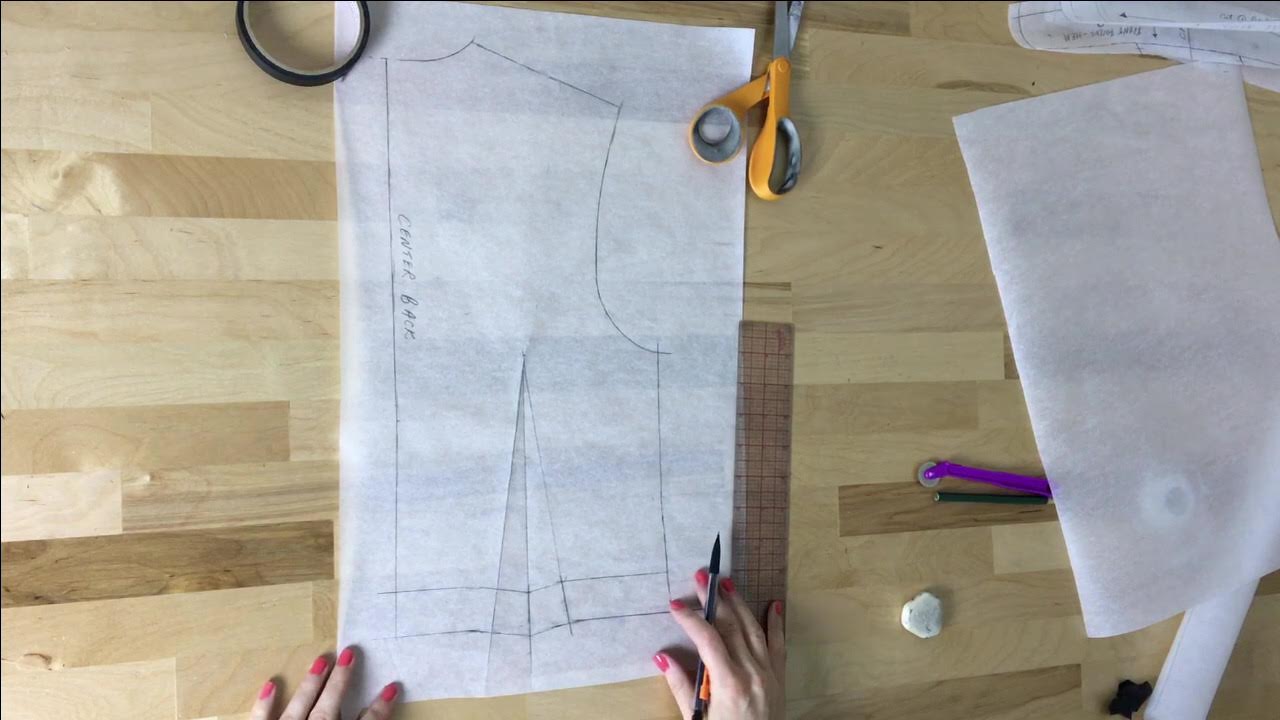 Follow the shape of the original hemline evenly throughout.
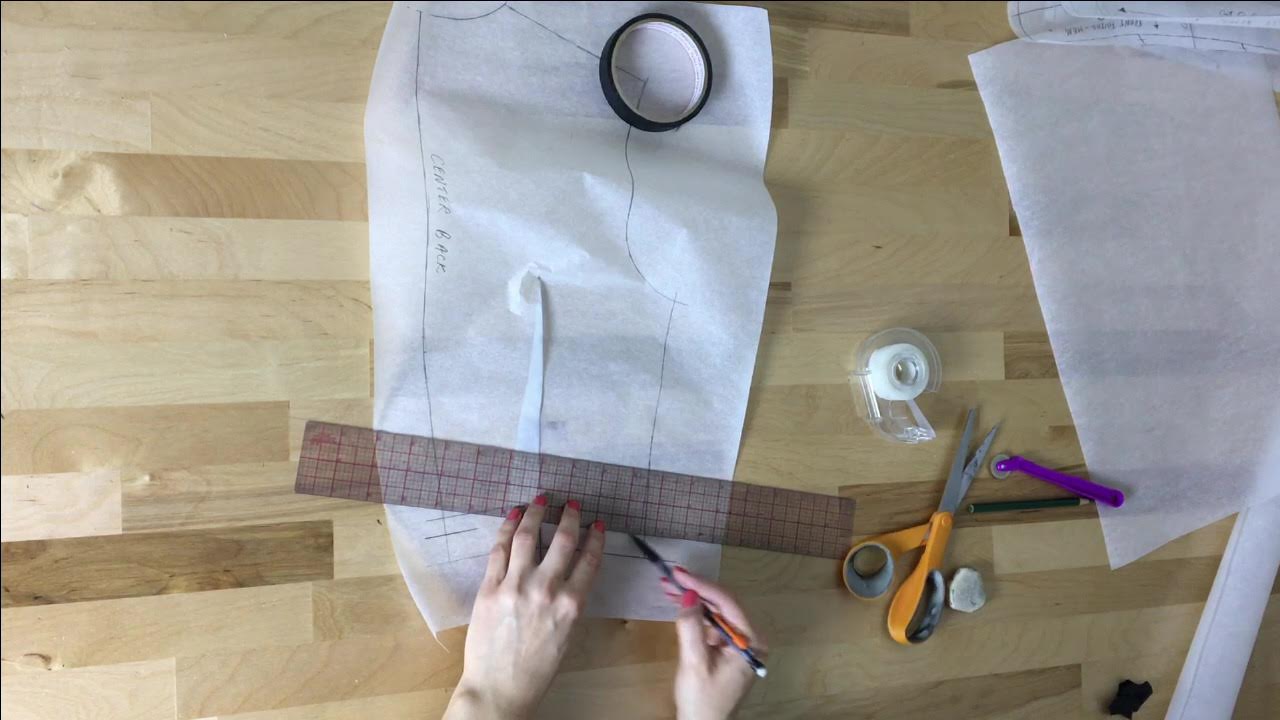
2. Close the dart and add hem allowance to the new hemline. In this case, ½” . 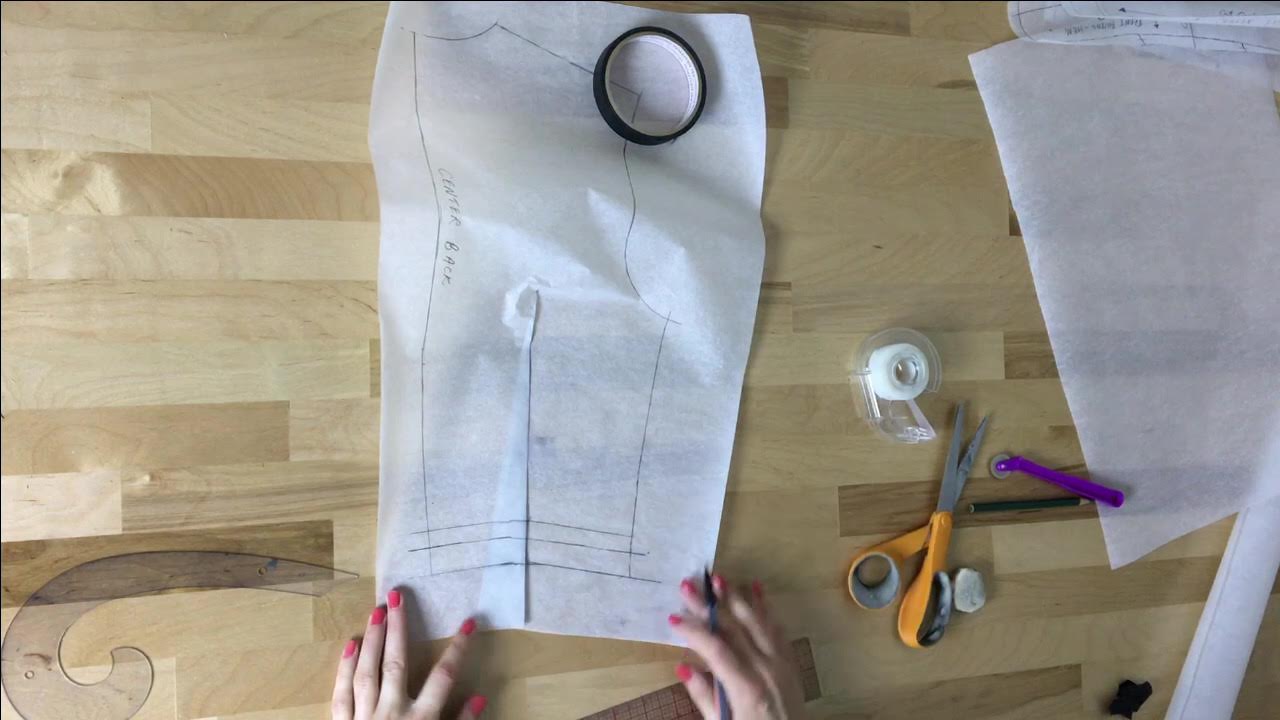 The new hemline with added seam allowance is shown above. 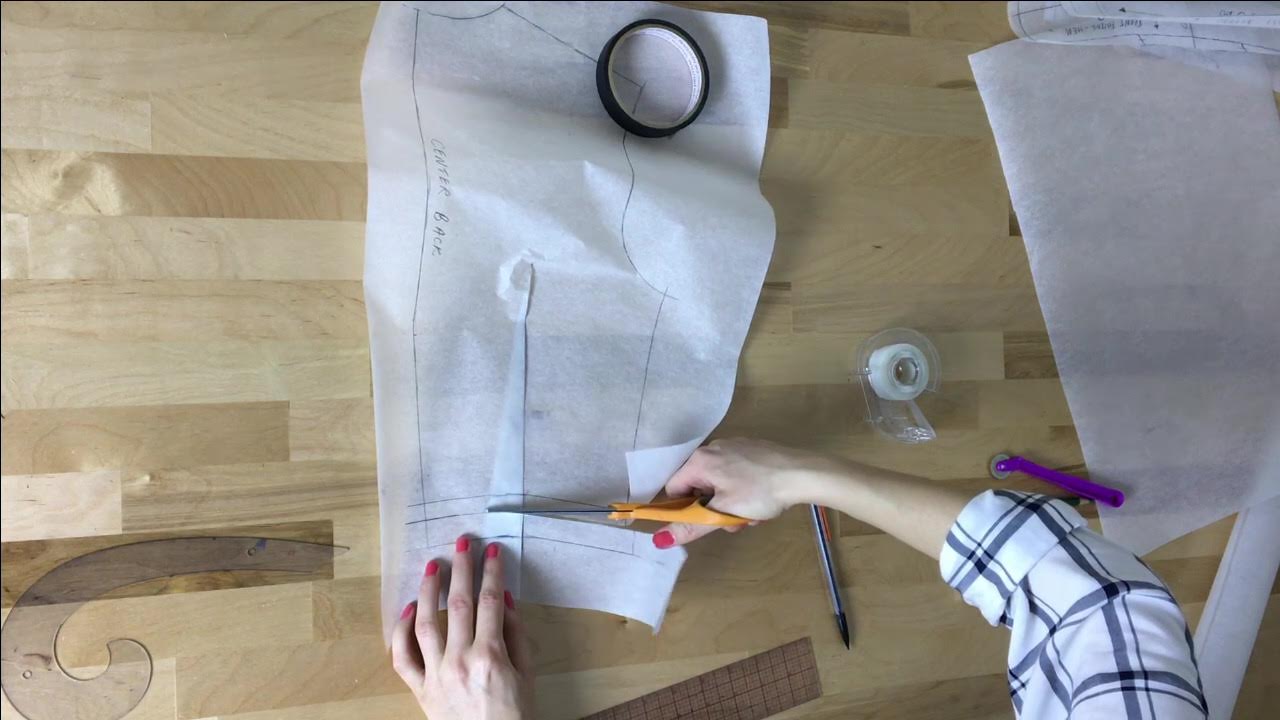 3. Cut along the outer edge of the hem allowance keeping the dart closed as shown.  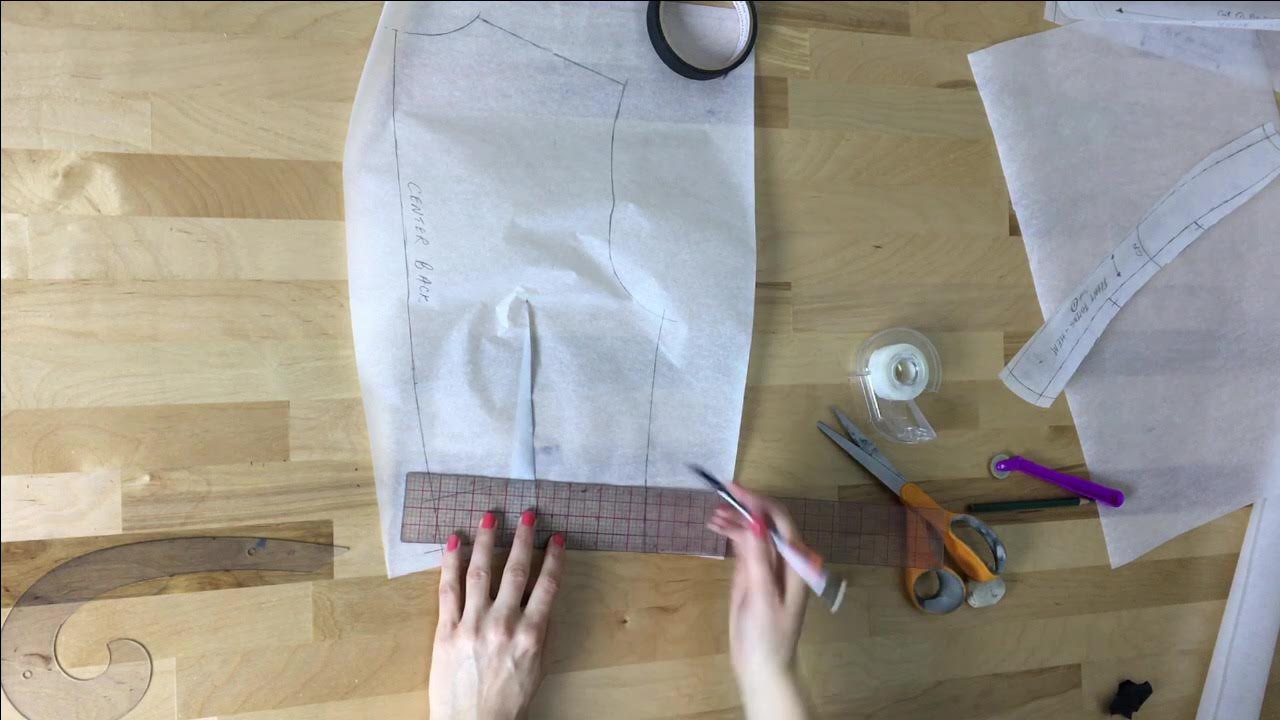 4. To draft the back portion of the hem facing, keep the dart closed and measure up the width of the hem facing (same measurement as the front facing) and mark its top edge at the same distance from the hemline throughout. This step follows exactly the same logic as the front pattern. 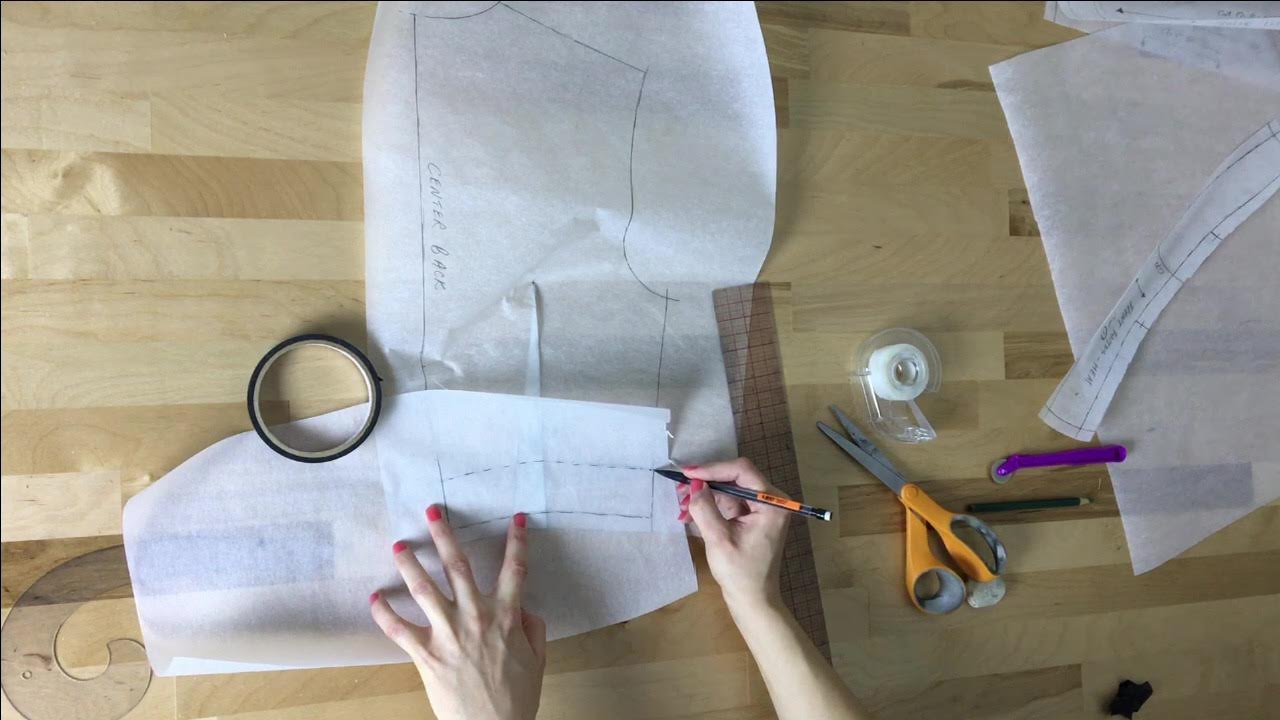 5. Once the outline of the facing is sketched on the blouse pattern, transfer it to a separate piece of pattern paper as shown. Although my back blouse pattern isn’t going to be cut on the fold, the hem facing will be a continuous piece. For that reason, I’m treating the blouse’s center back edge as the hem facing’s fold line. This line will essential divide the hem facing into two symmetric sides. That being said, leave yourself enough room on the center back side of the separate piece of paper to transfer the continuous hem facing (shown above) 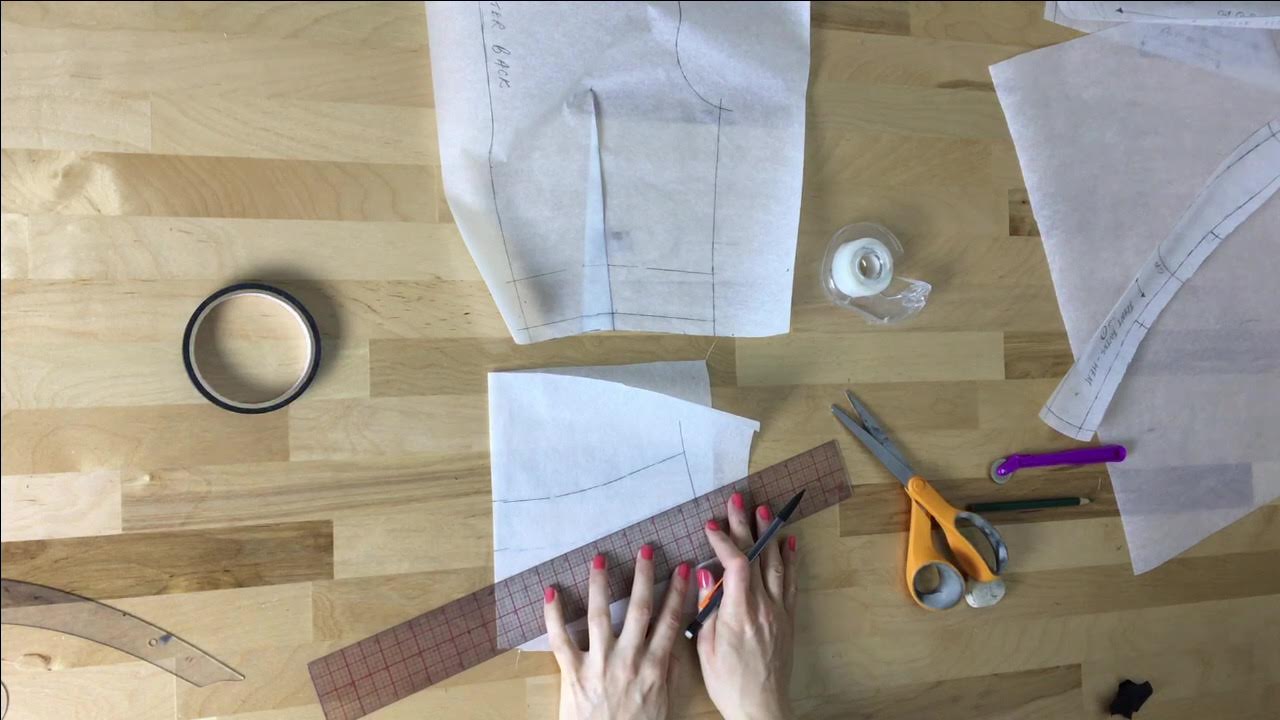 6. Fold the hem facing down the center back line and transfer the lines to the other side as shown. As you did for the front hem facing, make sure you also transfer the location of the closed dart as a vertical dash on the facing’s bottom edge. Do the same on both left and right sides of the hem facing. These two lines will become notches positioned along the bottom edge of the facing to help you match the hemline in the sewing process. 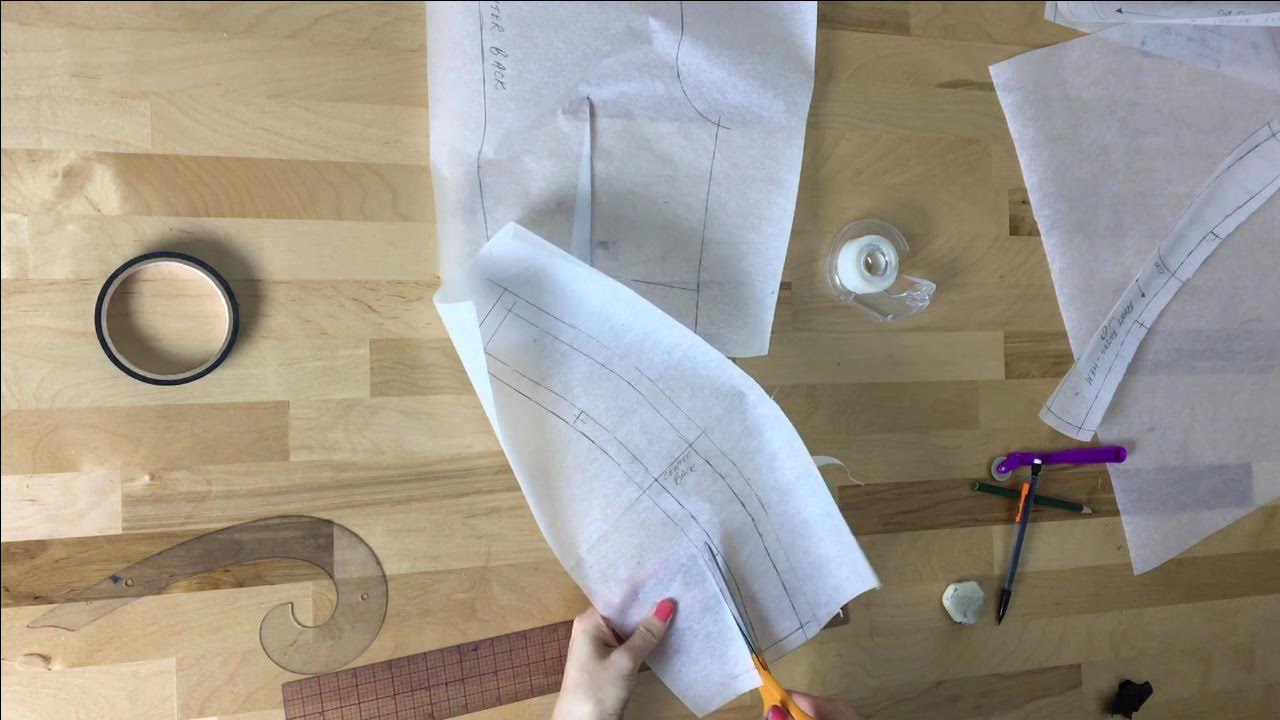 7. Add seam allowance to the hem facing. To complete the hem facing pattern, carefully cut the hem facing along the outer edges of the seam allowance. 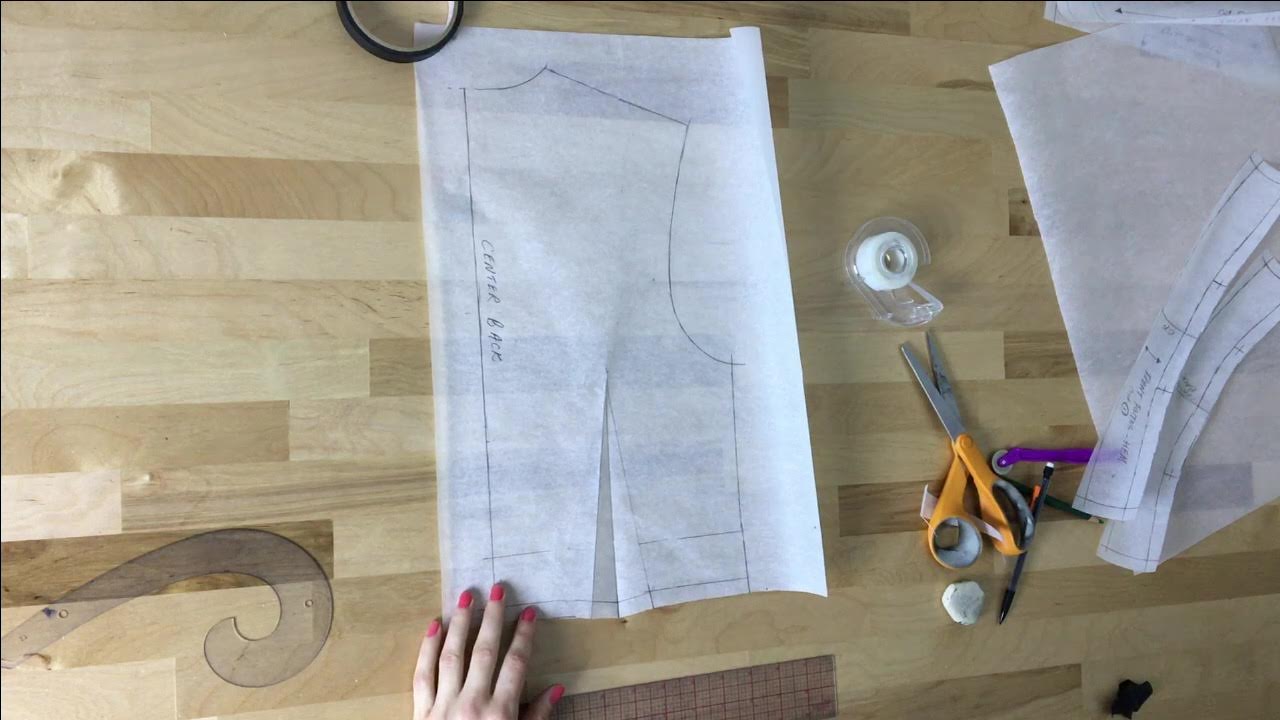 Open the dart back up at this point before moving on to the next patterning steps below. 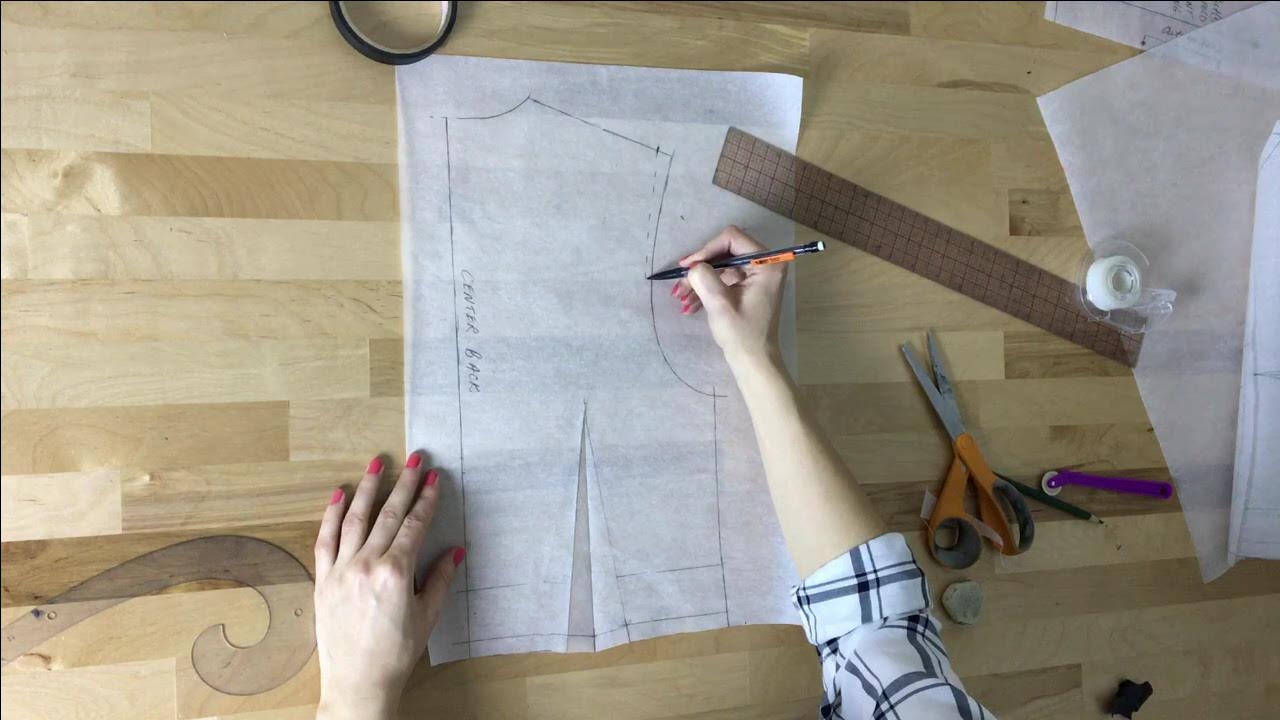 8. To alter the shoulder seam at the armhole, measure exactly the same distance from the armhole edge in as you did on the front pattern. Remember, the shoulder seam edges of both front and back patterns should match perfectly as they will eventually be sewn together. Thus, whatever distance you measure down the shoulder seam on the back pattern should mirror that of the front. At this location, sketch the new armhole using a dash line blending into the bottom of the armhole curve as shown above. 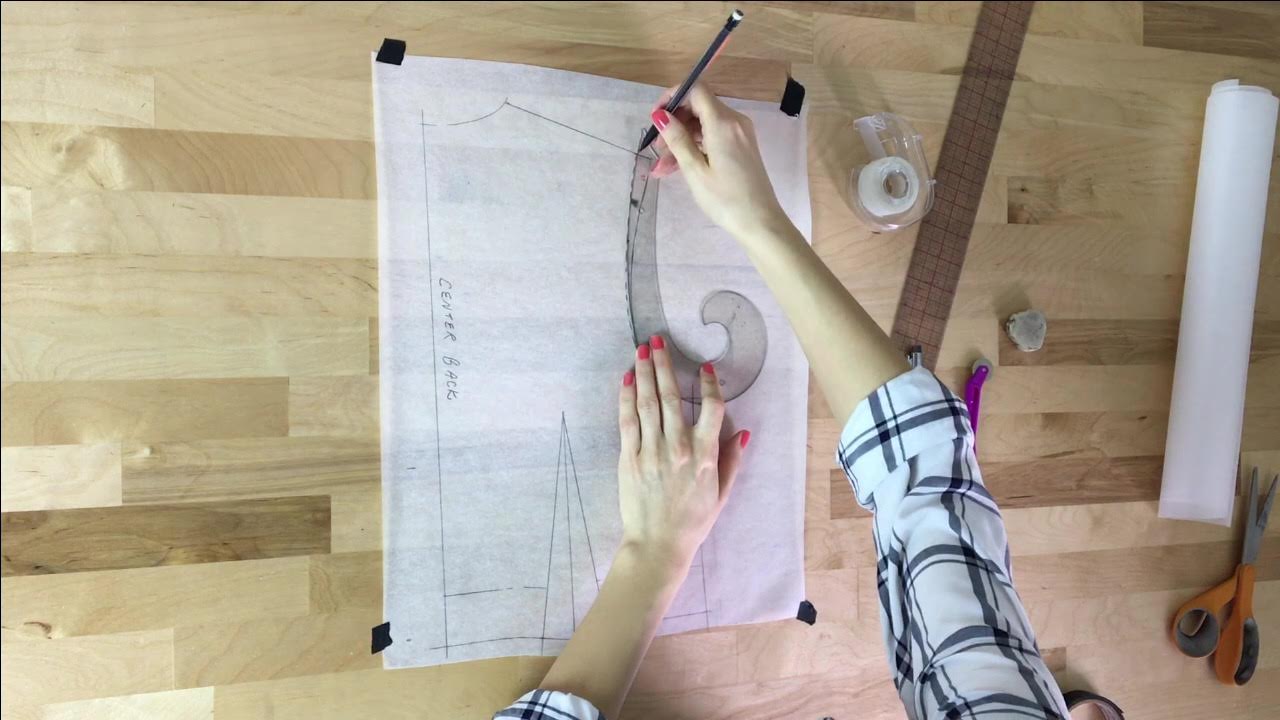 Use your french curve to smooth out the new armhole edge as shown. 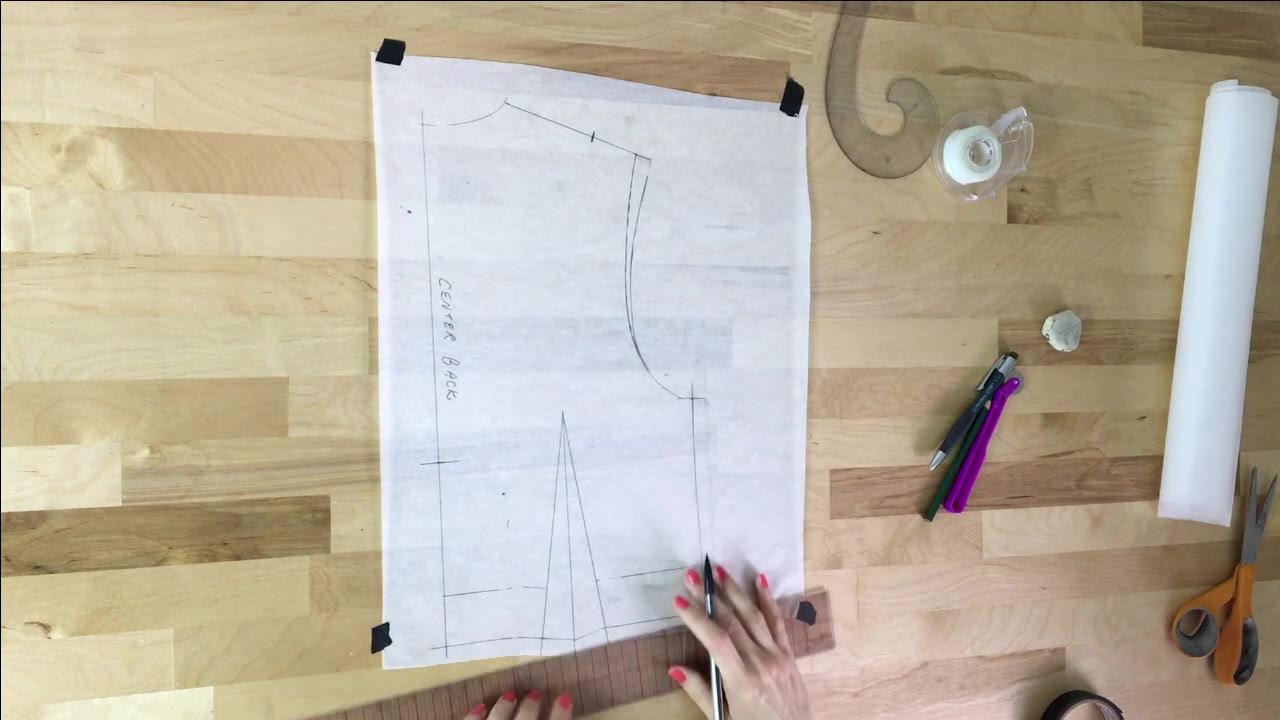 9. My blouse design has a curved open back. Before sketching out the shape of the final neckline, measure down the center back line and mark the depth of the neckline with a horizontal dash. Measure down the shoulder seam the same distance you did on the front, from the neckline in. Mark this point with a vertical dash. These two marks will serve as the start and end points of the final neckline curve. 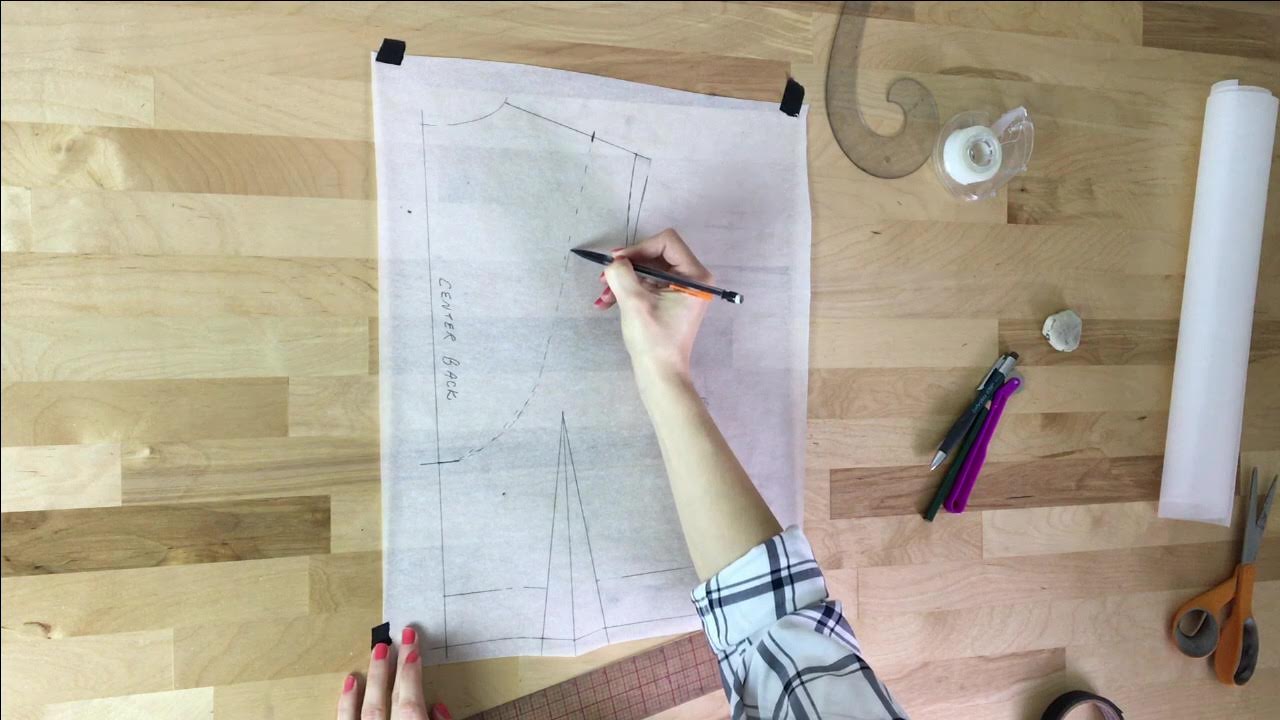 10. Staring at one of the marks (up to you which one), use a dash line to sketch the desired shape of the neckline. Mine blends into a more curved shape as it gets to the bottom. 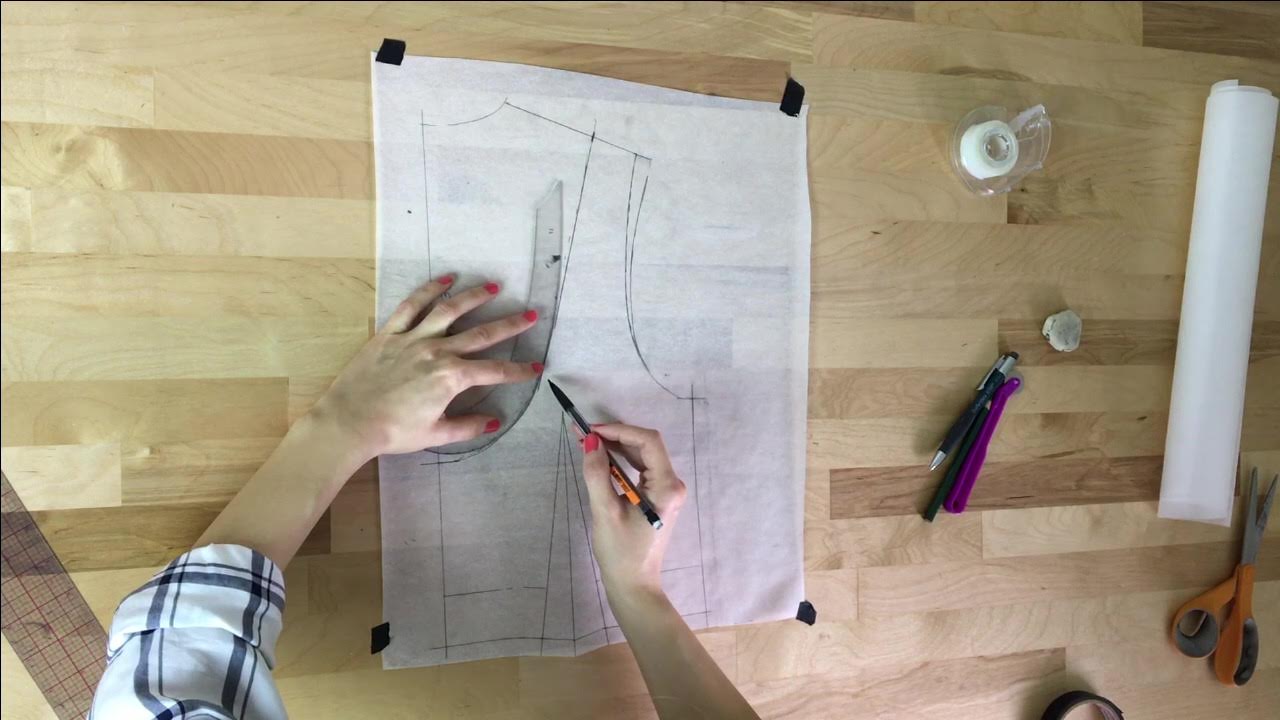 Use your french curve to smooth out the final neckline into a continuous line. 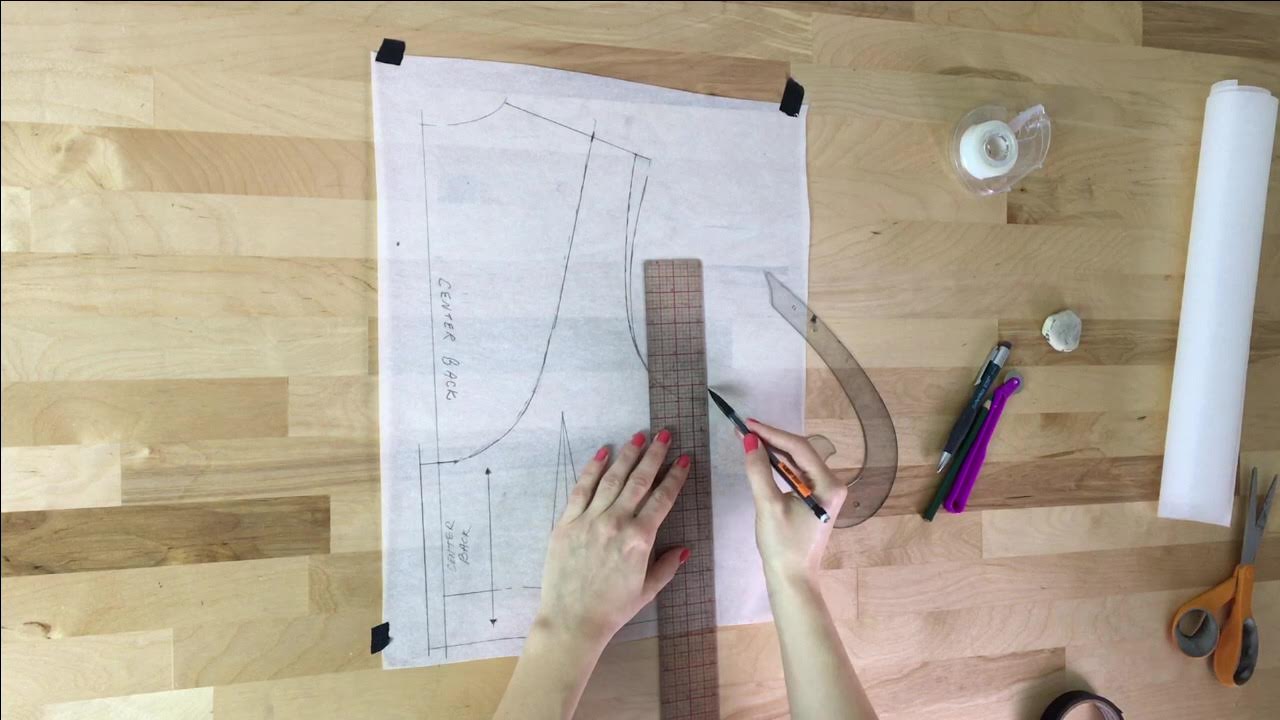 11. Now that the back blouse pattern is complete, use the clear plastic ruler to add the appropriate seam allowance to each edge. 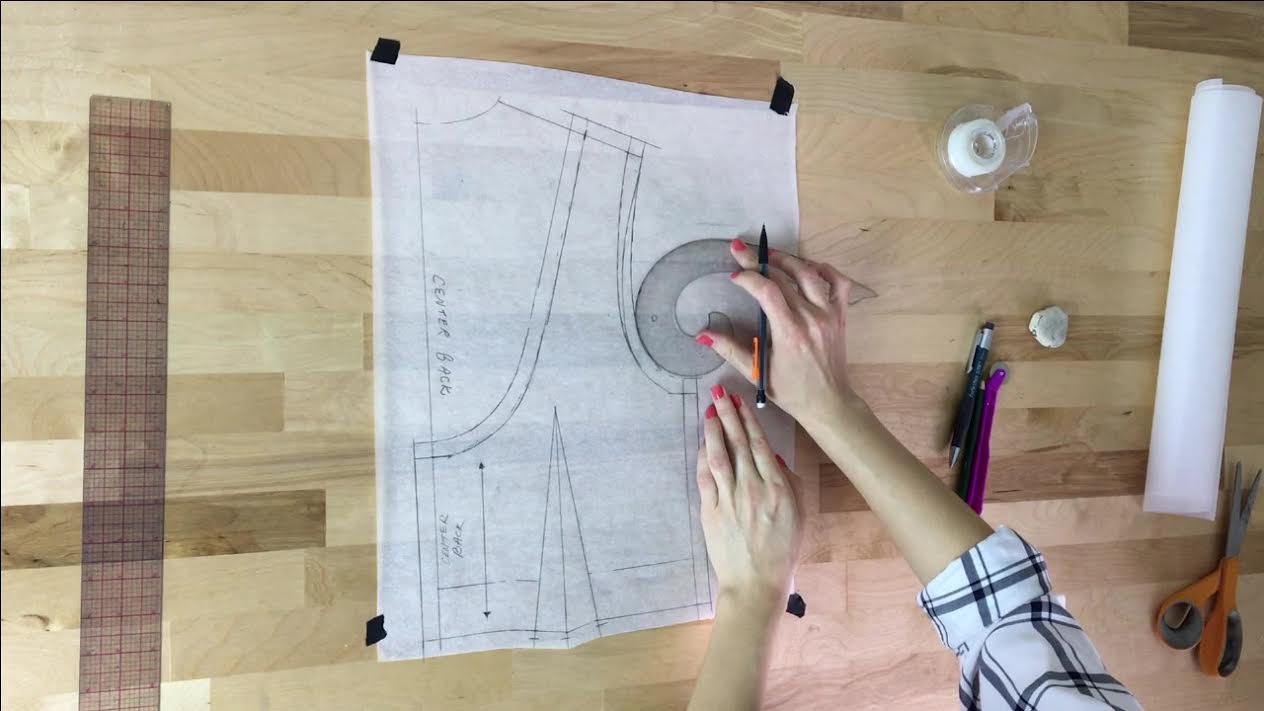 My blouse pattern has a seam allowance of 1/2" all around. When adding seam allowance to the curved edges of the neckline and armhole, I use a dash line first after which I smooth everything out with the french curve. Drafting The Back Lining Pattern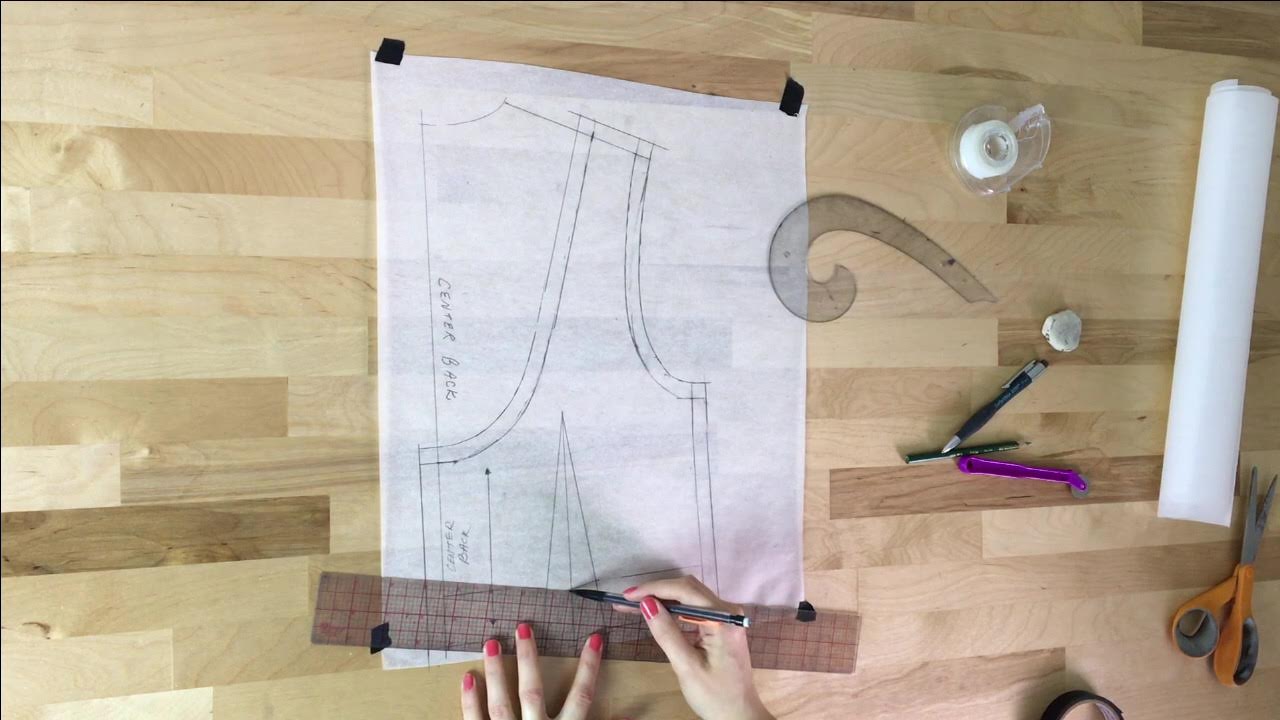 To draft the back lining pattern go back to the line corresponding to the top edge of the hem facing and connect all the missing pieces at the dart area as shown above. 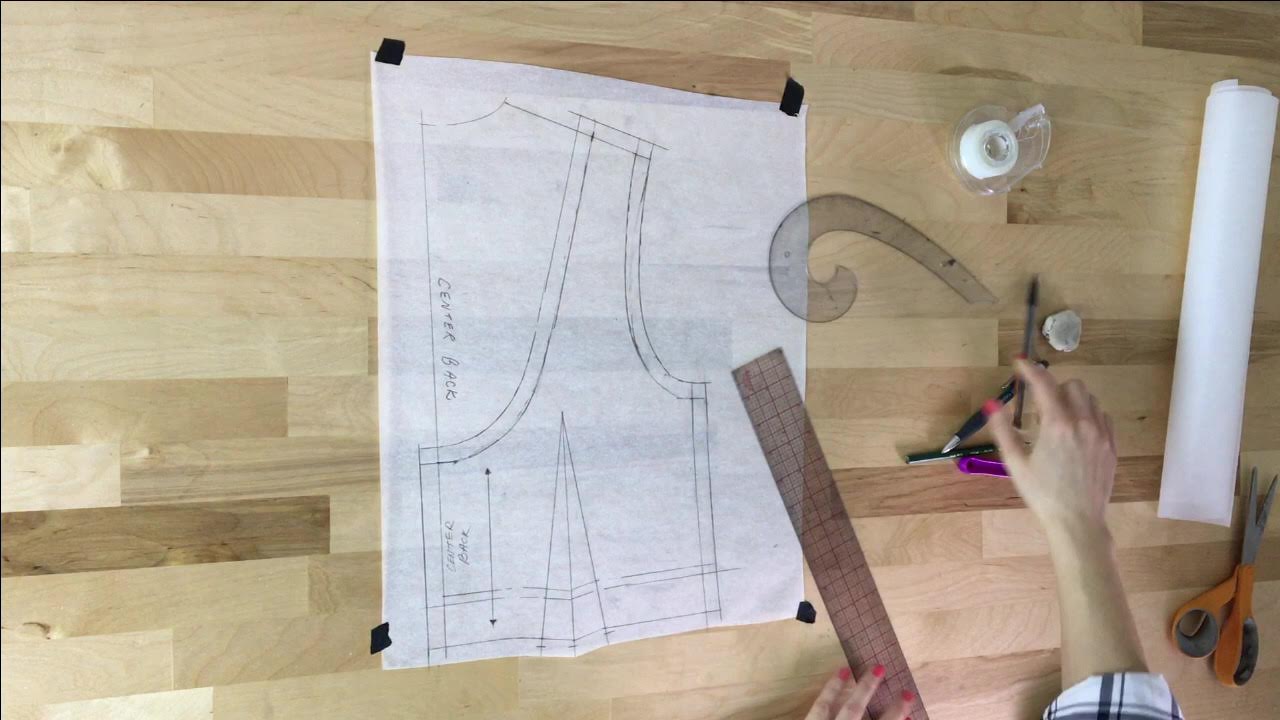 Remember that the lining layers should be slightly longer as it helps to prevent tension in the final garment. Add some ease to the bottom of the lining by measuring about 1/4-1/2" downward from the top edge of the hem facing. In the image above, the identical line marked underneath the hem facing edge will now become the lining's hemline. Above that, the lining will be identical to the blouse self. 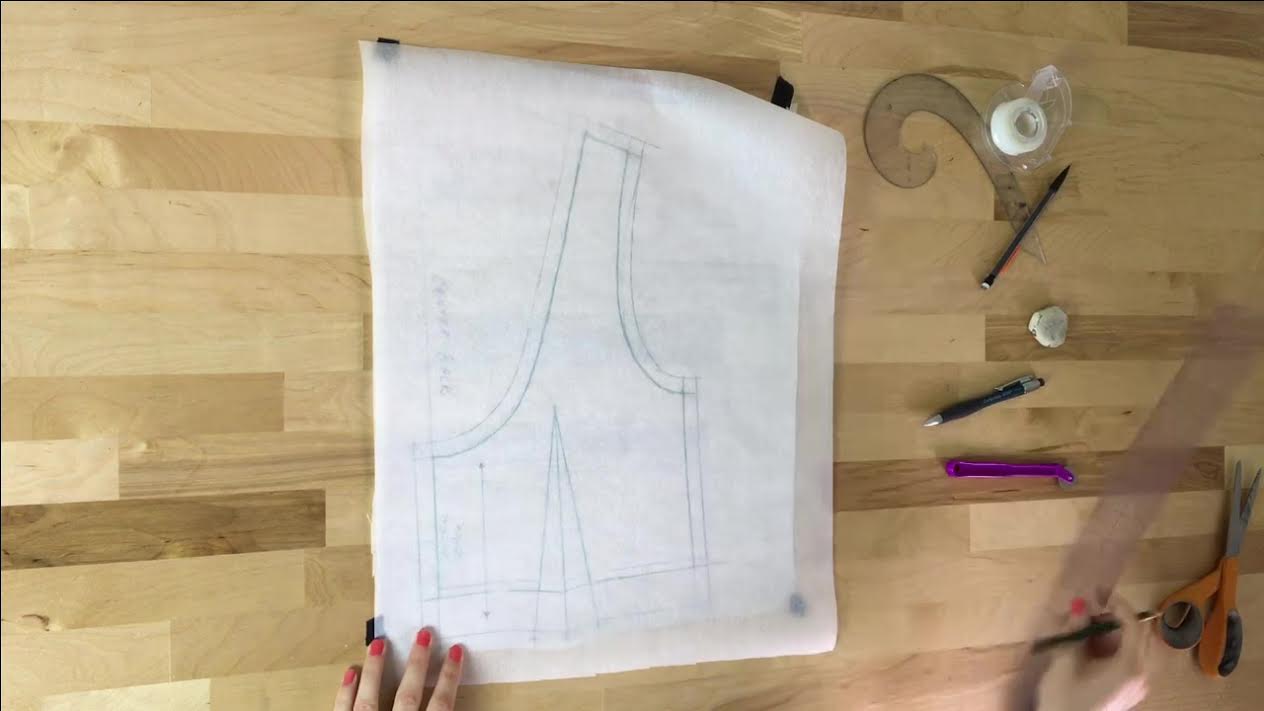 Transfer all lines corresponding to the lining onto a separate piece of paper. Using tracing paper is convenient as it allows you to see all the lines underneath. 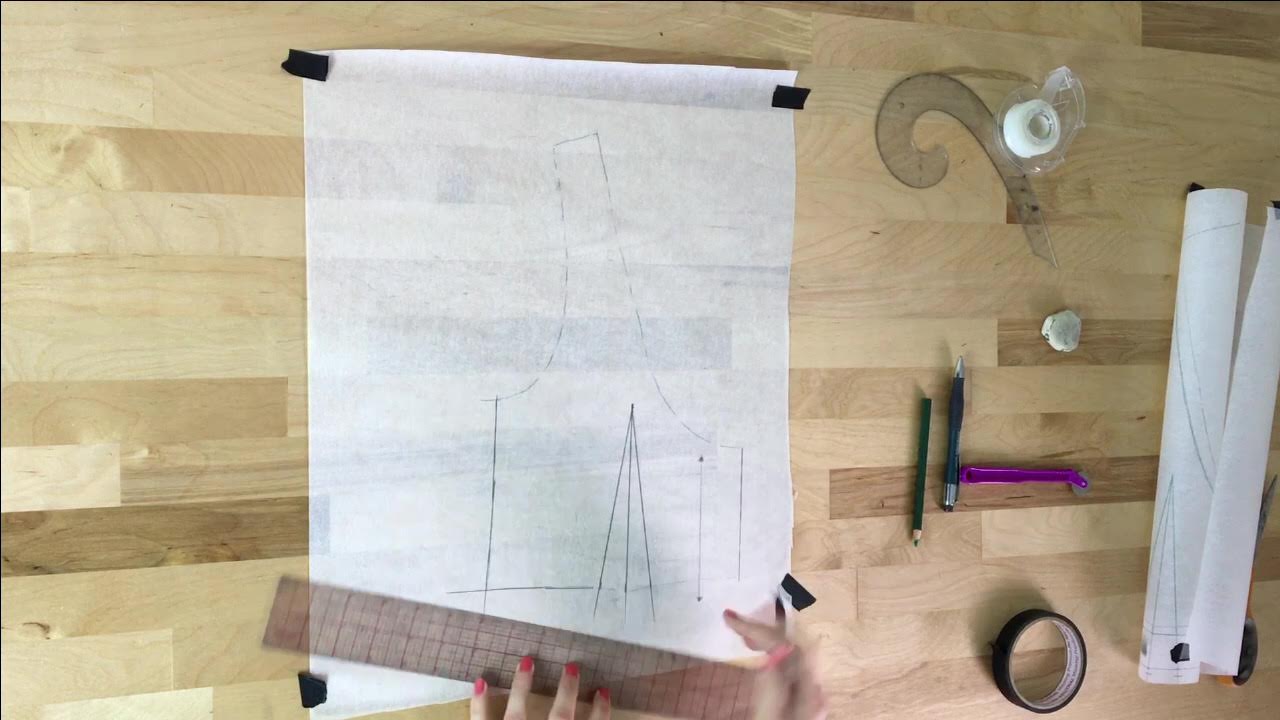 Complete the back lining pattern by connecting and smoothing out all the transfer lines. Don't forget to transfer the dart which in this instance, will be shorter in length than the blouse layer.  Once all the seam lines are transferred, add all appropriate seam allowance. Keep in mind that the lining edges that will be sewn to the blouse self piece (neckline and armholes) should have the same seam allowance. 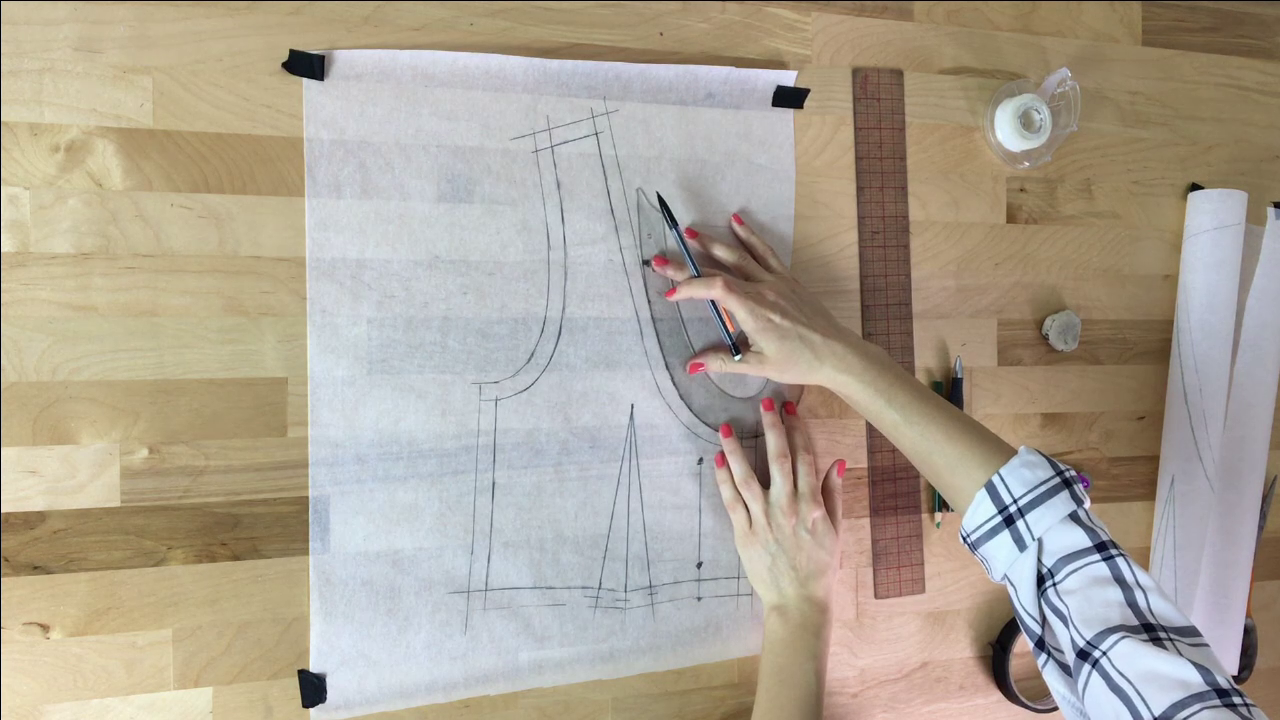 Once the seam allowance is added, cut the lining pattern carefully along its seam allowance edges. To complete the blouse pattern set, cut the back self (blouse layer) and hem facing patterns just as you did with the lining pattern above. Stay tuned for next week's sewalong video on cutting and sewing the blouse! Similar Tutorials You May Like: How To Make A Sewing Pattern For A Two-Piece Stand Collar How To Make A Pattern For A Round Neckline Facing Video Tutorial: How To Draft A Pattern For A Non-Stretch Skirt Waistband How To Make A Sleeveless Blouse Sewing Pattern From Scratch Video Tutorial: How To Draft A Sewing Pattern For An On-Seam Pocket How To Correctly Pin And Cut A Sewing Pattern 4 Ways To Lay Out A Sewing Pattern For Cutting: Understanding Fabric Grain And The Selvage Edge
1 Comment
Thank you for sharing your talent and expertise in this blog about how I could draft my own pattern of a fully lined cropped blouse. The detailed instructions and helpful images make it feel doable, even for someone with minimal sewing experience and is just starting in pattern making for fashion design like me. Also your writing style is so clear and easy to understand, thank you! Leave a Reply. |
The Blog:A journey into our design process, sewing tutorials, fashion tips, and all the inspiring people and things we love. 
Doina AlexeiDesigner by trade and dressmaker at heart. I spend most of my days obsessing over new fabrics and daydreaming new ideas. 
Sadie
Executive Assistant & Client Relations Manager Archives
November 2019
Categories
All

|

-
Sewing Tutorials
-
Basics
>
- Aligning Pattern Grainlines To Fabric
- Preparing Fabrics For Sewing
- Pinning Sewing Patterns To Fabric
- Placing Sewing Patterns On Fabric For Cutting
- Rotary Cutters or Fabric Scissors?
- Cutting The Sewing Patterns
- What Are Notches And How To Use Them In The Sewing Process
- Transferring Notches From Pattern To Fabric
- Transferring Seamlines to Fabric
- Staystitching
- Backstitching: A Complete Guide
- Hand Basting: A Complete Guide
- Sewing Continuous Bias Binding
- Darts >
-
Sewing Seams
>
- The Basics Of Seams And Seam Allowance
- How To Sew A Straight Seam
- Sewing Curved Seams
- Sewing Corner Seams
- Trimming And Grading Seam Excess
- Notching/Clipping Seam Allowance for Tension Release
- Sewing Topstitched Seams
- Sewing Corded Seams
- Sewing A Slot Seam
- Sewing A Gathered Seam
- Sewing Bias Seams
- Sewing Seams With Ease
- Sewing Seams With Crossing Seamlines
- Sewing Unlike Fabric Seams
- How To Iron Seams: Ironing Tools And Conventions
- Sewing With Knit Fabrics
- Understanding Stitch Length And Tension
- Sewing Unique Fabric Seams
-
Seam Finishes
>
- Seam Finishing Techniques - Overview
- Applying A Pinked Seam Finish
- Applying A Bias Bound Seam Finish
- Serging And Zigzag Seam Finishes
- Sewing A Self-Bound Seam Finish
- Sewing A French Seam Finish
- Sewing A Hong Kong Seam Finish
- Sewing A Mock French Seam Finish
- Sewing A Turned-and-Stitched Seam Finish
- Sewing Overcast Hand-Applied Seam Finishes
- Sewing A Flat Felled Seam
- Sewing A Hairline Seam Finish
-
Hem Finishes
>
- Garment Hem Finishes: Overview
- Sewing A Double Fold Hem Finish
- Sewing A Single Fold Hem Finish
- Sewing Bound Hem Finishes
- Sewing An Exposed Double Layer Bound Hem
- Sewing A Folded-Up Bound Hem with Pre-folded Binding
- Sewing A Hong Kong Hem Finish
- Sewing A Band Hem Finish
- Sewing A Bias Faced Hem Finish
- Sewing A Twill Tape Hem Finish
- Sewing A Rolled Hem Finish
- Sewing A Shaped Hem Facing
- Using Fusible Hem Tape And Webbing
- Finishing A Lace Fabric Hem
- Finishing A Leather Hem
- Sewing Faced Hem Corners
- How To Finish Lining At The Hem
- Finishing Fabric Corners by Mitering >
- Interfacing A Hemline: Lined And Unlined Examples
-
Sewing Pockets
>
- Curved Patch Pocket With Flap
- Unlined Square Patch Pockets
- Lined Patch Pockets: Two Ways
- Extension On-Seam Pockets
- Separate On-Seam Pocket
- Front Hip Pockets
- Bound Double Welt Pocket
- Double Welt Pocket With Flap
- Self-Welt Pocket (Using Single Fabric Layer)
- Slanted Welt Pocket (Hand-Stitched)
- Faced Slash Pockets: Overview >
-
Sewing Zippers
>
- Sewing Zippers: General Information
- Sewing A Centered Zipper
- Sewing A Lapped Zipper
- Sewing An Invisible Zipper
- Sewing A Fly Front Zipper
- Sewing A Closed-End Exposed Zipper (No Seam)
- Sewing An Exposed Separating Zipper
- Sewing Hand Stitched Zipper Applications
- Sewing A Zipper Underlay
- Sewing A Placket-Enclosed Separating Zipper
- Sleeveless Finishes >
-
Neckline Finishes
>
- Sewing A Neck Shaped Facing
- Sewing An All-In-One Neck Facing
- Neck And Garment Opening Combination Facings >
- Sewing A Bias Faced Neckline Finish
- Sewing A Band Neckline Finish
- Bound Neckline Finishes: Overview >
- Sewing A Semi-Stretch Strip Band Neckline
- Ribbed Neck Band And Classic Turtleneck
- Decorative Neckline Finishes >
- Finishing Facing Edges >
-
Extras
>
- A Complete Guide on Interfacing
- Sewing Bound Spaghetti Straps
- Sewing Spaghetti Straps To A Faced Neckline
- Sewing Ruffles: Overview
- Patterning And Sewing A Circle Ruffle
- Sewing A Gathered Heading Ruffle
- Sewing Double Layer Gathered Ruffles
- Sewing A Gathered Ruffle Into A Seam
- Sewing A Gathered Ruffle To A Fabric Edge
- Sewing A Fabric Surface Slit
- Sewing A Slit Seam
- Hand-Applied Straight Stitches
- Hand-Applied Blind Stitches
- Hand-Applied Overedge Stitches
- Hand-Applied Tack Stitches
- Hand-Applied Decorative Stitches
-
Basics
>
- Custom Bridal
- Custom Apparel
- About
- Blog
 RSS Feed
Services |
Company |
|
