|
Optimizing your fabric surface area during the cutting process is perhaps one of the most important concepts in garment manufacturing. We may not worry much about it when sewing at home, but the truth is, using the least amount of fabric will not only save money but will also minimize waste. I don’t know about you, but if I don’t optimize my pattern alignment for least amount of fabric use, I end up with awkwardly shaped remnants that usually find their way into the trash bin. Every little bit contributes to more waste and more money down the drain.
Luckily, there are techniques to habitually introduce at home which will allow you not only to cut down on the yardage purchased but also minimize the amount of unusable pieces left after the sewing patterns have been fully cut. These are concepts used on the manufacturing level and should technically be considered official rules for cutting and aligning fabric in the dressmaking process.
Correct pattern alignment is dependent on two important factors: selvage edge and the patterns’ grainline. These two elements work together to guide in the proper alignment scheme. Your critical thinking comes into play when putting all the pattern pieces next to each other such that they:
1. Are as close as possible to the selvage edge.
2. Are aligned as close as possible to one another in accordance with the patterns’ grainline.
3. For cut on fold type patterns, the fabric is folded just enough to account for the sewing pattern width (edge to edge) and not more.
If you enjoy puzzles, you will definitely love the pattern cutting portion of the sewing process. In the example below, I will demonstrate each one of the three concepts described above using a set of surplice style dress patterns. By the way, a full sewing tutorial on this surplice ruffle dress will be up on the blog soon!
This dress style is a great example to use as it incorporates both cut on fold pattern pieces and full sewing patterns. It also includes oddly shaped patterns like those of a circle ruffle and all-in-one facing. As noted, all of these pieces should be aligned and cut in concordance with the grainlines regardless of what shapes they are. Everything will be much clearer as we go through the steps below so let’s get started!
As mentioned above, my set of patterns includes both cut on fold and full patterns. It is really up to you which ones to start with. I personally always like to cut my full patterns first.
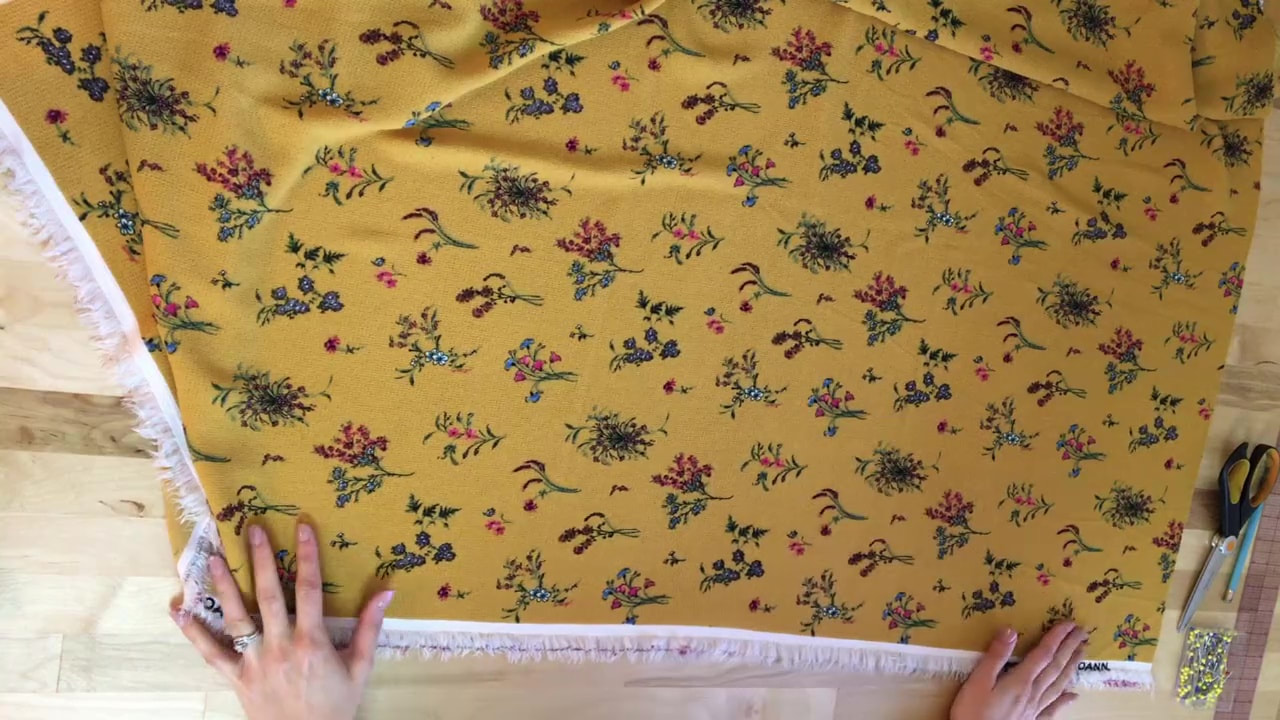
First, align your fabric such that the selvage edge is laying parallel to the length of your table.

Find the pattern that has the straightest edges and align it into the right-most fabric corner as shown above.
The pattern’s vertical side edge closest to you should be as close as possible to the selvage edge. The pattern’s top should align as close as possible to the fabric’s top edge. You also need to keep into account the fabric’s grainline in relation to the selvage edge. The rule is that a lengthwise (vertical) grain should be perfectly parallel to the selvage edge while a crosswise grain (horizontal) should be positioned perpendicular to the selvage. My patterns only have lengthwise grain lines thus all of them should be positioned perfectly parallel to the fabric's selvage. 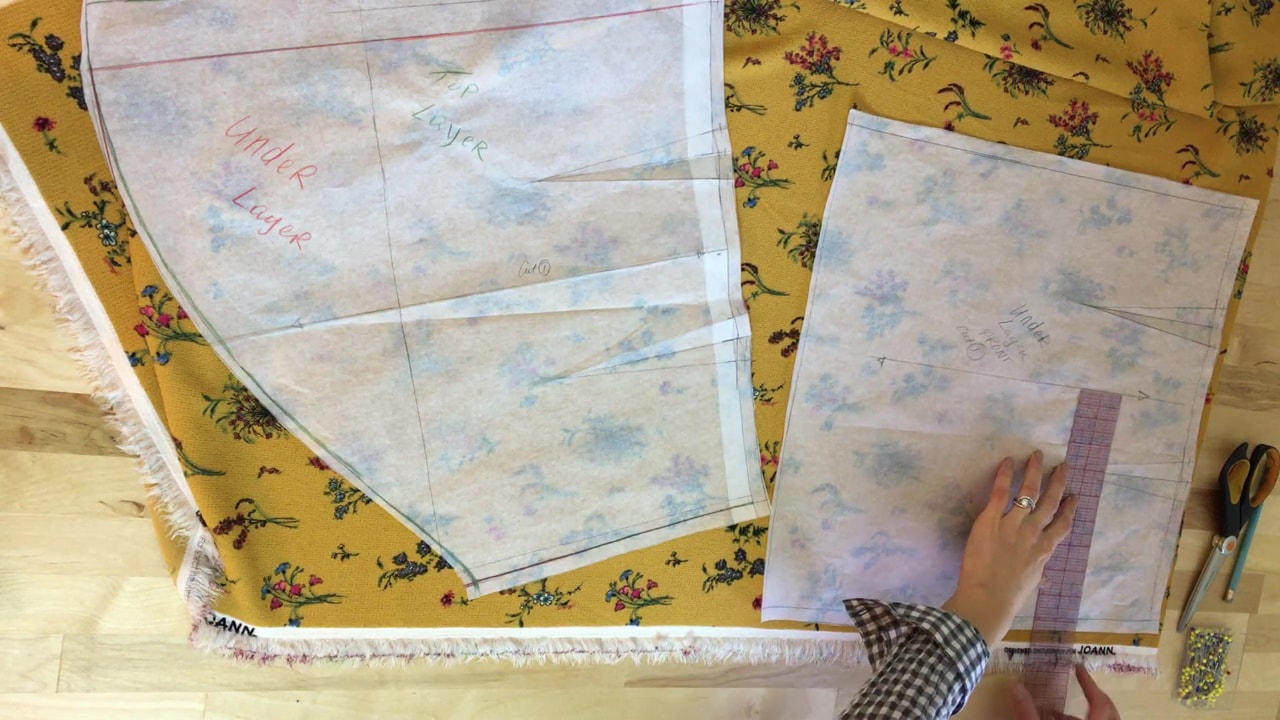
Use a ruler or measuring tape to position the grainline in relation to the selvage edge as shown.
I like to use my 18-inch clear plastic ruler for this step as it allows me the transparency and precision I need in the process. If you don’t have one of these rulers, I suggest you get one! They are perfect for pattern drafting providing lightness and flexibility for a convenient way to quickly measure edges in the cutting and sewing process.
Ok, now that your first pattern is perfectly aligned in the corner, pin it along the seam allowance edges.

Now that you set the wheels in motion, use the bottom edge of the first pattern as a guide to align the next full pattern piece. For fabric efficiency, align the second pattern’s top edge right below the horizontal hemline of the first pattern as shown above.
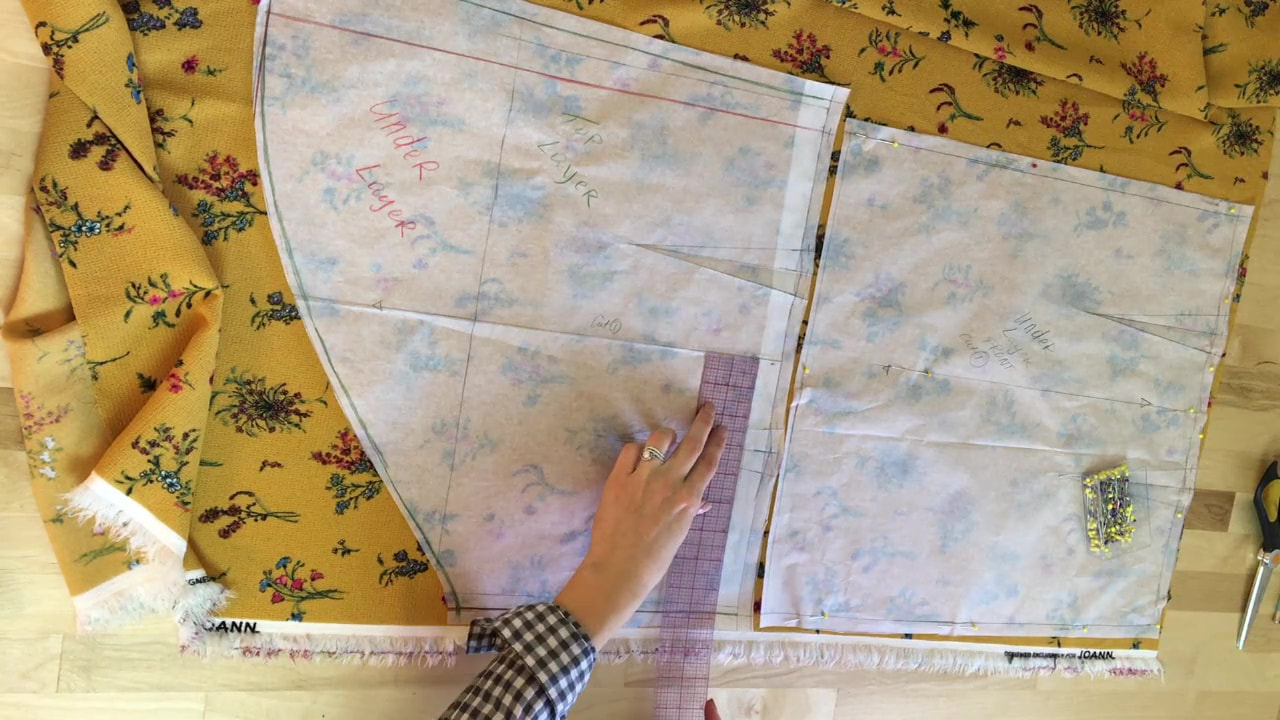
Of course, you have to make sure the grainline is perfectly parallel to the selvage edge, while the pattern itself is as close as possible to the selvage itself. As you did for the first pattern, use a ruler to correctly position the pattern.
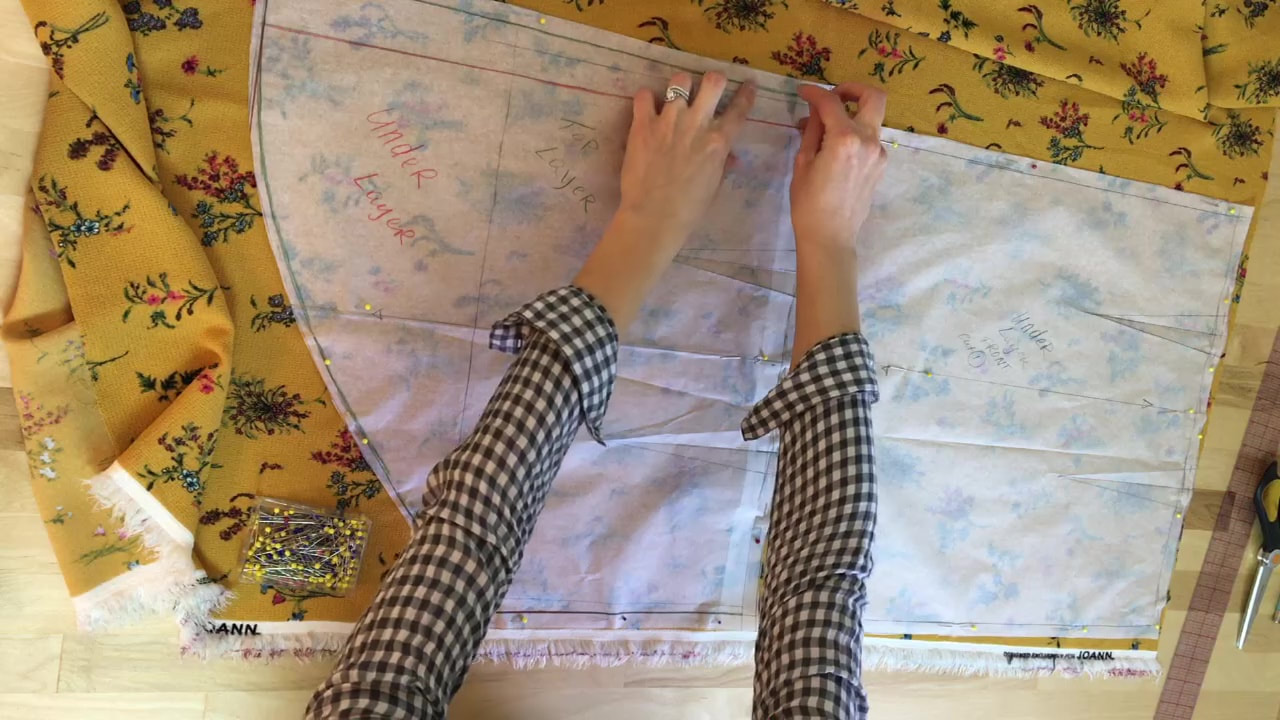
Pin the second pattern along the seam allowance edges.
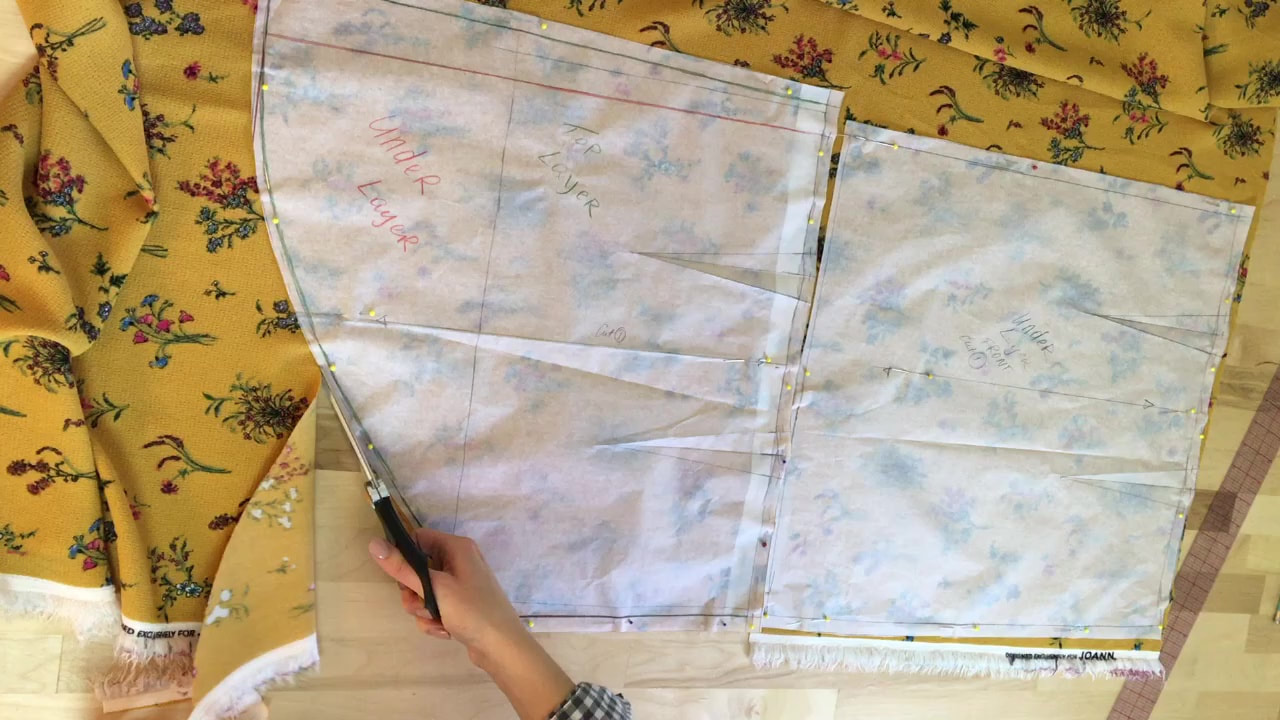
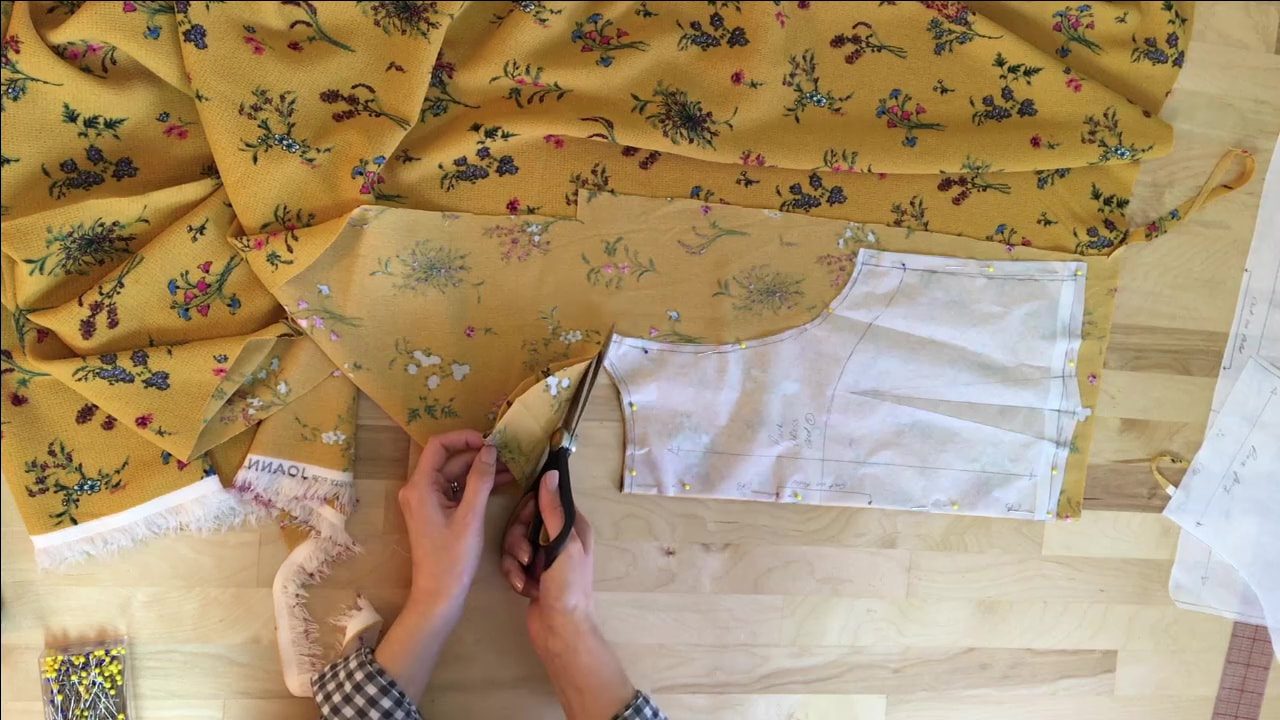
Start cutting your patterns carefully using your fabric scissors.
The bottom edge of my second pattern is asymmetric; thus once cut, it will leave a jagged cut edge in the remaining fabric piece. As you’ll see below, you can use this triangular shape to cut the additional patterns that fit within that shape. I encourage you to do so anytime you can- not only will you save fabric, you’ll also be able to use up awkwardly shaped fabric extensions which would otherwise most likely end up in the trash.
Before removing the pins, don’t forget to transfer all notches and additional pattern markings (such as darts) onto the fabric.
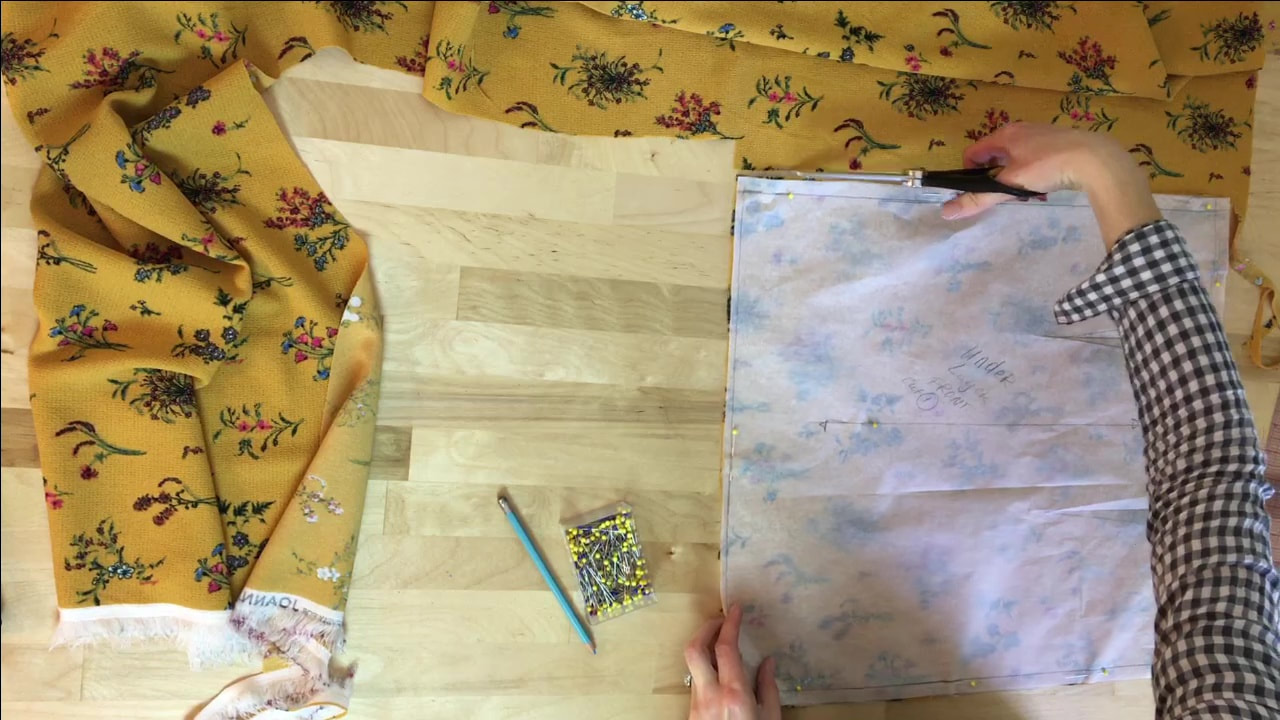
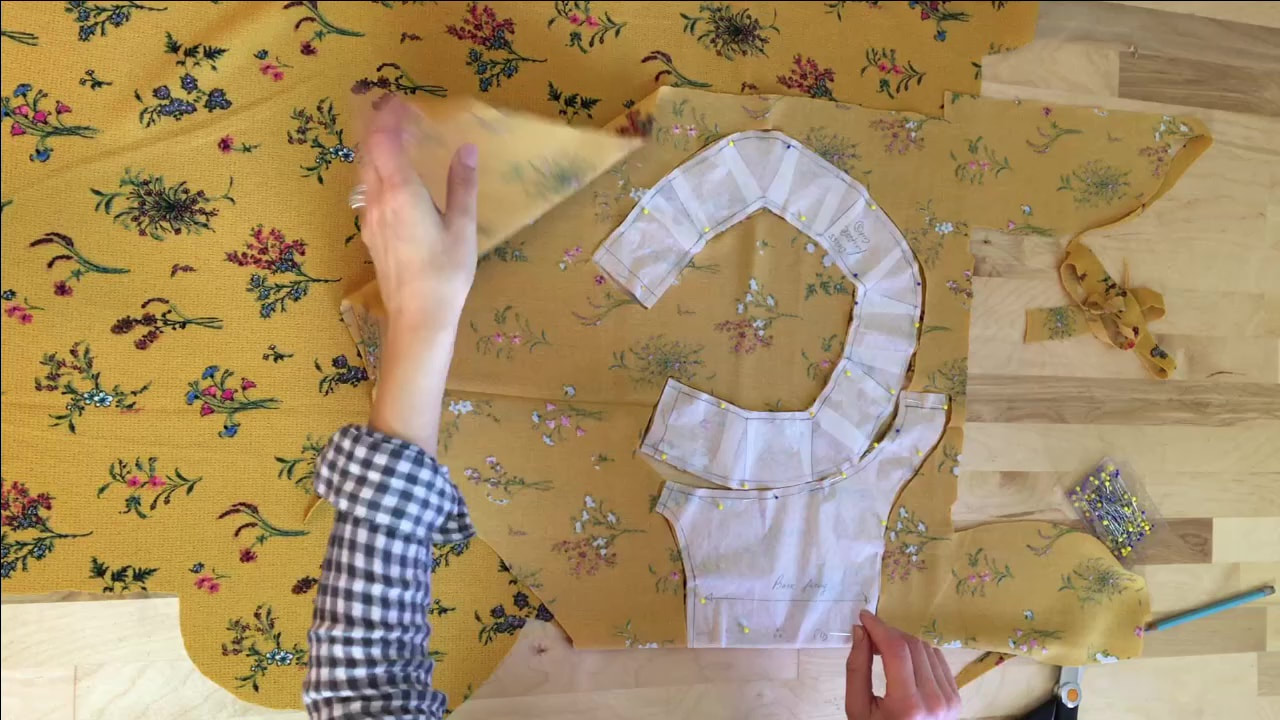
Moving on, the same concepts described above apply to cutting cut on fold style patterns. Fold the fabric parallel to the selvage edge, but only enough to account for the width of the pattern- not more. The biggest downfall of cutting a half pattern is folding the fabric too much. Once cut, you will end up with an extra strip of fabric that can’t really be used for anything else but adding to the waste issue.
Align the sewing pattern to the fabric's fold and carefully cut through both fabric layers as shown.

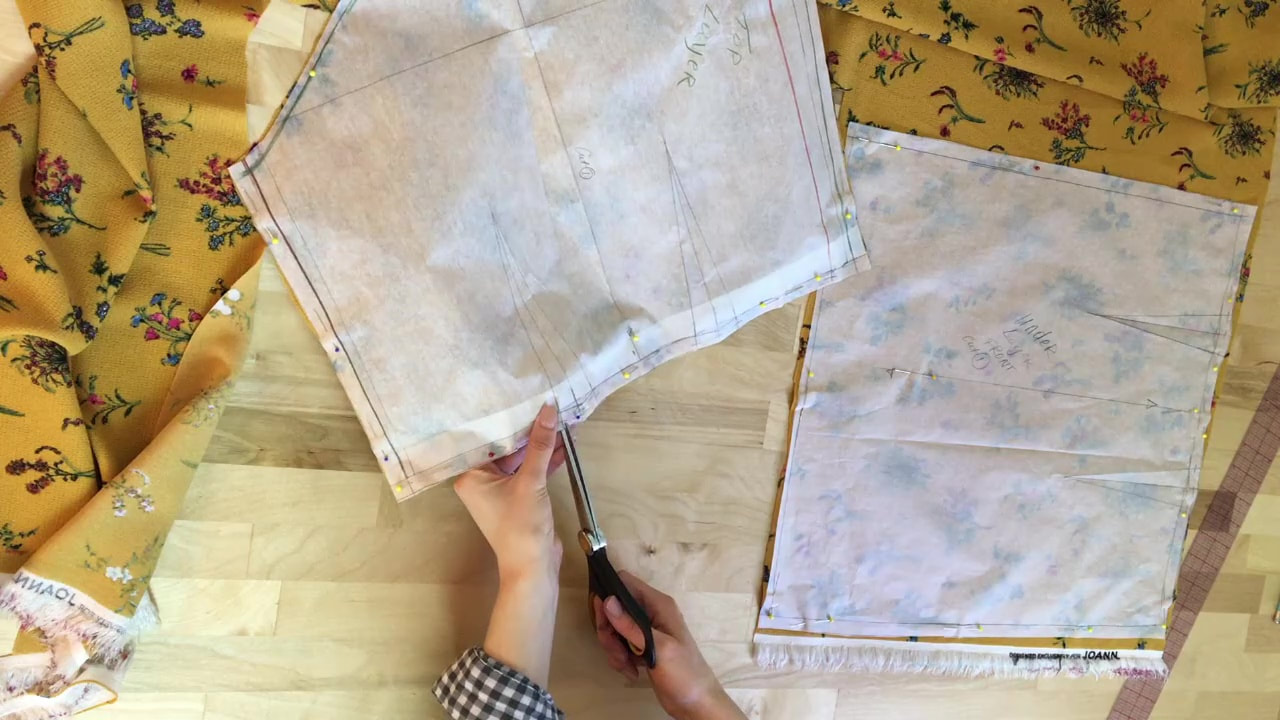
Instead of starting below my previously cut patterns, I went back to the top and used the remainder of the fabric’s width to cut these fold patterns. Since I positioned my full patterns so close to the edges, I had just enough fabric to use for cutting the rest of the fold patterns. Had I not cut the first two patterns efficiently, I would not have had enough to account for this remainder.
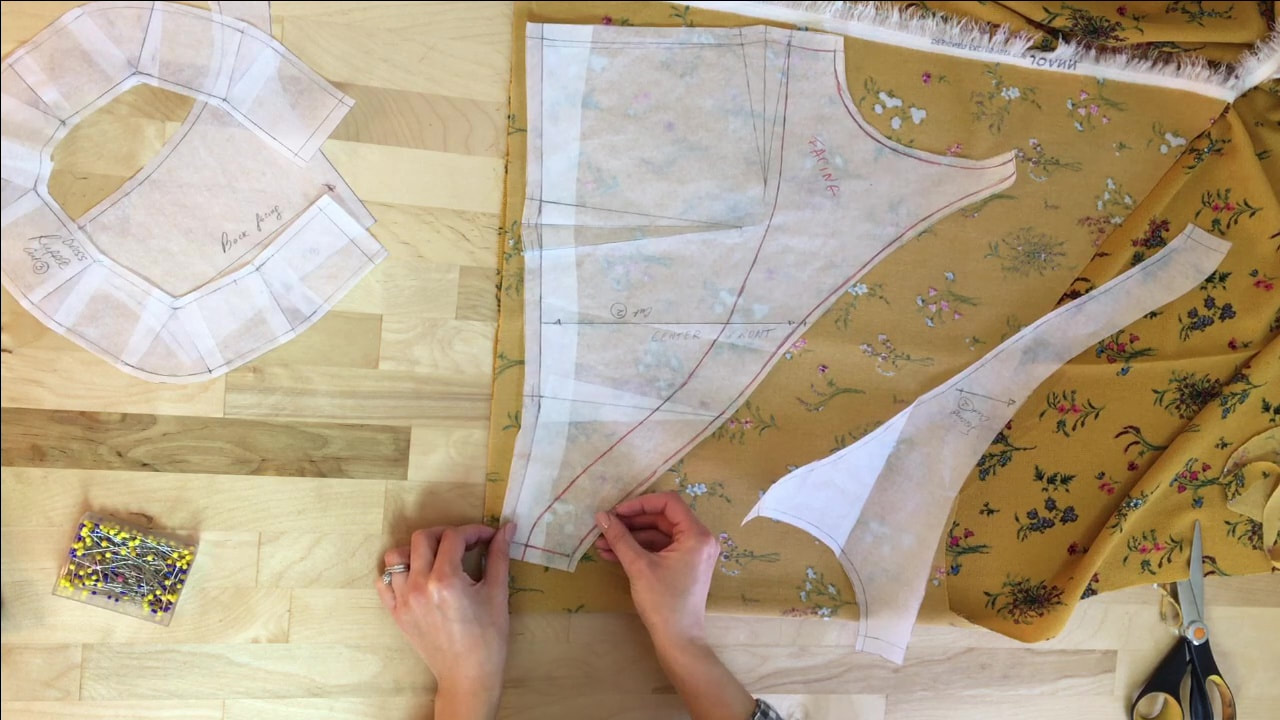
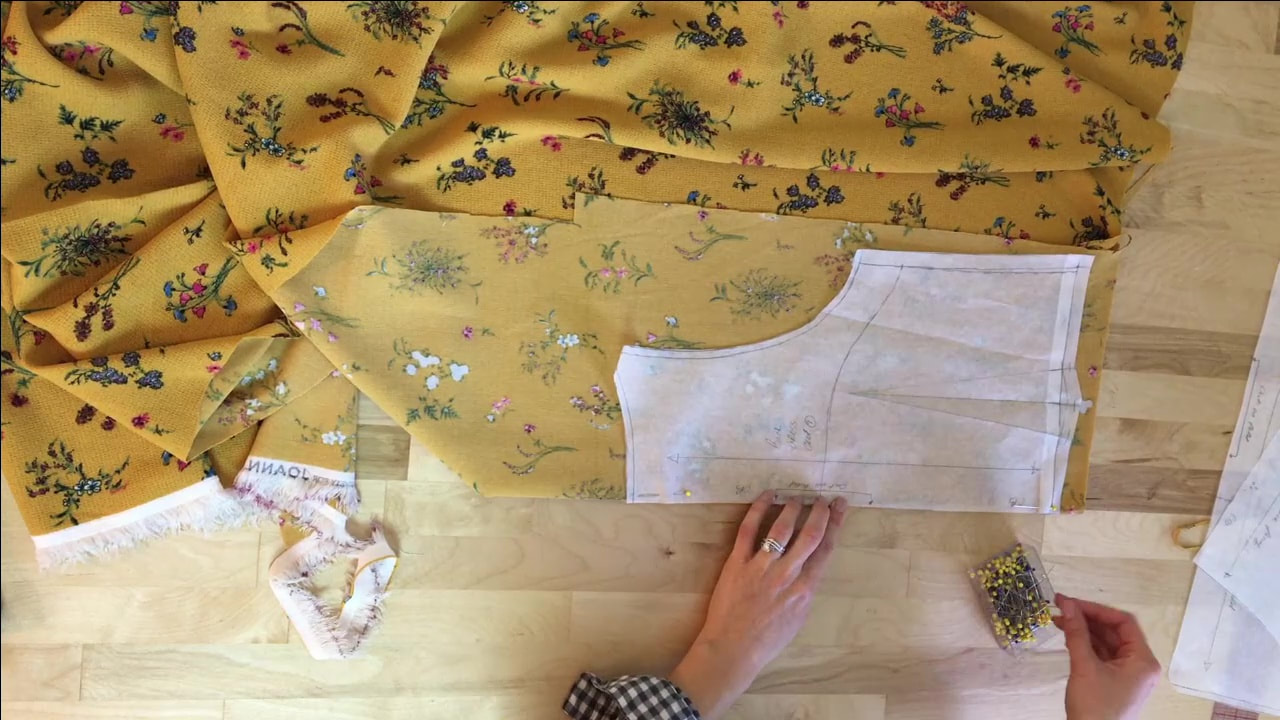
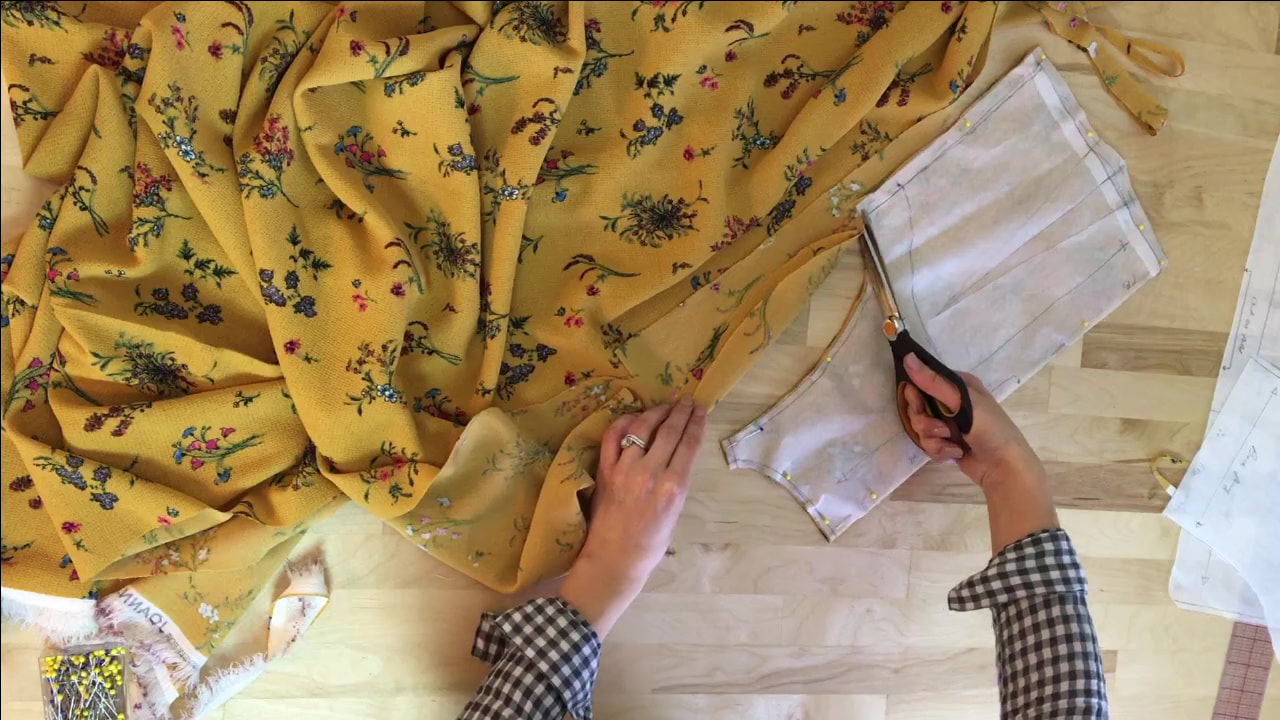
I saved the fun for last by leaving the most uniquely shaped, smaller patterns to be cut at the end. This is the instance where you can use the fabric’s remaining jagged edges to accommodate the unique shapes of your remaining patterns.
I used the fabric portion featuring the angular extension to cut the front surplice pieces. I folded this angular edge over such that the fabric face sides are touching and aligned both the surplice pattern piece and its corresponding facing to fit within the shape of the fabric. By the way, the reason the fabric is folded is because I need two identical, mirror images of each pattern piece. Again, even when aligning these patterns with the angular shaped fabric layers, you still have to account for grainline. Thus, if the shapes of the patterns match up when arranged edge to edge, they will still not be properly cut if the grainlines are not actually parallel to the selvage edge. 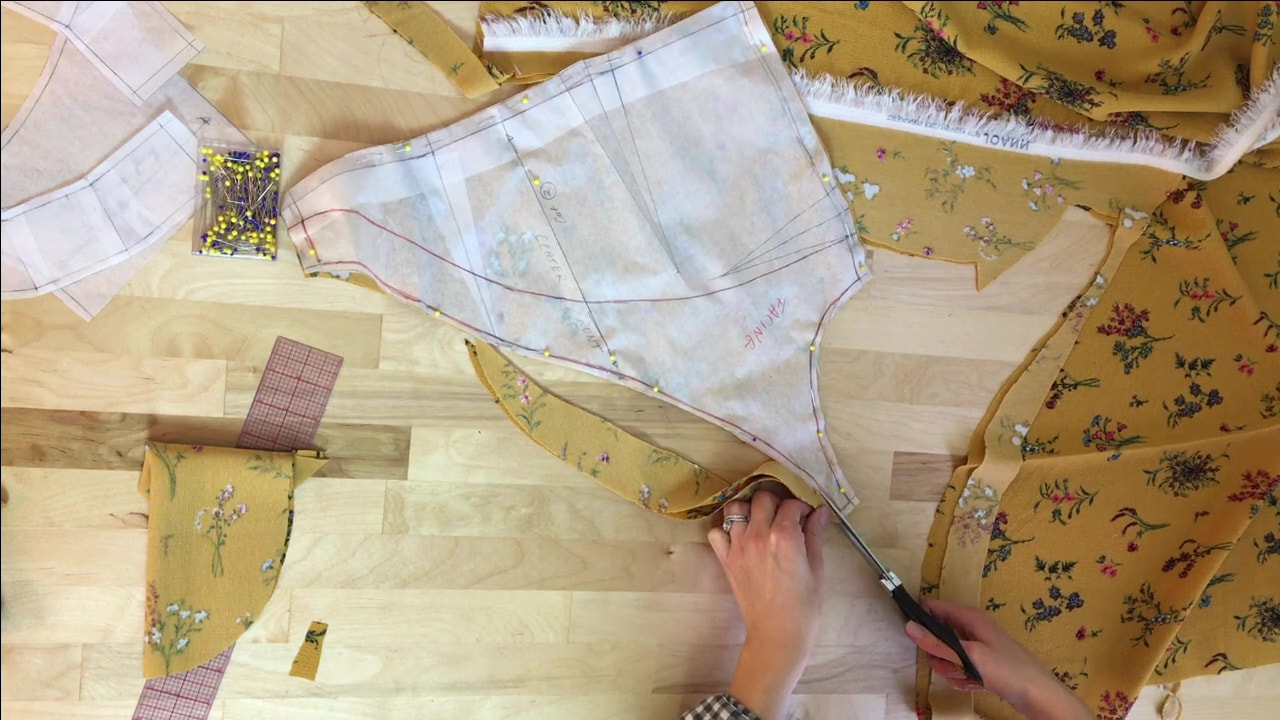
Once you have the patterns arranged most efficiently taking into account the grain lines and selvage factor, pin and cut the fabric pieces carefully.
To cut my circle ruffle pattern and the cut on fold back facing, I used the other end of my fabric featuring another uneven edge. Fitting within this uniquely shaped portion, the curved patterns can be cut to save as much fabric as possible!
A few notes on actually cutting the fabric pieces:
- Cut as smoothly and as close to the pattern edge as possible. Being careful during the cutting process will ensure a much easier sewing process with all seam edges matching perfectly. Cutting sewing patterns is especially difficult along very curved edges (such as my circle ruffle pattern shown above). I suggest you invest in a good pair of fabric scissors! I find that having a good set of working scissors can make the sewing process so much more enjoyable. I’ve tried dozens of different fabric scissors and finally settled for this pair:
They have lasted quite a long time and are very comfortable to use on a variety of different fabrics.
- Pinning the patterns along the edge, within the seam allowance, will not only ensure the patterns lay flatter during the cutting process but will also protect the fabric surface that is visible on the face of the garment from potential pin damage.
- Carefully shift the pinned pattern and fabric if needed in the cutting process. You’ll find that especially with larger pattern pieces, you may need to shift the entire fabric position to get a better cutting angle.
If you get into the habit of efficiently cutting your sewing patterns, you’ll find that not only will you be saving money you will also become more environmentally conscious contributing less waste in the long run!
We never recommend products that have not been tried and tests by us. To sustain writing these weekly tutorials, a small profit percentage is withheld from all Amazon purchases of products suggested in this post.
Similar Tutorials You May Like:
4 Ways To Lay Out A Sewing Pattern For Cutting: Understanding Grain And The Selvage Edge Cutting A Sewing Pattern On Fold Want To Learn How To Sew And Make Your Own Patterns? These Are The Basic Supplies You Need To Have Sewing Pin Basics: Types Of Sewing Pins Used In Dressmaking Types of Woven Fabrics You Should Know As A Sewing Beginner
1 Comment
|
The Blog:A journey into our design process, sewing tutorials, fashion tips, and all the inspiring people and things we love. 
Doina AlexeiDesigner by trade and dressmaker at heart. I spend most of my days obsessing over new fabrics and daydreaming new ideas. 
Sadie
Executive Assistant & Client Relations Manager Archives
November 2019
Categories
All

|

-
Sewing Tutorials
-
Basics
>
- Aligning Pattern Grainlines To Fabric
- Preparing Fabrics For Sewing
- Pinning Sewing Patterns To Fabric
- Placing Sewing Patterns On Fabric For Cutting
- Rotary Cutters or Fabric Scissors?
- Cutting The Sewing Patterns
- What Are Notches And How To Use Them In The Sewing Process
- Transferring Notches From Pattern To Fabric
- Transferring Seamlines to Fabric
- Staystitching
- Backstitching: A Complete Guide
- Hand Basting: A Complete Guide
- Sewing Continuous Bias Binding
- Darts >
-
Sewing Seams
>
- The Basics Of Seams And Seam Allowance
- How To Sew A Straight Seam
- Sewing Curved Seams
- Sewing Corner Seams
- Trimming And Grading Seam Excess
- Notching/Clipping Seam Allowance for Tension Release
- Sewing Topstitched Seams
- Sewing Corded Seams
- Sewing A Slot Seam
- Sewing A Gathered Seam
- Sewing Bias Seams
- Sewing Seams With Ease
- Sewing Seams With Crossing Seamlines
- Sewing Unlike Fabric Seams
- How To Iron Seams: Ironing Tools And Conventions
- Sewing With Knit Fabrics
- Understanding Stitch Length And Tension
- Sewing Unique Fabric Seams
-
Seam Finishes
>
- Seam Finishing Techniques - Overview
- Applying A Pinked Seam Finish
- Applying A Bias Bound Seam Finish
- Serging And Zigzag Seam Finishes
- Sewing A Self-Bound Seam Finish
- Sewing A French Seam Finish
- Sewing A Hong Kong Seam Finish
- Sewing A Mock French Seam Finish
- Sewing A Turned-and-Stitched Seam Finish
- Sewing Overcast Hand-Applied Seam Finishes
- Sewing A Flat Felled Seam
- Sewing A Hairline Seam Finish
-
Hem Finishes
>
- Garment Hem Finishes: Overview
- Sewing A Double Fold Hem Finish
- Sewing A Single Fold Hem Finish
- Sewing Bound Hem Finishes
- Sewing An Exposed Double Layer Bound Hem
- Sewing A Folded-Up Bound Hem with Pre-folded Binding
- Sewing A Hong Kong Hem Finish
- Sewing A Band Hem Finish
- Sewing A Bias Faced Hem Finish
- Sewing A Twill Tape Hem Finish
- Sewing A Rolled Hem Finish
- Sewing A Shaped Hem Facing
- Using Fusible Hem Tape And Webbing
- Finishing A Lace Fabric Hem
- Finishing A Leather Hem
- Sewing Faced Hem Corners
- How To Finish Lining At The Hem
- Finishing Fabric Corners by Mitering >
- Interfacing A Hemline: Lined And Unlined Examples
-
Sewing Pockets
>
- Curved Patch Pocket With Flap
- Unlined Square Patch Pockets
- Lined Patch Pockets: Two Ways
- Extension On-Seam Pockets
- Separate On-Seam Pocket
- Front Hip Pockets
- Bound Double Welt Pocket
- Double Welt Pocket With Flap
- Self-Welt Pocket (Using Single Fabric Layer)
- Slanted Welt Pocket (Hand-Stitched)
- Faced Slash Pockets: Overview >
-
Sewing Zippers
>
- Sewing Zippers: General Information
- Sewing A Centered Zipper
- Sewing A Lapped Zipper
- Sewing An Invisible Zipper
- Sewing A Fly Front Zipper
- Sewing A Closed-End Exposed Zipper (No Seam)
- Sewing An Exposed Separating Zipper
- Sewing Hand Stitched Zipper Applications
- Sewing A Zipper Underlay
- Sewing A Placket-Enclosed Separating Zipper
- Sleeveless Finishes >
-
Neckline Finishes
>
- Sewing A Neck Shaped Facing
- Sewing An All-In-One Neck Facing
- Neck And Garment Opening Combination Facings >
- Sewing A Bias Faced Neckline Finish
- Sewing A Band Neckline Finish
- Bound Neckline Finishes: Overview >
- Sewing A Semi-Stretch Strip Band Neckline
- Ribbed Neck Band And Classic Turtleneck
- Decorative Neckline Finishes >
- Finishing Facing Edges >
-
Extras
>
- A Complete Guide on Interfacing
- Sewing Bound Spaghetti Straps
- Sewing Spaghetti Straps To A Faced Neckline
- Sewing Ruffles: Overview
- Patterning And Sewing A Circle Ruffle
- Sewing A Gathered Heading Ruffle
- Sewing Double Layer Gathered Ruffles
- Sewing A Gathered Ruffle Into A Seam
- Sewing A Gathered Ruffle To A Fabric Edge
- Sewing A Fabric Surface Slit
- Sewing A Slit Seam
- Hand-Applied Straight Stitches
- Hand-Applied Blind Stitches
- Hand-Applied Overedge Stitches
- Hand-Applied Tack Stitches
- Hand-Applied Decorative Stitches
-
Basics
>
- Custom Bridal
- Custom Apparel
- About
- Blog

 RSS Feed
Services |
Company |
|
