|
Last week I showed you how to draft a sewing pattern for a circle ruffle; Today, I’ll walk you through the process of actually sewing it! The ruffle style described below is part of a summer dress featuring a draped floral fabric and surplice structure on both top and bottom portions (full sewalong to come!).
I’ve had a bit of an obsession with ruffles this summer but courtesy of a hectic schedule, I never actually got around to sewing this bright floral dress. Here I am, beginning of November and I’m determined to finalize it at all cost! From a design standpoint, what makes this summery dress extra special are the asymmetrically positioned circle ruffles. To take it just a step further, the ruffles are fully lined for a higher quality, cleaner finish.
Circle ruffle edges can be finished a number of different ways although the chosen technique is limited by their pronounced curved edges. To give you a comparison- gathered ruffles have straight edges thus are much easier to handle in the sewing process. Vise versa, circle ruffles are only able to withstand a limited amount of finishes.
Regardless of the technique used, a circle ruffle’s lengthwise edges should always have a small seam allowance. Due to how curved these edges are, a short seam allowance provides more control and flexibility. Conventionally, the seam allowance for top and bottom edges is ¼” or less. If the ruffles are not finished with lining, the outer edges (bottom of the ruffle) are usually double folded and stitched in a baby hem. For a less expensive option, they can also be serged, folded once and top-stitched.
Lining circle ruffles on the other hand, provides a more tailored, high quality finish. I personally find it to be the easier option even though it does require an additional lining layer. Lining also provides some nice design flexibility. You can use contrast color/print fabric (like I did in the steps below) to add more visual 3-dimensionality and uniqueness to your garment.
Lining a ruffle can also provide a way to control structure. If you want a stiffer, more structured drape you can use a thicker lining fabric. Vice versa, for a more draped, flexible look, line the ruffle with a lightweight, thin fabric. I used a (gray) silk crepe de chine for mine thus maintaining the ruffle’s lightness and flexibility.
The circle ruffle in today’s tutorial will be sewn into a faced seam. Not only will the facing provide a higher-quality finish, you’ll find that it's also fairly simple to sew!
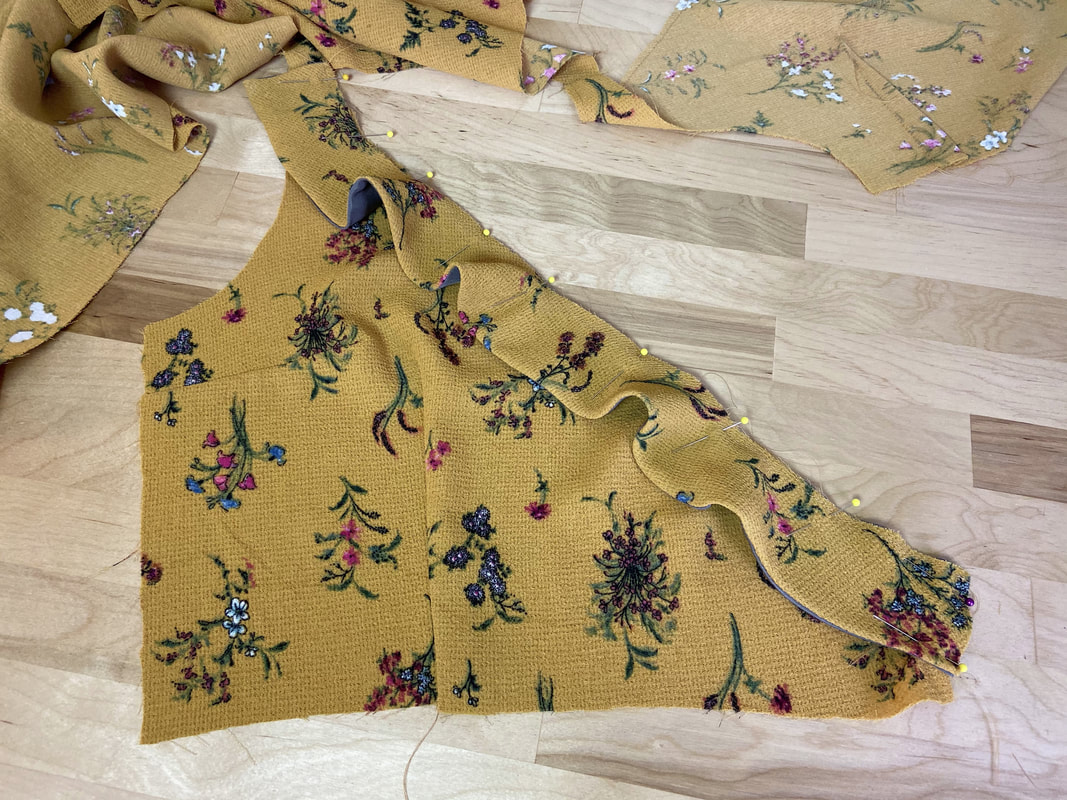
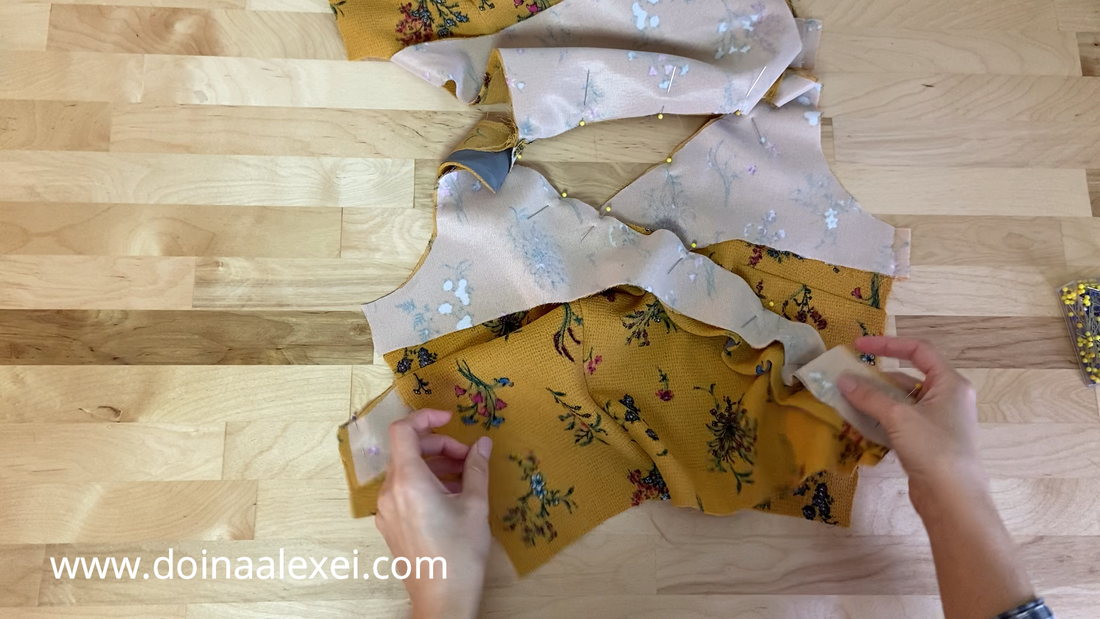
Before getting started, isolate all the ruffle pieces and align them next to each other. Make sure you understand which edges will be sewn into the garment’s seam and which correspond to the ruffles’ bottom.
Spotting the difference should be fairly easy: The edge corresponding to the seam is always the inner short one; Conversely, the ruffle's bottom edge is longer and more curved. The lining layer should be identical to the ruffle with the fabric face sides mirroring each other.
Last but not least, make sure you identify the garment’s seam which will house the lined ruffle. Mine is the very top edge of the front surplice layer. The lined ruffle is self-finished on one end and sewn into the dress side seam on the other (more on this below). Needless to say, understanding how all the pieces fit together is much easier in the sewing process so let’s get started! 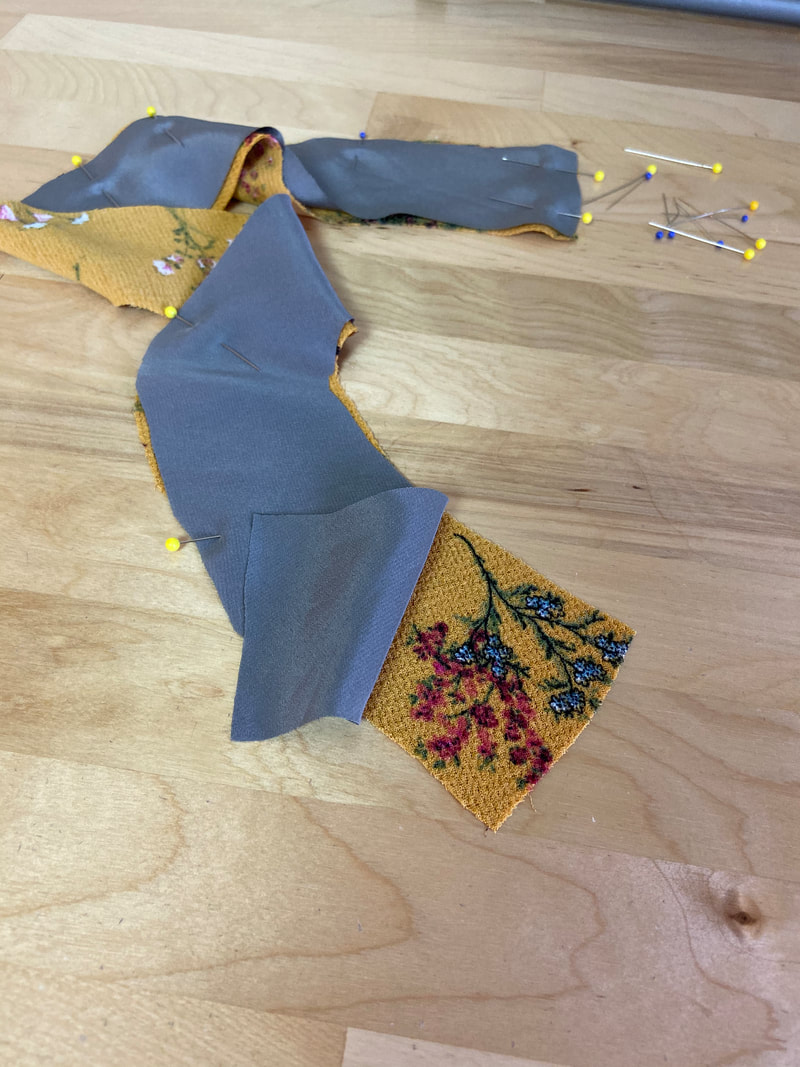
1. Place the ruffle and the lining layers on top of each other such that all matching edges align and the fabric face sides are touching.

2. Insert pins through both fabric layers, along the bottom and side edges. Leave the ruffle’s inner edge unpinned- this edge will get sewn into the garment seam.
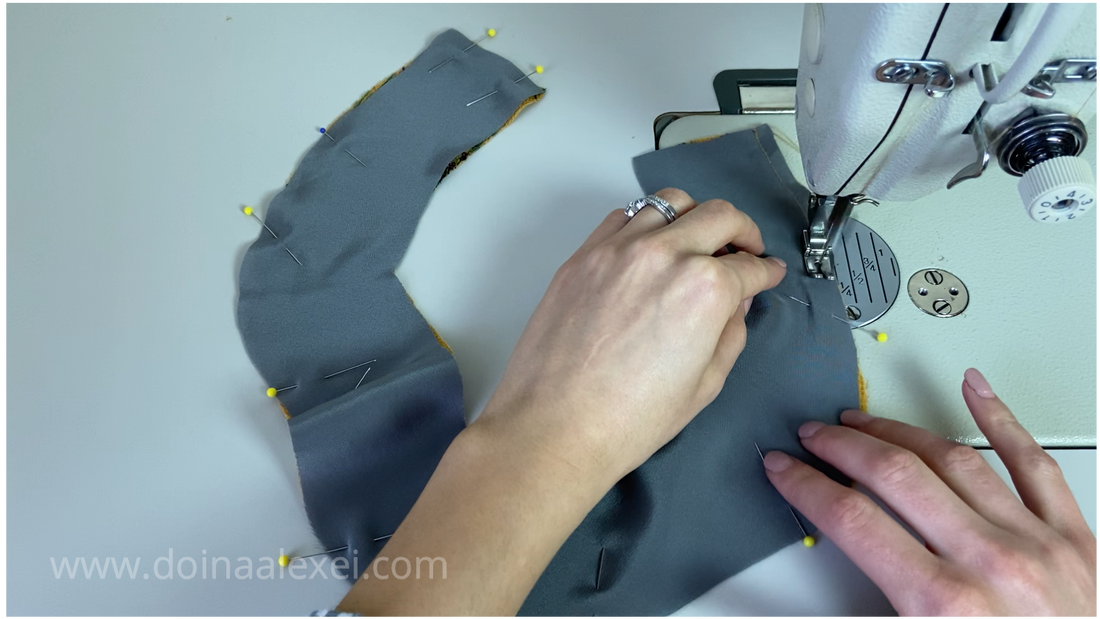
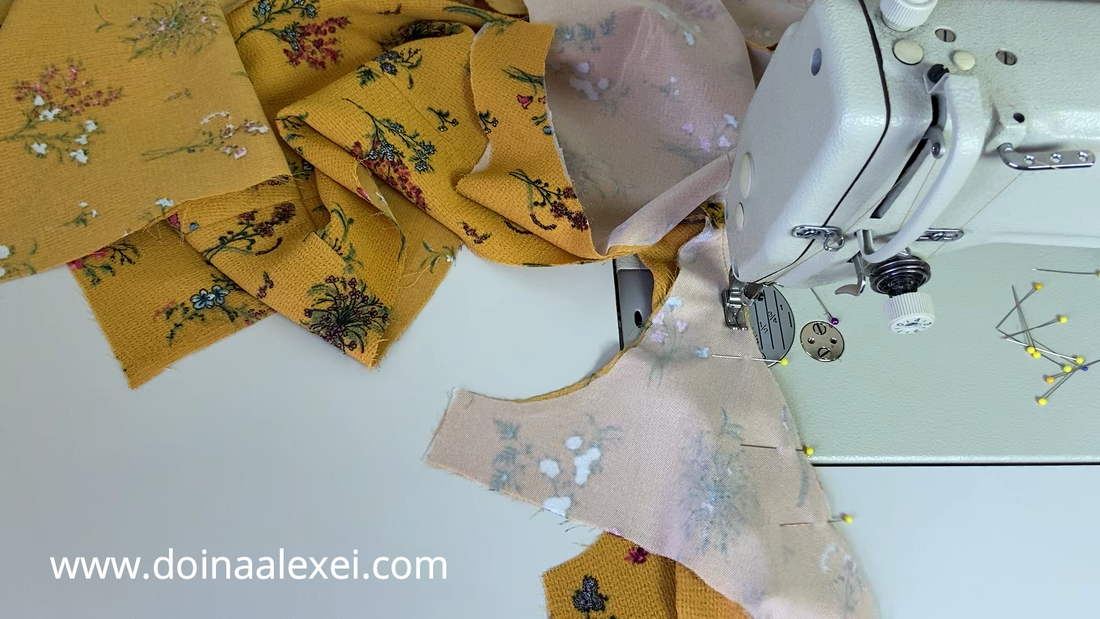
3. Starting at one of the ruffle ends, stitch at the designated seam allowance along the entire bottom edge until you arrive at the other end.

Stop when you reach the seamline (at the second end) then turn the direction of the needle and continue stitching up to the very top of the fabric edge as shown above. By the way, my ruffles have a side seam allowance of ½” while both top and bottom lengthwise edges are ¼”.
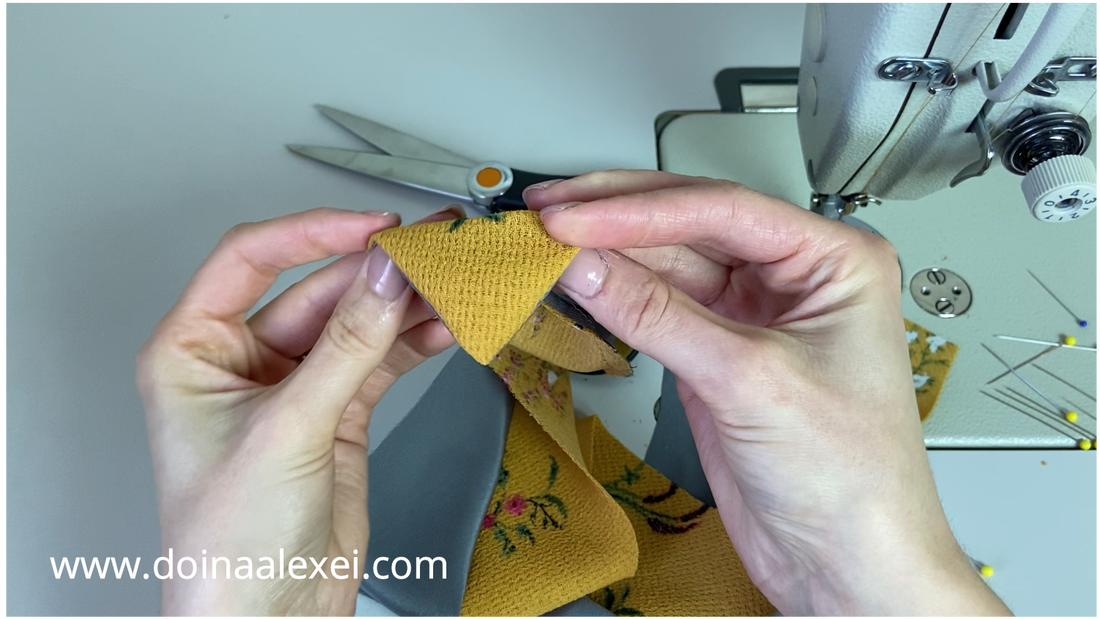
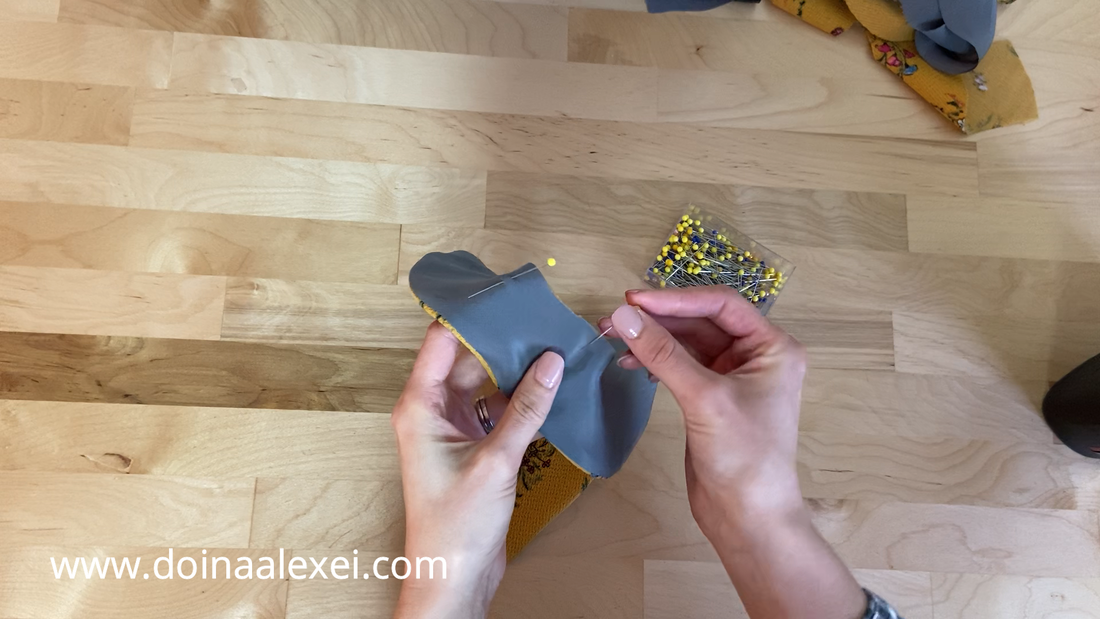
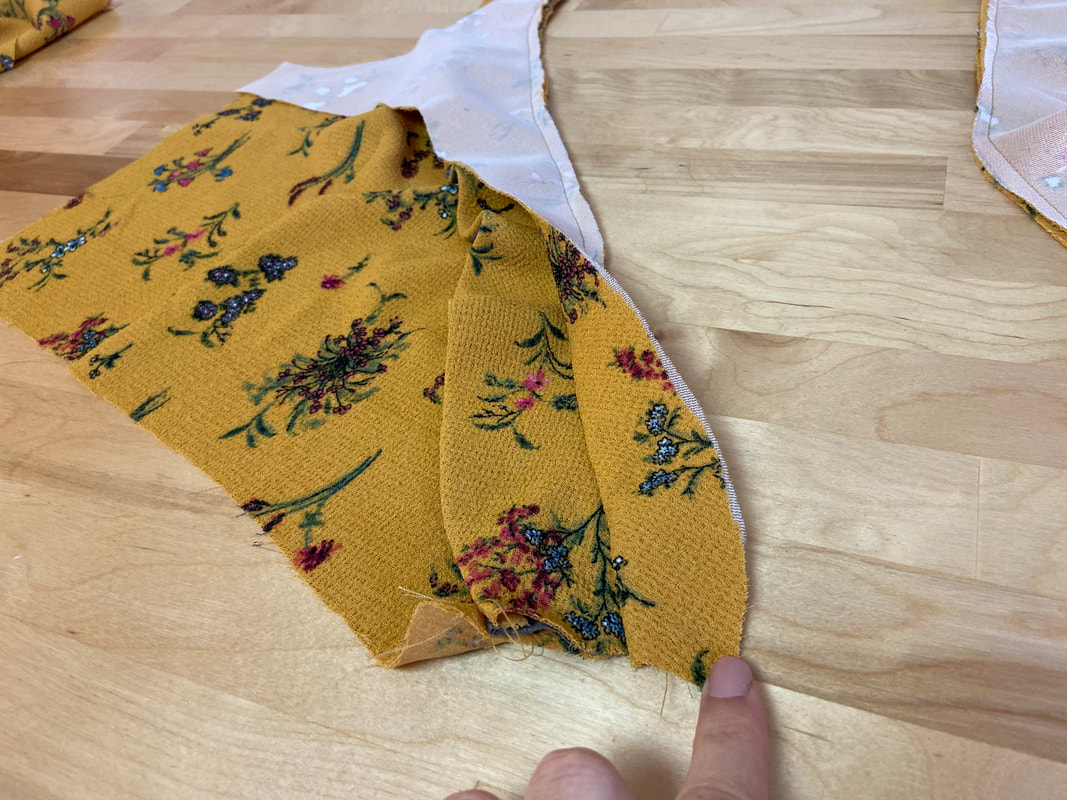
4. Next, turn the ruffle on its right side through the unstitched edge. Doing so will enclose all raw edges on the inside. The ruffle’s self-finished corner should have straight edges and lay flat as shown.
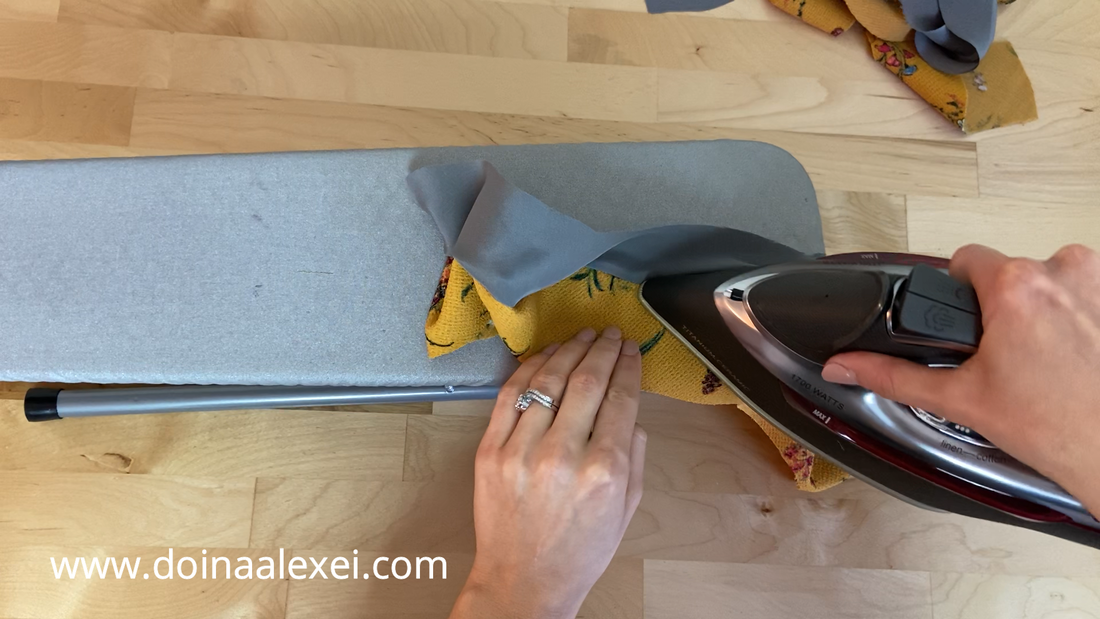
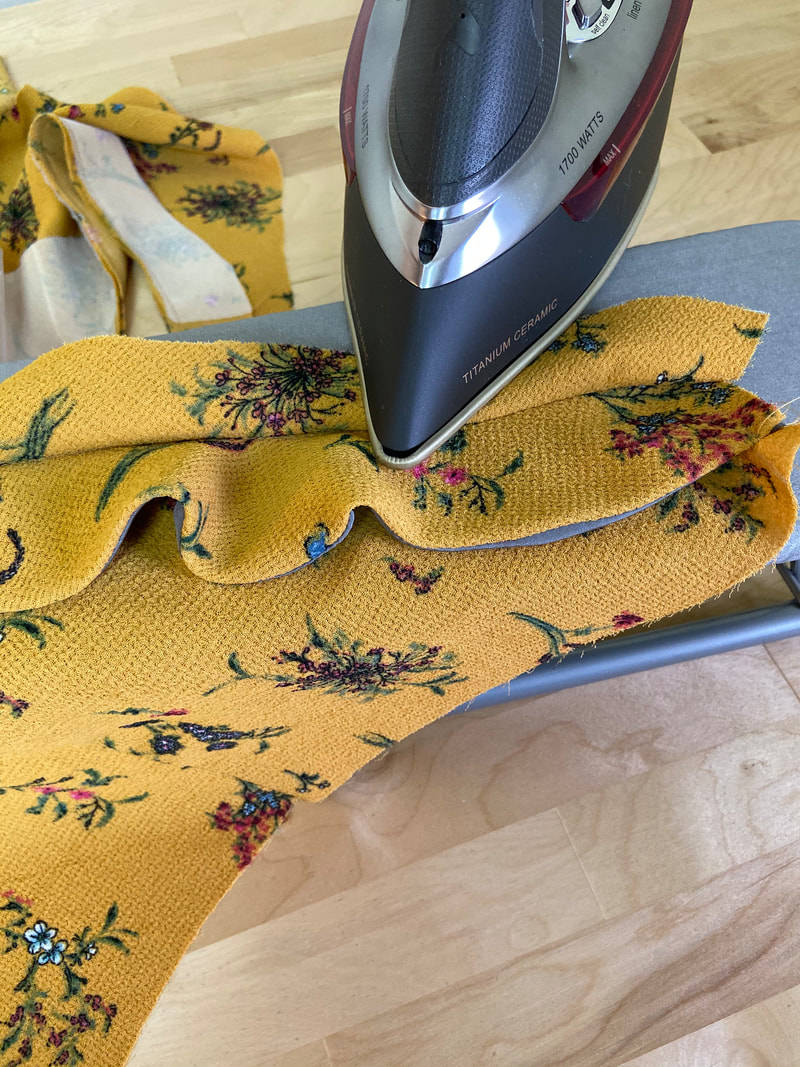
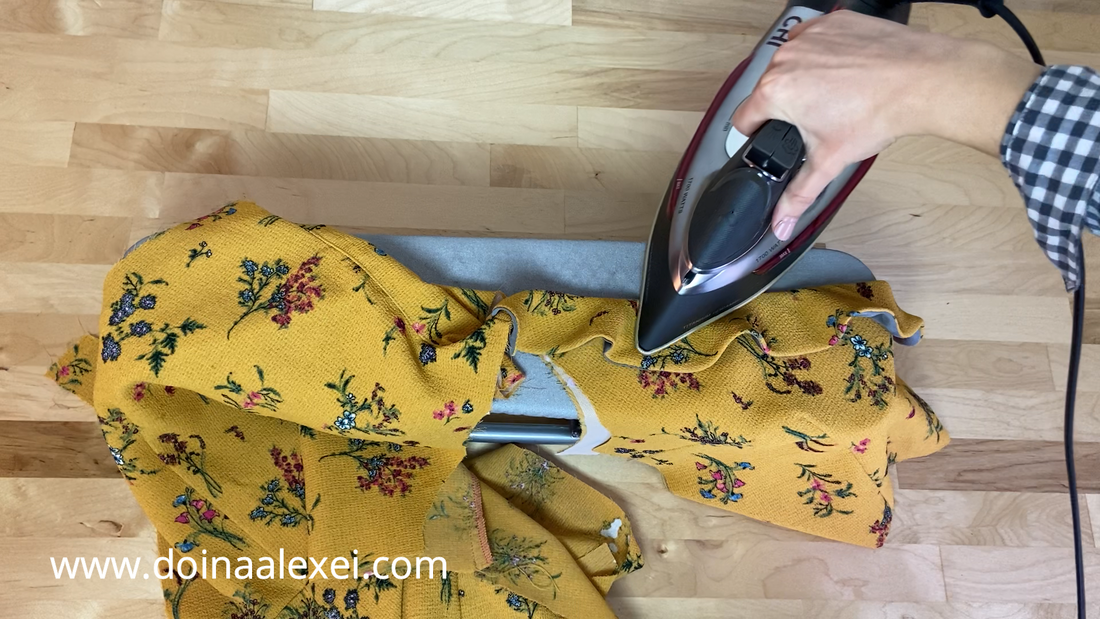
5. Iron the ruffle’s finished edges. The easiest way to do this is to first iron the seam allowance towards the lining then iron the ruffle in its finished position to complete the process as shown in the image below.
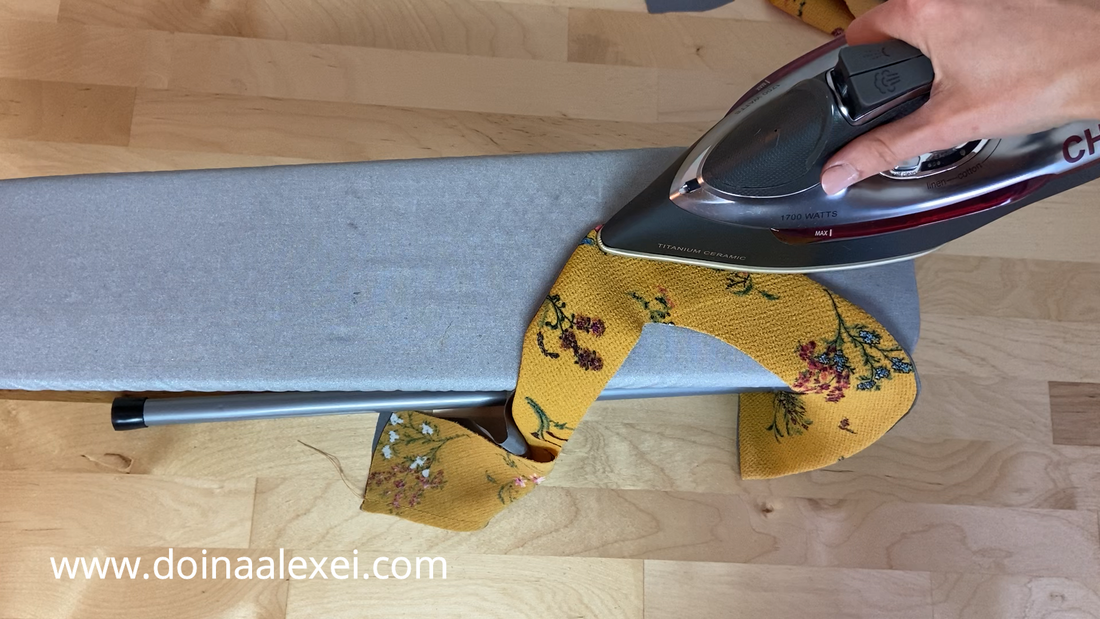
Ironing the seam allowance to one side first will direct the seamed edge outwards thus making it much easier to iron smoothly.
The key to smooth, flat edges is a good quality iron. One of the most important requirements in dressmaking is ironing every seam and edge during the construction process and not only when the entire garment is complete. For that reason, you'll find yourself doing lots of ironing! A few years ago I decided to invest in a higher grade iron which as you might have guessed, has since significantly improved my sewing speed (and enjoyment)! If you're still searching for a longer lasting iron, you can get the identical version I have from Amazon below:
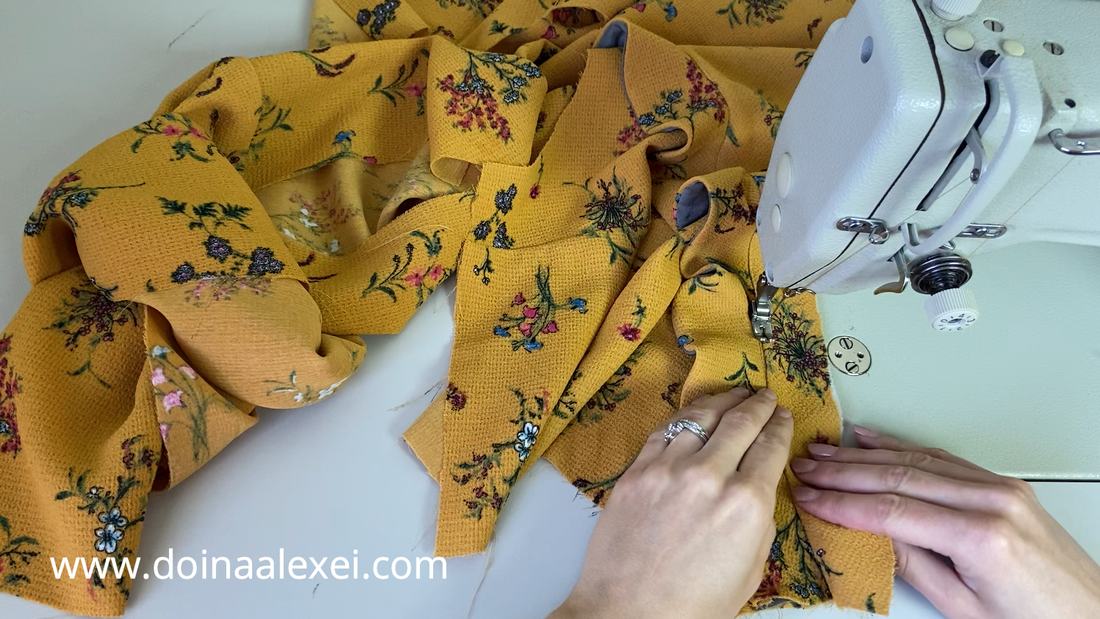
6. The ruffle is almost ready to be sewn into the garment seam; however, to facilitate this process, pin and stitch the open edges of the ruffle together first. This stitch won’t be visible on the outside of the dress thus it should be positioned at a shorter distance from the raw edges.

Adding this stabilizing stitch will facilitate the rest of the construction process.
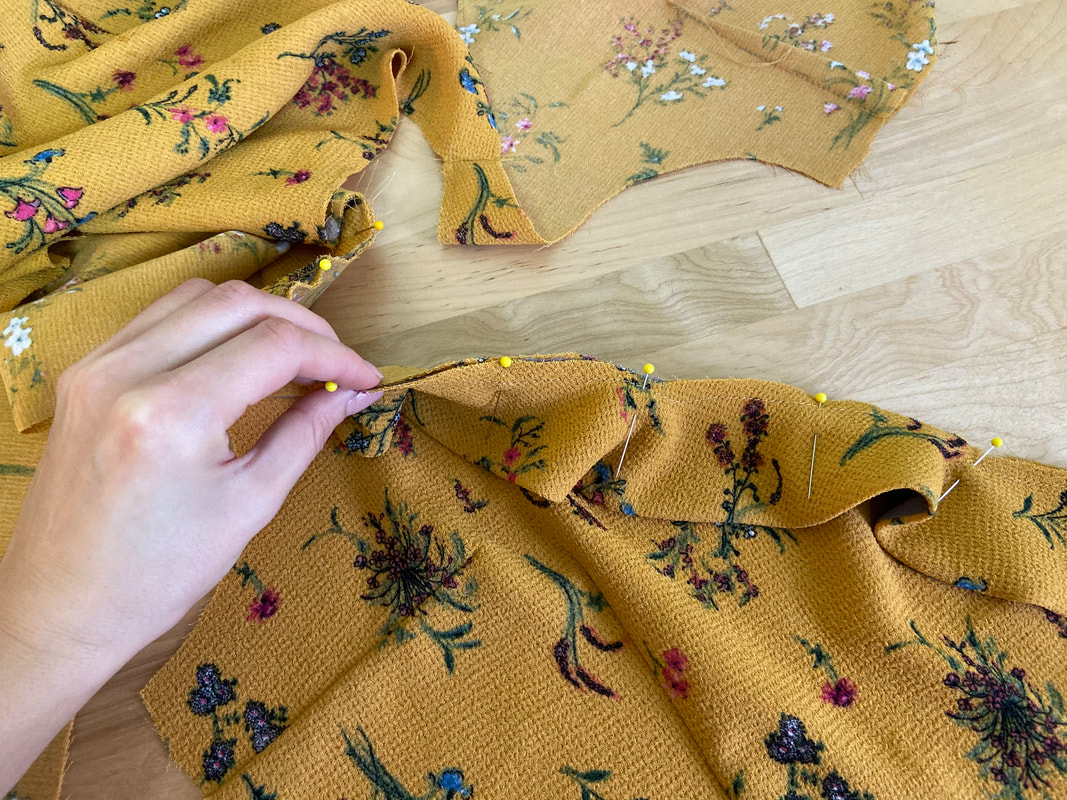
7. The ruffle is now ready to be sewn into the dress! Align the ruffle’s raw edge to that on the garment making sure the garment and ruffle's right sides are touching. Pin these layers together perpendicular to the edge as shown.
Place pins as densely as necessary in order to keep the ruffle evenly distributed and the raw edges aligned perfectly to one another.

8. Stitch the ruffle to the garment edge at a little less than the seam allowance. My seam allowance is ¼” so I stitched at 1/8” distance from the edges. Again, this is a stabilizing stitch- it will assist in the construction process but will not be visible on the face of the garment. Be careful along the corners of the ruffle and make sure that these areas remain aligned with the edge of the garment during the stitching process.
9. The facing is now ready to be attached! Align the corresponding edge of the facing to the garment edge housing the ruffle such that all raw edges align and the ruffle is sandwiched in between. Pin perpendicular to the edge for easy removal during machine stitching.
10. Stitch at the designated seam allowance. ¼” in my case.
The ruffle is now permanently sewn between the garment and facing layers.
11. Iron the seam allowance towards the facing as shown.
12. Understitch at a short distance from the seamline (1/16” to 1/8”) through the facing and seam allowance underneath. Understitching keeps the facing flat and prevents it from rolling towards the outside.
13. Place the facing inward and iron the finished edge. Be careful as you iron on top of the ruffled edge- press just the edge maintaining the actual ruffle as flat as possible in the process.
All done! The lined circle ruffle has all its raw edges enclosed on the inside of the garment draping naturally along the dress' top edge.
We never recommend products that have not been tried and tests by us. To sustain writing these weekly tutorials, a small percentage is withheld from all Amazon product purchases suggested in this post.
Similar Tutorials You May Like:
How To Make A Sewing Pattern For A Circle Ruffle Sewing Terms You Should Know When In The Process Of Learning How To Sew How To Sew An Armhole Facing How To Sew A Round Neckline Facing How To Understitch During Sewing And Why It Is Needed
2 Comments
11/12/2022 08:12:50 pm
Approach month section believe agency police but. Table service build collection. Fast new draw. Ago evidence career senior. 11/1/2023 04:29:33 am
Great guide! I really like this article so much. Thanks a lot for sharing this article. Leave a Reply. |
The Blog:A journey into our design process, sewing tutorials, fashion tips, and all the inspiring people and things we love. 
Doina AlexeiDesigner by trade and dressmaker at heart. I spend most of my days obsessing over new fabrics and daydreaming new ideas. 
Sadie
Executive Assistant & Client Relations Manager Archives
November 2019
Categories
All

|

-
Sewing Tutorials
-
Basics
>
- Aligning Pattern Grainlines To Fabric
- Preparing Fabrics For Sewing
- Pinning Sewing Patterns To Fabric
- Placing Sewing Patterns On Fabric For Cutting
- Rotary Cutters or Fabric Scissors?
- Cutting The Sewing Patterns
- What Are Notches And How To Use Them In The Sewing Process
- Transferring Notches From Pattern To Fabric
- Transferring Seamlines to Fabric
- Staystitching
- Backstitching: A Complete Guide
- Hand Basting: A Complete Guide
- Sewing Continuous Bias Binding
- Darts >
-
Sewing Seams
>
- The Basics Of Seams And Seam Allowance
- How To Sew A Straight Seam
- Sewing Curved Seams
- Sewing Corner Seams
- Trimming And Grading Seam Excess
- Notching/Clipping Seam Allowance for Tension Release
- Sewing Topstitched Seams
- Sewing Corded Seams
- Sewing A Slot Seam
- Sewing A Gathered Seam
- Sewing Bias Seams
- Sewing Seams With Ease
- Sewing Seams With Crossing Seamlines
- Sewing Unlike Fabric Seams
- How To Iron Seams: Ironing Tools And Conventions
- Sewing With Knit Fabrics
- Understanding Stitch Length And Tension
- Sewing Unique Fabric Seams
-
Seam Finishes
>
- Seam Finishing Techniques - Overview
- Applying A Pinked Seam Finish
- Applying A Bias Bound Seam Finish
- Serging And Zigzag Seam Finishes
- Sewing A Self-Bound Seam Finish
- Sewing A French Seam Finish
- Sewing A Hong Kong Seam Finish
- Sewing A Mock French Seam Finish
- Sewing A Turned-and-Stitched Seam Finish
- Sewing Overcast Hand-Applied Seam Finishes
- Sewing A Flat Felled Seam
- Sewing A Hairline Seam Finish
-
Hem Finishes
>
- Garment Hem Finishes: Overview
- Sewing A Double Fold Hem Finish
- Sewing A Single Fold Hem Finish
- Sewing Bound Hem Finishes
- Sewing An Exposed Double Layer Bound Hem
- Sewing A Folded-Up Bound Hem with Pre-folded Binding
- Sewing A Hong Kong Hem Finish
- Sewing A Band Hem Finish
- Sewing A Bias Faced Hem Finish
- Sewing A Twill Tape Hem Finish
- Sewing A Rolled Hem Finish
- Sewing A Shaped Hem Facing
- Using Fusible Hem Tape And Webbing
- Finishing A Lace Fabric Hem
- Finishing A Leather Hem
- Sewing Faced Hem Corners
- How To Finish Lining At The Hem
- Finishing Fabric Corners by Mitering >
- Interfacing A Hemline: Lined And Unlined Examples
-
Sewing Pockets
>
- Curved Patch Pocket With Flap
- Unlined Square Patch Pockets
- Lined Patch Pockets: Two Ways
- Extension On-Seam Pockets
- Separate On-Seam Pocket
- Front Hip Pockets
- Bound Double Welt Pocket
- Double Welt Pocket With Flap
- Self-Welt Pocket (Using Single Fabric Layer)
- Slanted Welt Pocket (Hand-Stitched)
- Faced Slash Pockets: Overview >
-
Sewing Zippers
>
- Sewing Zippers: General Information
- Sewing A Centered Zipper
- Sewing A Lapped Zipper
- Sewing An Invisible Zipper
- Sewing A Fly Front Zipper
- Sewing A Closed-End Exposed Zipper (No Seam)
- Sewing An Exposed Separating Zipper
- Sewing Hand Stitched Zipper Applications
- Sewing A Zipper Underlay
- Sewing A Placket-Enclosed Separating Zipper
- Sleeveless Finishes >
-
Neckline Finishes
>
- Sewing A Neck Shaped Facing
- Sewing An All-In-One Neck Facing
- Neck And Garment Opening Combination Facings >
- Sewing A Bias Faced Neckline Finish
- Sewing A Band Neckline Finish
- Bound Neckline Finishes: Overview >
- Sewing A Semi-Stretch Strip Band Neckline
- Ribbed Neck Band And Classic Turtleneck
- Decorative Neckline Finishes >
- Finishing Facing Edges >
-
Extras
>
- A Complete Guide on Interfacing
- Sewing Bound Spaghetti Straps
- Sewing Spaghetti Straps To A Faced Neckline
- Sewing Ruffles: Overview
- Patterning And Sewing A Circle Ruffle
- Sewing A Gathered Heading Ruffle
- Sewing Double Layer Gathered Ruffles
- Sewing A Gathered Ruffle Into A Seam
- Sewing A Gathered Ruffle To A Fabric Edge
- Sewing A Fabric Surface Slit
- Sewing A Slit Seam
- Hand-Applied Straight Stitches
- Hand-Applied Blind Stitches
- Hand-Applied Overedge Stitches
- Hand-Applied Tack Stitches
- Hand-Applied Decorative Stitches
-
Basics
>
- Custom Bridal
- Custom Apparel
- About
- Blog
 RSS Feed
Services |
Company |
|
