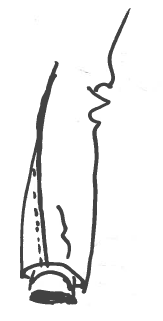
 1. Blouses and dresses pulling across the chest area. A blouse or dress that pulls across the chest is most often caused by the lack of bust darts at the garment's side seams. Bust darts are produced by sewing in excess fabric on a garment into triangle shapes. All darts have vanishing points and dart legs which essential makes them look like triangles or angles on a sewing pattern. Bust darts are added horizontally from side seam inward in order to create a more 3-dimensional shape around a woman's bust area. Bust darts are essential in allowing the fabric (which is 2-dimensional) to mold around the organic areas of the human form allowing for a comfortable fit. When bust darts are missing, a woven garment that is more form-fitting in design will often pull across the chest area not only creating fit issues, but also causing aesthetic inconsistencies. 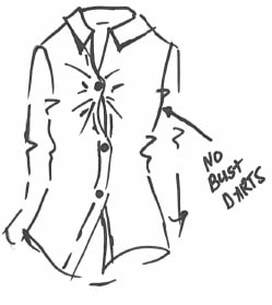 Missing bust darts is perhaps the most common fit issue that is caused at the construction level. One of the main reasons manufacturers/designers avoid adding bust darts is due to the increasing cost of production. It simply costs more money to add the extra steps of marking and sewing darts. However, darts are essential in providing the correct fit and comfort in more form-fitting, woven styles. You'll notice a woven clothing item pulling horizontally across the chest area most commonly with button down blouses- When the blouse is buttoned all the way up, the front pulls across the chest and forms a gap where the buttons close at the bust area. 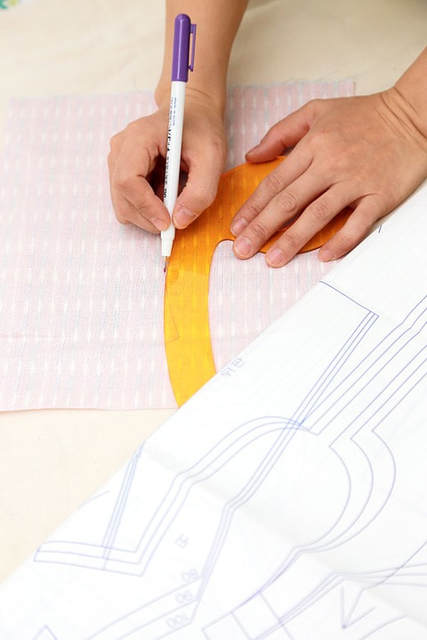 Unfortunately, this is a fit issue that cannot be fixed once the garment is completed. Because the exclusion of darts happens so early on in the construction process at the pattern-making/design level, once the sewing patterns have been cut, it is impossible to add bust darts afterwards. If you own a clothing item such as blouse or dress that pulls across the chest in an uncomfortable fashion, you can exchange the clothing item for a one that is a size up. If the garment in question is a button-up blouse, you can always layer it with a tank top underneath and wear it either fully unbuttoned or release the buttons where the blouse is pulling most. 2. Skinny jeans and pant legs twisting/pulling sideways. 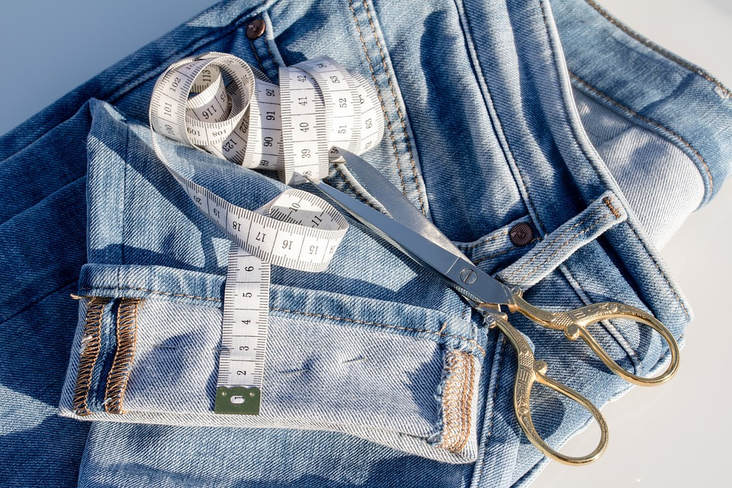 It is quite possible that you have experienced this fit issue at some point either with a pair of jeans or straight leg trousers. If a pant leg's side seams are not aligning straight and twisting towards the front creating an uncomfortable fit, then this most likely means that the sewing patterns were not cut on grain properly. When a sewing pattern is not cut according to the grain line of the fabric, the seams do not lay straight causing the fabric to pull or twist in an uncomfortable direction.
Just like missing bust darts, fixing garments that have been cut off-grain is impossible after the fact. Fixing an off grain garment would require re-cutting the sewing patterns on the correct grain. If you own a garment such as a pair of pants or blouse with side seams that twist in one direction creating fit and aesthetic issues, there are a few styling options you can adopt to fix some of the discomfort associated with it:  If a pair of straight or skinny jeans you own has a pant leg that twists in one direction you can try cuffing the bottom to hide this malfunction. If you own a dress or blouse with side seams that don't align straight you can try having the hem shortened if the length permits you do to so. This can often lessen the twisting by cutting off the part that is most off-grain which is usually at the bottom of a garment. 3. Neckline doesn't lay flat. 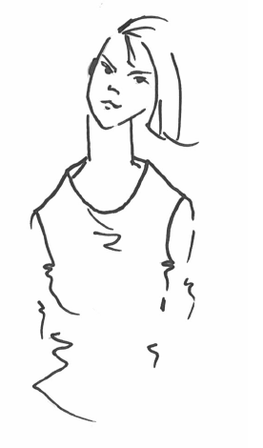 A neckline that doesn't lay flat can be the cause of a few different construction issues that vary from garment to garment. The most common cause of a poorly fitting neckline however is that there is either too much excess fabric at the upper back which causes the back neckline to open up, or the front of the garment doesn't have the proper darts to keep the front neckline flat. A neckline that does not lay properly could also be caused by the top of the garment having a wider proportion than it is appropriate for the design. A loose neckline that is not stable or wrinkles open anytime you move around is a bit of a complex issue from a construction stand point. In addition to the elements described above, a faulty neckline can also stem anywhere from the neckline being too low and not having enough dart support on the front and back of the garment to the wrong fabric being used altogether.  Although there is no easy fix for a loose neckline that doesn't require some sewing, you can always hide this malfunction in the styling process by layering. For example, if a sleeveless blouse or dress has a neckline that does not lay flat or fit quite right, simply layering these items with a cardigan can distract and compensate for the malfunctioning neckline. From a sewing stand point, you can fix a neckline that doesn't lay flat by taking in the excess fabric along the neckline using small localized darts. While wearing the clothing item with the faulty neckline, take in the excess into little dart shapes (with the vanishing point facing inwards) and pin the makeshift darts in place while you're still wearing the garment (you might need some help here). After taking in the excess, stitch it as you would any dart. Before you apply the final stitch however, make sure to remove the neckline clean finishes in order to avoid creating bulk along the neckline's edge. For example, if the edge of the neckline is finished with binding, take out the binding with a seam ripper first before adding the mini darts. It takes a bit of sewing experience to manage this fix so if you don't feel quite comfortable, take it to your local dry cleaners and they will most likely get the job done for you. 4. The seam rips at the armhole. If the underarm seam of a blouse or dress rips soon after it is worn a few times, it does not necessarily mean that the entire garment is low-quality and not constructed durably. This is often caused by the sleeve seam itself not being stretched enough in the sewing process to allow for more flexibility during wear. The curve of the underarm seam requires some special treatment in the sewing process. Our arms move a lot during the day and tops/dresses with sleeves should accommodate this. When a sleeve is attached to the rest of the garment the lowest, most curved part of the seam needs to be pulled slightly while it is getting machine stitched. This allows the non-stretch thread to be more flexible when the seam is in it's natural, relaxed state. Ultimately, stretching the curved armhole/sleeve seam slightly will allow for more stretch and durability during wear. This sewing technique is very commonly overlooked with less experienced dressmakers. Although a very small step, it can prevent unnecessary rips at the underarm section of a garment. Luckily, it is not necessarily a sign that the entire garment needs a do-over. If the underarm seam of your garment looks to be coming undone, you can re-sew it while adding this stretch feature during the stitching process. If you do not own a sewing machine and prefer to leave the sewing to a professional, let the seamstress know to stretch the armhole seam slightly while sewing to prevent the stitch from snapping again during future wear. 5. Sleeves feel tight and pull the garment across the upper back and shoulders. 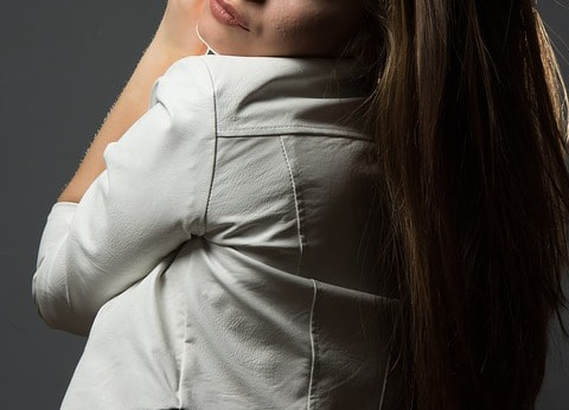 While this issue could stem from the shape of the sleeves themselves, it is often the cause of not enough ease across the upper back or the garment or lacking the proper back darts for achieving the correct fit. The upper back is a tricky part of the human body to fit. When patterning and sewing a garment the upper back has to accommodate arm movement and often works hand-in-hand with the shape and fit of the sleeves/armholes. If a garment you own has sleeves that seem to feel tight during movement, then this is most likely an issue that has to do with the upper back lacking enough room for movement. This is not to be confused with the sleeve feeling tight at the sleeve cap which occurs strictly at the upper sleeve whether the arms are moving or not. Sleeves that feel tight and pull towards the back can be fixed by releasing the armhole seam a bit in order to create more room for movement. However, this is often very tricky to do since many clothing items simply don't have enough seam allowance at the armhole to allow for enough tension release.  It is quite often that solving a fit problem that is caused early in the sewing/construction stage leaves very little room for fixing options when the garment is completed. If you own a blouse, blazer or dress that has this particular issue and you are in love with the design despite the fit problem, move up a size and see if that offers a fix. It is sometimes less time consuming to either try a different size or simply replace the garment all together. 6. Skirts and dresses riding up when moving or walking. 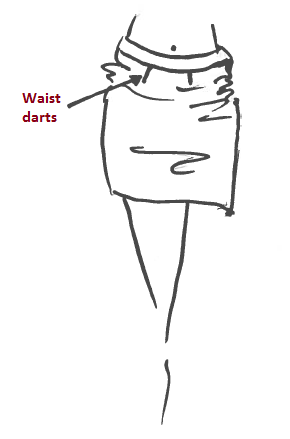 A skirt that rides up during wear, especially when walking or moving around, can signify an issue with its waist darts. This is a very common issue with pencil skirts or woven skirts that are generally more form-fitting. On the other hand, it could be that you are not wearing the correct fit/size for your body type. Let's face it, everyone's body shape is created different and finding form-fitting bottoms that actually fit and wear comfortably is always somewhat of a challenge. When a skirt hikes up during wear it is possible that you simply need to move up a size and the issue will be fixed. When shopping for more challenging, form-fitting silhouettes it is always a good idea to bring a few sizes into the dressing room and see which one will actually do the job. However, if you've tried a few different skirt sizes and are still unable to get the comfort and fit you are after, the issue most likely pertains to the actual waist darts. 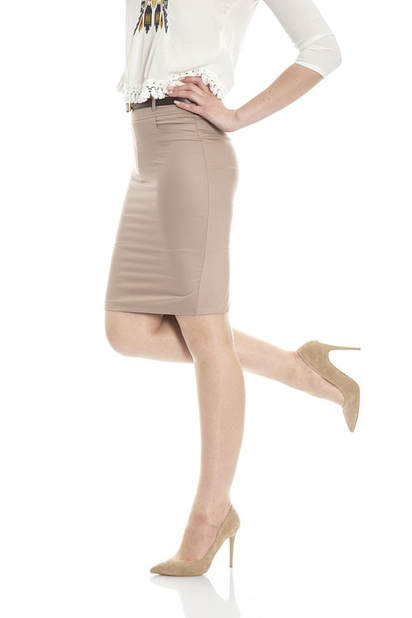 As mentioned above, darts play a key role in achieving the proper 3-dimensional fit around the human form. Darts have a significant importance at the waist just as much as they do at the bust area. If a form-fitting skirt rides up the hips during movement, then it is possible that the darts do not take in enough excess fabric to accommodate the curves of the hips properly. This results in too much tightness/tension around the hips which eventually causes the skirt to shift up in order to gain more room for movement. When the darts are constructed properly, meaning they are deep and long enough to encompass the curves of the body, a pencil skirt or form-fitting dress should not ride up even if it is a bit tighter in fit. Waist darts on skirts are usually longer in the back and shorter in the front. The back darts especially play a key role in the fit and comfort of a form-fitting woven skirt or dress. If the back waist darts are taken in enough to shape the bottom comfortably, then form-fitting garments should normally not ride up during movement at all (unless there are fabric or other construction issues associated with it). A more experienced seamstress should be able to perform the proper alterations to either reshape the darts a bit or release some tension at the seams. That being said, it is always a good idea to take a few steps in the dressing room and test how well a form-fitting skirt (or dress) holds up during movement before making the final purchase. 
0 Comments
Leave a Reply. |
The Blog:A journey into our design process, sewing tutorials, fashion tips, and all the inspiring people and things we love. 
Doina AlexeiDesigner by trade and dressmaker at heart. I spend most of my days obsessing over new fabrics and daydreaming new ideas. 
Sadie
Executive Assistant & Client Relations Manager Archives
November 2019
Categories
All

|

-
Sewing Tutorials
-
Basics
>
- Aligning Pattern Grainlines To Fabric
- Preparing Fabrics For Sewing
- Pinning Sewing Patterns To Fabric
- Placing Sewing Patterns On Fabric For Cutting
- Rotary Cutters or Fabric Scissors?
- Cutting The Sewing Patterns
- What Are Notches And How To Use Them In The Sewing Process
- Transferring Notches From Pattern To Fabric
- Transferring Seamlines to Fabric
- Staystitching
- Backstitching: A Complete Guide
- Hand Basting: A Complete Guide
- Sewing Continuous Bias Binding
- Darts >
-
Sewing Seams
>
- The Basics Of Seams And Seam Allowance
- How To Sew A Straight Seam
- Sewing Curved Seams
- Sewing Corner Seams
- Trimming And Grading Seam Excess
- Notching/Clipping Seam Allowance for Tension Release
- Sewing Topstitched Seams
- Sewing Corded Seams
- Sewing A Slot Seam
- Sewing A Gathered Seam
- Sewing Bias Seams
- Sewing Seams With Ease
- Sewing Seams With Crossing Seamlines
- Sewing Unlike Fabric Seams
- How To Iron Seams: Ironing Tools And Conventions
- Sewing With Knit Fabrics
- Understanding Stitch Length And Tension
- Sewing Unique Fabric Seams
-
Seam Finishes
>
- Seam Finishing Techniques - Overview
- Applying A Pinked Seam Finish
- Applying A Bias Bound Seam Finish
- Serging And Zigzag Seam Finishes
- Sewing A Self-Bound Seam Finish
- Sewing A French Seam Finish
- Sewing A Hong Kong Seam Finish
- Sewing A Mock French Seam Finish
- Sewing A Turned-and-Stitched Seam Finish
- Sewing Overcast Hand-Applied Seam Finishes
- Sewing A Flat Felled Seam
- Sewing A Hairline Seam Finish
-
Hem Finishes
>
- Garment Hem Finishes: Overview
- Sewing A Double Fold Hem Finish
- Sewing A Single Fold Hem Finish
- Sewing Bound Hem Finishes
- Sewing An Exposed Double Layer Bound Hem
- Sewing A Folded-Up Bound Hem with Pre-folded Binding
- Sewing A Hong Kong Hem Finish
- Sewing A Band Hem Finish
- Sewing A Bias Faced Hem Finish
- Sewing A Twill Tape Hem Finish
- Sewing A Rolled Hem Finish
- Sewing A Shaped Hem Facing
- Using Fusible Hem Tape And Webbing
- Finishing A Lace Fabric Hem
- Finishing A Leather Hem
- Sewing Faced Hem Corners
- How To Finish Lining At The Hem
- Finishing Fabric Corners by Mitering >
- Interfacing A Hemline: Lined And Unlined Examples
-
Sewing Pockets
>
- Curved Patch Pocket With Flap
- Unlined Square Patch Pockets
- Lined Patch Pockets: Two Ways
- Extension On-Seam Pockets
- Separate On-Seam Pocket
- Front Hip Pockets
- Bound Double Welt Pocket
- Double Welt Pocket With Flap
- Self-Welt Pocket (Using Single Fabric Layer)
- Slanted Welt Pocket (Hand-Stitched)
- Faced Slash Pockets: Overview >
-
Sewing Zippers
>
- Sewing Zippers: General Information
- Sewing A Centered Zipper
- Sewing A Lapped Zipper
- Sewing An Invisible Zipper
- Sewing A Fly Front Zipper
- Sewing A Closed-End Exposed Zipper (No Seam)
- Sewing An Exposed Separating Zipper
- Sewing Hand Stitched Zipper Applications
- Sewing A Zipper Underlay
- Sewing A Placket-Enclosed Separating Zipper
- Sleeveless Finishes >
-
Neckline Finishes
>
- Sewing A Neck Shaped Facing
- Sewing An All-In-One Neck Facing
- Neck And Garment Opening Combination Facings >
- Sewing A Bias Faced Neckline Finish
- Sewing A Band Neckline Finish
- Bound Neckline Finishes: Overview >
- Sewing A Semi-Stretch Strip Band Neckline
- Ribbed Neck Band And Classic Turtleneck
- Decorative Neckline Finishes >
- Finishing Facing Edges >
-
Extras
>
- A Complete Guide on Interfacing
- Sewing Bound Spaghetti Straps
- Sewing Spaghetti Straps To A Faced Neckline
- Sewing Ruffles: Overview
- Patterning And Sewing A Circle Ruffle
- Sewing A Gathered Heading Ruffle
- Sewing Double Layer Gathered Ruffles
- Sewing A Gathered Ruffle Into A Seam
- Sewing A Gathered Ruffle To A Fabric Edge
- Sewing A Fabric Surface Slit
- Sewing A Slit Seam
- Hand-Applied Straight Stitches
- Hand-Applied Blind Stitches
- Hand-Applied Overedge Stitches
- Hand-Applied Tack Stitches
- Hand-Applied Decorative Stitches
-
Basics
>
- Custom Bridal
- Custom Apparel
- About
- Blog
 RSS Feed
Services |
Company |
|
