|
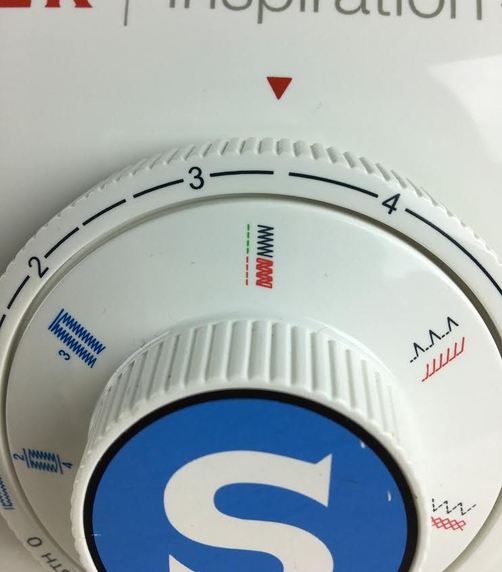
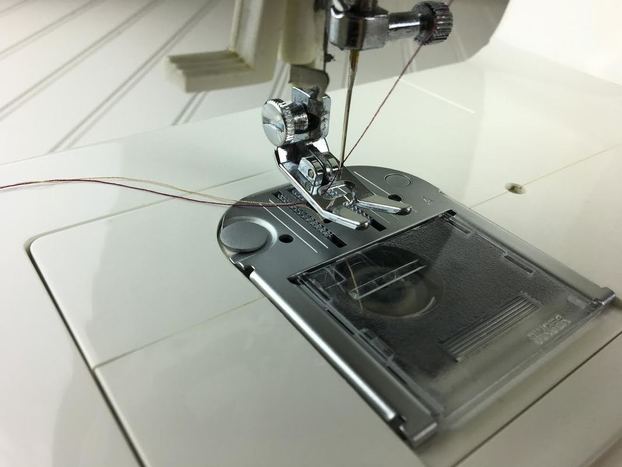
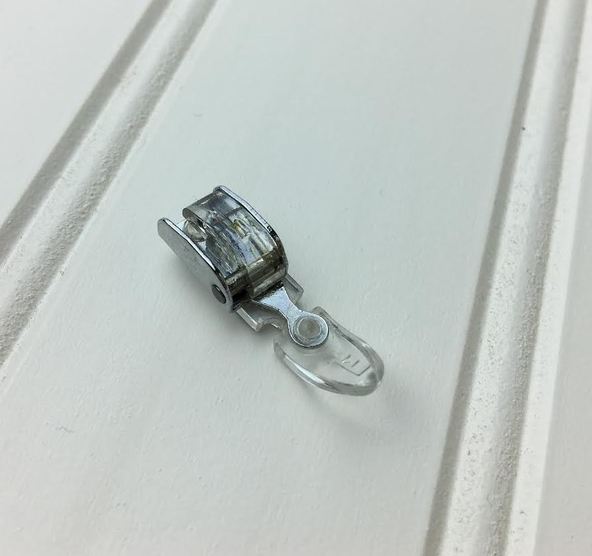
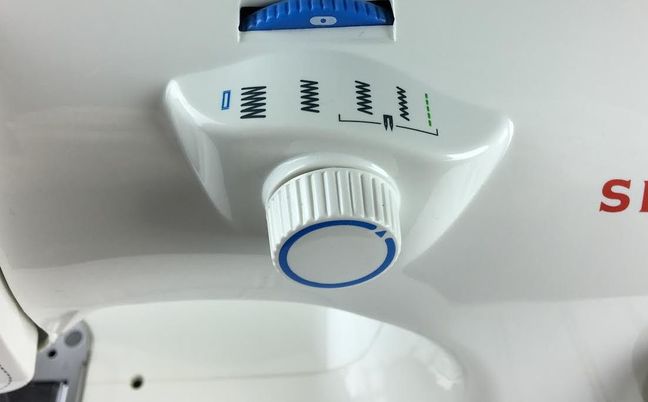
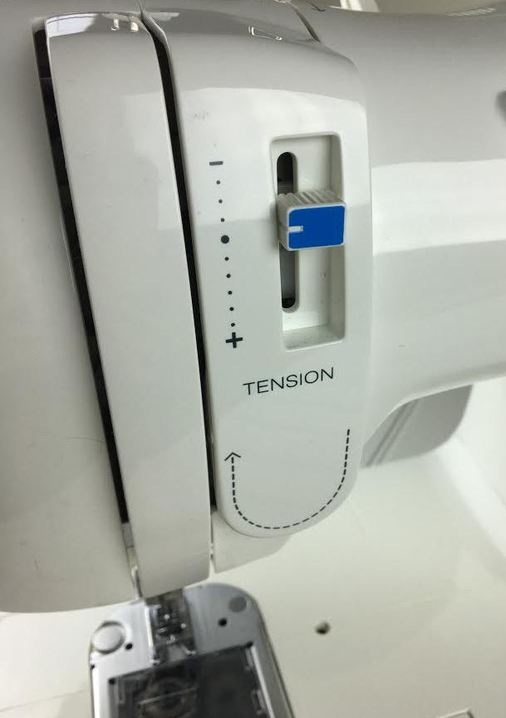
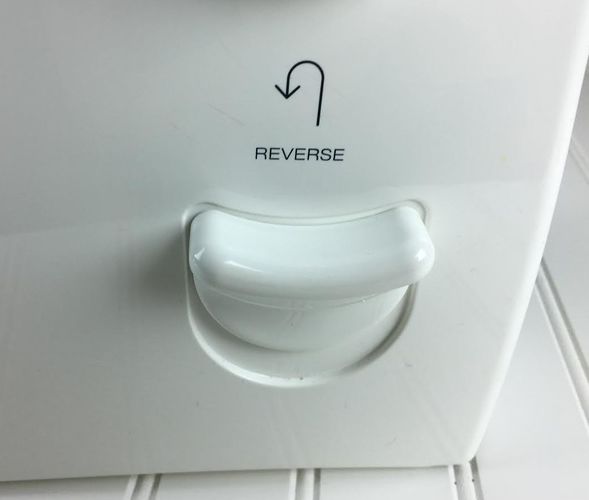
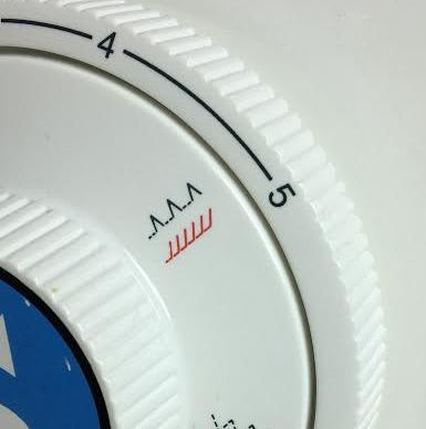
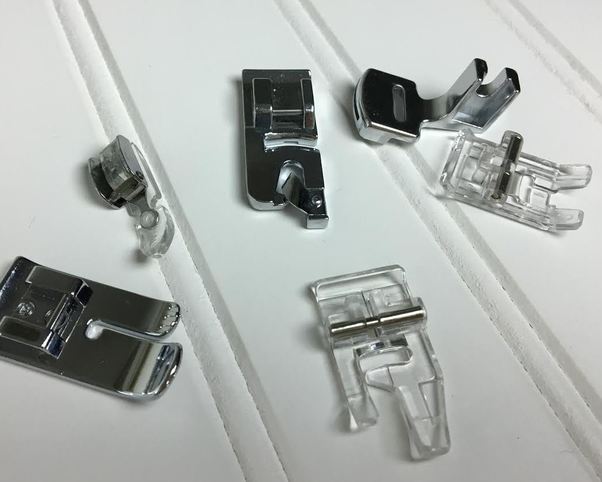
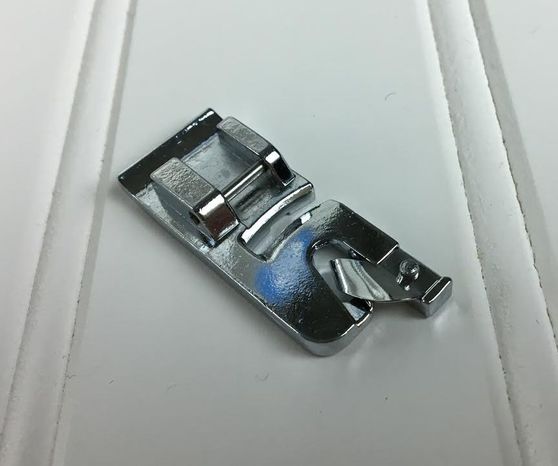
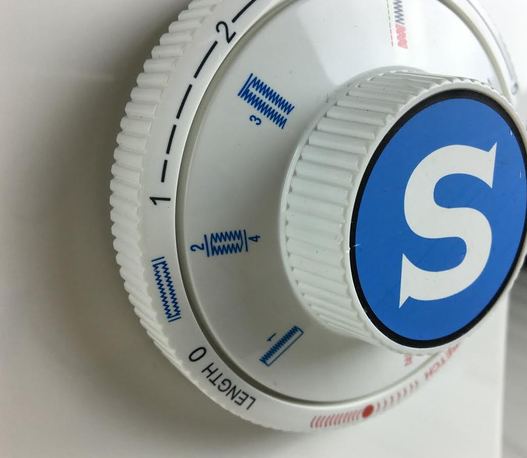
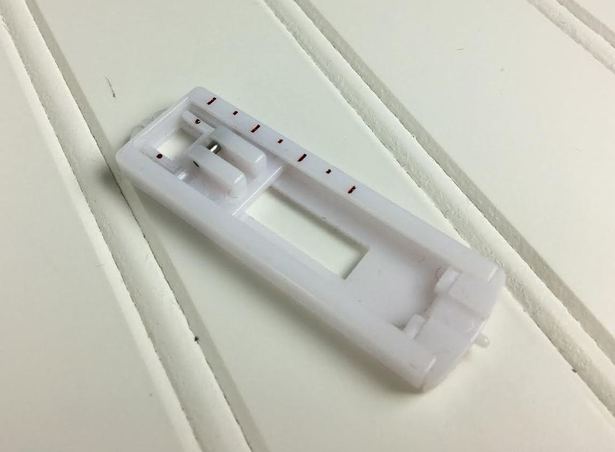
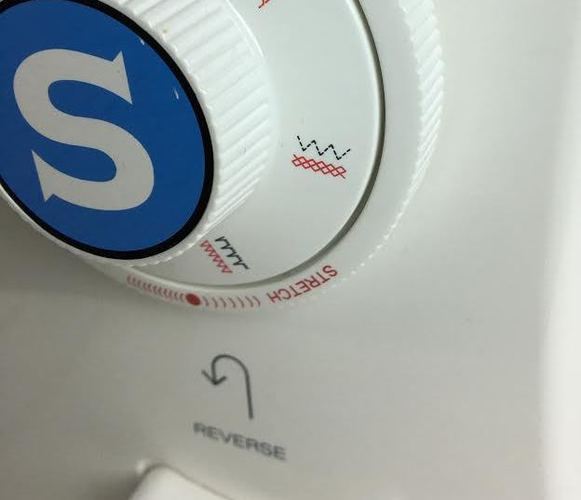
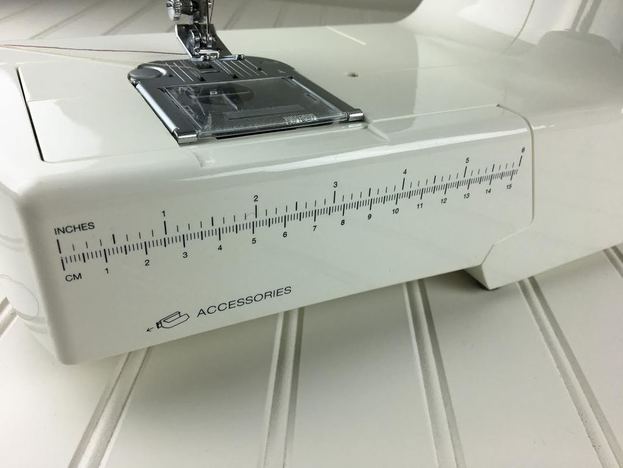
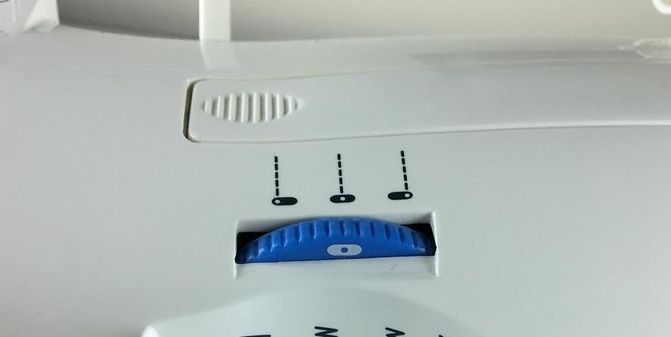
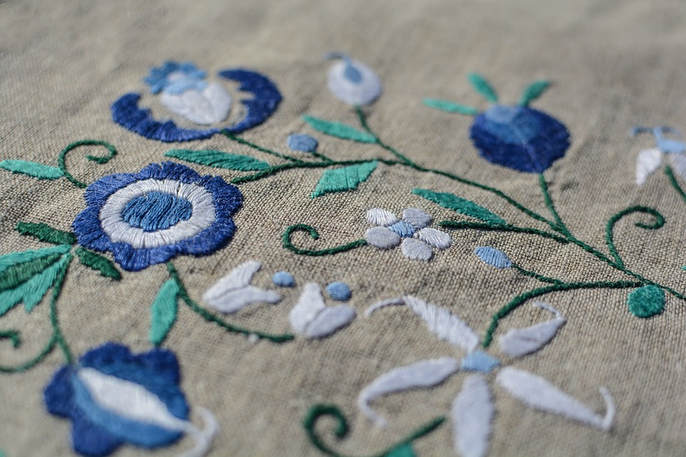
Buying the first sewing machine is perhaps the most intimidating purchase for sewing beginners. Knowing where to start and what to look for on the market can be a real challenge. If you are a beginner however, you should always start small. There is not need to invest in a sewing machine with a variety of complex stitches and features you might never need to use. Choosing the appropriate sewing machine means finding the right balance between quality, price and the necessary sewing capabilities. You'll find that you really don't need to spend a lot to get a good quality machine that will last you years. Many advanced dressmakers still use a simple home sewing machine for all their needs. There are a number of attachments and presser feet that work with almost all models which you may purchase additionally as you become more advanced. For now, if you are doing some research on where to start with the initial purchase, here are some of the main things to consider in your search for your first sewing machine: The Necessary Features All sewing machines will have the necessary features to sew a garment from start to finish. The most essential elements include: a straight stitch capability for applying permanent stitches; a zig zag stitch to clean finish the raw edges and accommodate knit fabrics, and a reverse button for back-stitching. Of course, even the most basic sewing machines available on the market will offer a few more features than just these 3 basic ones. However, as a beginner, you should start your search with the most essential and work outwards. Although, all sewing machines will probably already have similar settings, it is good to make yourself a little checklist and be able to recognize what the different notations and buttons stand for. The Straight Stitch It should be adjustable in stitch length to create a range from very short to a basting stitch with the longest stitch length. Stitch length is usually measured by counting how many stitches are in a 1 inch increment. The shortest stitch length will have a higher count of stitches within an 1" while a basting stitch has a lower stitch count. The shorter stitches are denser and used for finer fabrics like silk and chiffon. They can minimize tension in some very lightweight fabrics and create a durable connection. Basting stitches can either be used temporarily or permanently depending on the project. Generally, longer stitches are used for stretchier fabrics because they allow for more flexibility. For most projects, you will most likely use a medium-length stitch which is somewhere in between. A medium stitch on most sewing machines falls between the 3-4 settings. The good news is, all sewing machines on the market offer a straight stitch with length adjustments. Basic Presser Feet There is probably no functional sewing machine out there (no matter how basic) that does not have a regular presser foot. You really don't have to check if a sewing machine has one, but it is a good idea to know what it looks like. The regular presser foot features a flat surface on both sides of the needle that keeps the fabric layers stable while being fed through the machine in the stitching process. Two rough surfaces at the bottom further aid this process. Its front is slightly curved up to additionally ease the movement of the fabric during stitching. Every sewing machine has a presser foot-lifting handle that allows you to lift and lower the presser foot as needed. Most basic sewing machines also include a satin presser foot. It features a beveled bottom that facilitates dense zig zag stitches (which we will discuss more bellow). You can recognize a satin presser foot by the fact that it appears wider than a regular presser foot. It also features a wider slot opening for the needle. Its bottom surface is beveled so that it feeds the thread smoother during zig zag or satin stitch applications. A Zipper Presser Foot As opposed to a regular presser foot, a zipper presser foot is used for sewing various styles of zippers as well as stitching next to piping, cording and raised edges. A zipper presser foot is narrow and allows the needle to align and sew right next to raised sides that a regular presser foot normally cannot move past. If you look at the image above, you will notice that it features two open slots on each side- This is where the machine needle goes. Depending on the direction necessary for sewing, you can adjust the needle to either side accordingly. Just like almost all presser feet, the zipper foot has a curved, slightly raised front to aid the movement of fabric during sewing. As you move from beginner to intermediate, you will become quite dependent of this zipper foot to sew more detailed garments and complex zippers. If your sewing machine does not come pre-equipped with an invisible zipper foot (which many basic ones don't), you can use a regular zipper foot to easily attach an invisible zipper. A Zig Zag Stitch A zig zag stitch on a sewing machine is most commonly used to sew stretch knits and clean finish seam allowance raw edges. It is a necessary feature for any basic sewing machine. It is also important that the zig zag stitch have a size and density adjustment. The necessary stitch length and density usually depends on the fabric. Your goal when clean finishing fabric raw edges is to contain the fraying as much as possible, and create a finish that withstands wear and care over a long period of time. A denser zig zag stitch is recommended for thicker, bulkier woven fabrics that unravel (fray) easily. The more surface you cover and the larger the stitch is, the more efficiently the fabric raw edge will be enclosed. Although a denser zig zag stitch is always a good bet whether using light or heavy weight fabrics, a less dense zig zag stitch can be used to clean finish fabrics that do not fray as much. It is always a good idea to test the edge of the fabric to make sure you are using the appropriate setting. Additionally, a zig zag stitch is often used for sewing stretchy knits. The zig zag structure allows the stretchy-ness of the knit fabric to bounce back after being pulled. When sewing knits with a regular straight stitch, the non-stretch thread can actually break when the knit garment is pulled during wear. A zig zag stitch eliminates this issue by allowing for movement and flexibility. As you gain more knowledge, you will most likely want to experiment with various knit fabrics so learning how to apply a zig zag stitch on your machine will prove to be good practice. A zig zag can also be used as 2-in-1 solution for sewing knit seams: It permanently connects the fabric layers while also clean finishing their edges. Once the zig zag is applied, the edges of the knit fabric are trimmed close to the stitch to complete the seam. Various styles of zig zag stitches can also be utilized on the surface of fabric to fix tears. Just as is true for straight stitches, a zig zag stitch needs to be set at the correct tension when used on woven fabrics. Most sewing machines with offer a tension setting control. Sewing machine tension can be a little complicated to understand for a sewing beginner. What you should keep in mind however is how to recognize tension issues. For a zig zag and straight stitches specifically, if it is bunching or tightening the fabric and further disrupting the smoothness of the seam, then the tension is not adjusted properly on your sewing machine. Consult your manual on how to fix it as this can vary from machine to machine. A Reverse Button A reverse button, whether labeled as that or not, is added to every sewing machine from the most basic to the most intricate. A reverse stitch is used to lock a straight stitch in place thus preventing it from coming undone- This is called backstitching. This machine control is most commonly depicted by a lever or button that you hold down while pressing the foot control to reverse the stitch. You might not always have this lever marked with the word "reverse" but it is quite easy to identify by the fact that its symbol is marked by a curved arrow. It is usually depicted by a lever or single button and commonly located on sewing machine's front either in the lower hand side or right above the presser foot. A Blind Stitch Setting Although you'll most likely learn how to sew a blind stitch by hand first, learning how to apply it with a sewing machine will facilitate sewing and save you some time in the process. Most sewing machines come equipped with this unique stitch and include a special presser foot to accompany it. You might mistake the blind stitch for a funky zig zag stitch: It features a few straight stitches (usually 2) interrupted by a "V" shaped stitch. Holding the hem in a specified folded position will allow the point of the "V" stitch to catch a few threads from the wrong side of the fabric thus creating an invisible look on the face side. Look for this stitch setting on your potential machine purchase as it will really come in handy later down the road. To facilitate the application process, most sewing machines come equipped with a special blind hem presser foot. It is easy to identify by the fact that it has vertical extension at the bottom which aligns to the folded edge of the garment during sewing. It is a good idea to play around with a machine blind stitch application when you begin to feel more comfortable with basic sewing techniques. For now however, make sure you are able to recognize the look of this stitch to ensure that you invest in a sewing machine that offers it (almost all do!). Suggested Sewing Machine Features Now that you've learned about the most necessary features any basic sewing machine should offer, lets explore some suggested machine settings that will benefit you in the long run. A sewing machine is a long term product and should accommodate you in your beginning stages but also be appropriate to use at the intermediate-more advanced level. At a more seasoned stage, you'll explore more complex sewing techniques like adding buttonholes, applying a blind stitch, and hemming directly with your sewing machine. The good news is, you don't have to buy a new sewing machine just to get these techniques accomplished. It is suggested that your first sewing machine have some additional suggested features we'll describe bellow that should hopefully eliminate the need to upgrade later down the road. Specialized Presser Feet A good, basic sewing machine will include additional presser feet with the initial purchase. However, if a certain presser foot style is not provided, you may always buy it individually. They are standardized and will work with almost any home sewing machine. When purchasing special presser feet, it is a good idea to search for the ones that work with the brand of sewing machine you own. To be on the safe side, always check that any additional attachment such as needles, presser feet and bobbins always fits your brand of sewing machine. The common presser feet you will most likely be interested in as you become more advanced are: a rolled hem presser foot (pictured bellow), an invisible zipper foot, a blind stitch presser foot (if not provided), a single step button hole presser foot, and a presser foot with attachment for sewing double-folded binding in one step. A Buttonhole Setting Some basic sewing machines do not offer a buttonhole setting. It is not always necessary for a sewing beginner but it does prove useful as you become more knowledgeable and looking to experiment with adding functional buttons to a garment. You do not have to base your initial purchase on whether the machine has a buttonhole setting or not. However, if you have some room in your budget, we recommend that you purchase a machine that has this additional feature. A sewing machine with a buttonhole setting will usually come with additional presser feet attachments for achieving the correct application. Using them can sometimes be a little tricky but lots of practice with trial and error will get you there in no time. You will notice that the buttonhole setting allows you to either sew it in one step, or in 4 separate steps applied manually. The single step setting will require a specialized presser foot equipped with a button insertion slot for size reference. For the single step process, the sewing machine should also be equipped with a lever that drops down towards the presser foot. Not all basic sewing machines are supplied with this single step presser foot so it may need to be purchased separately. Almost all basic machines that offer a buttonhole setting however, will include a simple presser foot like the one pictured above which aligns to the buttonhole lines allowing you to sew it in 4 separate steps. It is highly recommended that you practice a number of times on scrap fabric before applying the final button hole on the garment. Doing this on a home sewing machine can take some getting used to which is why this is a setting for an intermediate-advanced dressmaker. Stretch Fabric Setting The stretch fabric setting is available on most basic sewing machines and is used on highly stretch fabrics like those in active wear or swimwear. The stretch setting applies the appropriate tension necessary to sew such highly stretch fabrics. It works hand-in-hand with zig zag stitches to achieve the correct balance of tension and stitch flexibility. Special Features Additional special settings offered by various sewing machines are sort of like the cherry on top. You can certainly get the job done without them but they add convenience and facilitate the sewing process. Different sewing machines have different special features depending on the brand and type of sewing machine. Embroidery sewing machines will have special features that facilitate the embroidery process, while a basic home sewing machine features additional specialized settings to facilitate basic crafts and apparel construction. Here are some examples: A Built-in Ruler A built-in ruler is not a necessity, but it does create convenience. You can use it to do some quick measuring in real time without the use of a separate ruler. Not all sewing machines will have this, but it does add a nice touch which will most likely not increase the price of the sewing machine itself. Needle Position Selector This setting allows you to move the needle left, right or center. Most straight stitches are set to the center needle position. In some cases, having the ability to shift the needle allows you to achieve specialized sewing techniques for embroidery, top-stitching, sewing a buttonhole and even sewing a button. Not all sewing machines include this capability, but when present, it works with other settings like the buttonhole setting, embroidery and some zig zag stitches. Embroidery Stitches Embroidery stitches will most likely increase the price of the sewing machine. Embroidery sewing machines are usually computerized and can be a bit too complex for a beginner. However, if you do plan on using some embroidery in your future projects and have some extra income to spend, look for a machine that offers a few embroidery stitches as a special feature. The issue with embroidery-focused machines is that they can prove to be too confusing and difficult to use for a sewing beginner. If you have never owned a sewing machine and you want to start from the ground up, we suggest you stick to a basic to mid-range regular model before investing in an embroidery machine. Nevertheless, if embroidery is your field of choice, it might be worth the initial investment.
5 Comments
2/11/2021 11:12:21 pm
It is very insightful and helpful for me. I appreciate the useful information you include in your articles. I have read your post. Thank you for posting this.
Reply
6/7/2021 12:46:41 pm
It's good to know that it should have a zigzag stitch setting. My sister was telling me last night about how she is planning on looking into getting a sewing machine in a couple of weeks, and she wants to make sure that she can find the right one to get. I'll make sure to pass these tips along to her as she searches for a sewing machine to get.
Reply
6/7/2021 12:46:54 pm
It was really interesting when you explained that it is a good idea to start small when you are looking to purchase a sewing machine. My wife is wanting to get into sewing so that she can make clothes once we start having our own kids. Once we start having kids, my wife will probably need to upgrade to a larger sewing machine.
Reply
6/8/2021 07:23:50 am
I want to make sure that I get the right sewing machine. It makes sense that I would want to get one that I can do basic maintenance on it. That seems like a great way to ensure that I can take good care of it.
Reply
Leave a Reply. |
The Blog:A journey into our design process, sewing tutorials, fashion tips, and all the inspiring people and things we love. Doina AlexeiDesigner by trade and dressmaker at heart. I spend most of my days obsessing over new fabrics and daydreaming new ideas. Sadie
Executive Assistant & Client Relations Manager Archives
November 2019
Categories
All
|
-
Sewing Tutorials
-
Basics
>
- Aligning Pattern Grainlines To Fabric
- Preparing Fabrics For Sewing
- Pinning Sewing Patterns To Fabric
- Placing Sewing Patterns On Fabric For Cutting
- Rotary Cutters or Fabric Scissors?
- Cutting The Sewing Patterns
- What Are Notches And How To Use Them In The Sewing Process
- Transferring Notches From Pattern To Fabric
- Transferring Seamlines to Fabric
- Staystitching
- Backstitching: A Complete Guide
- Hand Basting: A Complete Guide
- Sewing Continuous Bias Binding
- Darts >
-
Sewing Seams
>
- The Basics Of Seams And Seam Allowance
- How To Sew A Straight Seam
- Sewing Curved Seams
- Sewing Corner Seams
- Trimming And Grading Seam Excess
- Notching/Clipping Seam Allowance for Tension Release
- Sewing Topstitched Seams
- Sewing Corded Seams
- Sewing A Slot Seam
- Sewing A Gathered Seam
- Sewing Bias Seams
- Sewing Seams With Ease
- Sewing Seams With Crossing Seamlines
- Sewing Unlike Fabric Seams
- How To Iron Seams: Ironing Tools And Conventions
- Sewing With Knit Fabrics
- Understanding Stitch Length And Tension
- Sewing Unique Fabric Seams
-
Seam Finishes
>
- Seam Finishing Techniques - Overview
- Applying A Pinked Seam Finish
- Applying A Bias Bound Seam Finish
- Serging And Zigzag Seam Finishes
- Sewing A Self-Bound Seam Finish
- Sewing A French Seam Finish
- Sewing A Hong Kong Seam Finish
- Sewing A Mock French Seam Finish
- Sewing A Turned-and-Stitched Seam Finish
- Sewing Overcast Hand-Applied Seam Finishes
- Sewing A Flat Felled Seam
- Sewing A Hairline Seam Finish
-
Hem Finishes
>
- Garment Hem Finishes: Overview
- Sewing A Double Fold Hem Finish
- Sewing A Single Fold Hem Finish
- Sewing Bound Hem Finishes
- Sewing An Exposed Double Layer Bound Hem
- Sewing A Folded-Up Bound Hem with Pre-folded Binding
- Sewing A Hong Kong Hem Finish
- Sewing A Band Hem Finish
- Sewing A Bias Faced Hem Finish
- Sewing A Twill Tape Hem Finish
- Sewing A Rolled Hem Finish
- Sewing A Shaped Hem Facing
- Using Fusible Hem Tape And Webbing
- Finishing A Lace Fabric Hem
- Finishing A Leather Hem
- Sewing Faced Hem Corners
- How To Finish Lining At The Hem
- Finishing Fabric Corners by Mitering >
- Interfacing A Hemline: Lined And Unlined Examples
-
Sewing Pockets
>
- Curved Patch Pocket With Flap
- Unlined Square Patch Pockets
- Lined Patch Pockets: Two Ways
- Extension On-Seam Pockets
- Separate On-Seam Pocket
- Front Hip Pockets
- Bound Double Welt Pocket
- Double Welt Pocket With Flap
- Self-Welt Pocket (Using Single Fabric Layer)
- Slanted Welt Pocket (Hand-Stitched)
- Faced Slash Pockets: Overview >
-
Sewing Zippers
>
- Sewing Zippers: General Information
- Sewing A Centered Zipper
- Sewing A Lapped Zipper
- Sewing An Invisible Zipper
- Sewing A Fly Front Zipper
- Sewing A Closed-End Exposed Zipper (No Seam)
- Sewing An Exposed Separating Zipper
- Sewing Hand Stitched Zipper Applications
- Sewing A Zipper Underlay
- Sewing A Placket-Enclosed Separating Zipper
- Sleeveless Finishes >
-
Neckline Finishes
>
- Sewing A Neck Shaped Facing
- Sewing An All-In-One Neck Facing
- Neck And Garment Opening Combination Facings >
- Sewing A Bias Faced Neckline Finish
- Sewing A Band Neckline Finish
- Bound Neckline Finishes: Overview >
- Sewing A Semi-Stretch Strip Band Neckline
- Ribbed Neck Band And Classic Turtleneck
- Decorative Neckline Finishes >
- Finishing Facing Edges >
-
Extras
>
- A Complete Guide on Interfacing
- Sewing Bound Spaghetti Straps
- Sewing Spaghetti Straps To A Faced Neckline
- Sewing Ruffles: Overview
- Patterning And Sewing A Circle Ruffle
- Sewing A Gathered Heading Ruffle
- Sewing Double Layer Gathered Ruffles
- Sewing A Gathered Ruffle Into A Seam
- Sewing A Gathered Ruffle To A Fabric Edge
- Sewing A Fabric Surface Slit
- Sewing A Slit Seam
- Hand-Applied Straight Stitches
- Hand-Applied Blind Stitches
- Hand-Applied Overedge Stitches
- Hand-Applied Tack Stitches
- Hand-Applied Decorative Stitches
-
Basics
>
- Custom Bridal
- Custom Apparel
- About
- Blog
Services |
Company |
|



 RSS Feed

