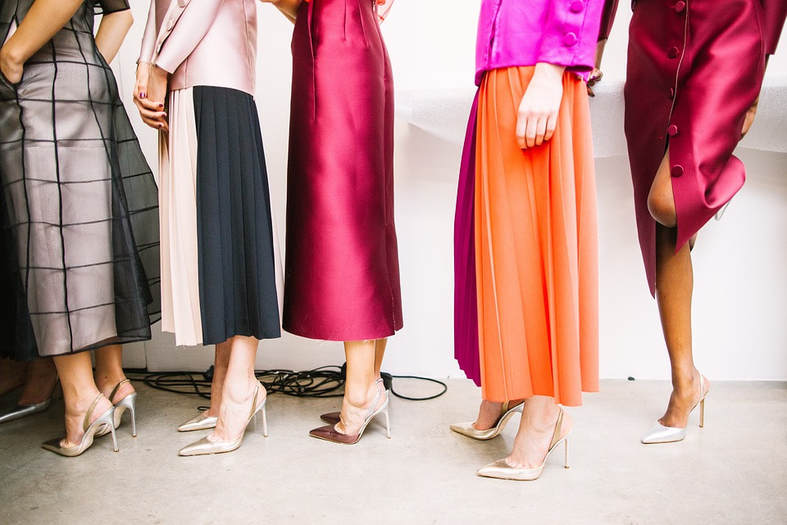
 1. If it uses more fabric, it should be more expensive. It couldn't be farther from the truth. Just because a clothing item uses a lot more yardage of fabric does not mean that it should automatically cost more. Although the amount of fabric used is certainly important, it is not the sole factor that determines the price of a garment. If we break down how fabric affects the cost of a clothing item, then quality and content is always at the forefront. Natural fibers and some embellished fabrics will often cost more per yard then commonly-used, synthetic fabrics. For that reason, it is quite acceptable that the price of a clothing item that uses less fabric is sometimes more expensive due to the higher cost of the fabric per yard. A polyester maxi dress requires more fabric but will most likely be less expensive than let's say a silk charmeuse sleeveless blouse that doesn't require as much material. The difference is in the quality and cost of the fabric alone- silk is a pricier, more luxurious fabric that is not as readily-available and massively produced at lower costs as synthetic polyester is.  Fabric alone is not what determines the overall price of a garment either. There are a few different aspects being considered when deciding on the final cost of a garment. Production costs and the quality of all sewing/aesthetic finishes are a huge contributing factor. Although not always visible on the outside of a garment, more expensive seam finishes like french or bound seams will hike up the cost of a clothing item whether it uses a lot or very little fabric. Additional finishes like appliques, findings and trims that are made of higher-grade materials requiring more construction steps will also a raise a garment's bottom line. When it comes to the cost of production, where a garment is manufactured/produced will have a great impact on the final price despite the amount of fabric being used. Clothing that is made in the USA is always more expensive than that manufactured abroad. There is simply a lot more overhead cost to produce apparel at home, not to mention that labor costs are always higher. Smaller brands are usually the ones manufacturing in the USA due to their small quantity requirements. Thus, the smaller the quantity the higher the overhead cost in production which ultimately results in a higher costing garment. Clothing manufactured in the US compared to that manufactured abroad is another myth we'll debunk below! 2. Clothing made in the USA is higher quality.  The truth? Not necessarily. While clothing manufactured in the USA can certainly be of higher grade, this does not mean that apparel produced abroad is always worse in quality. This common misconception is due to the higher price of clothing manufactured in the US. We always assume that if something costs more it must be better quality. After all, you get what you pay for, right? When it comes to clothing however, that is not always the case. Producing apparel in the USA is often more expensive due to overhead costs and price of labor and materials. Companies that manufacture in the USA usually produce smaller quantities which ends up costing the factory more in overhead thus hiking up the wholesale and ultimately, retail price of the garment. The best way to make this comparison is to look at the actual physical differences and similarities between a similar clothing item produced in the USA and one that is produced abroad. If you put them side by side, you might not notice much of a difference aside from the higher price difference. If you turn the two garments inside out and look at the seam finishes, it is very likely that you wont find much of a difference. Finally, check the fabric content on the care tags. A blend of synthetics fibers will most likely cost less than natural fibers like silk, bamboo and linen. If you find that both items are similar in fabric content yet the prices fall into completely opposite ranges, then their cost has to do with place and cost of manufacture rather than quality. 3. You have to spend a lot of money to be fashionable.  No, you don't. Competition in the fashion market has really allowed the consumer to get their money's worth in recent years. Both brands and retail stores are adding new, affordable stock almost monthly. At the forefront of the fashion industry is aiming to please the consumer who has a shorter attention span and always looking to replenish his/her closet with the newest of trends at the lowest cost. Online alternatives for inexpensive fashion and brick-and-mortar stores that offer fast fashion at a very affordable price has pushed other retailers that normally carry higher-priced stock to follow suit and provide less expensive outlets. All of this means that you do not have to spend a lot too look great and feel comfortable. From a quality perspective, competition and globalization has made it possible for the fashion consumer to find good clothing that is just as fashionable as it is well-made. If you are the type of person that doesn't like discussing how much you pay for your clothing, then you are in luck- With the range of apparel choices available on the market today, no one will be able to tell the difference. Aside from that, style goes beyond the price tag. Style is all about you and how you wear it. It makes no difference how much it costs if you know how to style and wear a clothing item well. When the silhouette and fit work harmoniously with your body type, you can look like a million bucks at a very low cost. Pairing some of your favorite wardrobe staples that are timeless and elegant with a trendy, less expensive clothing item is a great styling alternative. Mix and match your pieces regardless of how much they cost. This is a great way to balance out your style and achieve a look that works wonders regardless of the price tag. 4. If it stretches, it's a knit fabric.  As a very common misconception for many people, this one requires a bit of basic knowledge about fabrics. While it is very true that knits always stretch, that does not mean that every fabric that stretches is a necessarily a knit. If you are not familiar with the concept of fabric weave at all (and maybe not all that interested in learning too much about it) then just keep this in mind: There are two main groups of fabrics: Woven and knit fabrics. The difference between the two is in the way they are woven. Knit fabrics are woven in loops such that they always stretch regardless of the fiber content. Woven fabrics are made by interlacing the threads together at right angles. This weave does not stretch naturally unless spandex or other elastic composition is added to the fabric content. So the main difference is: Knit fabrics always stretch due to the way they are woven while basic woven fabrics do not usually stretch based on their weave but rather based on content. Now that you have some background on these two fabric weave types, the logical conclusion is that not all fabrics that stretch are knits. A woven (normally non-stretch) fabric that has enough spandex content (14% max) can sometimes stretch more than a knit fabric. A regular woven fabric can resemble a knit and have lots of stretch due to the addition of Spandex but it would still not be considered a knit fabric due to the fact that it is not constructed using a knit weave. 5. If the care tag says Dry Clean Only, the clothing item should be dry cleaned, only.  We might get in trouble for spilling out the beans but the truth is, not all items that have a Dry Clean Only tag need to be dry cleaned necessarily. Clothing brands and manufacturers mark garments as Dry Clean Only to ensure that there is absolutely no potential risk of damage at the cost of their designated care instructions. That is not to say that ALL dry clean only clothing items can be washed at home. Items that require dry cleaning are those that can loose their structure, became weakened, or impossible to iron after contact with water. A Dry Clean Only tag does not always mean that the garment can't withstand hand washing or a very gentle machine washing cycle. It simply means that there is somewhat of a damage risk if the wash cycle or water temperature is set incorrectly for the vulnerability of the garment. Using dry cleaning ensures that the wearer simply avoids the possibility of damaging the clothing item. The truth is, you can actually avoid dry cleaning for certain Dry Clean Only garments if you pay close attention to fabric content. For example, most regular silk garments can be gently hand washed in cold water and laid flat to dry. Some wool fabrics can also be cared for at home even if the care instructions require dry cleaning only. It is certainly recommended that you do some research on how to care for certain fabrics at home first before taking on the actual task of washing vulnerable clothing items. Techniques should be researched based on fabric content and you should always pay close attention to water temperature and required means for drying more sensitive clothing items. Water that is too hot or applying too much friction during at-home washing can risk damaging the fabric. However, if you master a few washing techniques you can do at home will save you a considerable amount of money on dry cleaning in the long run. If you are unsure of what clothing items you can care for at home, do a quick online search of the particular fabric at hand. A good rule of thumb is: If you are uncertain and don't feel comfortable taking on the (sometimes intimidating) task of hand-washing then stick to dry cleaning instead. 6. Sheer fabrics are difficult to wear and style. 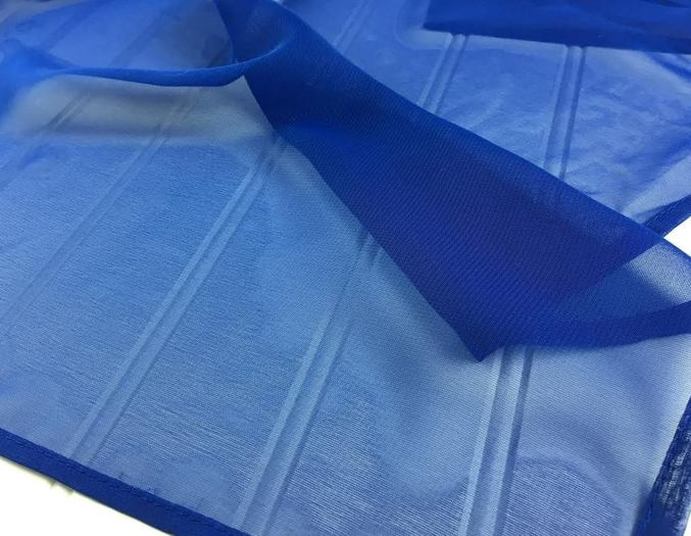 Truthfully, some fabrics are indeed much more difficult to wear and style than others. Some people might consider sheer fabrics to fall in this category, but actually, that could not be farther from the truth. Sheer fabrics are perhaps some of the most versatile out there if you know a couple of styling tricks. You can wear sheer boluses with almost anything if you invest in some plain spaghetti strap tanks in a few different colors. You can find some really inexpensive ones on the market costing not more the $5 each. Layering them with all your sheer tops is fast and easy yet always looks elegant and feminine. The tank top underneath keeps you warm and the combination of the two items allows for a great seasonal transition. The same is true for semi-transparent dresses and bottoms. These are not necessarily styles you can easily find on the marked because of the misconception that they are difficult to wear/style. However, if you invest in a plain, solid-colored dress you can always layer it with all your see-through dresses that are otherwise more difficult to style. Garments made of sheer fabrics like poly and silk chiffon, lace and embroidery make for great layering pieces. Most sheer blouses are light enough to be tucked into high waist bottoms and have a beautiful, flowing drape when worn over the hips in a relaxed fashion. On the same note, see-through tops (such as chiffon blouses) work great in a casual setting just as much as they do in a more formal one- the secret is in the styling. Wear a sheer blouse with a pair of jeans for a semi-dressy, everyday look or pair it with a pair of dark color trousers or suits for more formal, business-casual occasions.
2 Comments
1/4/2022 02:17:52 am
Great post! We adore this blog and This information is very good.Started humble in 2012, Luminous Printing is a T-shirt printing company in Singapore.
Stats N Data
3/1/2024 03:10:24 am
Great post! For unparalleled market insights and research resources tailored specifically to the market research industry, explore Stats N Data (https://www.statsndata.org). Our platform offers invaluable market intelligence across diverse domains, empowering businesses with actionable insights that drive success. Looking forward to more engaging content from you! Leave a Reply. |
The Blog:A journey into our design process, sewing tutorials, fashion tips, and all the inspiring people and things we love. 
Doina AlexeiDesigner by trade and dressmaker at heart. I spend most of my days obsessing over new fabrics and daydreaming new ideas. 
Sadie
Executive Assistant & Client Relations Manager Archives
November 2019
Categories
All

|

-
Sewing Tutorials
-
Basics
>
- Aligning Pattern Grainlines To Fabric
- Preparing Fabrics For Sewing
- Pinning Sewing Patterns To Fabric
- Placing Sewing Patterns On Fabric For Cutting
- Rotary Cutters or Fabric Scissors?
- Cutting The Sewing Patterns
- What Are Notches And How To Use Them In The Sewing Process
- Transferring Notches From Pattern To Fabric
- Transferring Seamlines to Fabric
- Staystitching
- Backstitching: A Complete Guide
- Hand Basting: A Complete Guide
- Sewing Continuous Bias Binding
- Darts >
-
Sewing Seams
>
- The Basics Of Seams And Seam Allowance
- How To Sew A Straight Seam
- Sewing Curved Seams
- Sewing Corner Seams
- Trimming And Grading Seam Excess
- Notching/Clipping Seam Allowance for Tension Release
- Sewing Topstitched Seams
- Sewing Corded Seams
- Sewing A Slot Seam
- Sewing A Gathered Seam
- Sewing Bias Seams
- Sewing Seams With Ease
- Sewing Seams With Crossing Seamlines
- Sewing Unlike Fabric Seams
- How To Iron Seams: Ironing Tools And Conventions
- Sewing With Knit Fabrics
- Understanding Stitch Length And Tension
- Sewing Unique Fabric Seams
-
Seam Finishes
>
- Seam Finishing Techniques - Overview
- Applying A Pinked Seam Finish
- Applying A Bias Bound Seam Finish
- Serging And Zigzag Seam Finishes
- Sewing A Self-Bound Seam Finish
- Sewing A French Seam Finish
- Sewing A Hong Kong Seam Finish
- Sewing A Mock French Seam Finish
- Sewing A Turned-and-Stitched Seam Finish
- Sewing Overcast Hand-Applied Seam Finishes
- Sewing A Flat Felled Seam
- Sewing A Hairline Seam Finish
-
Hem Finishes
>
- Garment Hem Finishes: Overview
- Sewing A Double Fold Hem Finish
- Sewing A Single Fold Hem Finish
- Sewing Bound Hem Finishes
- Sewing An Exposed Double Layer Bound Hem
- Sewing A Folded-Up Bound Hem with Pre-folded Binding
- Sewing A Hong Kong Hem Finish
- Sewing A Band Hem Finish
- Sewing A Bias Faced Hem Finish
- Sewing A Twill Tape Hem Finish
- Sewing A Rolled Hem Finish
- Sewing A Shaped Hem Facing
- Using Fusible Hem Tape And Webbing
- Finishing A Lace Fabric Hem
- Finishing A Leather Hem
- Sewing Faced Hem Corners
- How To Finish Lining At The Hem
- Finishing Fabric Corners by Mitering >
- Interfacing A Hemline: Lined And Unlined Examples
-
Sewing Pockets
>
- Curved Patch Pocket With Flap
- Unlined Square Patch Pockets
- Lined Patch Pockets: Two Ways
- Extension On-Seam Pockets
- Separate On-Seam Pocket
- Front Hip Pockets
- Bound Double Welt Pocket
- Double Welt Pocket With Flap
- Self-Welt Pocket (Using Single Fabric Layer)
- Slanted Welt Pocket (Hand-Stitched)
- Faced Slash Pockets: Overview >
-
Sewing Zippers
>
- Sewing Zippers: General Information
- Sewing A Centered Zipper
- Sewing A Lapped Zipper
- Sewing An Invisible Zipper
- Sewing A Fly Front Zipper
- Sewing A Closed-End Exposed Zipper (No Seam)
- Sewing An Exposed Separating Zipper
- Sewing Hand Stitched Zipper Applications
- Sewing A Zipper Underlay
- Sewing A Placket-Enclosed Separating Zipper
- Sleeveless Finishes >
-
Neckline Finishes
>
- Sewing A Neck Shaped Facing
- Sewing An All-In-One Neck Facing
- Neck And Garment Opening Combination Facings >
- Sewing A Bias Faced Neckline Finish
- Sewing A Band Neckline Finish
- Bound Neckline Finishes: Overview >
- Sewing A Semi-Stretch Strip Band Neckline
- Ribbed Neck Band And Classic Turtleneck
- Decorative Neckline Finishes >
- Finishing Facing Edges >
-
Extras
>
- A Complete Guide on Interfacing
- Sewing Bound Spaghetti Straps
- Sewing Spaghetti Straps To A Faced Neckline
- Sewing Ruffles: Overview
- Patterning And Sewing A Circle Ruffle
- Sewing A Gathered Heading Ruffle
- Sewing Double Layer Gathered Ruffles
- Sewing A Gathered Ruffle Into A Seam
- Sewing A Gathered Ruffle To A Fabric Edge
- Sewing A Fabric Surface Slit
- Sewing A Slit Seam
- Hand-Applied Straight Stitches
- Hand-Applied Blind Stitches
- Hand-Applied Overedge Stitches
- Hand-Applied Tack Stitches
- Hand-Applied Decorative Stitches
-
Basics
>
- Custom Bridal
- Custom Apparel
- About
- Blog
 RSS Feed
Services |
Company |
|
