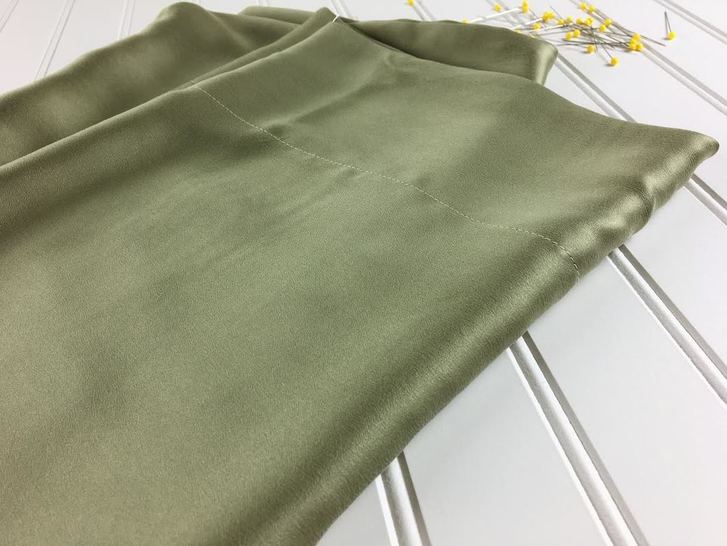
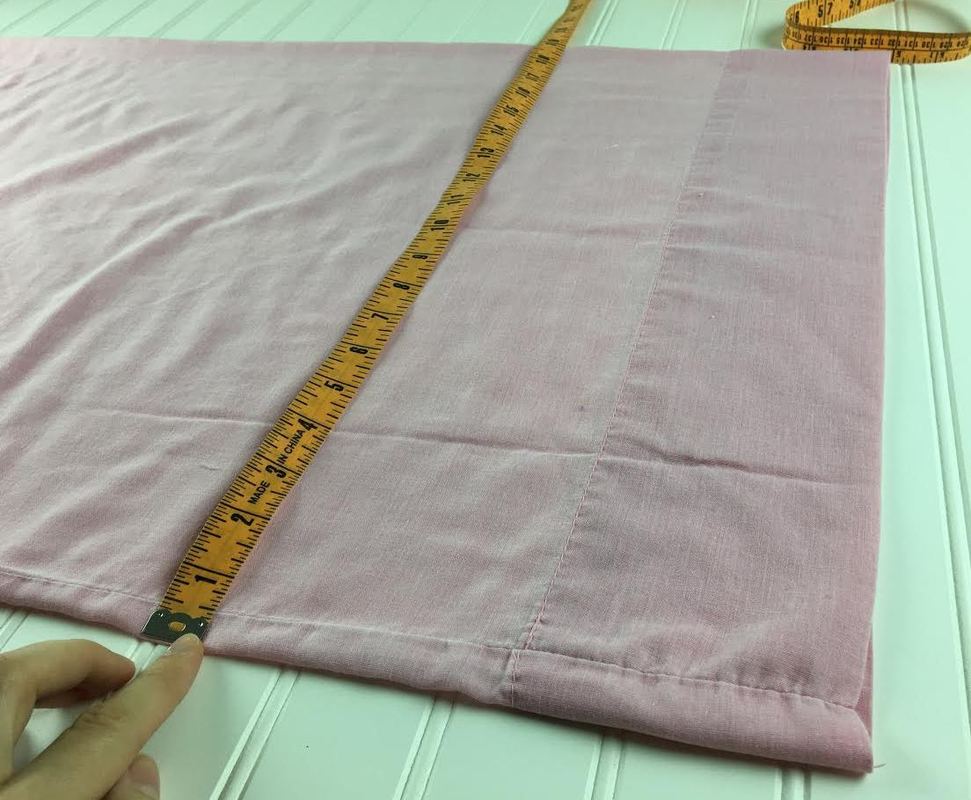
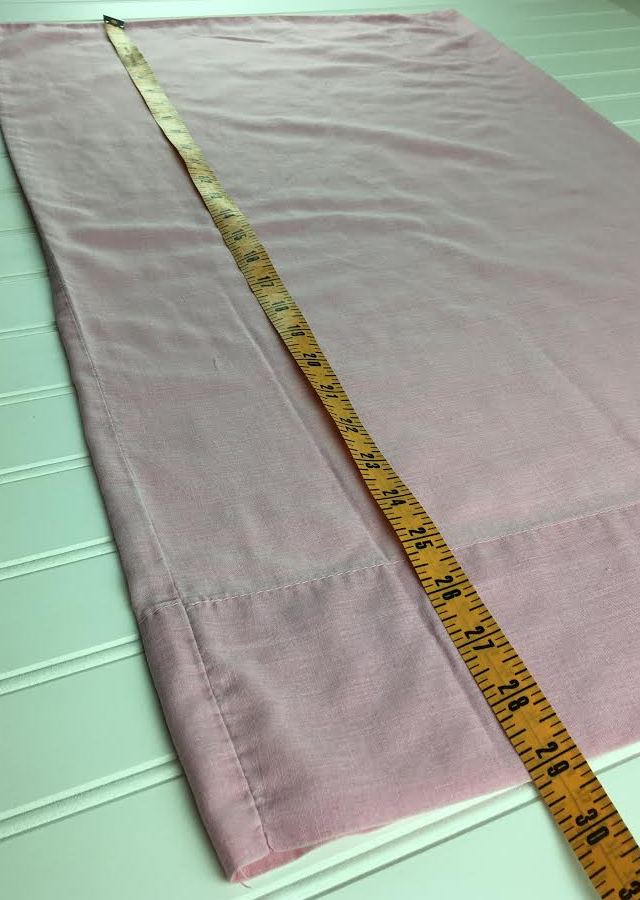
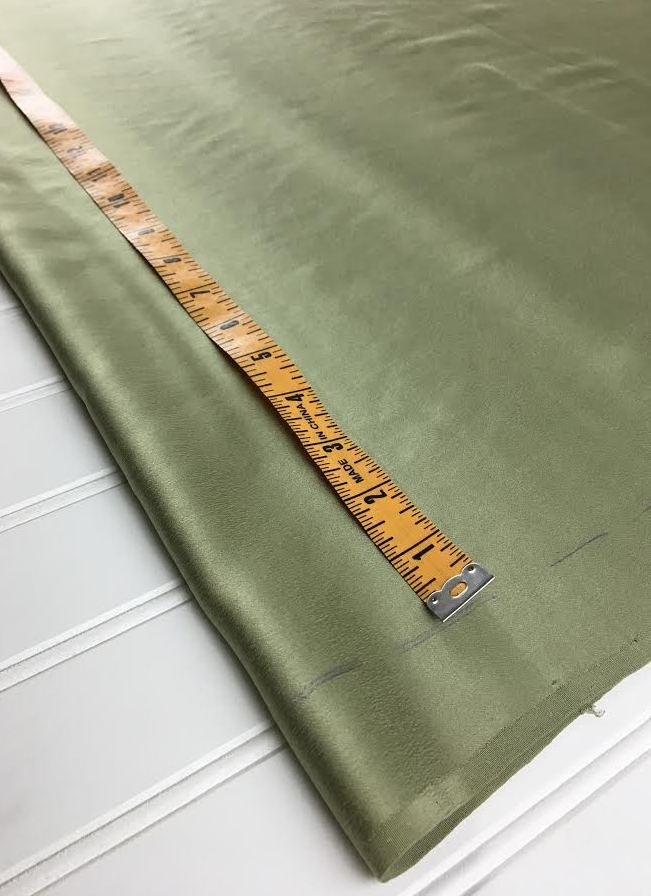
 Rumor has it that sleeping on a silk pillowcase is much easier on the skin, possibly reducing wrinkles and skin irritations during the night. The constant tossing and turning on a regular pillowcase doesn't hurt your skin by any means but it certainly adds to those sleep wrinkles we sometimes end up with in the morning. Although they go away in a matter of minutes (and sometimes even hours), it's always a good idea to stay away from things that unnecessarily wrinkle or irritate the skin, even if only temporarily. If you do a quick Google search for "how to prevent face wrinkles" you'll find that one of the suggestions listed is sleeping on a silk pillowcase. Why? Well, silk fabric has a smooth, soft quality and doesn't form deep fabric wrinkles like cotton does. This allows the face to rest more flat and maintain a smooth surface throughout the night. In addition, silk is made of 100% natural fibers which means it is just as absorbent as cotton, allowing the skin to breath comfortably during the night. Speaking of comfort, silk feels extremely soft and luxurious on the skin which certainly contributes to a better night's sleep. Now let's talk money: Silk is a more expensive fabric which means if you want to switch to silk pillowcases, it might turn out to be a bit of an investment. If you're not ready to dig into your savings just yet, no problem! Being the resourceful, crafty person that you are, you can actually make your own silk pillowcases. All you have to do is get the fabric and take out your trusty sewing machine. We'll show you the easiest way to do so bellow, but first a few things to remember about silk fabric:  1. Silk fibers can deteriorate with too much friction and heat which means washing it in warm to hot water is a big no-no. If your washer has a hand-wash setting always use it to wash your silks and makes sure the water is cold or cool. To be on the safe side, you can always gently wash silk by hand with soap or very gentle detergent. 2. When shopping for silk fabric, check the label for machine washable silk. Yes, there is such a thing and we have the goods to prove it. An example of machine-washable silk is a sueded silk which has been sand washed in an industrial setting about 5000 times to create a soft, "fuzzy"coating. This treatment allows for the silk to withstand much greater tolerance for friction which makes it perfect for everyday clothing and silk pillowcases. That being said, you should still take some precautions when machine washing it: Cold to cool water in addition to the most gentle setting you have available on your washing machine. 3. When sewing with silk, especially silk charmeuse and chiffon, it is recommended that instead of a zig-zag stitch or serging along the raw edges of the seam you use a french seam finish. This technique will not only ensure that the edges don't fray over time, but also creates an extremely high-quality, durable finish which should last you over a long period of time. Note: If you have an overlock machine at home, you can certainly use that to finish the inside edges but we recommend using a more dense stitch setting and make sure the needles are sharp enough to avoid pulling on the sensitive silk fibers. If a zig zag stitch is all that's available to you, we recommend a french seam for your pillowcases instead- It is not difficult and we'll show you how to do it bellow. In this tutorial, we'll guide through both the french seam method and serging so that you get a better understanding of both. Sewing The Silk Pillowcase 1. Get precise measurements from a pillowcase you already own. Using a measuring tape, measure along the width and length of an existing pillowcase. A standard pillowcase is 19" wide by 29" long.
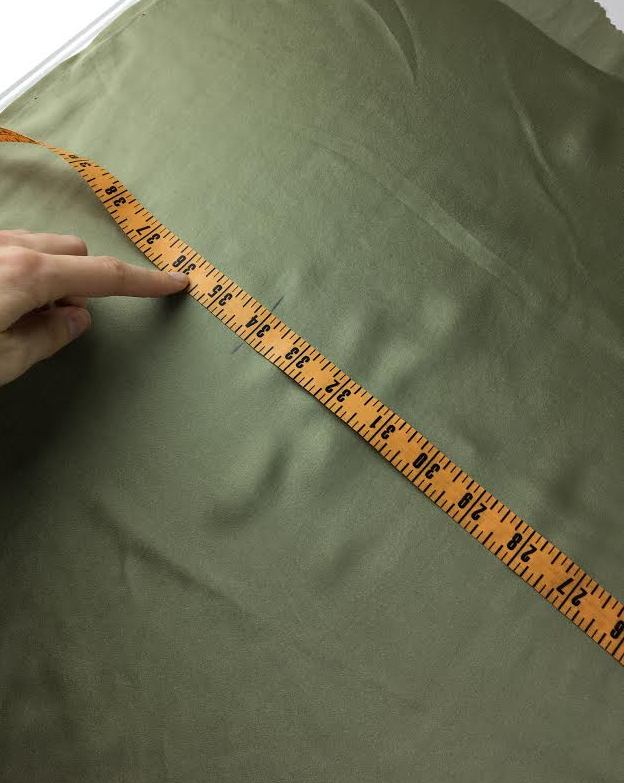
2. Add seam allowance to both measurements. You will need to add 1/2" in seam allowance to the width measurement which will give you a total of 19 1/2". Add an extra 5" to the lengthwise measurement totaling 34". The reason why a longer seam allowance is needed for the length is due to the fact that the pillowcase is folded and stitched to create the illusion of a wide band along the opening. The 5" excess also includes the 1/2" allowance necessary to sew the seam on the opposite end of the opening.
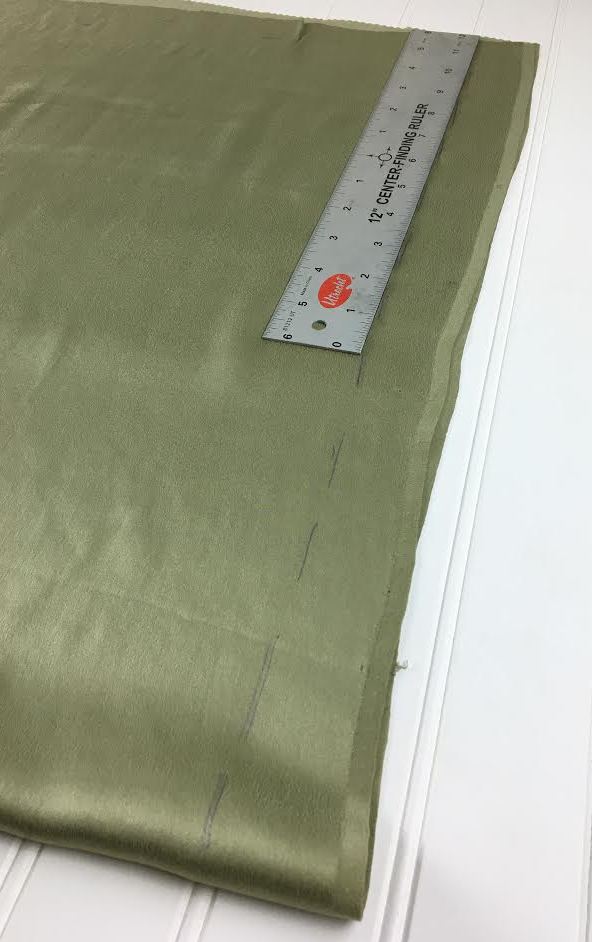
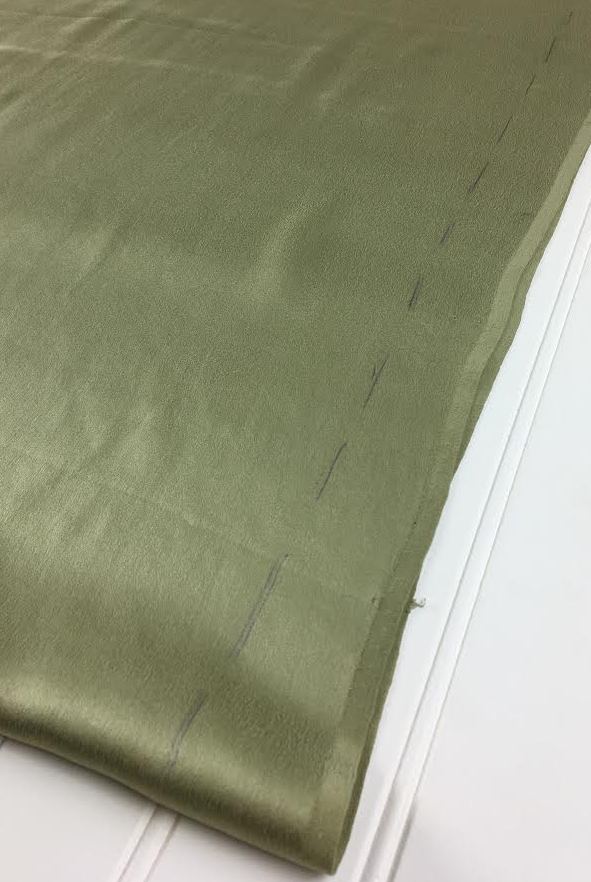
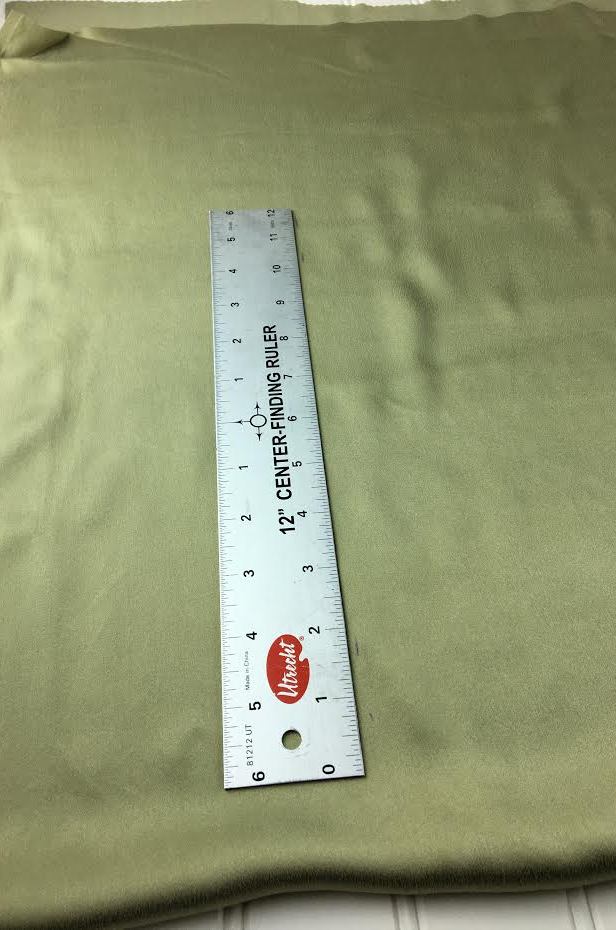
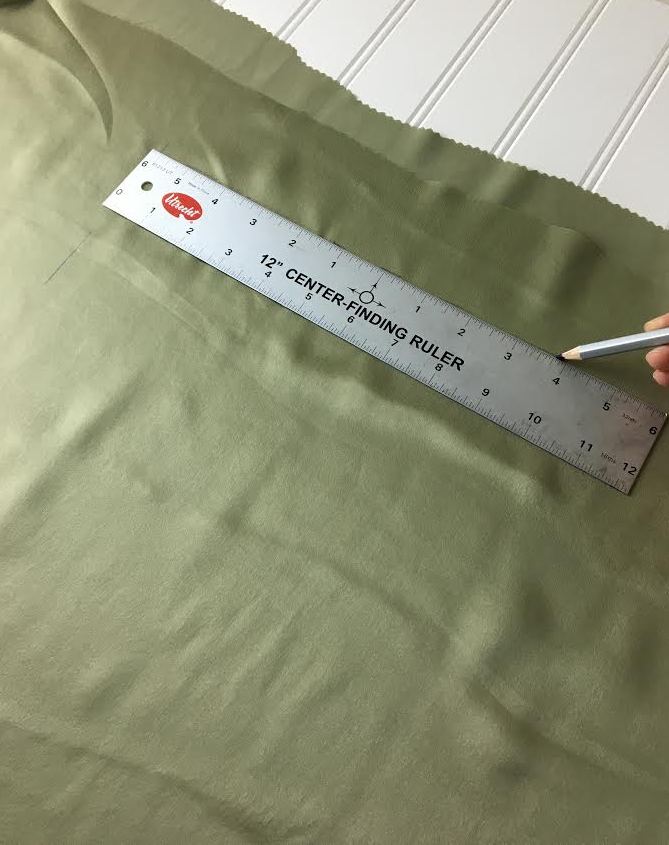
3. Fold the silk fabric lengthwise, ensuring that you have enough fabric for a 19.5" x 34" rectangle. Using a ruler and a fabric water-soluble pencil, draw a straight line perpendicular to the bottom fold, about 1" away from the edge. This will ensure that the pillow has a straight side edge. 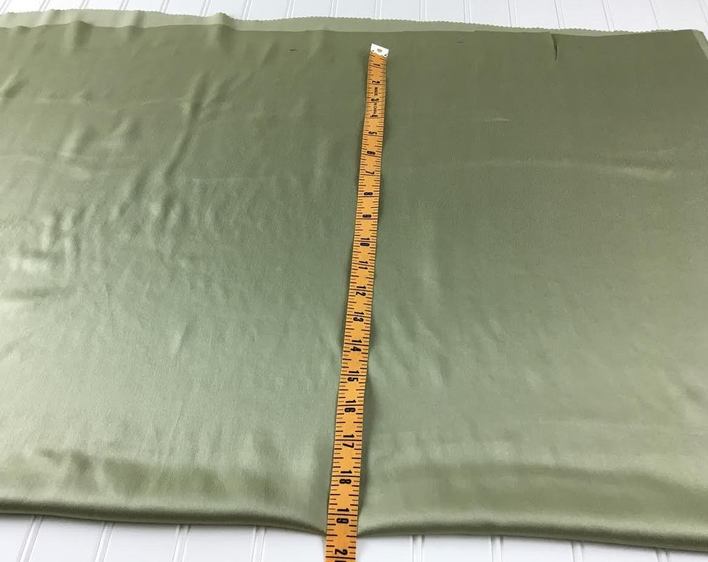 4. Starting at the fold, measure 19.5" inches up and mark a dash line with your fabric pencil. Repeat this step at different areas of the fold to achieve an alignment of dash lines which will eventually be connected into a straight line.
5. Starting at the vertical line you drew initially in Step 3, align the measuring tape parallel to the lengthwise fold and mark a dash line at 34". Repeat the step at different areas of the vertical line thus marking an alignment of vertical dashes which will form a straight line.
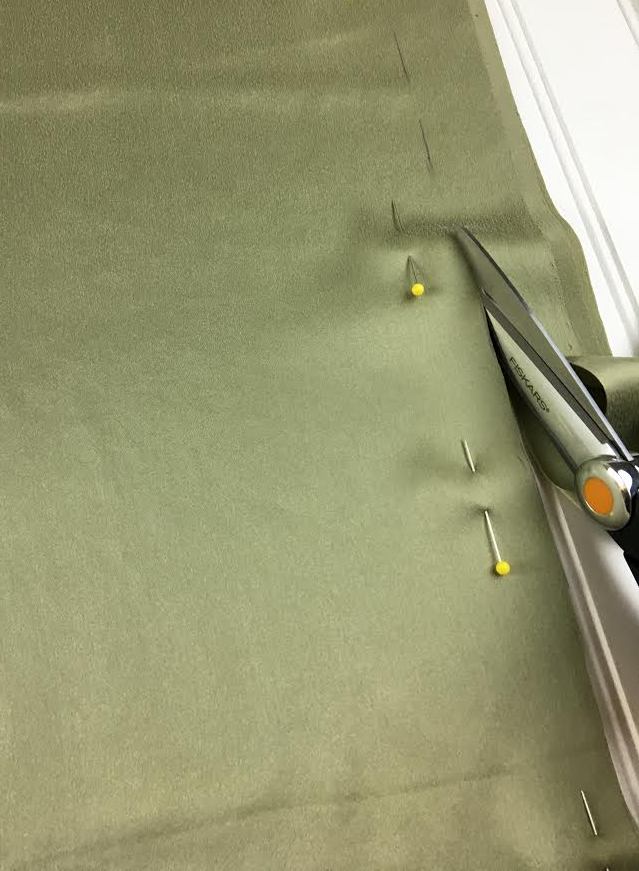
6. Using a ruler and your fabric pencil, connect all the dash lines vertically and horizontally on the fabric resulting in a 19.5" x 34" rectangle. 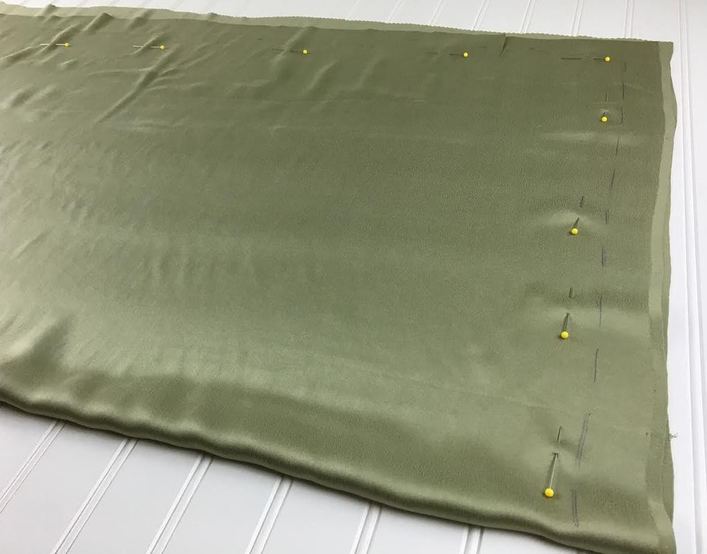 7. Before cutting, place a few pins vertically on the inside of the rectangle. Silk has a fluid drape and is more difficult to cut. Pinning the fabric on the inner edge will hold the two layers of fabric together so that both receive an even cut.
8. Carefully cut the rectangular shape following along the pencil markings. 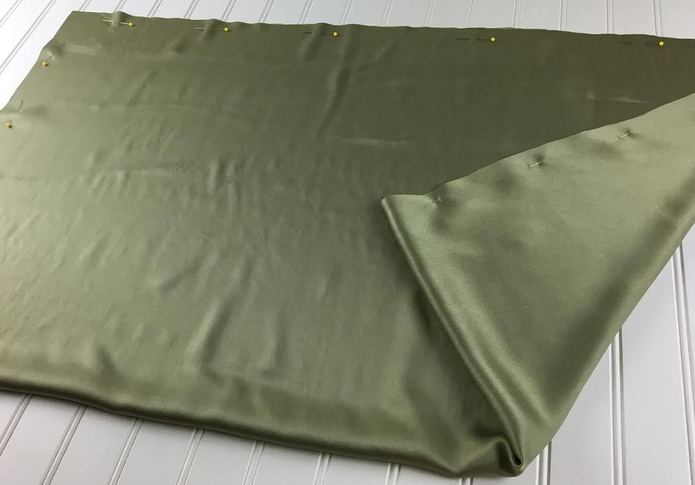 The result should be an evenly cut, double-layer rectangle with a lengthwise fold as displayed in the image above. You may now remove the stability pins. 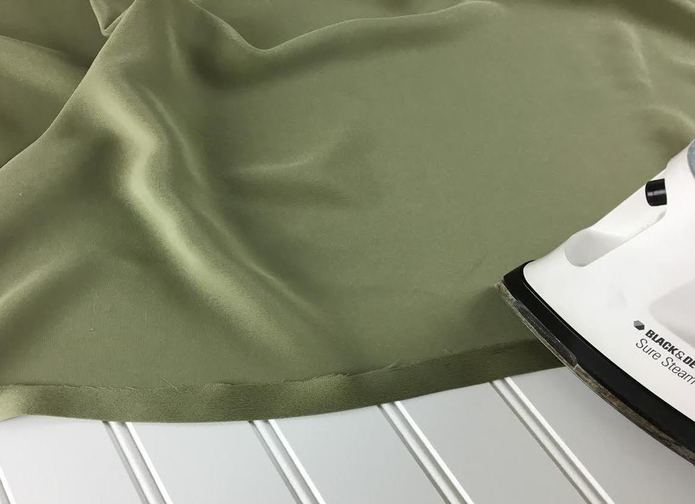 9. Working with one of the two side edge (19.5" width), fold the raw edge of the fabric at 1/2" towards the wrong side of the fabric and iron this fold to stabilize. 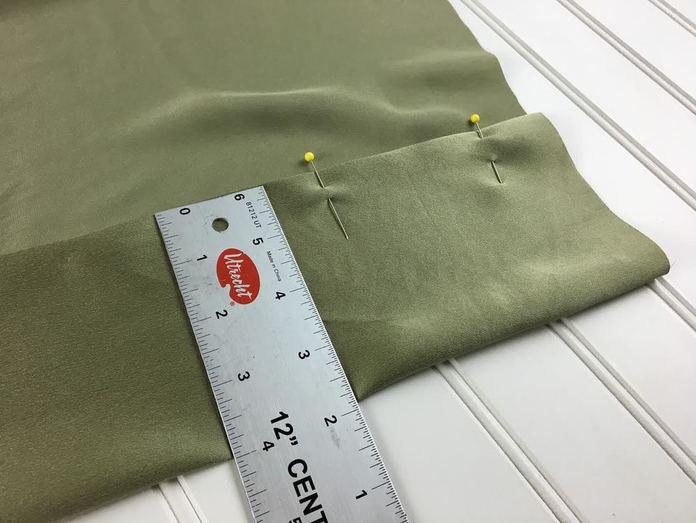 10. Fold this edge once more towards the wrong side of the fabric at 4" this time. Use a ruler to ensure that the fold measures 4" throughout. Place pins perpendicular to the top fold to hold the layers in place. 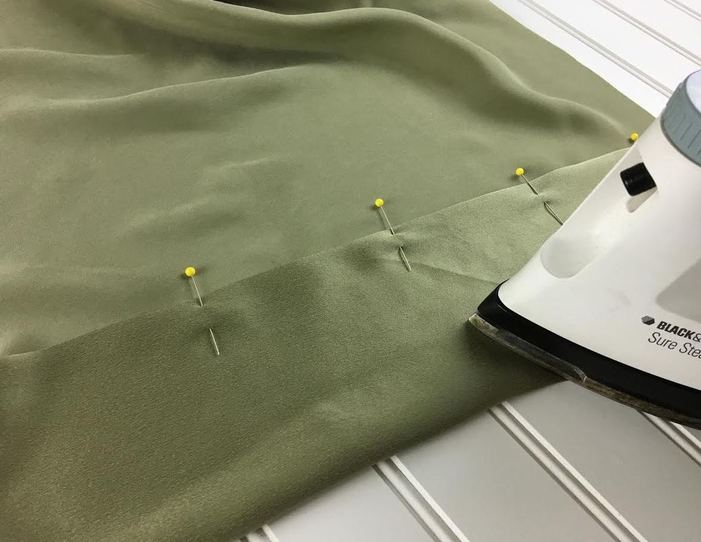 11. Iron the bottom fold for more stability. 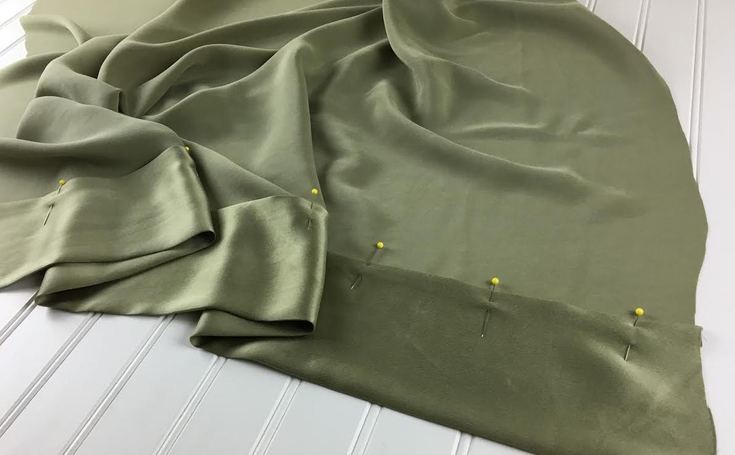 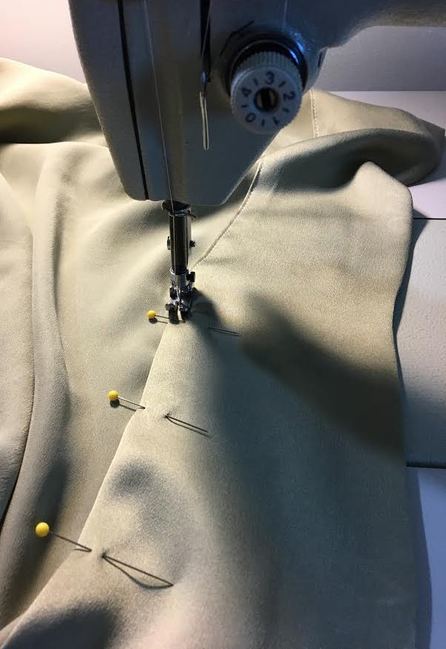 12. Using the pinned top fold as a guide, machine stitch at about 1/8" away from it. 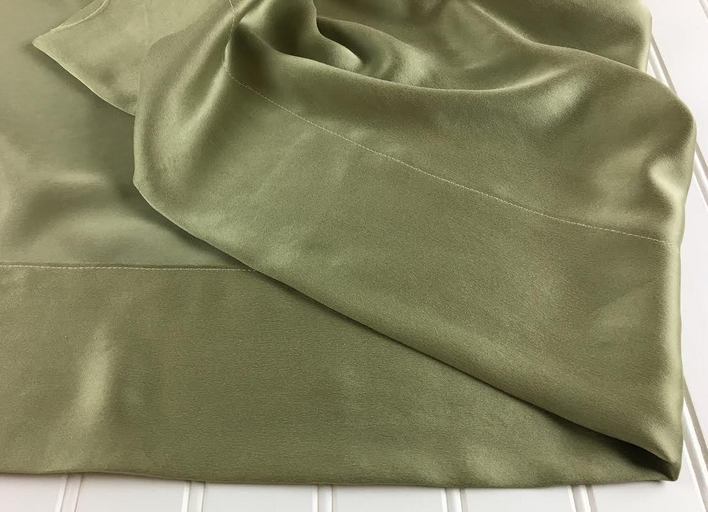 The opening edge of the pillowcase is now complete! 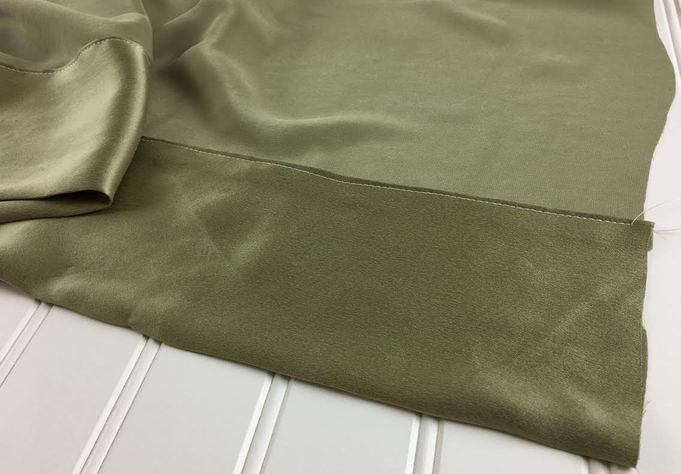 You should have a horizontal straight stitch visible on the outside of the pillowcase, while the inside is clean finished with a top-stitched fold. 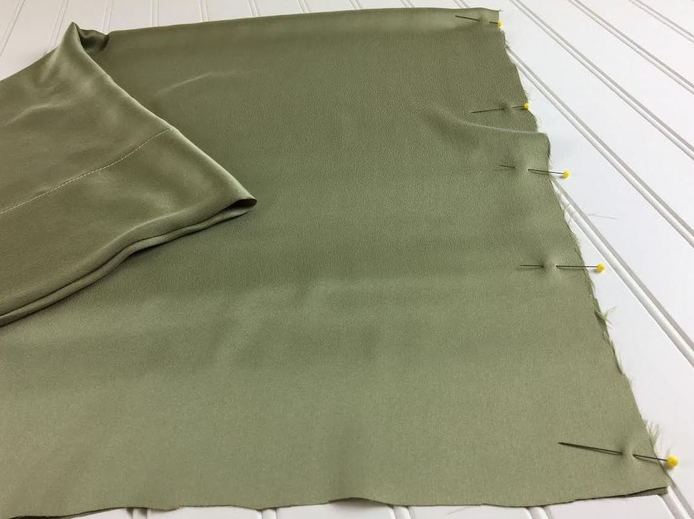 13. Working on the face side of the fabric, pin the two layers of the second side edge (19.5" width, parallel to the pillowcase's opening) horizontally as shown. This edge will be finished with a french seam. The total seam allowance is 1/2".
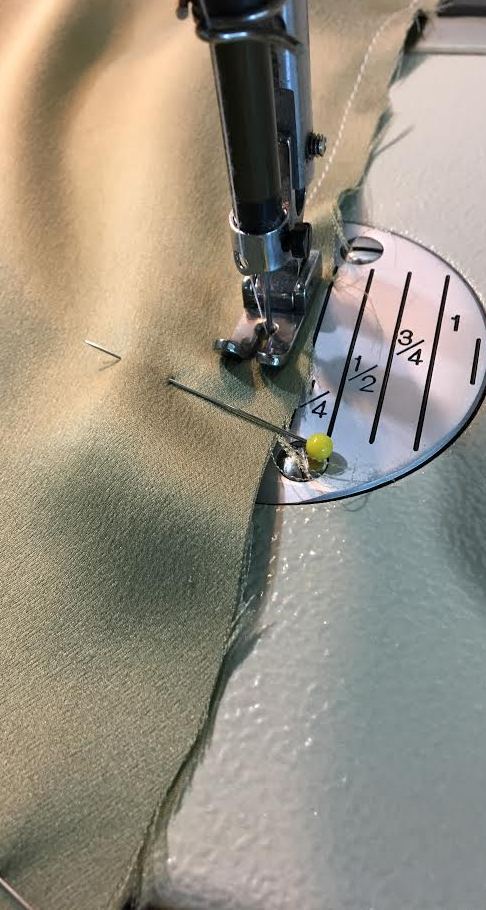
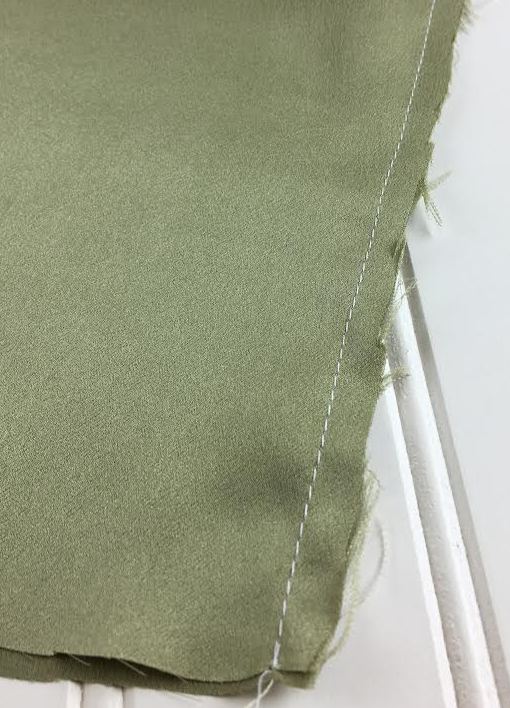
14. Straight stitch at 1/4" seam allowance from the raw edge. Make sure the face of the fabric is positioned on the outside. 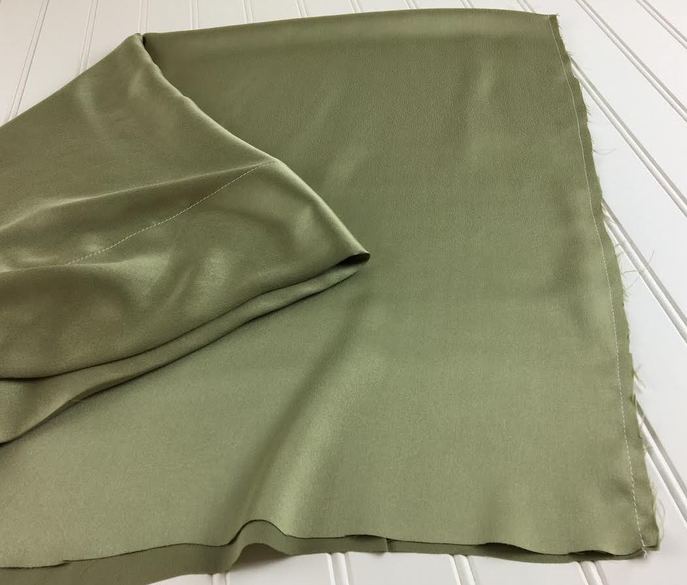 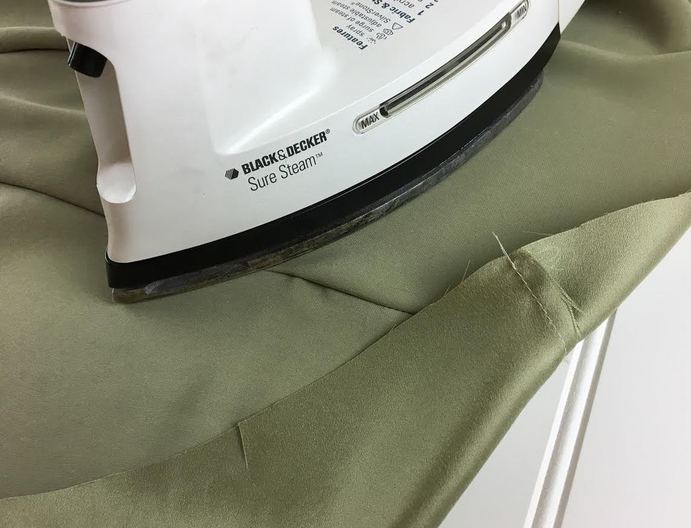 15. Iron the seam allowance excess towards one side making sure to iron on the wrong side of the fabric (clean side of the seam). 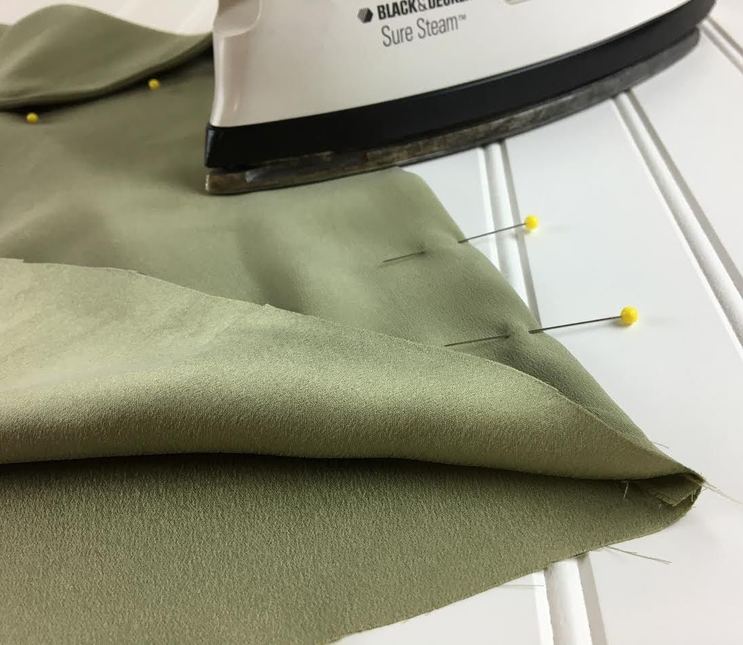 16. Fold the seam to enclose the raw edge and iron this fold for stability. Place pins horizontally along the fold to hold it in place properly. The face side of the fabric should be on the inside of this fold. 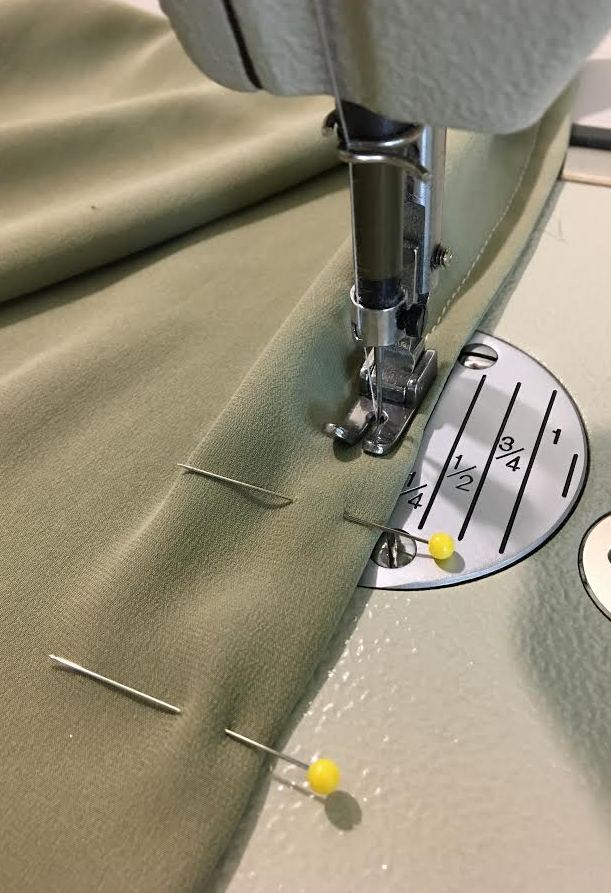 17. Machine stitch at 1/4" seam allowance from the fold's edge. This stitch will enclose the raw edge of the seam allowing for both outside and inside edges to be clean finished. 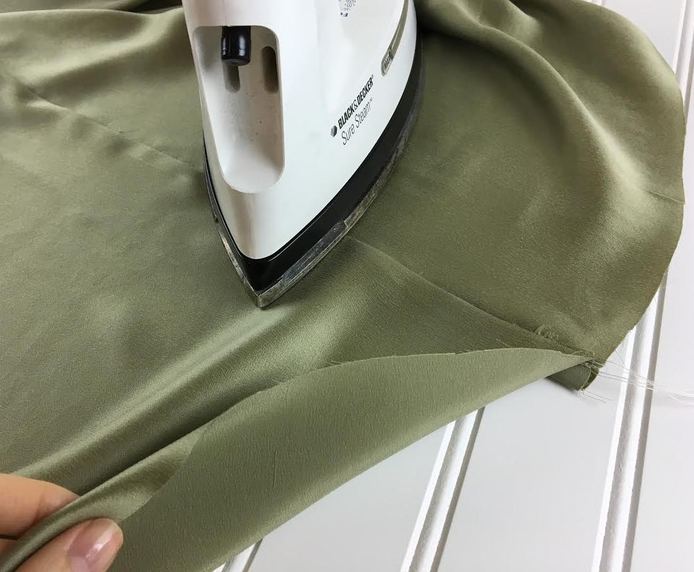 18. Working on the face side of the fabric, iron the folded seam allowance pointing to whatever direction you choose. 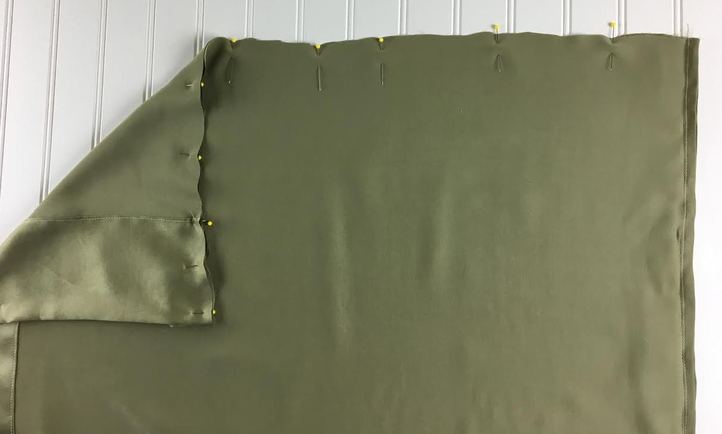 19. On the inside of the pillowcase (wrong side of the fabric), pin the final lengthwise seam horizontally. The face sides of the fabric should be touching. 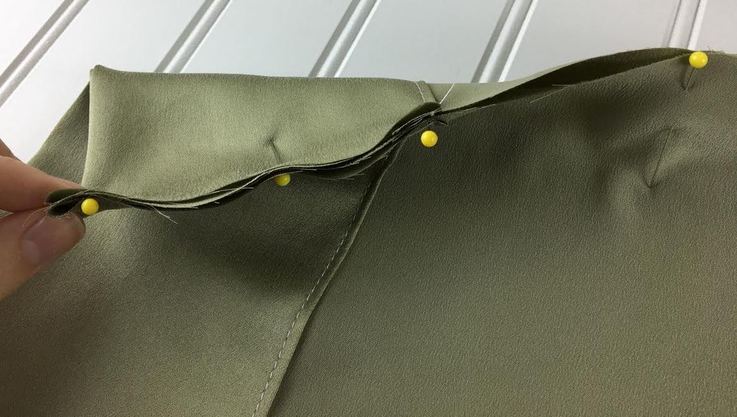 Make sure opening edge and the fold lines at the pillowcase's opening are matched properly on both layers. The best way to do this is to align the fold lines and place a pin horizontally right at the location where they match. 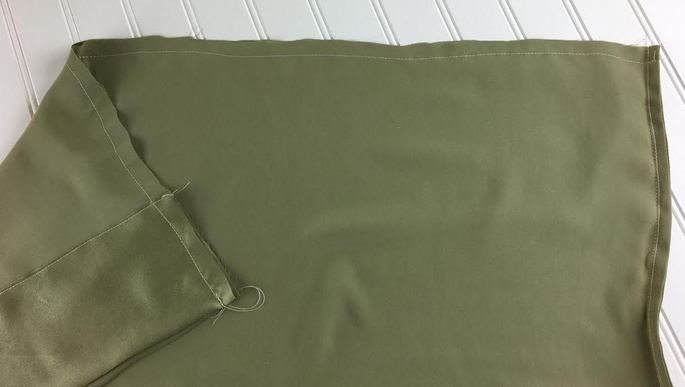 20. Straight stitch at 1/2" seam allowance.  21. To clean finish the seam, apply a serging/overlock stitch along the raw edge. As mentioned above, silk is made of very fine, dainty fibers which requires thinner, sharper needles and a denser overlock stitch. If you don't have a serging machine, you may use a regular zig-zag stitch but make sure you have it set at the densest setting and your sewing machine needle is sharp and appropriate for silk fabric. For a highly durable finish however, we recommend that you use a french seam on both seam edges. 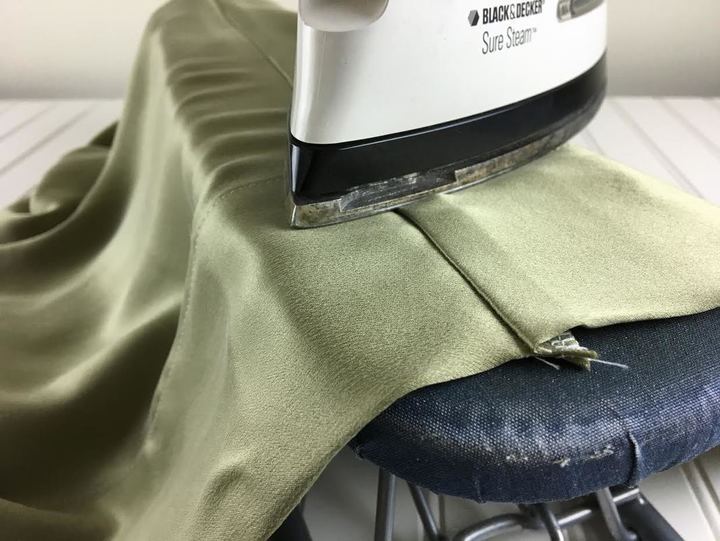 22. As a last step, iron the seam's serged edge towards one side for a smooth, professional finish. 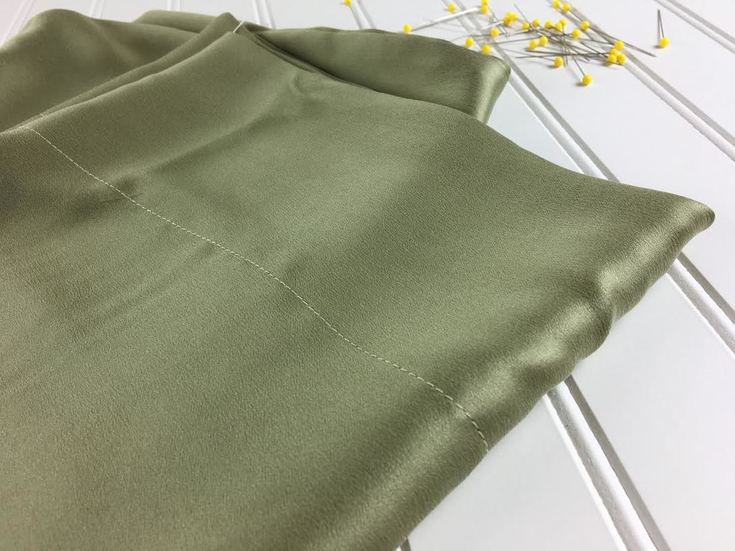 
1 Comment
12/13/2022 08:09:12 pm
Thank you for mentioning that it's rumored that using a silk pillowcase while you sleep is significantly kinder to your skin, possibly preventing wrinkles and skin irritations. My mother desires a new pillowcase. I'll purchase her a silk pillowcase because her birthday is coming up and it will be kind to her skin. Leave a Reply. |
The Blog:A journey into our design process, sewing tutorials, fashion tips, and all the inspiring people and things we love. 
Doina AlexeiDesigner by trade and dressmaker at heart. I spend most of my days obsessing over new fabrics and daydreaming new ideas. 
Sadie
Executive Assistant & Client Relations Manager Archives
November 2019
Categories
All

|

-
Sewing Tutorials
-
Basics
>
- Aligning Pattern Grainlines To Fabric
- Preparing Fabrics For Sewing
- Pinning Sewing Patterns To Fabric
- Placing Sewing Patterns On Fabric For Cutting
- Rotary Cutters or Fabric Scissors?
- Cutting The Sewing Patterns
- What Are Notches And How To Use Them In The Sewing Process
- Transferring Notches From Pattern To Fabric
- Transferring Seamlines to Fabric
- Staystitching
- Backstitching: A Complete Guide
- Hand Basting: A Complete Guide
- Sewing Continuous Bias Binding
- Darts >
-
Sewing Seams
>
- The Basics Of Seams And Seam Allowance
- How To Sew A Straight Seam
- Sewing Curved Seams
- Sewing Corner Seams
- Trimming And Grading Seam Excess
- Notching/Clipping Seam Allowance for Tension Release
- Sewing Topstitched Seams
- Sewing Corded Seams
- Sewing A Slot Seam
- Sewing A Gathered Seam
- Sewing Bias Seams
- Sewing Seams With Ease
- Sewing Seams With Crossing Seamlines
- Sewing Unlike Fabric Seams
- How To Iron Seams: Ironing Tools And Conventions
- Sewing With Knit Fabrics
- Understanding Stitch Length And Tension
- Sewing Unique Fabric Seams
-
Seam Finishes
>
- Seam Finishing Techniques - Overview
- Applying A Pinked Seam Finish
- Applying A Bias Bound Seam Finish
- Serging And Zigzag Seam Finishes
- Sewing A Self-Bound Seam Finish
- Sewing A French Seam Finish
- Sewing A Hong Kong Seam Finish
- Sewing A Mock French Seam Finish
- Sewing A Turned-and-Stitched Seam Finish
- Sewing Overcast Hand-Applied Seam Finishes
- Sewing A Flat Felled Seam
- Sewing A Hairline Seam Finish
-
Hem Finishes
>
- Garment Hem Finishes: Overview
- Sewing A Double Fold Hem Finish
- Sewing A Single Fold Hem Finish
- Sewing Bound Hem Finishes
- Sewing An Exposed Double Layer Bound Hem
- Sewing A Folded-Up Bound Hem with Pre-folded Binding
- Sewing A Hong Kong Hem Finish
- Sewing A Band Hem Finish
- Sewing A Bias Faced Hem Finish
- Sewing A Twill Tape Hem Finish
- Sewing A Rolled Hem Finish
- Sewing A Shaped Hem Facing
- Using Fusible Hem Tape And Webbing
- Finishing A Lace Fabric Hem
- Finishing A Leather Hem
- Sewing Faced Hem Corners
- How To Finish Lining At The Hem
- Finishing Fabric Corners by Mitering >
- Interfacing A Hemline: Lined And Unlined Examples
-
Sewing Pockets
>
- Curved Patch Pocket With Flap
- Unlined Square Patch Pockets
- Lined Patch Pockets: Two Ways
- Extension On-Seam Pockets
- Separate On-Seam Pocket
- Front Hip Pockets
- Bound Double Welt Pocket
- Double Welt Pocket With Flap
- Self-Welt Pocket (Using Single Fabric Layer)
- Slanted Welt Pocket (Hand-Stitched)
- Faced Slash Pockets: Overview >
-
Sewing Zippers
>
- Sewing Zippers: General Information
- Sewing A Centered Zipper
- Sewing A Lapped Zipper
- Sewing An Invisible Zipper
- Sewing A Fly Front Zipper
- Sewing A Closed-End Exposed Zipper (No Seam)
- Sewing An Exposed Separating Zipper
- Sewing Hand Stitched Zipper Applications
- Sewing A Zipper Underlay
- Sewing A Placket-Enclosed Separating Zipper
- Sleeveless Finishes >
-
Neckline Finishes
>
- Sewing A Neck Shaped Facing
- Sewing An All-In-One Neck Facing
- Neck And Garment Opening Combination Facings >
- Sewing A Bias Faced Neckline Finish
- Sewing A Band Neckline Finish
- Bound Neckline Finishes: Overview >
- Sewing A Semi-Stretch Strip Band Neckline
- Ribbed Neck Band And Classic Turtleneck
- Decorative Neckline Finishes >
- Finishing Facing Edges >
-
Extras
>
- A Complete Guide on Interfacing
- Sewing Bound Spaghetti Straps
- Sewing Spaghetti Straps To A Faced Neckline
- Sewing Ruffles: Overview
- Patterning And Sewing A Circle Ruffle
- Sewing A Gathered Heading Ruffle
- Sewing Double Layer Gathered Ruffles
- Sewing A Gathered Ruffle Into A Seam
- Sewing A Gathered Ruffle To A Fabric Edge
- Sewing A Fabric Surface Slit
- Sewing A Slit Seam
- Hand-Applied Straight Stitches
- Hand-Applied Blind Stitches
- Hand-Applied Overedge Stitches
- Hand-Applied Tack Stitches
- Hand-Applied Decorative Stitches
-
Basics
>
- Custom Bridal
- Custom Apparel
- About
- Blog

 RSS Feed
Services |
Company |
|
