|
This morning, as I was browsing through pictures of Kristen Saksa Juen's beautiful ceramics, I inadvertently landed on her Instagram page. A black and white image of clay pieces neatly arranged in a kiln caught my eye. The message adjacent to it made an even more powerful statement as it is a true depiction of Kristen Saksa Juen's journey through her artistic development. She says: " I'm grateful to call myself an artist. Not to say it isn't a lot of hard work that comes with some trade offs. And it took me time, a looong time to even have the courage to say the words 'I am an artist'. But I am so happy and grateful that I get to do this work." As you'll discover in the interview with Kristen below, art was always present in her life even when she wasn't intently pursuing it. That's the thing about art- you don't choose it, it chooses you. A true artist doesn't actively decide to become an artist. Vise versa, your artistic spirit grabs hold of you and doesn't let go until it is explored and pursued.  Kristen Saksa Juen She loves to work with her hands, free-forming and feeling the textures while creating a bond with each material at hand. Kristen sees accidental imperfections as beautiful. To her, what some might perceive as an "imperfection" she sees as a gift that comes from each individual artistic process, creating pieces that are always one-of-a-kind. As opposed to other ceramicists, she does not work on a wheel but rather prefers to hand-mold each piece to her individual artistic rhythm. Her connection to nature is prevalent in her love for naturally vibrant colors, creating unique plant potters, and hand carving nature-inspired prints which she designs to fit within a clean space, both modernizing and refreshing it. She describes her work as "a connection to nature in modern spaces". It took Kristen years to discover herself and become the artist she is today. As you'll notice in her work presented below, she incorporates the natural color of the clay (and its color variations) into the finished product, resulting in pieces that feel earthy yet maintain clean design lines. In the interview to follow, take a journey into the life of a ceramics artist, from the everyday process of designing and making each piece to the challenges and rewards associated with this artistic exploration. When and how did you become interested in pottery/ceramics? I remember being fascinated with ceramics as a child, but it wasn’t until I was in college that I took a couple ceramics classes on the side for fun. My creativity was always something that I thought I would have to satisfy on the side. It took me several more years to have confidence in my artwork, appreciate the value of my creativity, and entertain the idea of working as an artist. When I got back into ceramics and started to develop my own artistic style, I started having so much fun I couldn’t stop. 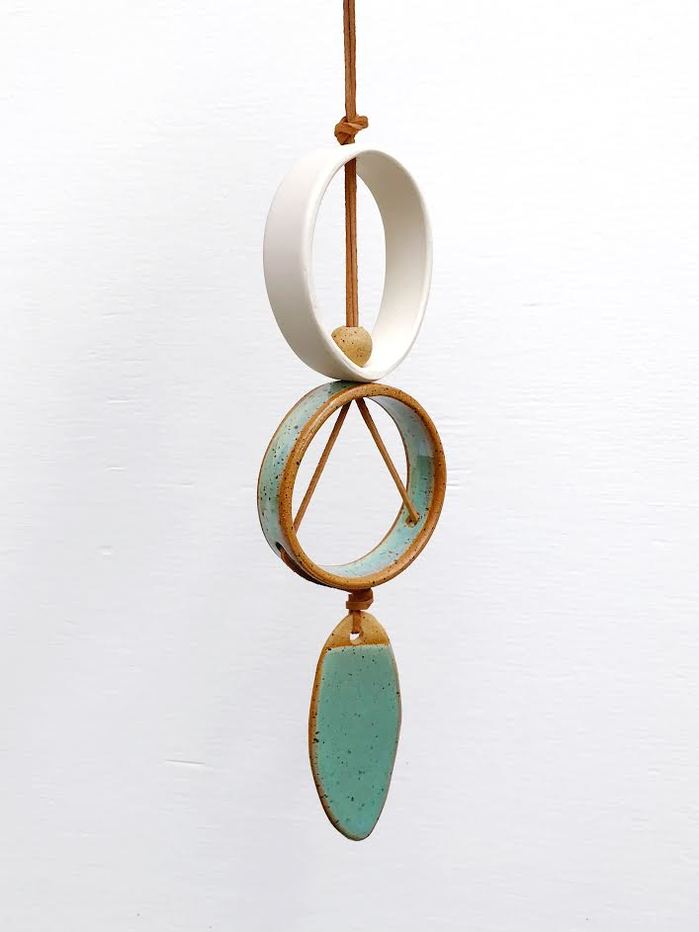 Photo courtesy of Kristen Saksa Juen There is a beautiful earthy, clean quality mixed with architectural structured edges in your work. How do you describe this unique aesthetic and what inspires you artistically in your work? I am inspired by the beauty of nature and my love for the outdoors greatly influences my creativity. I particularly love getting inspiration from mountainous landscapes, and unique plants. I strive to create ceramics that spark a connection with nature for modern spaces. Additionally, I strive to express the beauty I see in the process of working in clay. I love to create items that grow into their own unique character, and to celebrate the beauty of handmade. 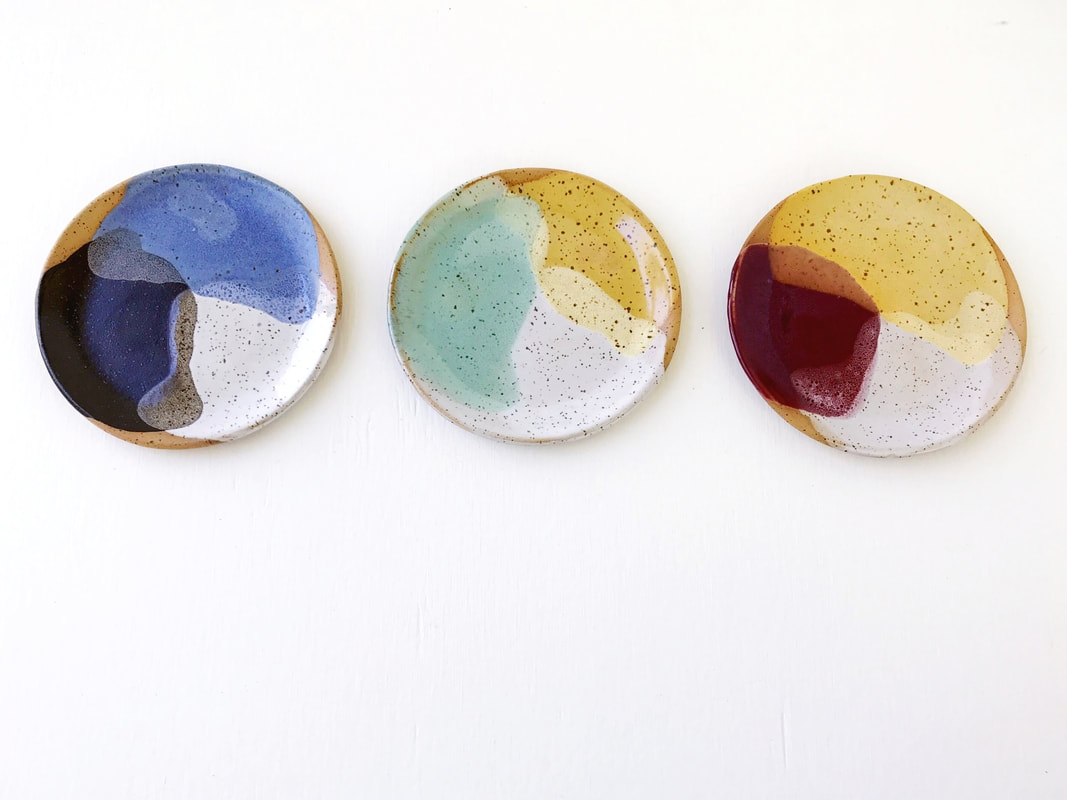 Photo courtesy of Kristen Saksa Juen I love how you use color in your pieces- it makes a statement visually, yet still remains very earthy and natural. Can you describe what color represents to you in your work? I love to use the color of the clay itself as a color in my pallet. Clay by its nature, comes in many earthy tones from white to tan and brown. I enjoy incorporating the color of the ungalzed raw clay into my designs which I think gives my work an additional connection to nature.  Photo courtesy of Kristen Saksa Juen
Speaking of color, what is the physical process of applying color to ceramics/pottery? Is color incorporated after the piece has been completed before glazing or does it happen in the glazing process? Can you describe that for those unfamiliar with this process. I apply glazes to my work by dipping, pouring, or painting before they are fired in the kiln. In order to incorporate the color of the clay itself into my work, I can choose to leave a portion of clay unglazed by either not applying any glaze or by using a type of resist such as wax or tape. 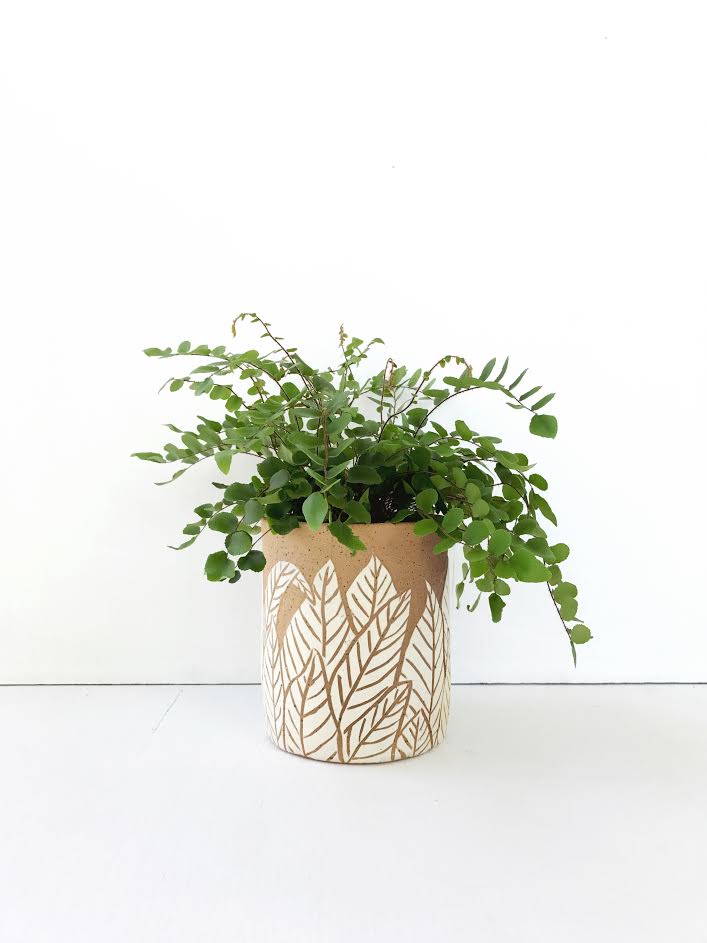 Photo courtesy of Kristen Saksa Juen What is your design/work process like? Do you decide on the design and sketch the idea first or does it come to you as you start working with the materials at hand? All of my pieces are individually hand-built from clay. My process starts by rolling clay out into large slabs, which are then carefully cut and rejoined to create unique angles and curves. I occasionally sketch out ideas before working, but often these ideas change as I work with the clay, which is a process I enjoy. I prefer to design without rigid guidelines and a healthy dose of variability, which ultimately gives my work its unique organic look. 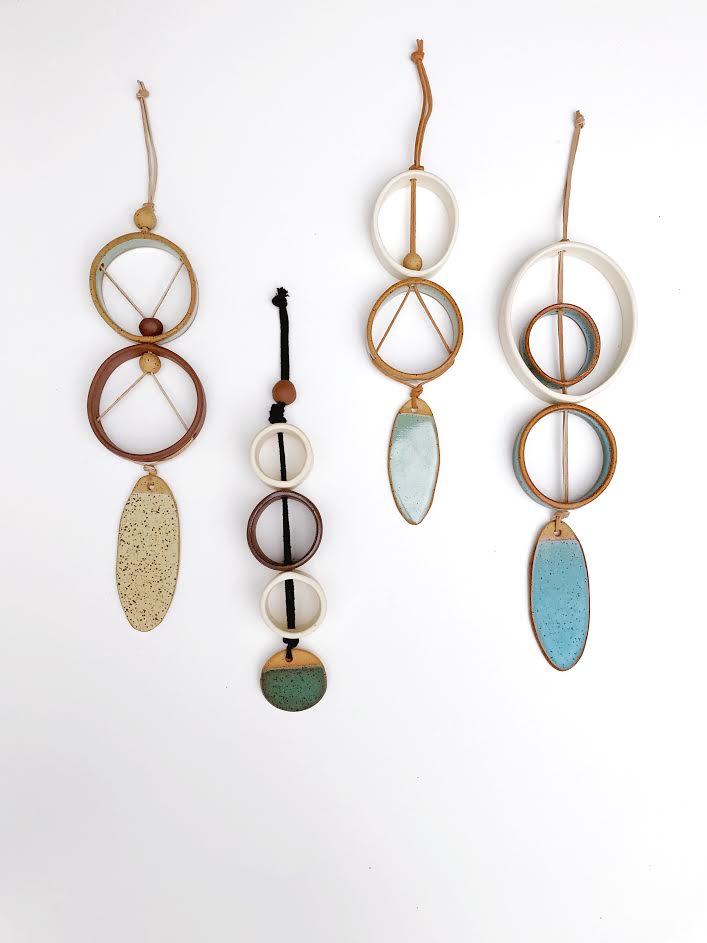 Photo courtesy of Kristen Saksa Juen Pottery is somewhat of a therapeutic artform allowing us to physically feel the clay and materials as we work with them. Is this tactile aspect something that connects you to pottery on a healing level? I do believe that pottery can be therapeutic. I spent a lot of time working with clay after I had an injury a few years ago. That time working with clay gave me a lot of joy and it really helped me develop my own artistic voice. So really, working with clay on a healing level is a big part of my story and how I became an artist today. 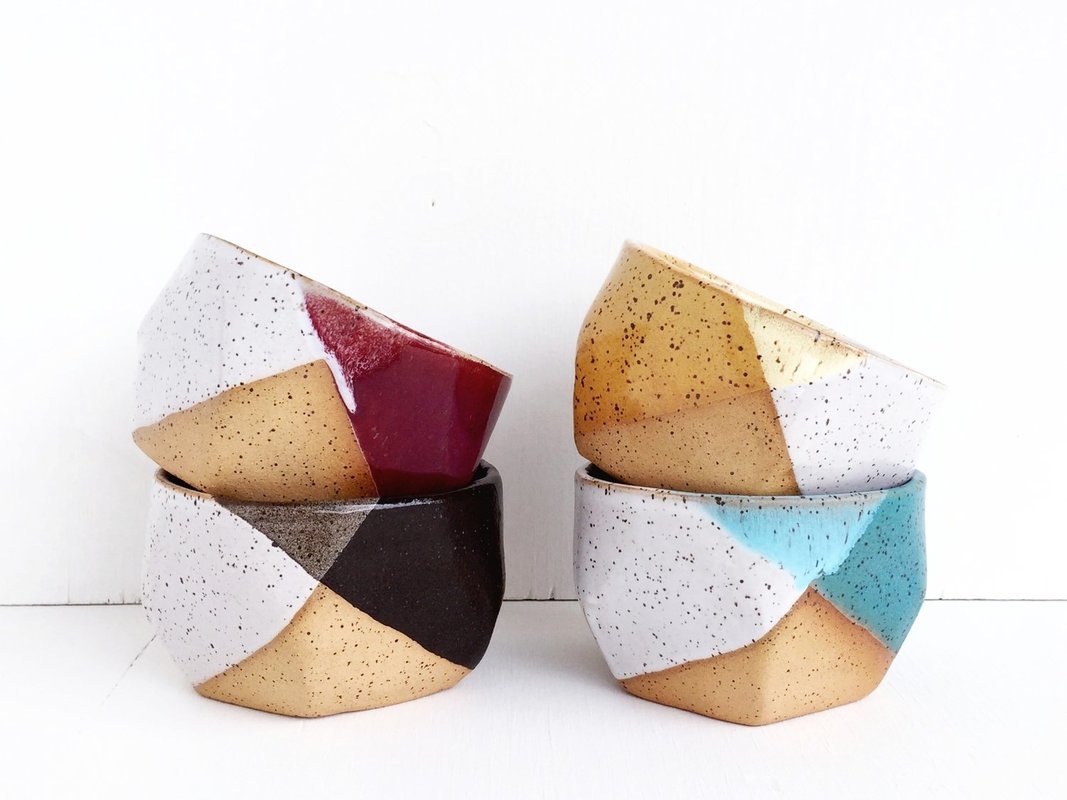 Photo courtesy of Kristen Saksa Juen Your products are described as “handformed” – What does “handformed” mean and what is the actual process behind it? Where do you start and how does the handformed piece come to life? Handformed means to me, that each piece is made one at a time, and therefore each piece is unique and not exactly like everything else. 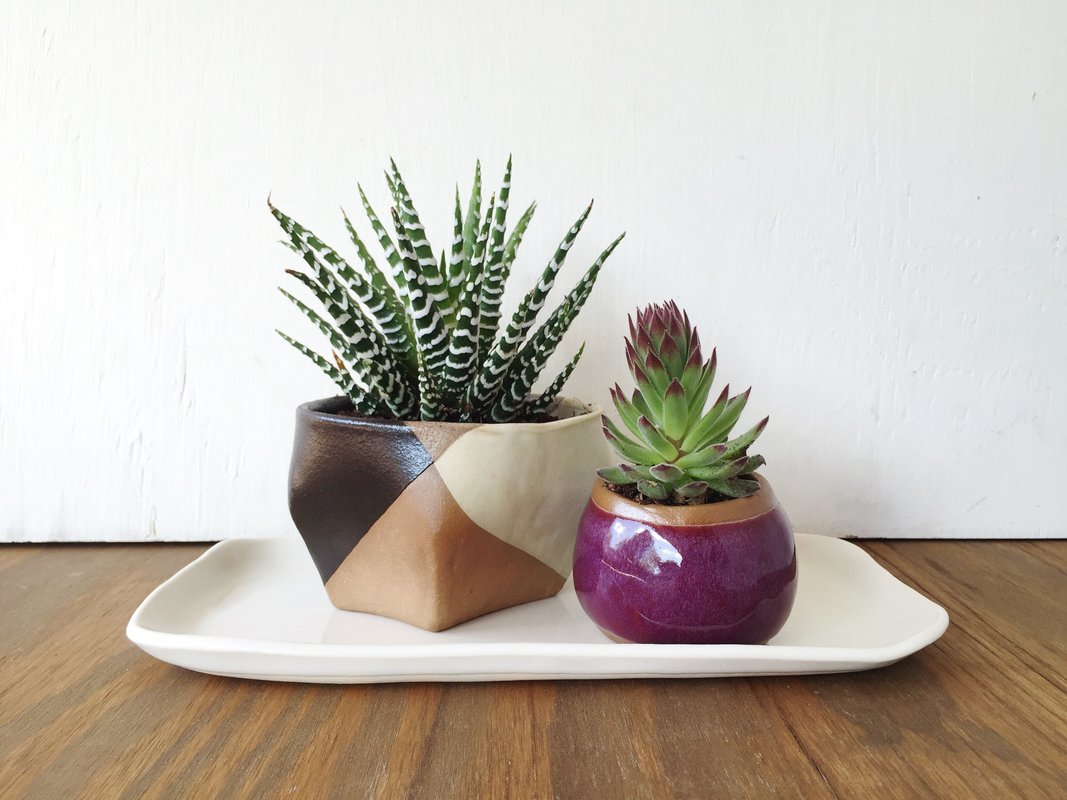 Photo courtesy of Kristen Saksa Juen
Do you work on a spinning wheel? How does the technique of hand-forming differ from that of a classic spinning table for you personally? I don’t work on the wheel/ spinning table. When working on the wheel, the shapes made are primarily round. My artistic voice in clay started when I first decided that maybe my work did not have to be perfectly round. Instead perhaps it was even better if it was something different all together. I started working primarily from slabs and made pieces that were intentionally not perfectly round. This shift in my mindset, to embrace irregularity and take chances on new shapes and forms, changed everything. That change was when my artwork became exciting. Ever since then I simply couldn’t stop creating in clay. 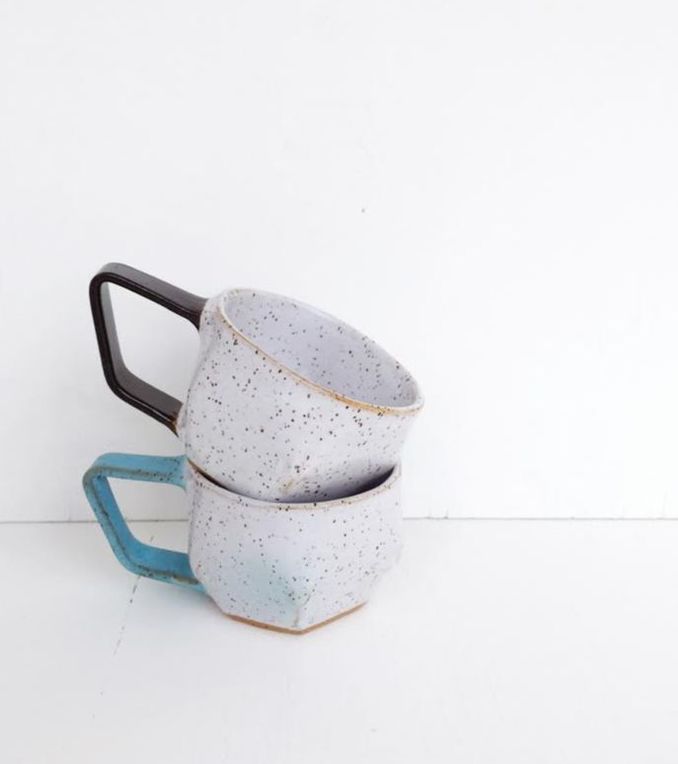 Photo courtesy of Kristen Saksa Juen On your website, you talk about the imperfections that make each piece beautiful and unique. How do you perceive “mistakes” in ceramics and are they really “mistakes” to you? If I haven’t made a “mistake” in a while, it’s a sign to me that maybe I haven’t been trying enough new things. I push myself to try new things in my search for creativity. This quest often includes mess-ups, oops, and shouldn’t have gone there moments. My mistakes are sometimes an unexpected source of inspiration and often give way to beautiful new ideas. 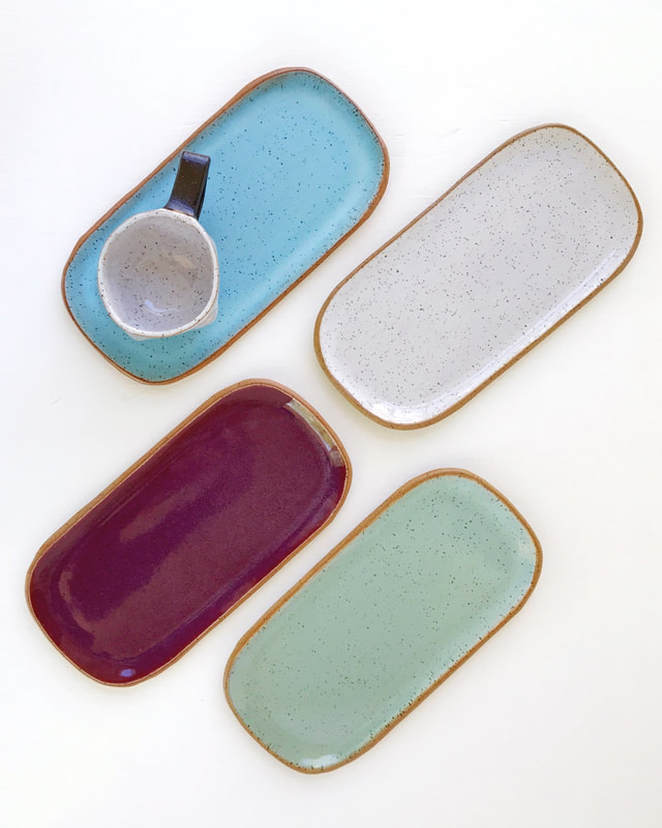 Photo courtesy of Kristen Saksa Juen "This shift in my mindset, to embrace irregularity and take chances on new shapes and forms, changed everything. That change was when my artwork became exciting. " What is your favorite piece at the moment and what connects you to it? I recently pulled out an older vase of mine that had been in storage after my last move. It is even more organic and angular than my more recent work. The colors and shape remind me of a valley in the mountains. It is fun for me to see the evolution of my work and ponder on what was successful in the past and where I want to go. 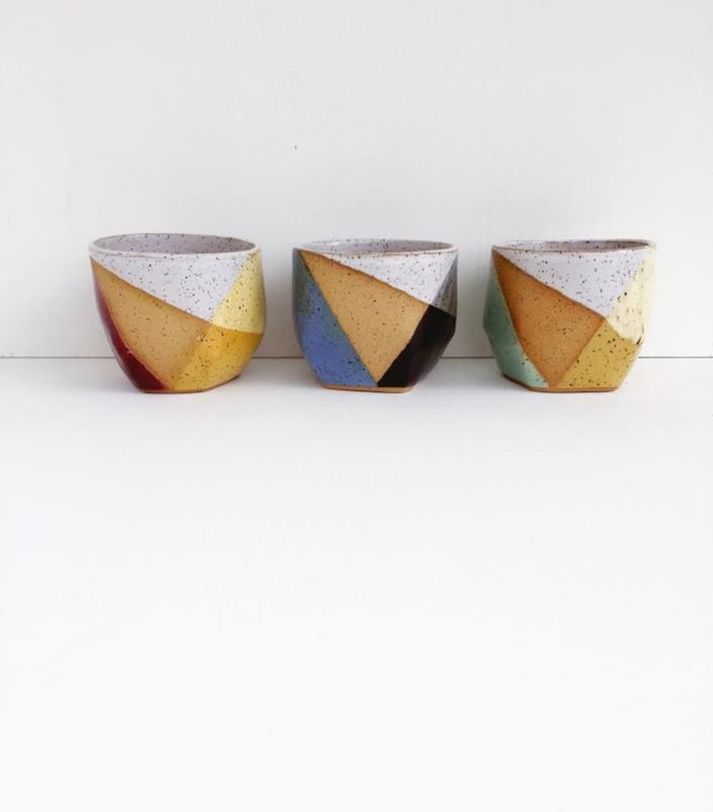 Photo courtesy of Kristen Saksa Juen What is the most rewarding aspect of your work? Is it in the process or seeing the final result? The most rewarding part of my work really is my supporters. Hearing from people who also enjoy my work warms my heart. 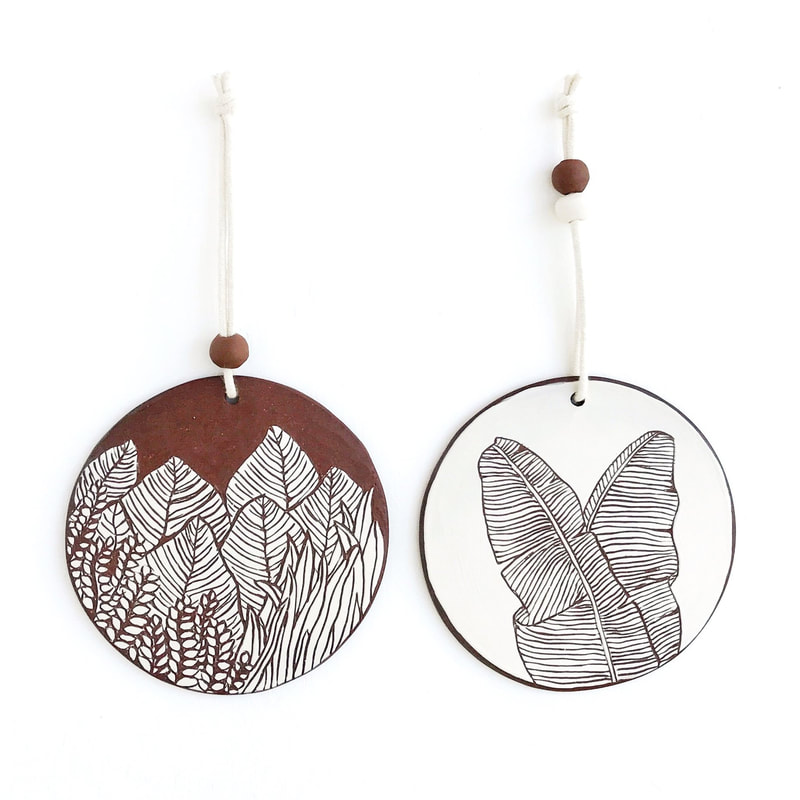 Photo courtesy of Kristen Saksa Juen What are some challenges you’ve experienced in your work, either on a competitive scale or perhaps your own artistic development, and how do you stay motivated each day? There are a long list of challenges. A couple are balancing my time between making product and designing, and remembering not to compare myself too much to others. "It took me several more years to have confidence in my artwork, appreciate the value of my creativity, and entertain the idea of working as an artist." Are you looking to experiment with new materials and techniques in the near future, or perhaps expand your product line? I try to always have a few side projects going on. Right now I am working on some botanical inspired dishes, and mugs. I hope they come out well!
0 Comments
Leave a Reply. |
The Blog:A journey into our design process, sewing tutorials, fashion tips, and all the inspiring people and things we love. 
Doina AlexeiDesigner by trade and dressmaker at heart. I spend most of my days obsessing over new fabrics and daydreaming new ideas. 
Sadie
Executive Assistant & Client Relations Manager Archives
November 2019
Categories
All

|

-
Sewing Tutorials
-
Basics
>
- Aligning Pattern Grainlines To Fabric
- Preparing Fabrics For Sewing
- Pinning Sewing Patterns To Fabric
- Placing Sewing Patterns On Fabric For Cutting
- Rotary Cutters or Fabric Scissors?
- Cutting The Sewing Patterns
- What Are Notches And How To Use Them In The Sewing Process
- Transferring Notches From Pattern To Fabric
- Transferring Seamlines to Fabric
- Staystitching
- Backstitching: A Complete Guide
- Hand Basting: A Complete Guide
- Sewing Continuous Bias Binding
- Darts >
-
Sewing Seams
>
- The Basics Of Seams And Seam Allowance
- How To Sew A Straight Seam
- Sewing Curved Seams
- Sewing Corner Seams
- Trimming And Grading Seam Excess
- Notching/Clipping Seam Allowance for Tension Release
- Sewing Topstitched Seams
- Sewing Corded Seams
- Sewing A Slot Seam
- Sewing A Gathered Seam
- Sewing Bias Seams
- Sewing Seams With Ease
- Sewing Seams With Crossing Seamlines
- Sewing Unlike Fabric Seams
- How To Iron Seams: Ironing Tools And Conventions
- Sewing With Knit Fabrics
- Understanding Stitch Length And Tension
- Sewing Unique Fabric Seams
-
Seam Finishes
>
- Seam Finishing Techniques - Overview
- Applying A Pinked Seam Finish
- Applying A Bias Bound Seam Finish
- Serging And Zigzag Seam Finishes
- Sewing A Self-Bound Seam Finish
- Sewing A French Seam Finish
- Sewing A Hong Kong Seam Finish
- Sewing A Mock French Seam Finish
- Sewing A Turned-and-Stitched Seam Finish
- Sewing Overcast Hand-Applied Seam Finishes
- Sewing A Flat Felled Seam
- Sewing A Hairline Seam Finish
-
Hem Finishes
>
- Garment Hem Finishes: Overview
- Sewing A Double Fold Hem Finish
- Sewing A Single Fold Hem Finish
- Sewing Bound Hem Finishes
- Sewing An Exposed Double Layer Bound Hem
- Sewing A Folded-Up Bound Hem with Pre-folded Binding
- Sewing A Hong Kong Hem Finish
- Sewing A Band Hem Finish
- Sewing A Bias Faced Hem Finish
- Sewing A Twill Tape Hem Finish
- Sewing A Rolled Hem Finish
- Sewing A Shaped Hem Facing
- Using Fusible Hem Tape And Webbing
- Finishing A Lace Fabric Hem
- Finishing A Leather Hem
- Sewing Faced Hem Corners
- How To Finish Lining At The Hem
- Finishing Fabric Corners by Mitering >
- Interfacing A Hemline: Lined And Unlined Examples
-
Sewing Pockets
>
- Curved Patch Pocket With Flap
- Unlined Square Patch Pockets
- Lined Patch Pockets: Two Ways
- Extension On-Seam Pockets
- Separate On-Seam Pocket
- Front Hip Pockets
- Bound Double Welt Pocket
- Double Welt Pocket With Flap
- Self-Welt Pocket (Using Single Fabric Layer)
- Slanted Welt Pocket (Hand-Stitched)
- Faced Slash Pockets: Overview >
-
Sewing Zippers
>
- Sewing Zippers: General Information
- Sewing A Centered Zipper
- Sewing A Lapped Zipper
- Sewing An Invisible Zipper
- Sewing A Fly Front Zipper
- Sewing A Closed-End Exposed Zipper (No Seam)
- Sewing An Exposed Separating Zipper
- Sewing Hand Stitched Zipper Applications
- Sewing A Zipper Underlay
- Sewing A Placket-Enclosed Separating Zipper
- Sleeveless Finishes >
-
Neckline Finishes
>
- Sewing A Neck Shaped Facing
- Sewing An All-In-One Neck Facing
- Neck And Garment Opening Combination Facings >
- Sewing A Bias Faced Neckline Finish
- Sewing A Band Neckline Finish
- Bound Neckline Finishes: Overview >
- Sewing A Semi-Stretch Strip Band Neckline
- Ribbed Neck Band And Classic Turtleneck
- Decorative Neckline Finishes >
- Finishing Facing Edges >
-
Extras
>
- A Complete Guide on Interfacing
- Sewing Bound Spaghetti Straps
- Sewing Spaghetti Straps To A Faced Neckline
- Sewing Ruffles: Overview
- Patterning And Sewing A Circle Ruffle
- Sewing A Gathered Heading Ruffle
- Sewing Double Layer Gathered Ruffles
- Sewing A Gathered Ruffle Into A Seam
- Sewing A Gathered Ruffle To A Fabric Edge
- Sewing A Fabric Surface Slit
- Sewing A Slit Seam
- Hand-Applied Straight Stitches
- Hand-Applied Blind Stitches
- Hand-Applied Overedge Stitches
- Hand-Applied Tack Stitches
- Hand-Applied Decorative Stitches
-
Basics
>
- Custom Bridal
- Custom Apparel
- About
- Blog
 RSS Feed
Services |
Company |
|
