|
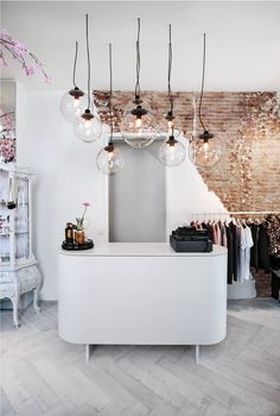
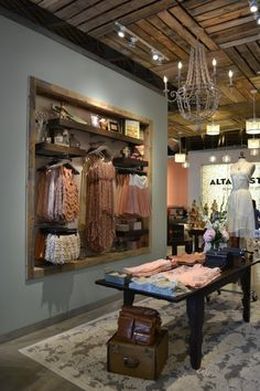
If you own a store or boutique, the right setting and decoration is essential for establishing your brand. Setting up your store to be easy to browse is just as important as creating a unique visual experience for your customers. The decorating items and furniture you bring in plays an important factor in making your store memorable to the consumer and attracting them back into the store. Often times, if you have a really tasteful, unique setup, your customers will feel tempted to bring friends and family with them on their next visit which means building more clientele for you! If you have a great eye for curating products but are struggling a bit in the interior design department, we've put together a comprehensive list of basic ideas that will get you on your way to creating the perfect (and most individual) setting for your store or boutique. 1. Use Unique Lighting Fixtures and Installations: This is a huge part of what will give your store it's ambiance. You will first want to decide the lighting mood that fits best with your store: does it feature dimmer lighting or is it a bright open space? It all has to do with the kind of products you're selling and what fits best with your brand. Once that's decided, it's time to shop around for unique lighting fixtures or installation. Many stores make this the focal point of their space, which means it really has to stand out. Find the perfect spot in your store where it will stand out as the customer enters the store. Choose somewhere central if its a single large chandelier, and above the register or display racks if you're opting out for multiple fixtures. At the end of the day, you decide what works best for your space- it should make a statement without becoming overwhelming.
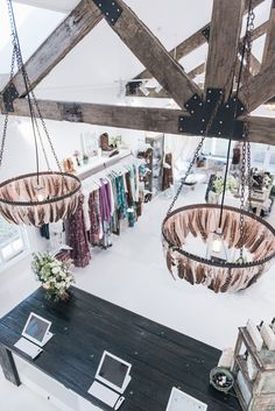
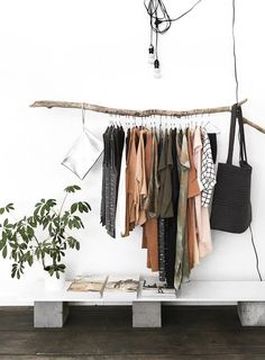
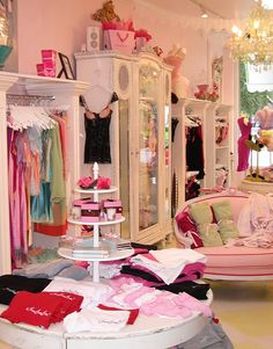
2. Find a Unique Way To Display Your Products. At the end of the day, the focal point of your store is the products you carry and you should pay special attention to how they fit into your space. Think of your products as the most important objects in your store- they need to be enhanced by your decor but not overwhelmed by it. Your furniture and decorations should be in the foreground and there just to set the right mood- the eye should go straight to the merchandise. That being said, they should be displayed in a clever way. You could go in two directions here: Stay clean and minimalist or do something completely unexpected and imaginative. There's some really interesting racks and shelving you could find on the market, but also don't shy away from building something yourself.
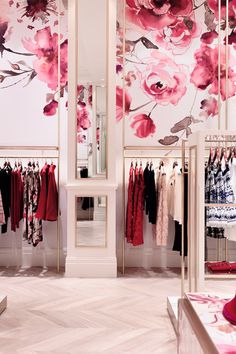
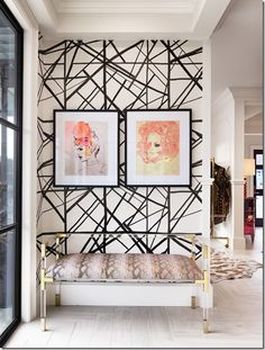
3. Use The Walls As Your Canvas Don't neglect the walls in your store. They make a great canvas for adding something unique especially when you are limited on space and can't use any large installations or furniture. If your store is a little tight, you can use the walls to create an illusion of space while simultaneously adding character to your decor. Even if you own a larger space, having empty walls can sometimes create a cold and void atmosphere. Interestingly, painting the walls or adding unique patterns softens up the setting making it feel more comfortable and homey. The trick however is not to go overboard. You should be doing this as a last step after you've already added your furniture and light fixtures- look around the store and see what area feel a little empty. You can then use the wall in the immediate area to add something that will go well with the rest of your decor. If you have a small separating wall in your store you should make it pop with some interesting prints or paint it a completely different color.
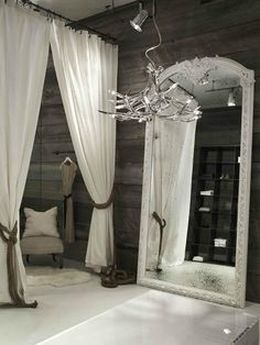
4. Make it feel like home: Your store or boutique should be inviting and make your customers want to stay longer. When the ambiance in your store feels relaxing and refreshing, people will want to come back just to experience that feeling again. Of course, this atmosphere is created by a combination of factors like music, smell, colors etc but you can always step it up a notch by bringing in some furniture and elements that will remind your customers of home. For example, if you own a clothing or accessories store, a beautiful wall installation that resembles a dresser with multiple mirrors can remind your customers of their own bedroom where they feel comfortable to try things on and play with different styles. It is also highly recommended that you bring in a unique seating arrangement- maybe there is a beautiful love seat or a printed chair that fits in perfectly with the theme of your store, or perhaps you saw some beautiful large ottomans that will make a corner of your store feel like home. Whichever one it is, a small (not too big) seating area that is incorporated beautifully with the rest of the decor will feel inviting and remind everyone of home (including the employees).
5. Use The Merchandise As Part Of The Decoration. Give customers the allusion of what the product will look like once they take it home. Incorporating your products with the furniture and set up of your store creates a deeper connection between consumer and product. It allows your customers to visually imagine that product in their own home and how they could potentially use it. This of course is most commonly used in furniture and home decor stores but there's no reason why you shouldn't be using the same idea whether you have a clothing boutique or a gift shop. Display your accessories and jewelry on a dresser-like structure with a mirror, or fold t-shirts and sweaters on a shelf as someone would at home. Variety in how you display your products and the interaction between them will create a beautiful space that your customer can relate to. If you have a gift shop create a few small displays using some of your products: Perhaps you sell books and some kitchen wear- throw a few books on a small writing table with a beautiful tea cup next to them. This will create a story which will connect your customers to the products in a more personal way. 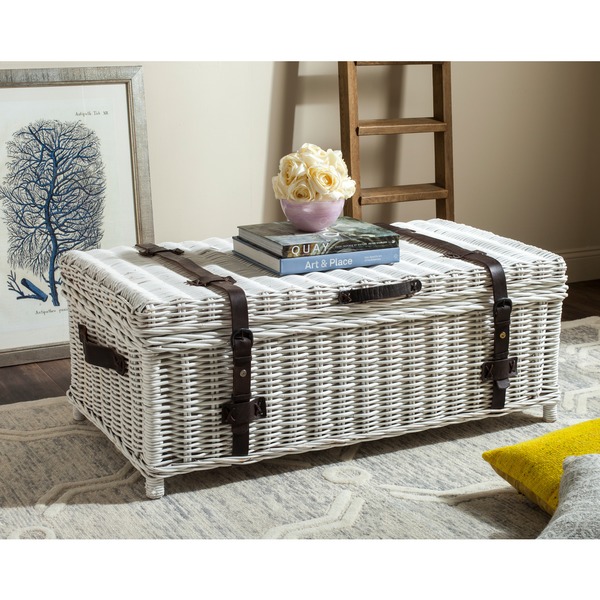 Image via Overstock.com 6. Don't Neglect The Register Area So after a good amount of browsing through your beautifully decorated store, it is time to check out at the register- This is your opportunity to leave a lasting impression. As well as a friendly staff, you should invest in a custom register counter that fits in with your store's theme. You don't need to go overboard, but you definitely want it to incorporate nicely. The register should be extremely easy to find and have enough space around it to give your customers the ability to build a comfortable (and not confusing) line should they need to. The way to make the register space more inviting is either by having a beautiful light fixture hovering over or displaying an interesting statement piece on the wall right behind. Whichever option you pick remember to always keep the area inviting, open and visually pleasing. 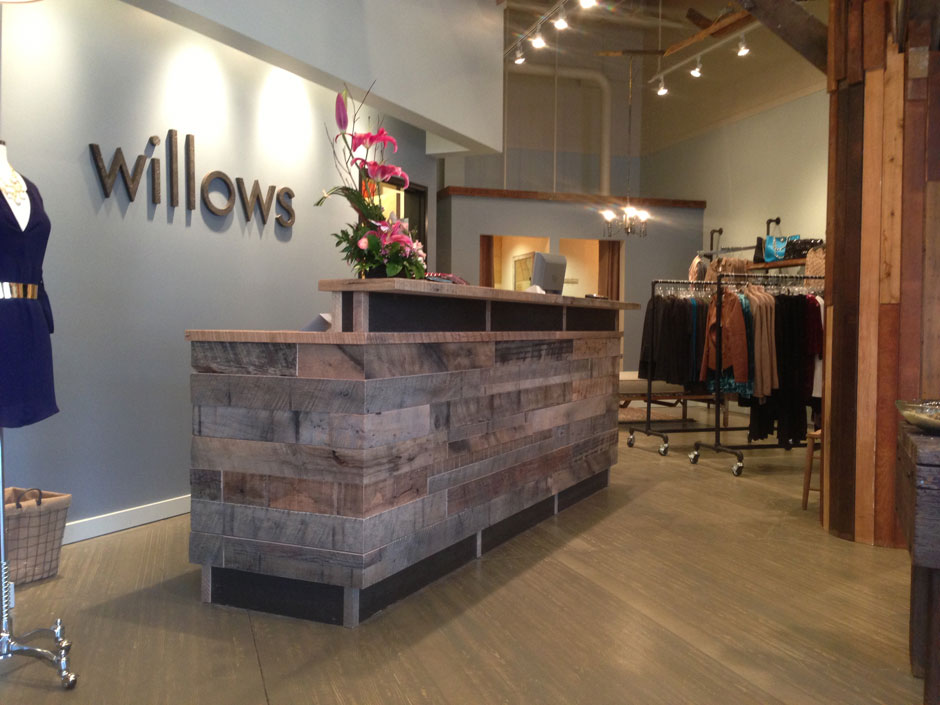 Image via Hayescabinetsinc.com Looking for more unique finds? Check out the 11:11 Convertible Jacket- a jacket that transforms into a bag.
0 Comments
Leave a Reply. |
The Blog:A journey into our design process, sewing tutorials, fashion tips, and all the inspiring people and things we love. 
Doina AlexeiDesigner by trade and dressmaker at heart. I spend most of my days obsessing over new fabrics and daydreaming new ideas. 
Sadie
Executive Assistant & Client Relations Manager Archives
November 2019
Categories
All

|

-
Sewing Tutorials
-
Basics
>
- Aligning Pattern Grainlines To Fabric
- Preparing Fabrics For Sewing
- Pinning Sewing Patterns To Fabric
- Placing Sewing Patterns On Fabric For Cutting
- Rotary Cutters or Fabric Scissors?
- Cutting The Sewing Patterns
- What Are Notches And How To Use Them In The Sewing Process
- Transferring Notches From Pattern To Fabric
- Transferring Seamlines to Fabric
- Staystitching
- Backstitching: A Complete Guide
- Hand Basting: A Complete Guide
- Sewing Continuous Bias Binding
- Darts >
-
Sewing Seams
>
- The Basics Of Seams And Seam Allowance
- How To Sew A Straight Seam
- Sewing Curved Seams
- Sewing Corner Seams
- Trimming And Grading Seam Excess
- Notching/Clipping Seam Allowance for Tension Release
- Sewing Topstitched Seams
- Sewing Corded Seams
- Sewing A Slot Seam
- Sewing A Gathered Seam
- Sewing Bias Seams
- Sewing Seams With Ease
- Sewing Seams With Crossing Seamlines
- Sewing Unlike Fabric Seams
- How To Iron Seams: Ironing Tools And Conventions
- Sewing With Knit Fabrics
- Understanding Stitch Length And Tension
- Sewing Unique Fabric Seams
-
Seam Finishes
>
- Seam Finishing Techniques - Overview
- Applying A Pinked Seam Finish
- Applying A Bias Bound Seam Finish
- Serging And Zigzag Seam Finishes
- Sewing A Self-Bound Seam Finish
- Sewing A French Seam Finish
- Sewing A Hong Kong Seam Finish
- Sewing A Mock French Seam Finish
- Sewing A Turned-and-Stitched Seam Finish
- Sewing Overcast Hand-Applied Seam Finishes
- Sewing A Flat Felled Seam
- Sewing A Hairline Seam Finish
-
Hem Finishes
>
- Garment Hem Finishes: Overview
- Sewing A Double Fold Hem Finish
- Sewing A Single Fold Hem Finish
- Sewing Bound Hem Finishes
- Sewing An Exposed Double Layer Bound Hem
- Sewing A Folded-Up Bound Hem with Pre-folded Binding
- Sewing A Hong Kong Hem Finish
- Sewing A Band Hem Finish
- Sewing A Bias Faced Hem Finish
- Sewing A Twill Tape Hem Finish
- Sewing A Rolled Hem Finish
- Sewing A Shaped Hem Facing
- Using Fusible Hem Tape And Webbing
- Finishing A Lace Fabric Hem
- Finishing A Leather Hem
- Sewing Faced Hem Corners
- How To Finish Lining At The Hem
- Finishing Fabric Corners by Mitering >
- Interfacing A Hemline: Lined And Unlined Examples
-
Sewing Pockets
>
- Curved Patch Pocket With Flap
- Unlined Square Patch Pockets
- Lined Patch Pockets: Two Ways
- Extension On-Seam Pockets
- Separate On-Seam Pocket
- Front Hip Pockets
- Bound Double Welt Pocket
- Double Welt Pocket With Flap
- Self-Welt Pocket (Using Single Fabric Layer)
- Slanted Welt Pocket (Hand-Stitched)
- Faced Slash Pockets: Overview >
-
Sewing Zippers
>
- Sewing Zippers: General Information
- Sewing A Centered Zipper
- Sewing A Lapped Zipper
- Sewing An Invisible Zipper
- Sewing A Fly Front Zipper
- Sewing A Closed-End Exposed Zipper (No Seam)
- Sewing An Exposed Separating Zipper
- Sewing Hand Stitched Zipper Applications
- Sewing A Zipper Underlay
- Sewing A Placket-Enclosed Separating Zipper
- Sleeveless Finishes >
-
Neckline Finishes
>
- Sewing A Neck Shaped Facing
- Sewing An All-In-One Neck Facing
- Neck And Garment Opening Combination Facings >
- Sewing A Bias Faced Neckline Finish
- Sewing A Band Neckline Finish
- Bound Neckline Finishes: Overview >
- Sewing A Semi-Stretch Strip Band Neckline
- Ribbed Neck Band And Classic Turtleneck
- Decorative Neckline Finishes >
- Finishing Facing Edges >
-
Extras
>
- A Complete Guide on Interfacing
- Sewing Bound Spaghetti Straps
- Sewing Spaghetti Straps To A Faced Neckline
- Sewing Ruffles: Overview
- Patterning And Sewing A Circle Ruffle
- Sewing A Gathered Heading Ruffle
- Sewing Double Layer Gathered Ruffles
- Sewing A Gathered Ruffle Into A Seam
- Sewing A Gathered Ruffle To A Fabric Edge
- Sewing A Fabric Surface Slit
- Sewing A Slit Seam
- Hand-Applied Straight Stitches
- Hand-Applied Blind Stitches
- Hand-Applied Overedge Stitches
- Hand-Applied Tack Stitches
- Hand-Applied Decorative Stitches
-
Basics
>
- Custom Bridal
- Custom Apparel
- About
- Blog
 RSS Feed
Services |
Company |
|
