
How To Choose The Right Trim For An Edge Finish In Dressmaking
When clean finishing edges with decorative trim, there are 3 main things to consider when making your trim choice:
- Can it be efficiently stitched either by hand or machine?
- Does it work with the garment's design?
- Does it cover the garment's edge efficiently?
|
From a design standpoint, the decorative trim should work visually with the rest of the garment's fabric and design. Choose a trim that complements and/or enhances the garment's edge(s) both in terms of color and structure. The trim should not be so bulky that it weighs down the garment's edges and disrupts its desired natural drape.
|
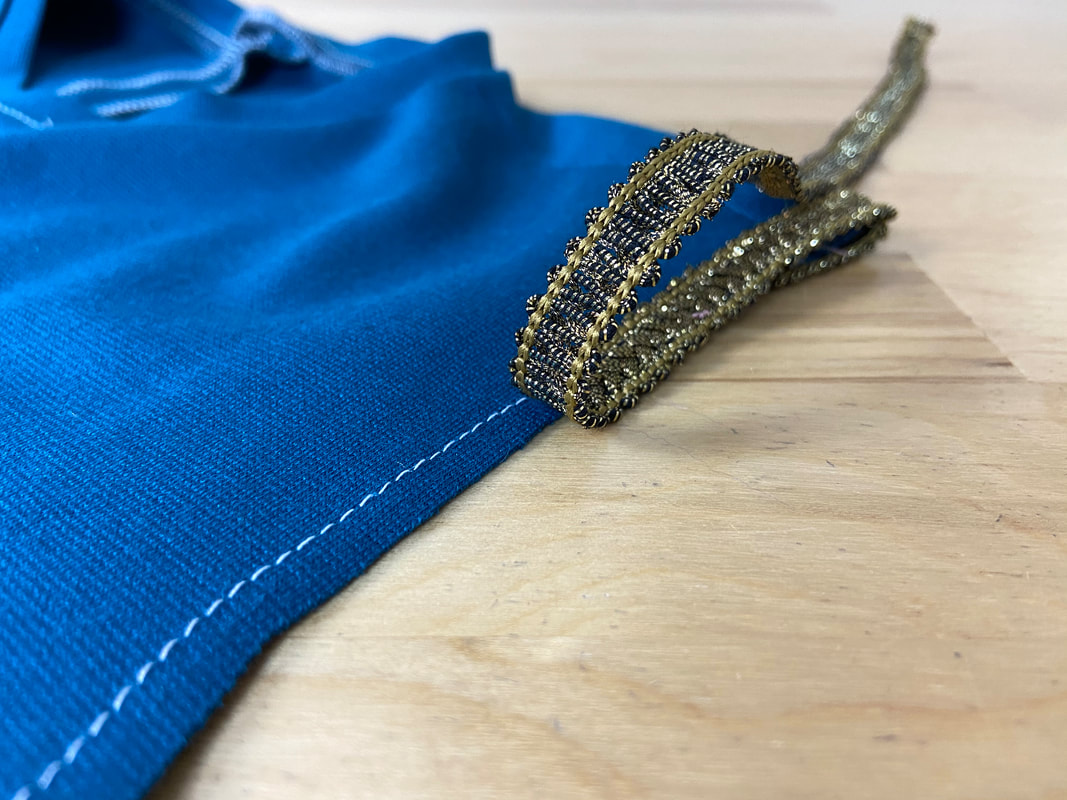
From a functional standpoint, the body of the trim should fully cover the raw edge it finishes. After all, fully finishing a garment edge means that the raw threads are either hidden (or fully enclosed) and not visible on the garment's right side.
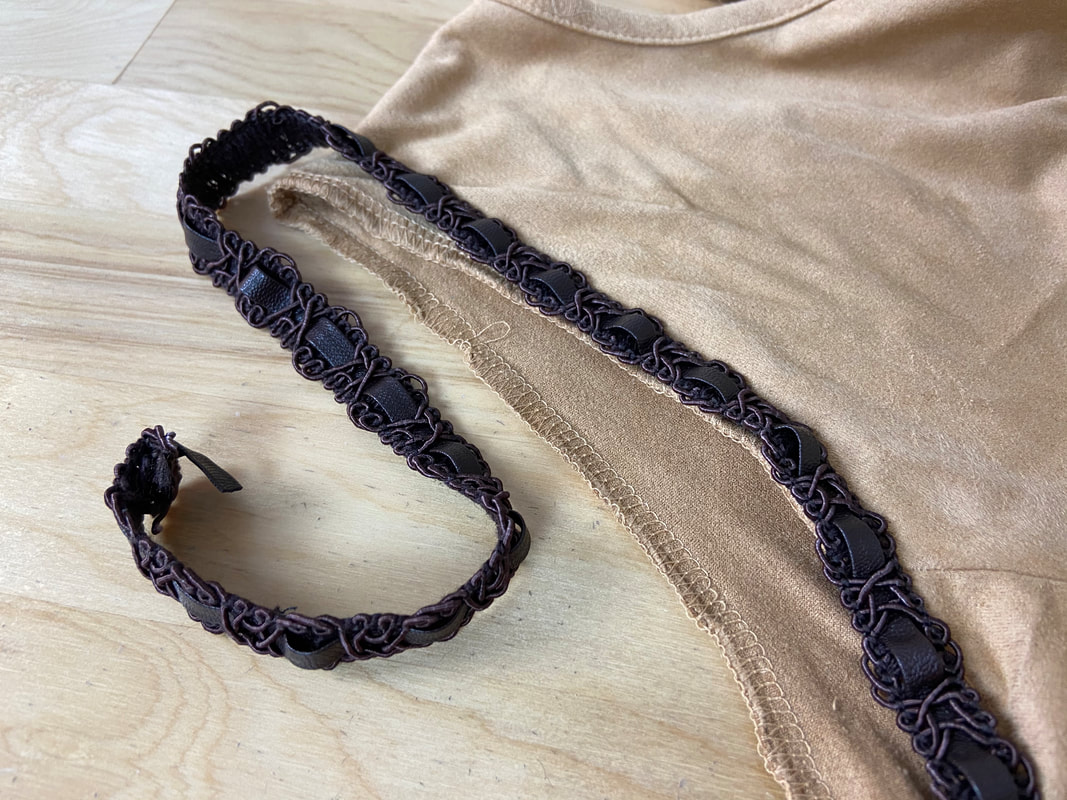
While the trim should efficiently hide the garment's edge, it does not necessarily have to have straight edges itself. It can be asymmetric and irregularly-shaped with as many decorative or 3-dimensional elements as desired. What matters is that the trim does a good job of finishing the garment edge properly, and it can be stitched either by hand or machine. This takes us to the third, equally-important element to consider: Attaching the trim to the garment edge.
While the trim should efficiently hide the garment's edge, it does not necessarily have to have straight edges itself. It can be asymmetric and irregularly-shaped with as many decorative or 3-dimensional elements as desired. What matters is that the trim does a good job of finishing the garment edge properly, and it can be stitched either by hand or machine. This takes us to the third, equally-important element to consider: Attaching the trim to the garment edge.
|
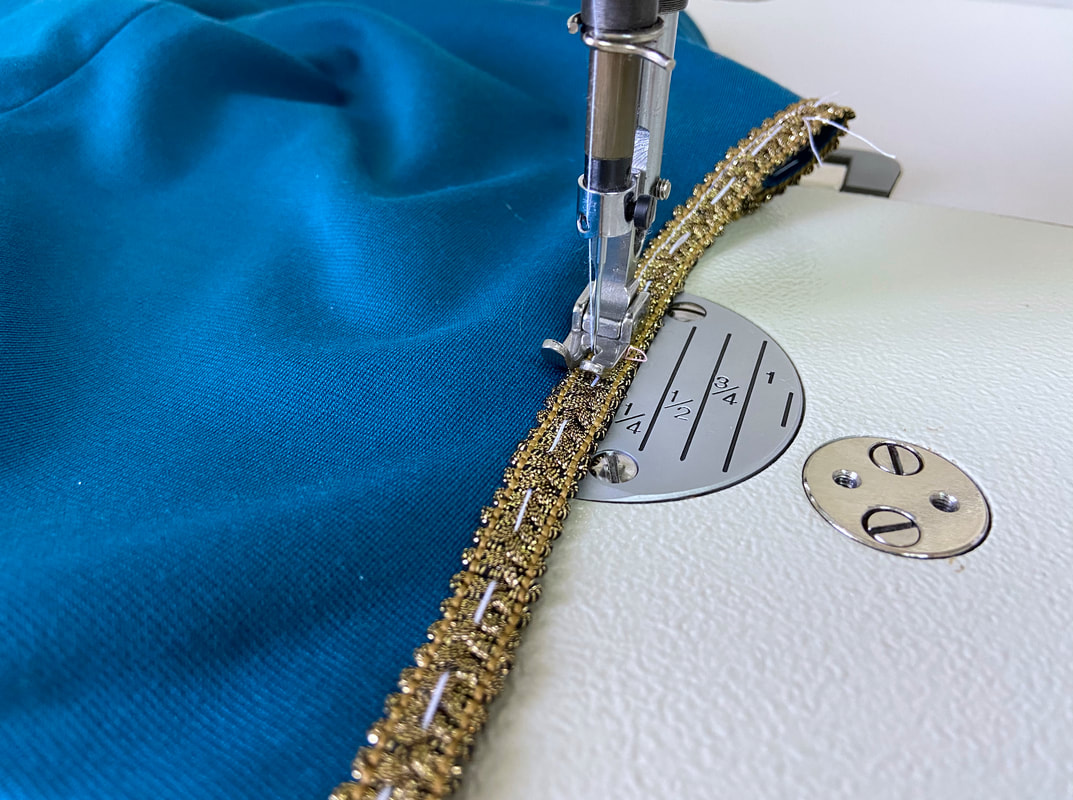
If your trim is safe to machine stitch, either using a regular presser foot (as shown above) or a zipper foot (used to stitch next to decorative/raised edge), you can safely topstitch it. For best results, topstitch along the area of the trim that will hide the stitching best.
Trims that are designed to be machine stitched often have edges that provide a linear stitching guide. Some trims feature an actual stitch line that is built into the trim design. Regardless of whether the trim was designed for machine stitching or not, you can make the call on how to attach it by pre-testing a scarp of the trim first.
Trims that are designed to be machine stitched often have edges that provide a linear stitching guide. Some trims feature an actual stitch line that is built into the trim design. Regardless of whether the trim was designed for machine stitching or not, you can make the call on how to attach it by pre-testing a scarp of the trim first.

|
Use a hand-applied stitch to attach bulkier, more complex decorative trims. Depending on the trim, you can use either a prickstitch, a slipstitch or a regular hemming stitch. Choose the option that provides the most durable yet invisible attachment to the garment edge/layer underneath. Additionally, using matching color thread will naturally encourage the stitch to disappear into the texture and color of the trim.
