How To Align A Double Layer Binding To A Closed Armhole Edge
A double layer binding is constructed from a wider bias fabric strip that is folded down the center such taht one of its lengthwise edges is self-finished with a fold. The initial fabric strip should be cut at six (6) times the width of the finished (folded) binding application.
If you are using double layer binding to clean-finish an armhole edge, you may feel a little perplexed when aligning the binding ends to yield a fully enclosed, clean finish. Given that armhole edges are almost always closed, here is a standard way to align an exposed double layer binding starting at the garment's underarm seam:
If you are using double layer binding to clean-finish an armhole edge, you may feel a little perplexed when aligning the binding ends to yield a fully enclosed, clean finish. Given that armhole edges are almost always closed, here is a standard way to align an exposed double layer binding starting at the garment's underarm seam:
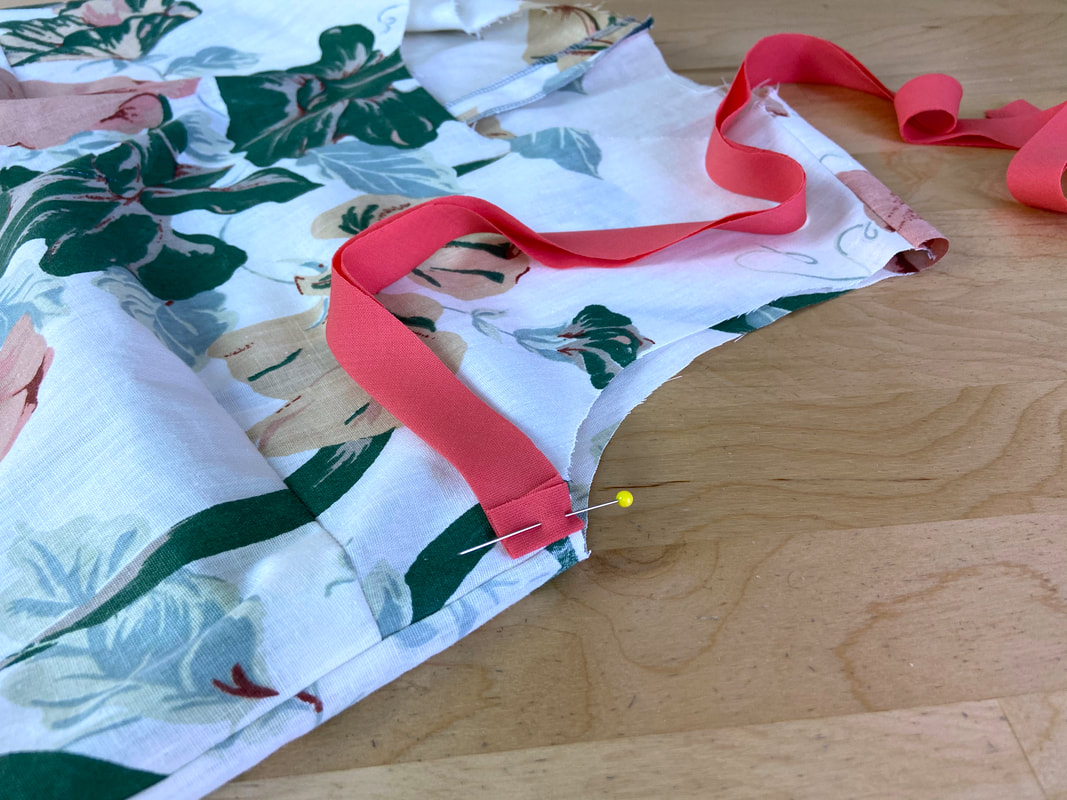
1. Keeping the garment on its right side, fold the end of the double layer binding at about 1/2" and align the resulting fold with the garment's underarm seam (or side seam). Insert a pin perpendicular to the edges to keep the layers aligned. The binding's lengthwise raw edges should align with the garment's armhole edge as pictured above.
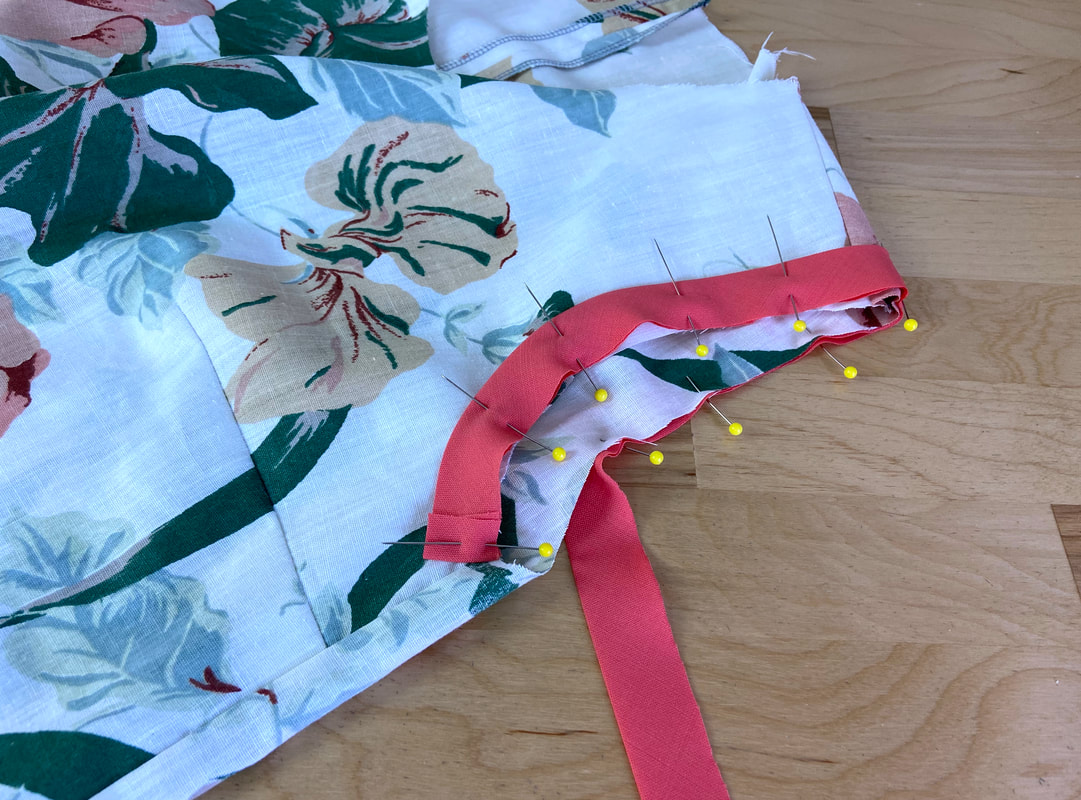
2. Continue aligning and pinning the double layer binding from the garment's face side, until you arrive at the binding's starting point (or underarm seam).
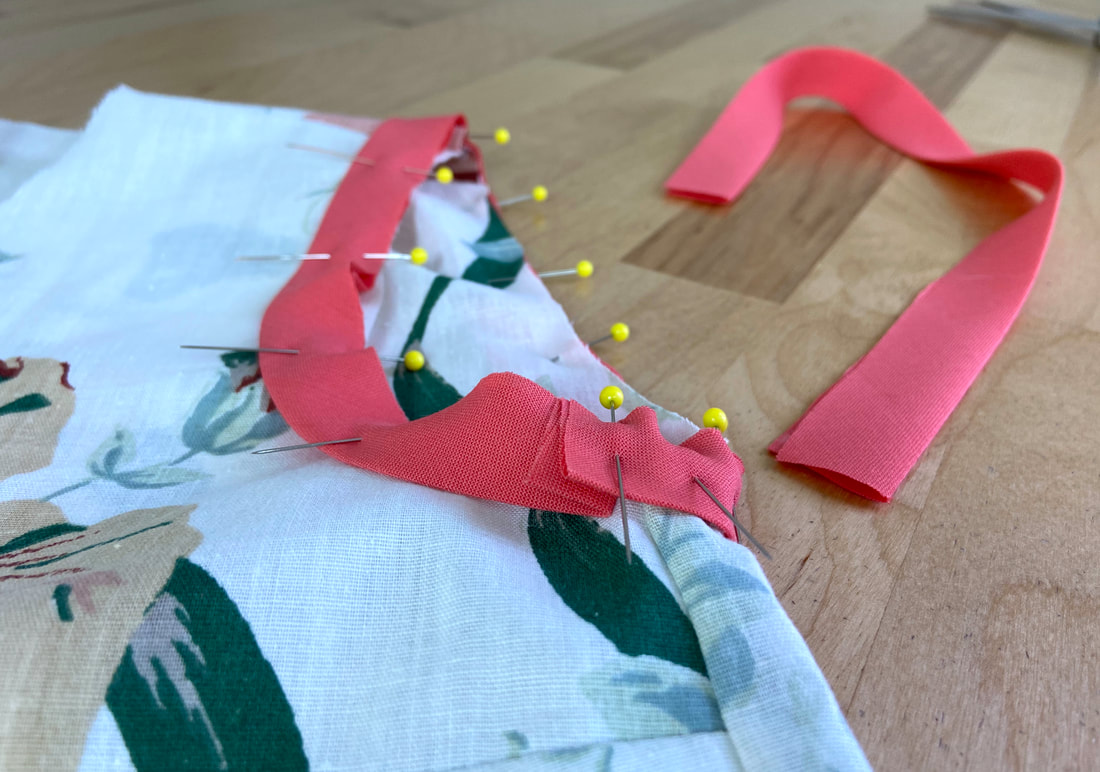
3. At this point, place the unfolded binding end over the folded one, and trim the excess binding so that both ends are overlapped by approximately 1/2".
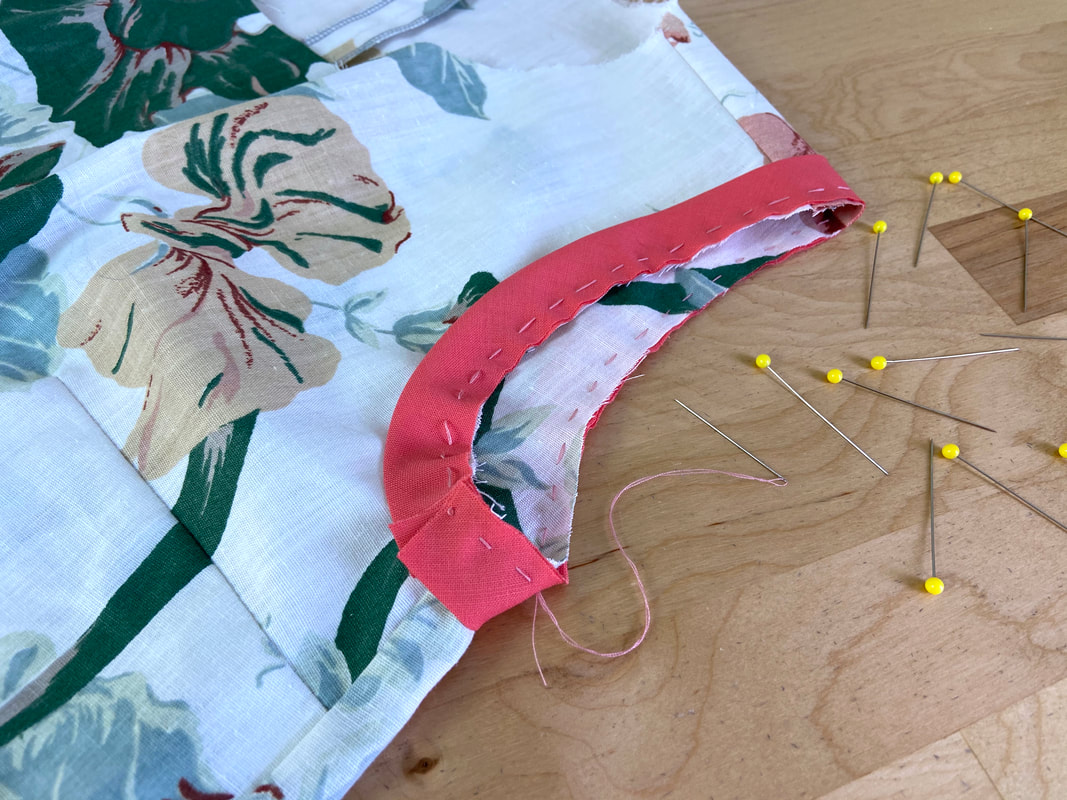
Note: Prior to machine stitching the binding, it helps to replace the pins with hand basting as this will keep the layers significantly more secure and accurately aligned during the stitching process. Increased stability is especially important at the binding's overlapping ends.


