
A Simpler Way To Sew A Bound Armhole Finish With Exposed Binding
When sewing a bound armhole finish with exposed binding, you may find that the conventional, pre-packaged double fold binding available on the market tends to be quite difficult to stabilize and align at the abruptly curved underarm area. Using a double layer binding instead, allows you to not only skip a few sewing steps, but also have a lot more control during the binding alignment and stitching process.
|
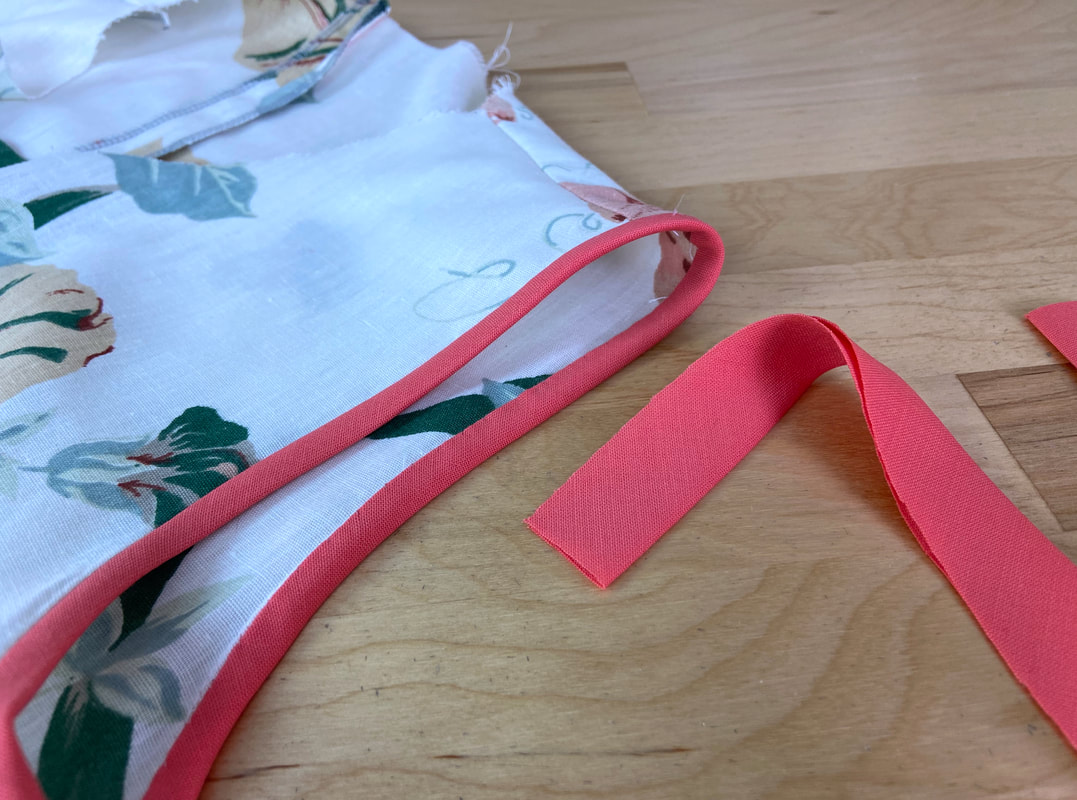
A double layer biding is a bias fabric strip that is folded once down the center, self-finishing one of its lengthwise edges with a fold. The initial bias strip is cut at six (6) times the width of the finished bias binding application.
For example, the finished exposed bound edge shown above is 1/4" wide, thus the initial bias strip is cut at 1.5" wide then folded down the center in preparation for stitching.
For example, the finished exposed bound edge shown above is 1/4" wide, thus the initial bias strip is cut at 1.5" wide then folded down the center in preparation for stitching.
|
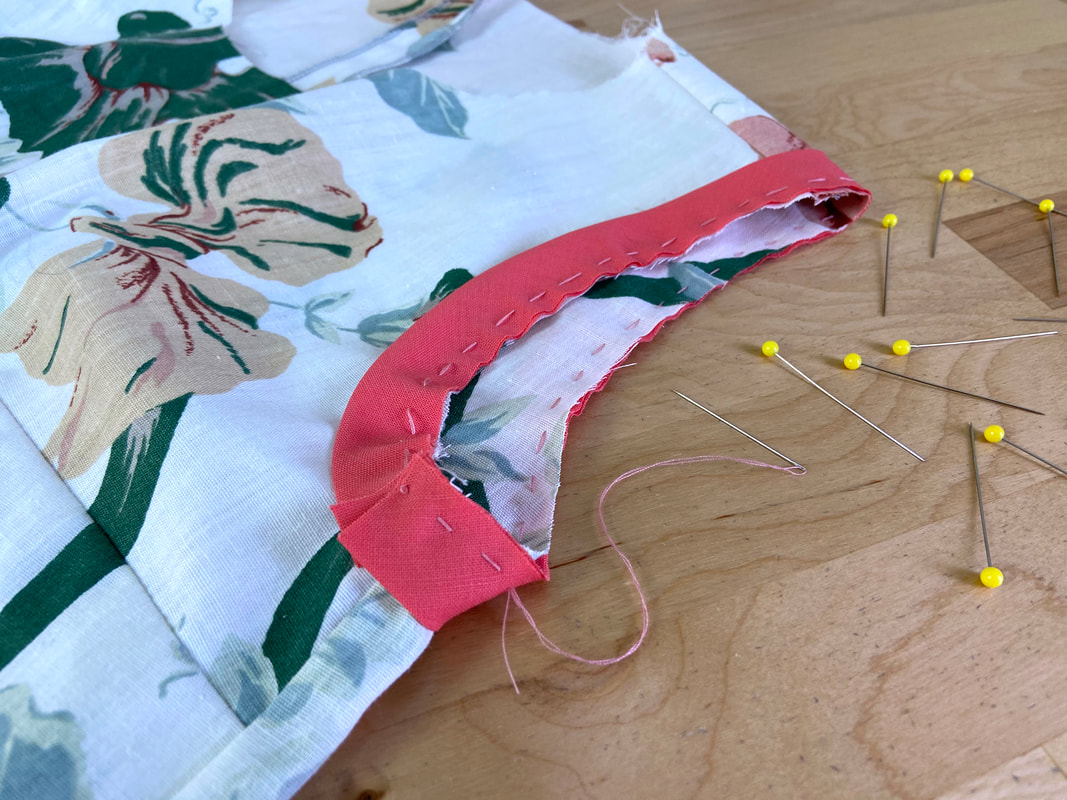
The double layer biding is aligned to the armhole edge from the garment's right side, with all binding and armhole raw edges aligning.
It is highly recommended that in lieu of pins, you use a temporary hand basting stitch (pictured above) to keep the edges perfectly aligned in the stitching process.
It is highly recommended that in lieu of pins, you use a temporary hand basting stitch (pictured above) to keep the edges perfectly aligned in the stitching process.
|
The beginning end of the binding is folded so that when the binding is flipped over the armhole edge, this initial fold naturally hides the end of the binding left unfolded.
It is important to note that when sewing an exposed bound finish, the garment's raw edge should have no seam allowance. The binding simply encases this edge without requiring any additional folding steps.
It is important to note that when sewing an exposed bound finish, the garment's raw edge should have no seam allowance. The binding simply encases this edge without requiring any additional folding steps.
|
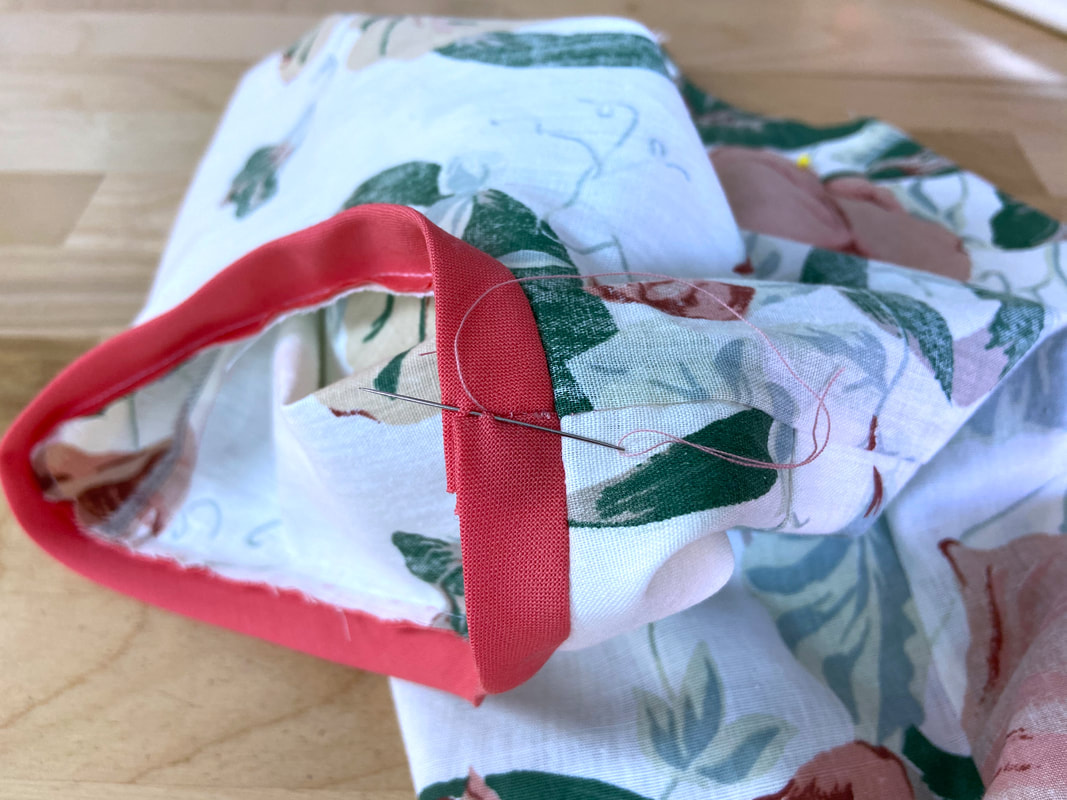
Once the double layer binding is stitched to the armhole edge, all you have to do is flip the binding's folded edge to the wrong side of the garment encasing all raw edges underneath. In this position, the binding's folded edge should align with the binding's connective stitch. This will ensure that the double layer binding is naturally folded lengthwise along its halfway point.
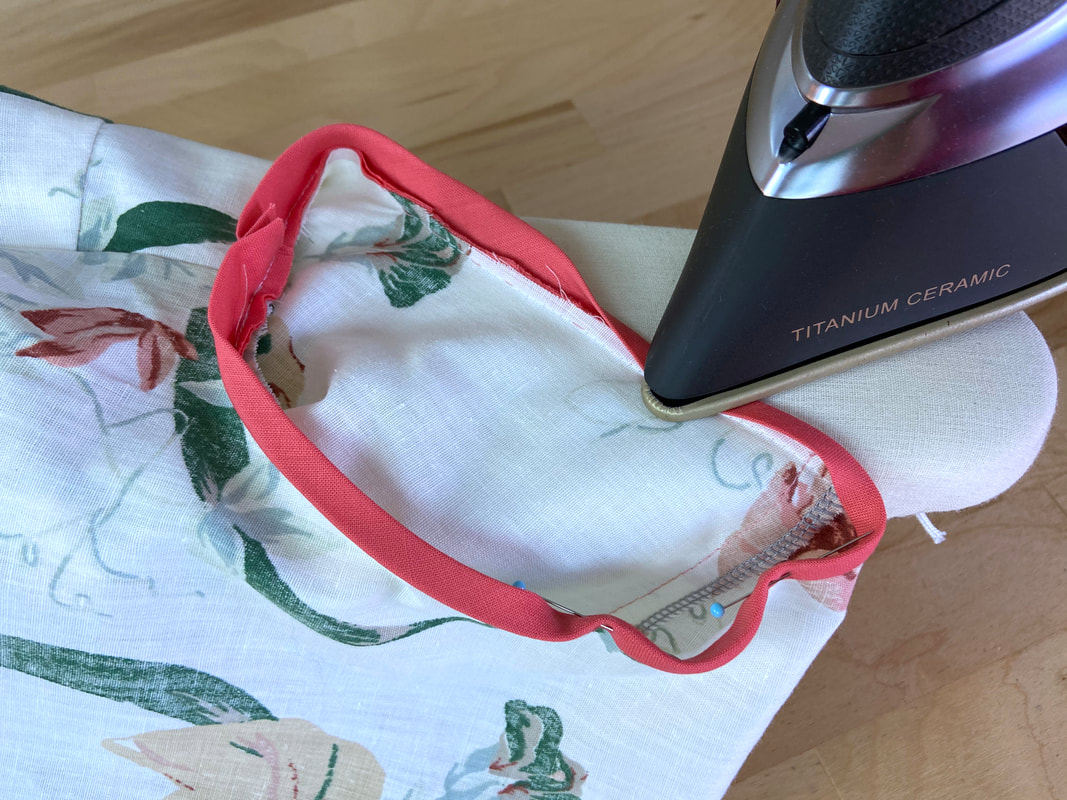
To facilitate the remining sewing process, iron the resulting fold to stabilize it.
To facilitate the remining sewing process, iron the resulting fold to stabilize it.
|
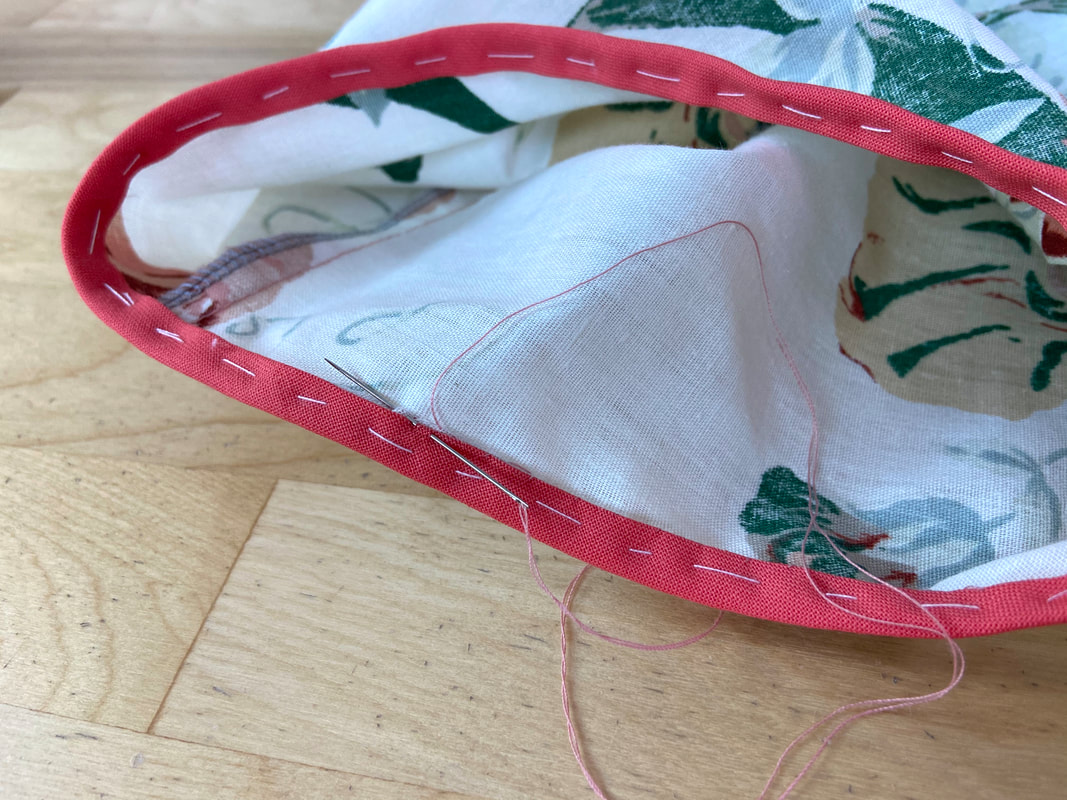
It is incredibly helpful, especially if working with a narrow application or flimsy fabrics, to hand baste the double layer binding in its final position. Once the binding is fully sealed, this hand basting stitch can be easily removed using a seam ripper.
In terms of sealing the binding's open edge, you can accomplish this either by hand or by machine. For no visible topstitching on the garment's right side, blindstitch the binding fold to the garment surface underneath using a slipstitch application(pictured above). The slipstitch is applied from the armhole's wrong side, catching the binding's folded edge and a few threads from the wrong side of the garment underneath.
In terms of sealing the binding's open edge, you can accomplish this either by hand or by machine. For no visible topstitching on the garment's right side, blindstitch the binding fold to the garment surface underneath using a slipstitch application(pictured above). The slipstitch is applied from the armhole's wrong side, catching the binding's folded edge and a few threads from the wrong side of the garment underneath.
|
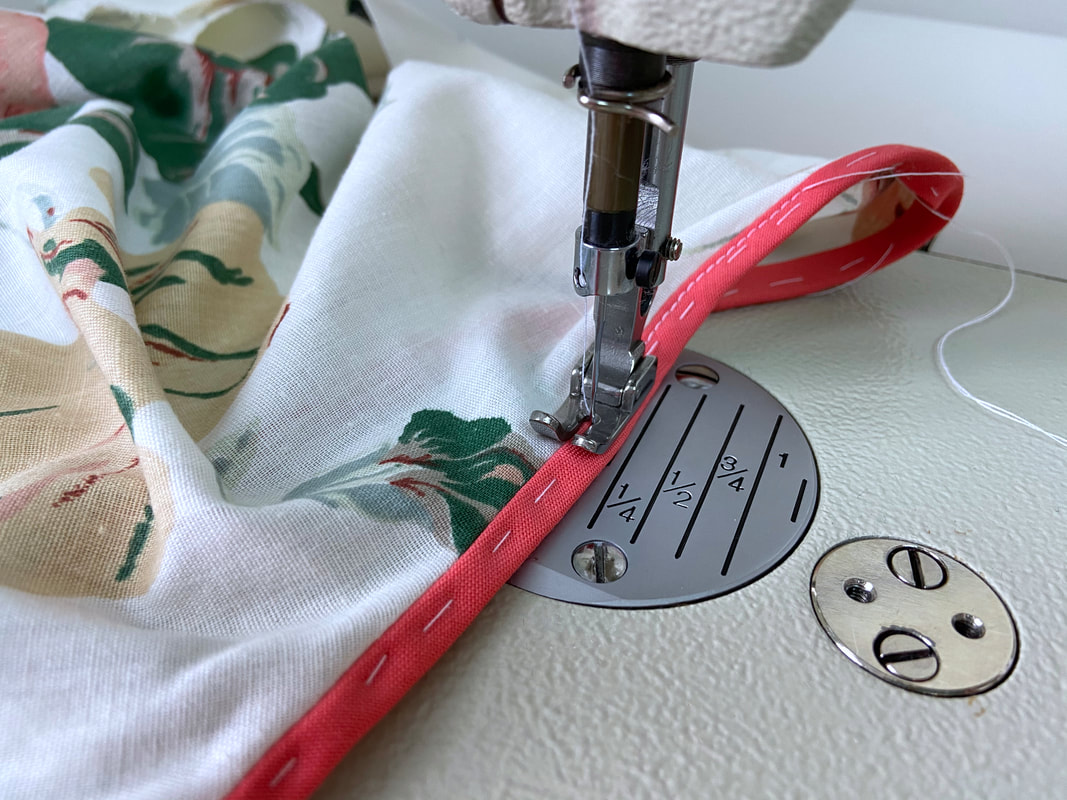
If you prefer a machine stitched finish, topstitch the binding layer from the garment's face side, applying the stitch next to the binding seamline (or inner edge). As you stitch, double check that you are catching the binding's open edge underneath.
