
Use Notching To Release Tension And Achieve Smooth Faced Armhole Edges
When sewing faced armhole edges, one of the biggest challenges is managing the abruptly curved underarm area. Not only is this edge difficult to machine stitch evenly, it is also prone to lots of tension if not handled properly in the construction process. Luckily, these tension issues can be easily prevented with some tension-release notching:
|
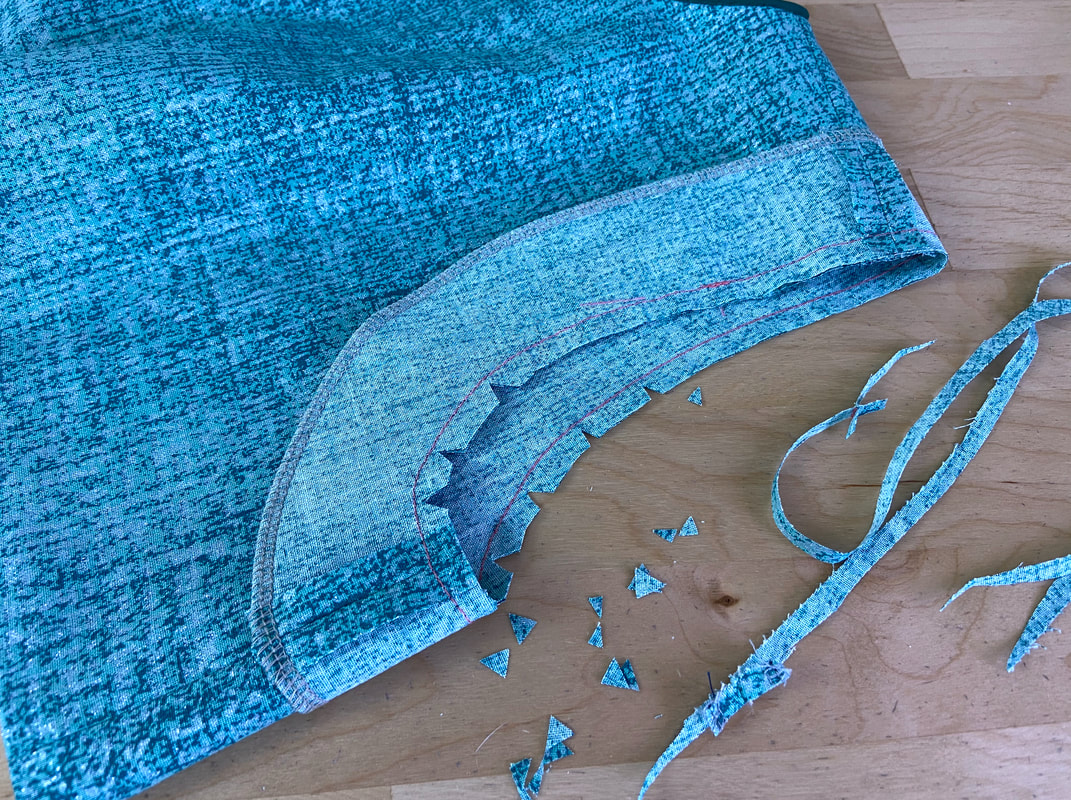
Once the facing unit is permanently stitched to the armhole edge, the seam allowance layers should first be trimmed (if needed) to eliminate excess bulk in the finished faced edge. In the example above, the seam allowance width is 1/2" and trimmed by about 1/8".
Next, clip triangle-shaped or wedge notches into the seam allowance at the armscye's most curved area- in this case, the underarm. These notches should be clipped close to the stitch but not so close that you accidentally clip it or weaken the seam.
Aside from releasing tension in the curved seam, these triangle cutouts will also remove excess seam allowance that may cause unnecessary thickness and bulk in the finished faced edge.
|
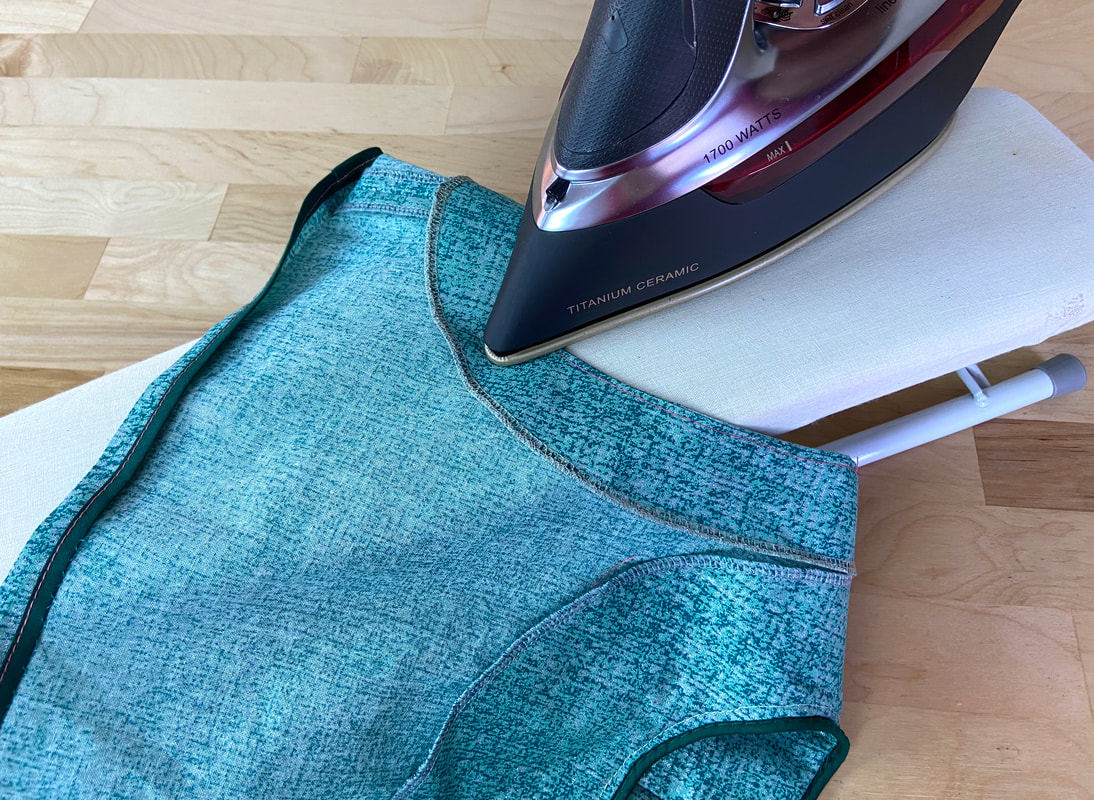
The facing layer is then flipped to its natural position (toward the inside of the garment), exposing a smooth tension-free faced edge. If you attempt to flip the facing to the garment's wrong side without first, notching the seam allowance edges, you'll find that this is virtually impossible as there is too much tension to allow the finished edges to lay flat and smooth.
