
Two Ways To Sew And Finish Lined Shoulder Seams In Dressmaking
When sewing a fully lined garment, the most confusing aspect of sealing the lining layer is handling the shoulder seam area. Depending on the garment's seam location and its design, there are two different techniques you can use to clean-finish lining at the shoulder seams:
Garment With Fully Separating Front/Back Seam
|
If the garment has a fully separating back or front seam, the shoulder seams on both lining and garment are stitched separately in a conventional manner: fabric face side touching, edges aligning, and seam allowance layers ironed open.
The lining and garment layers are then aligned with right sides touching such that the shoulder seams of both garment and lining match up, and the armhole and neckline edges align perfectly as pictured above.
Next, the neckline and armhole edges are stitched and notched for tension release.
The lining and garment layers are then aligned with right sides touching such that the shoulder seams of both garment and lining match up, and the armhole and neckline edges align perfectly as pictured above.
Next, the neckline and armhole edges are stitched and notched for tension release.

|
The lined garment is then pulled through the front/back separating seam opening and one of the shoulder areas, flipping it completely on its right side. This will naturally enclose all shoulder seam, neckline and armhole raw edges.
|
Continue by understitching the lining layer. Once understitched, iron the finished edges prior to stitching the rest of the garment seams (with right sides touching).
Garment With No Fully Separating Front/Back Seam
|
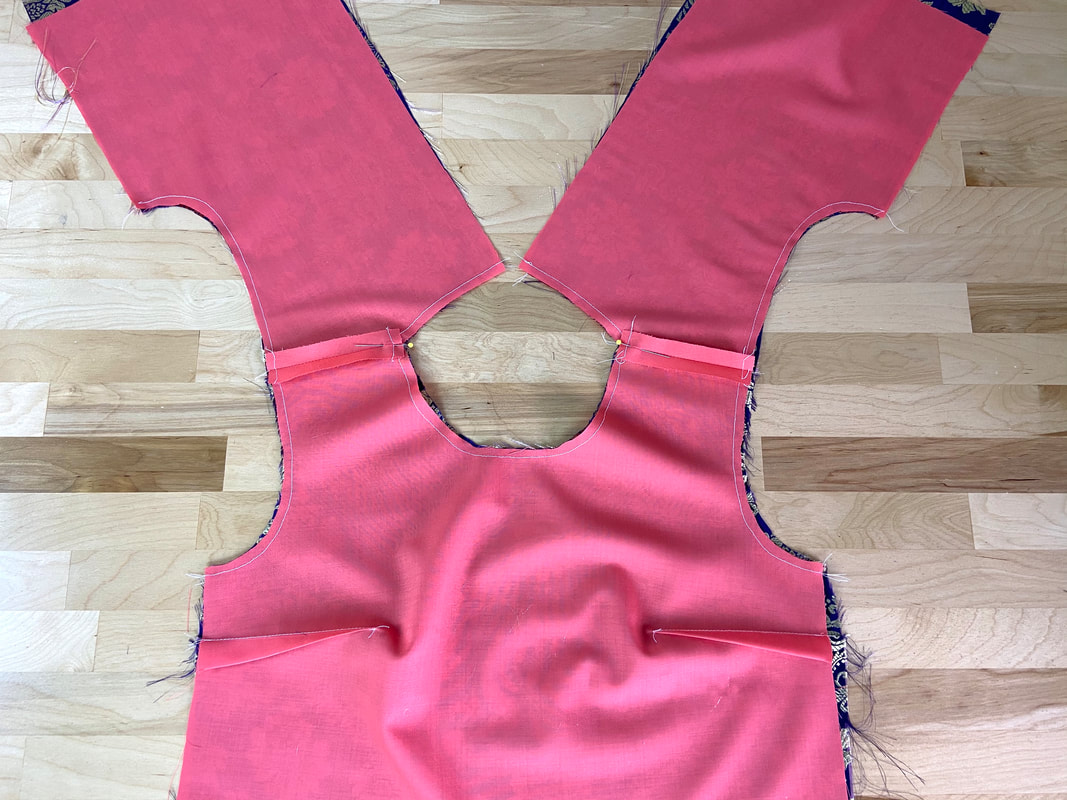
If the garment does not have a fully separating seam, either on the front or back of the garment, the shoulder seams of both lining and garment layers are left unstitched in the initial lining attachment process. The side seams of both compartments however, are fully stitched and ironed with the seam allowance layers open.
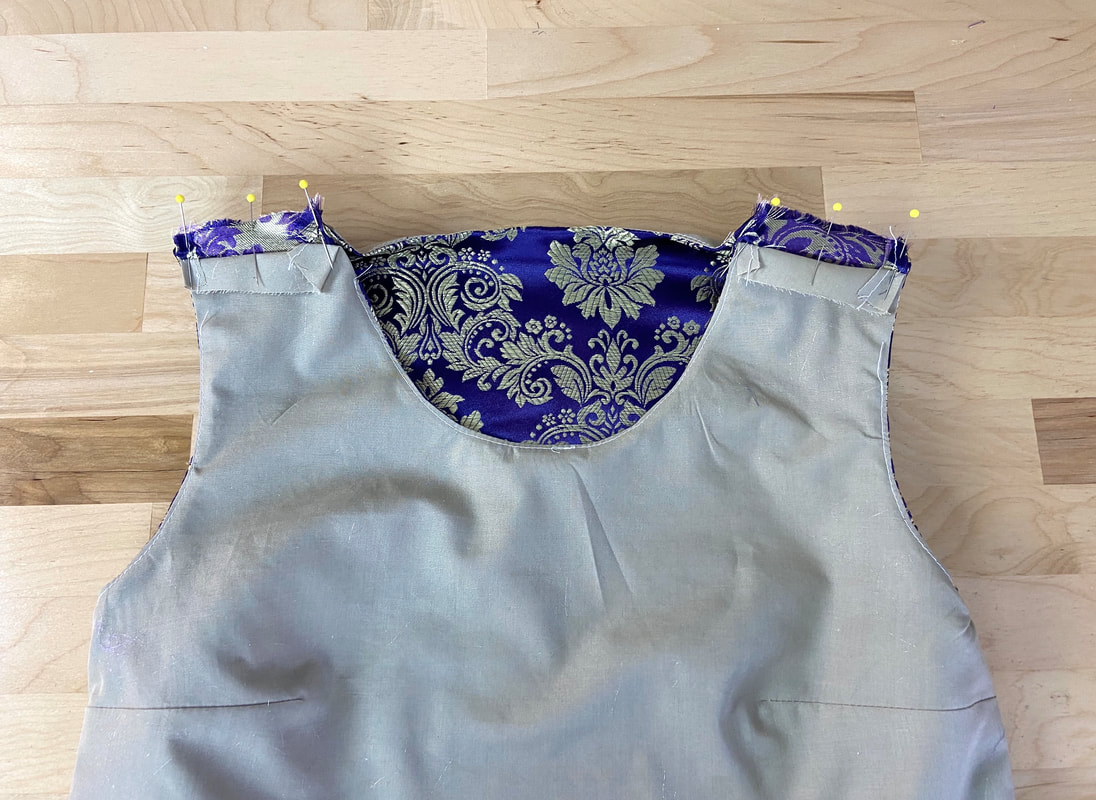
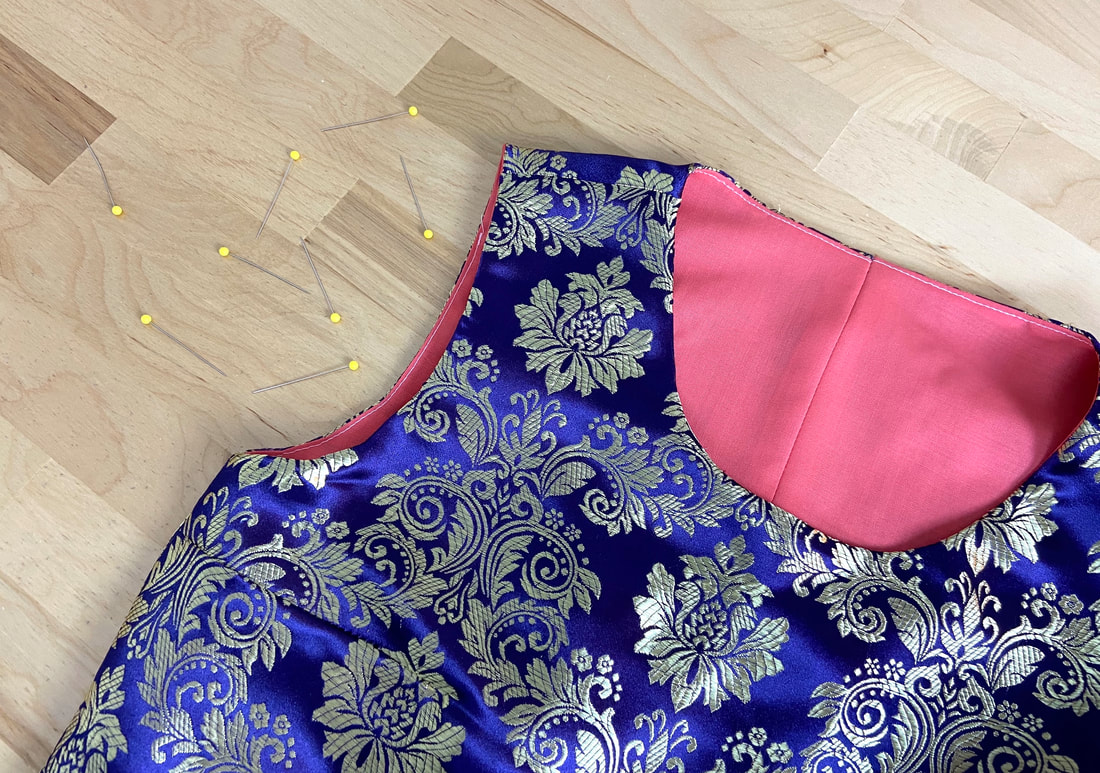
The lining is then aligned to the garment layer with fabric right sides touching and all edges of the neckline and armholes aligning as shown above. Pins are inserted along the edges to secure them for machine stitching. In the process, the shoulder seams are left unstitched.
The lining is then aligned to the garment layer with fabric right sides touching and all edges of the neckline and armholes aligning as shown above. Pins are inserted along the edges to secure them for machine stitching. In the process, the shoulder seams are left unstitched.
|
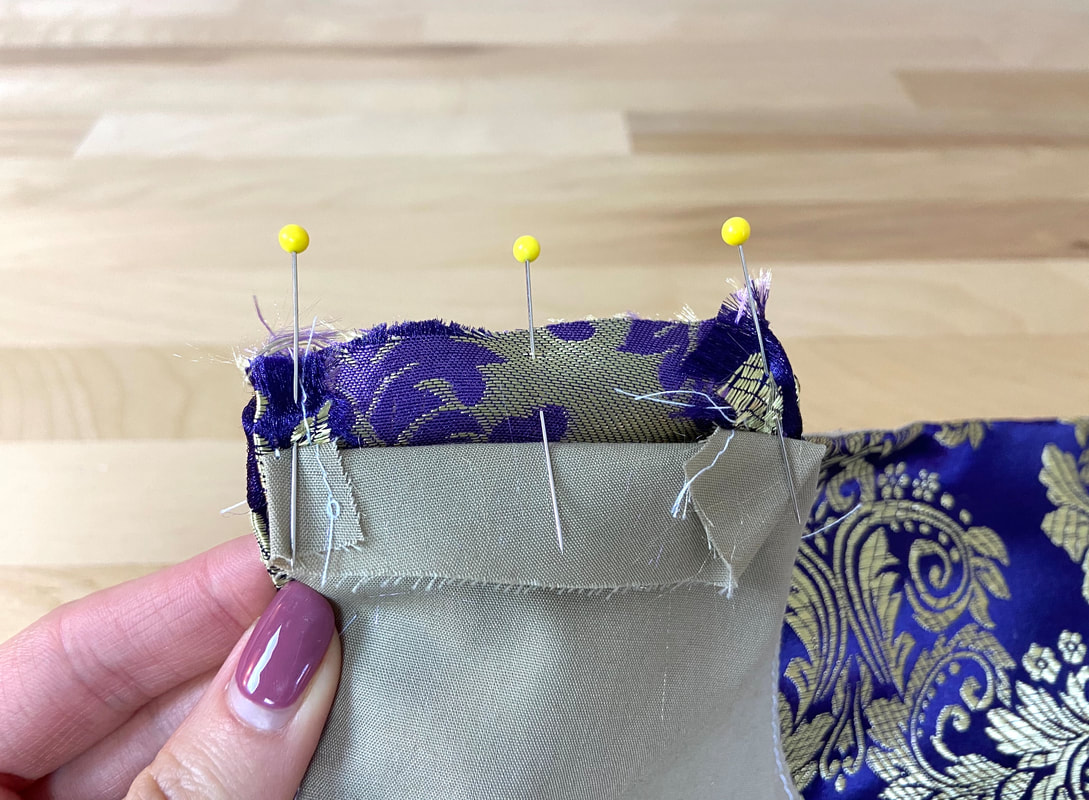
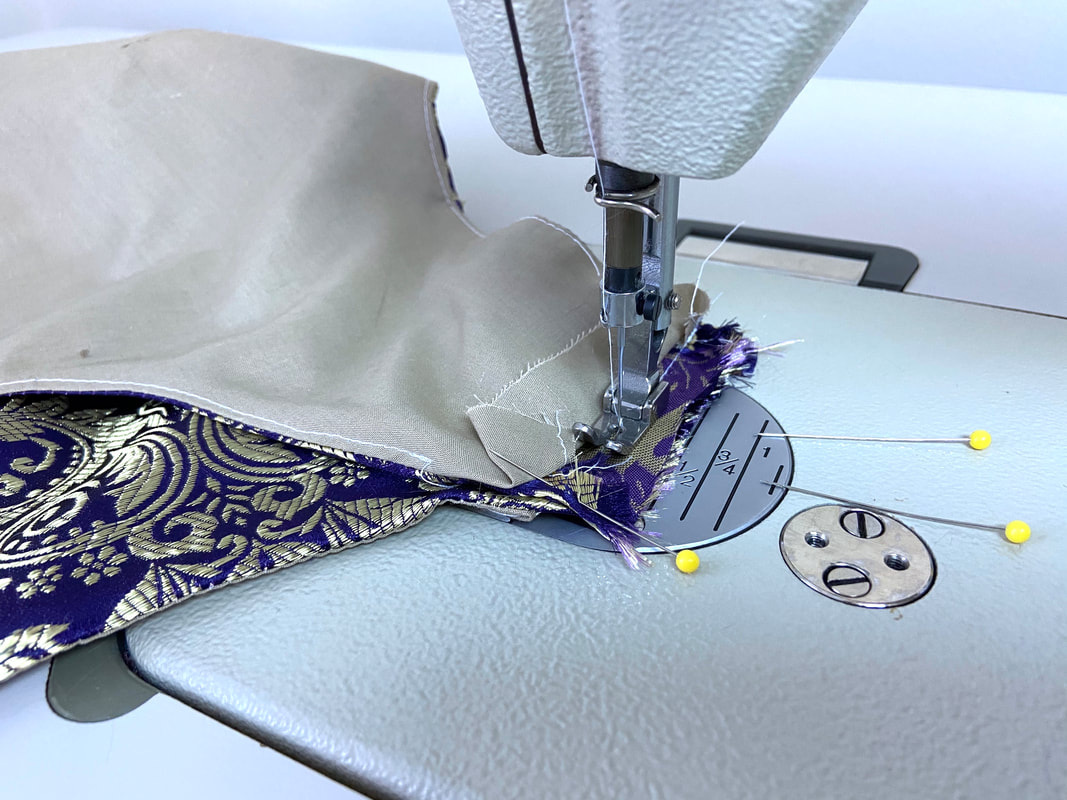
When stitching the neckline and armhole edges, a 1/2" portion is left unstitched at both ends of the shoulder seam. This means that when stitching the armhole and neckline, you should start and end your stitch at about 1/2" from the edge each time.

|
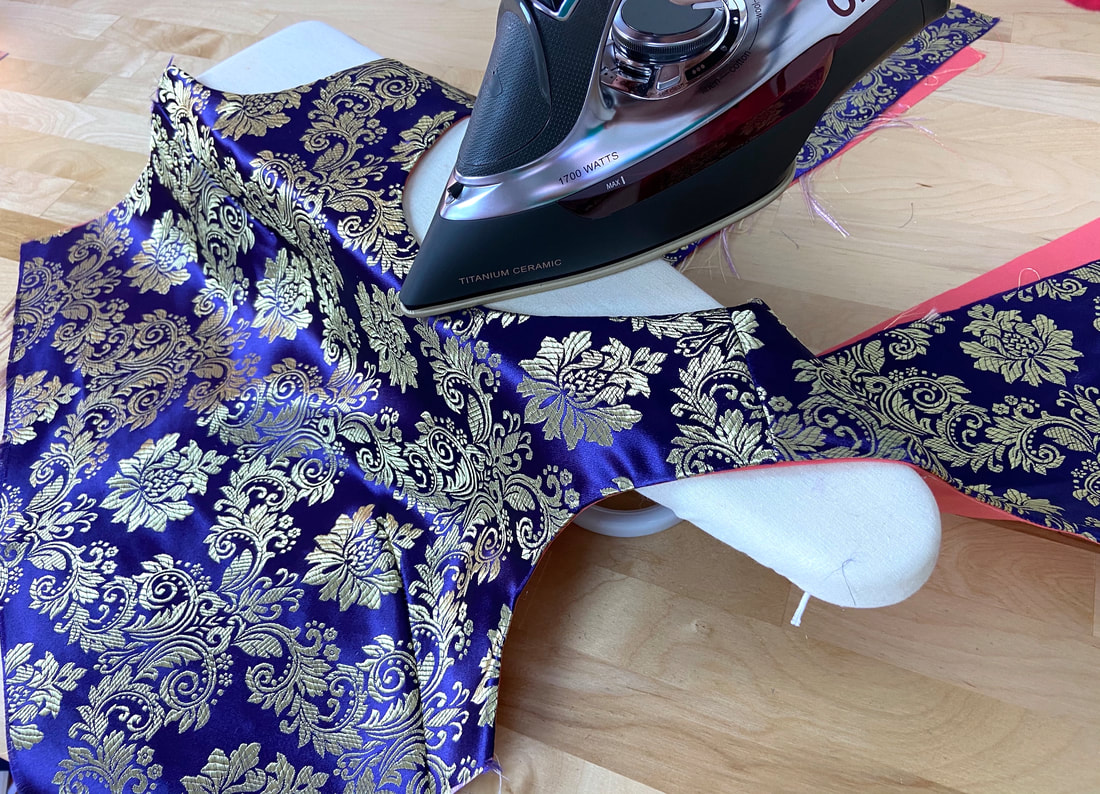
The lining and garment layers are then flipped to their face sides through both shoulder openings, thus exposing the clean-finished neckline and armhole edges. These edges are then understitched and ironed flat.
The shoulder area is stitched and finished last:
The shoulder area is stitched and finished last:
|
|
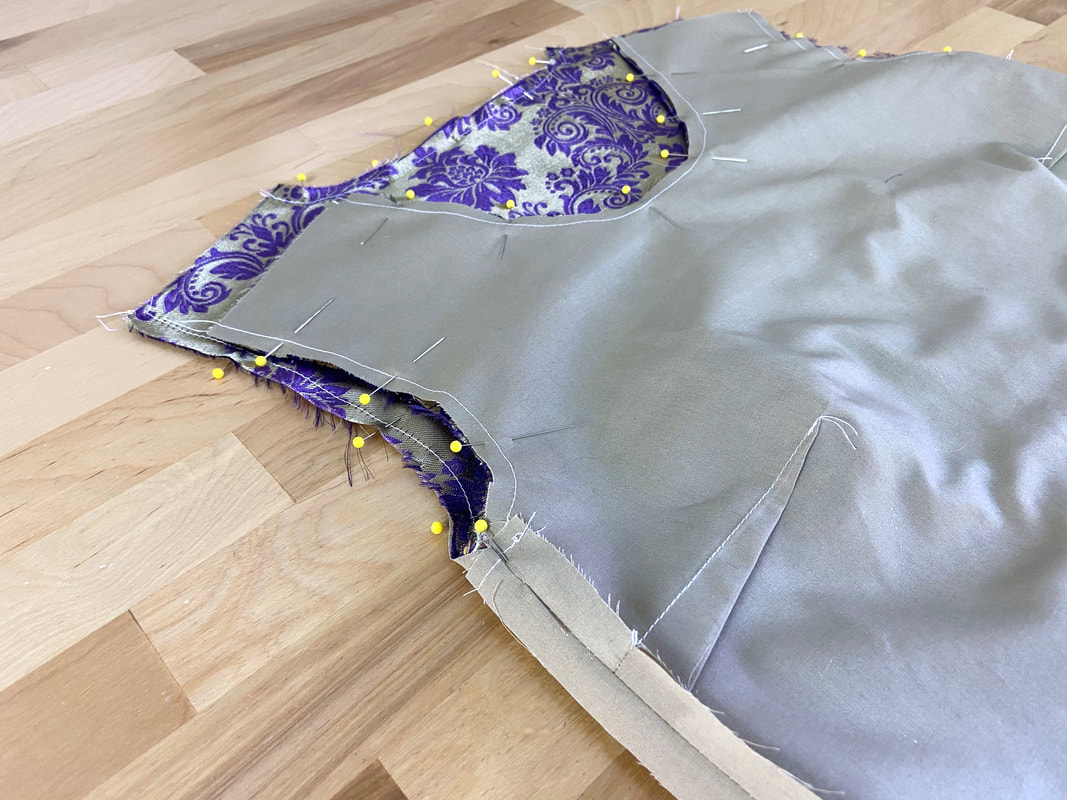
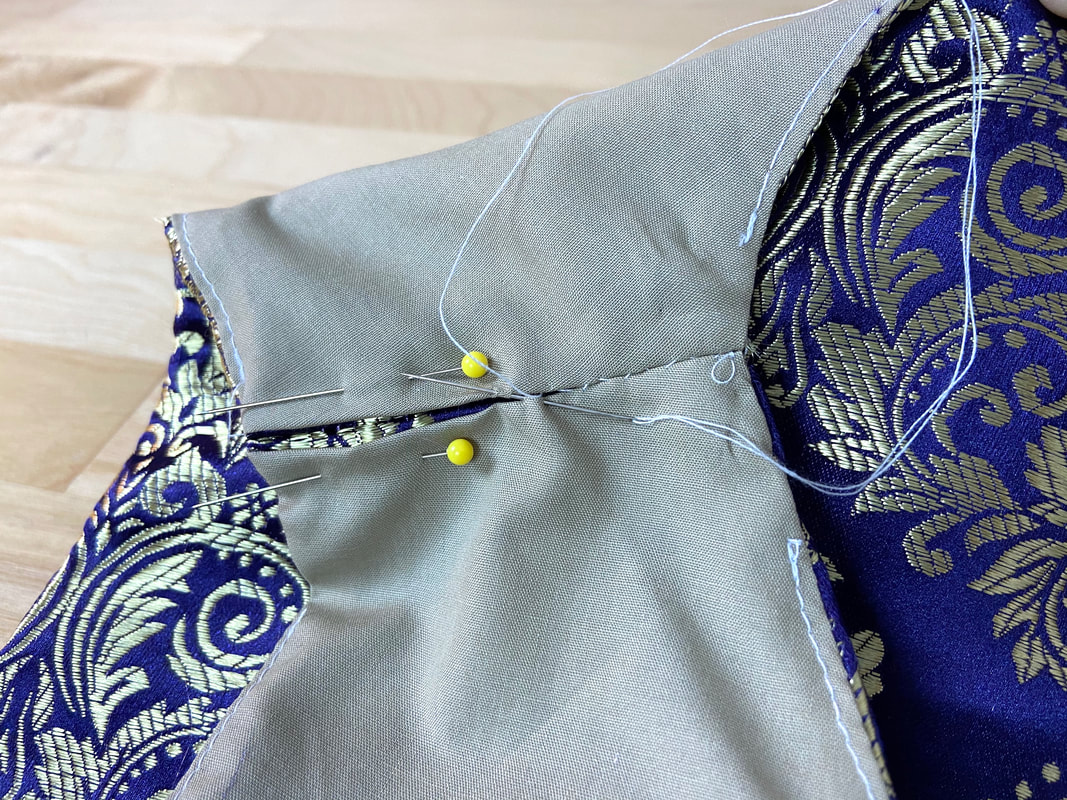
To complete the shoulder seams, align the garment's shoulder seam edges (not lining) with face side stitching as you would any conventional seam. Insert pins perpendicularly to secure the edges together. Move the lining edges out of the way for now, and repeat the alignment and pinning process on both shoulder seams as shown.
|
Stitch the garment shoulder seams at the designated seam allowance -1/2" in this case. Be careful not to accidentally catch the lining layers in the process.
|
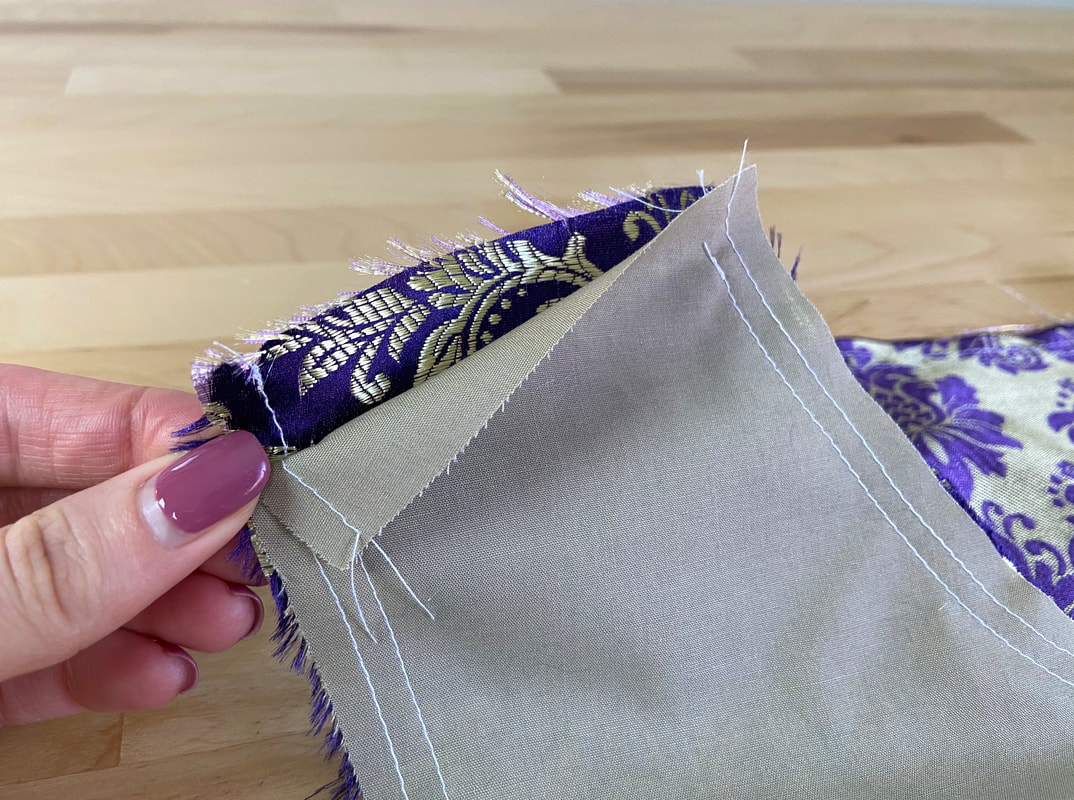
Next, fold the lining's shoulder seam edges inwards to enclose all raw edges and pin them in this position to secure. Slipstitch the folded lining to either the garment's seam allowance layers underneath or to each other as pictured above.
|
Once the rest of the garment's seams are complete, the lining should fully encase all fabric raw edges underneath. All seams, especially the shoulder seams, should lay flat, smooth and bulk-free.
