
Mini Tutorial: How To Sew A Curved Edge Zipper Underlay
A zipper underlay is a separate compartment that provides a protective barrier between the skin surface and the zipper components. A curved-bottom underlay is a classic style constructed of two identical pieces that are stitched together to fully clean-finish the underlay's edges.
|
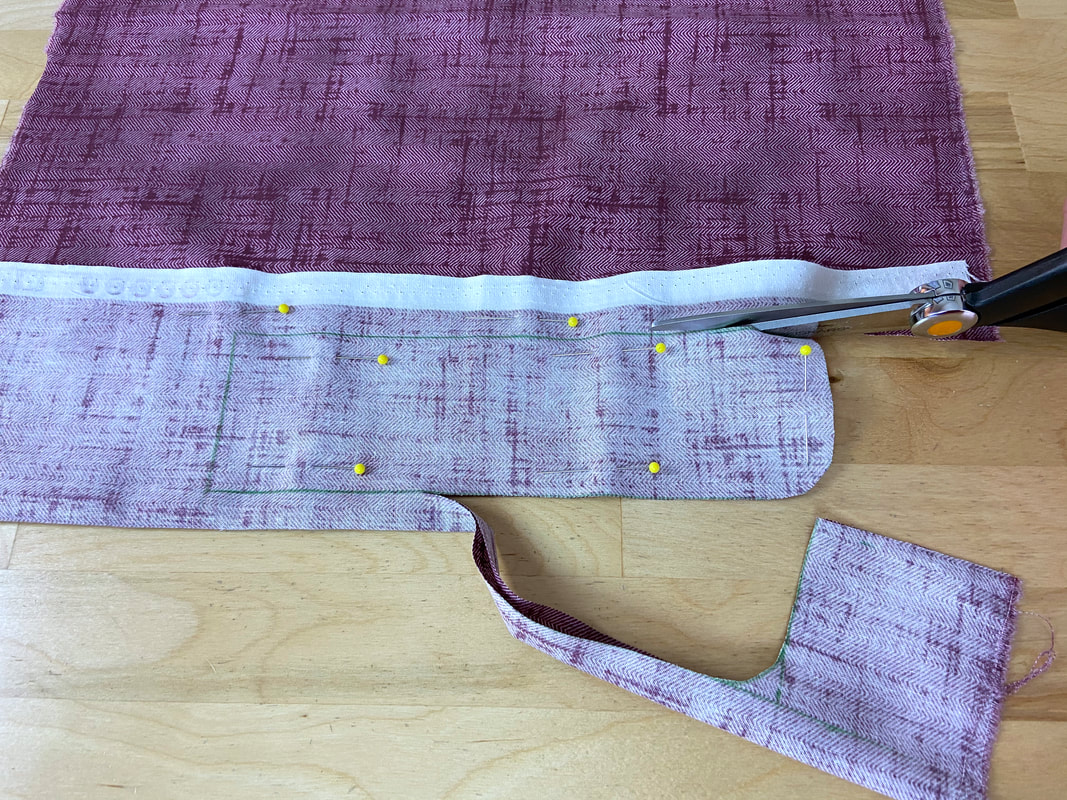
1. To cut the underlay pieces simultaneously, fold the fabric layer with face sides touching and mark the underlay outline directly on the fabric using tailor's chalk or a quilting pencil. Use a french curve (or anything that has a curved traceable edge) to curve the underlay's bottom corner.
Keep in mind that the underlay covers the entire zipper compartment thus it should be at least 2"-3" wide and at least 1" longer than the zipper length.
Pin the fabric layers within the marked lines and cut the two layers simultaneously following the marked lines as a guide.
Keep in mind that the underlay covers the entire zipper compartment thus it should be at least 2"-3" wide and at least 1" longer than the zipper length.
Pin the fabric layers within the marked lines and cut the two layers simultaneously following the marked lines as a guide.
|
|
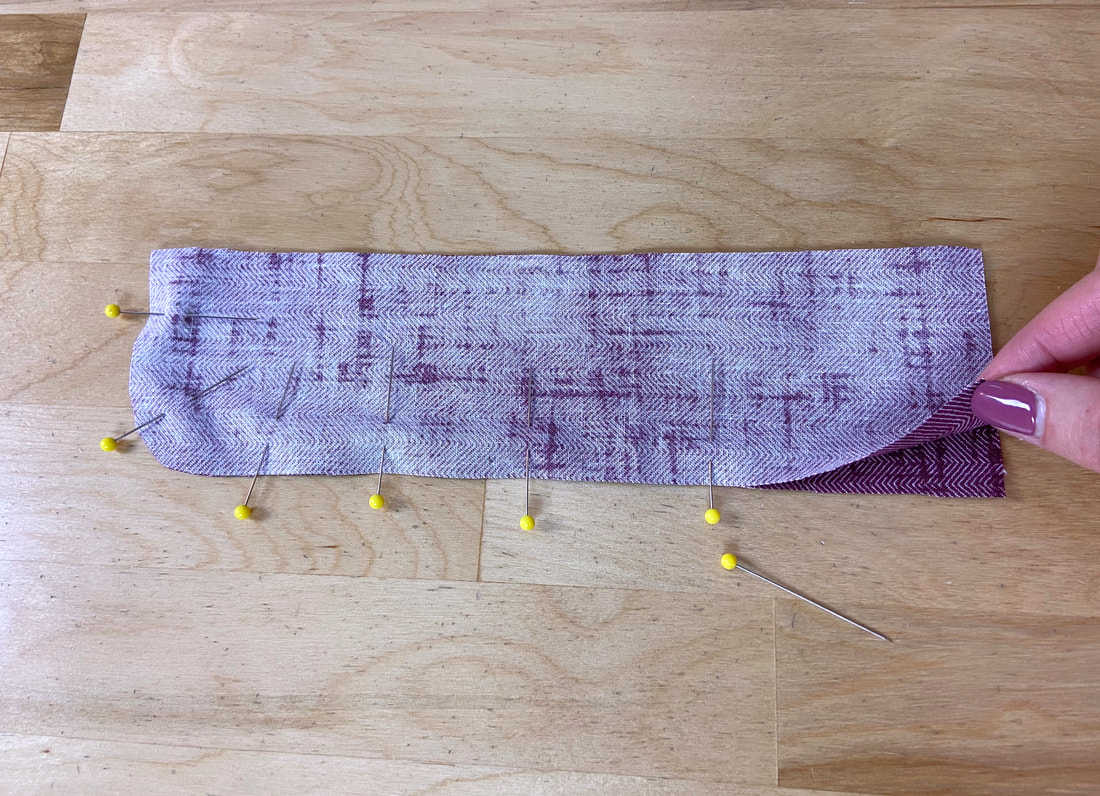
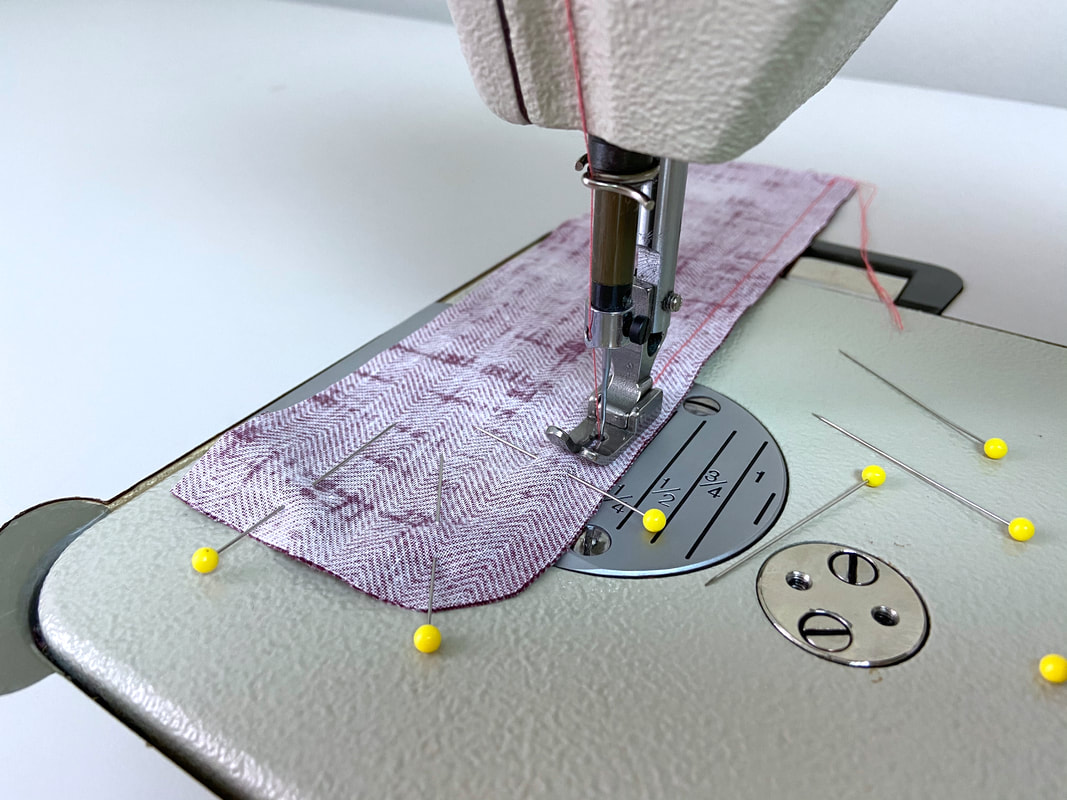
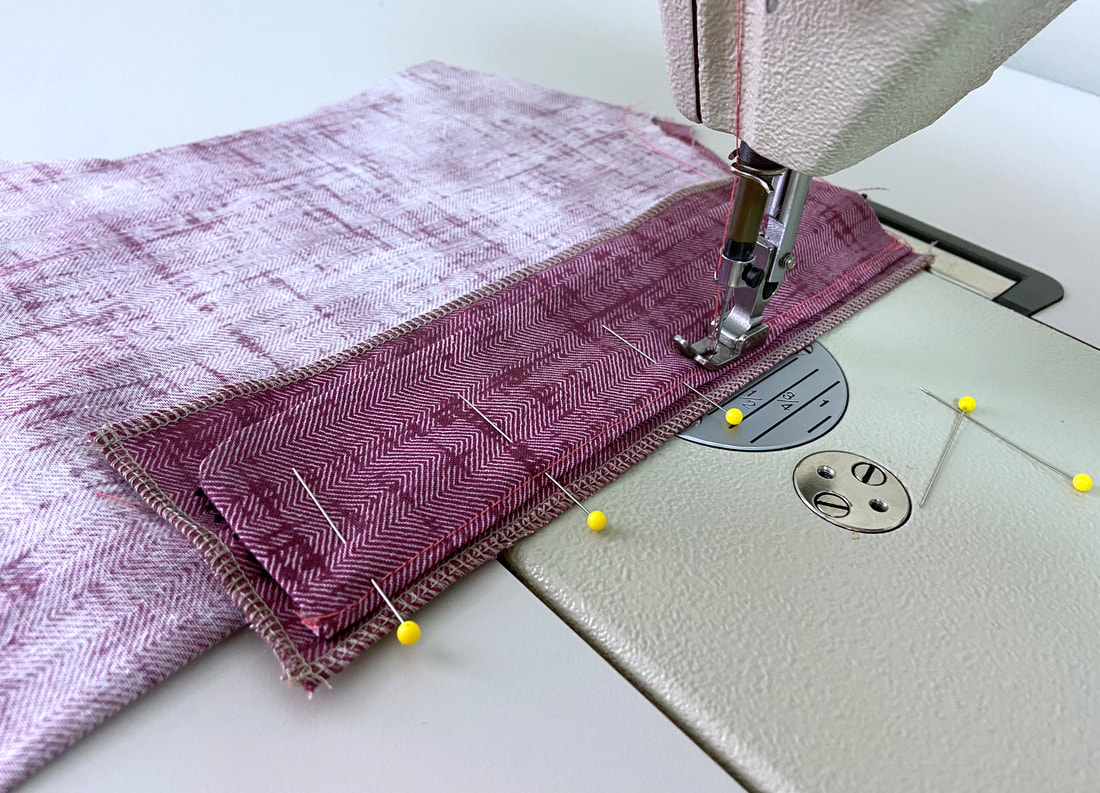
2. Align the two layers together with face sides touching and insert pins perpendicularly along the curved outer edges. Machine stitch the outer curved edge at 1/4" seam allowance or whatever seam allowance is indicated in your project (if you are following a set of patterns).
|
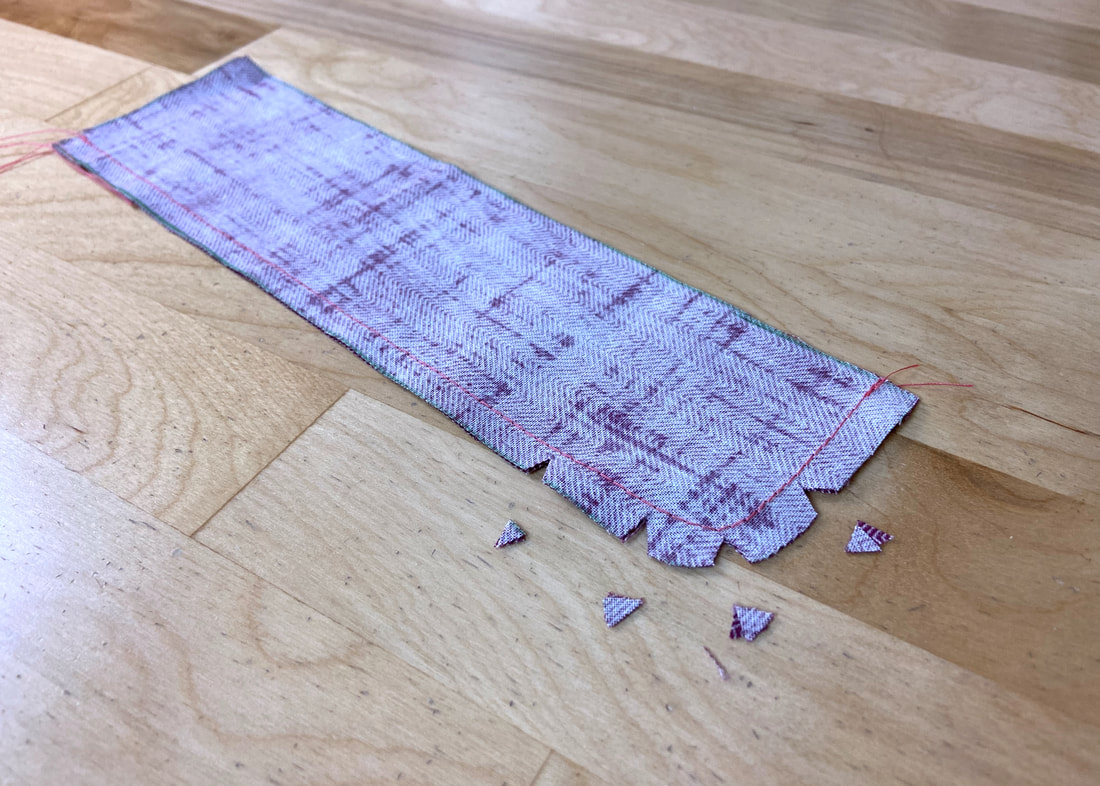
3. Clip wedge notches into the seam allowance at the most curved area of the underlay. These notches will eliminate tension in the finished curved edge allowing it to lay smooth and flat.
|
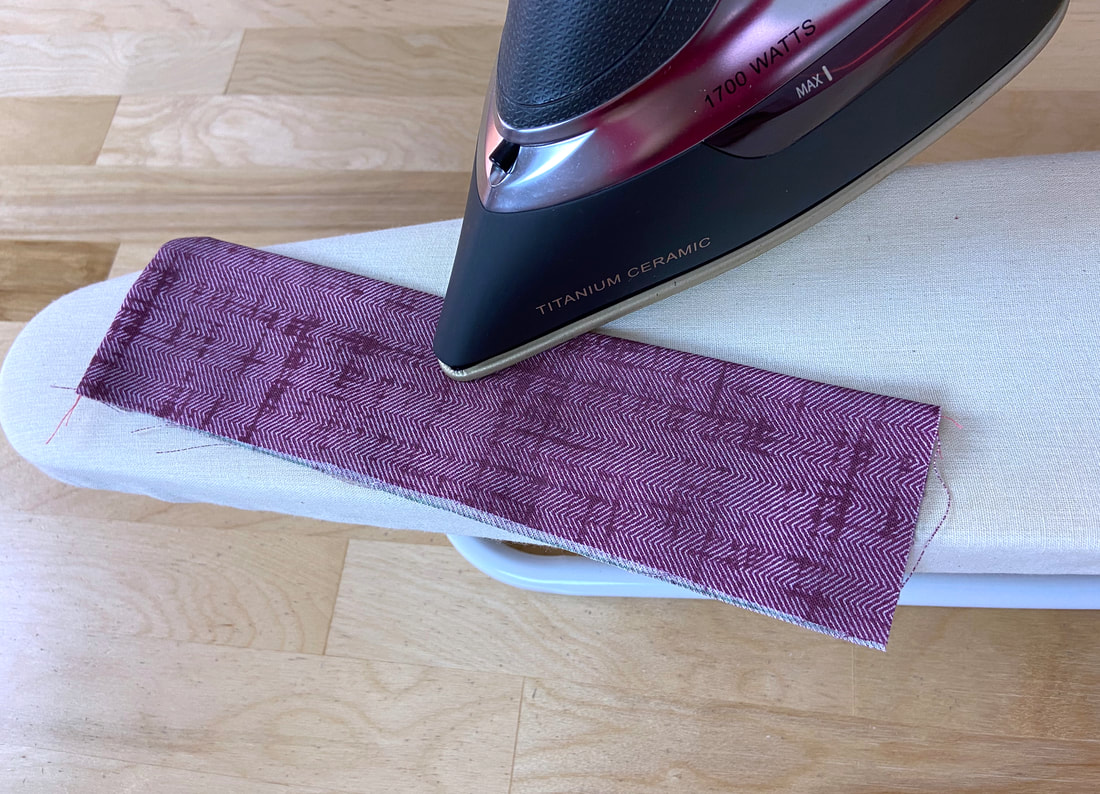
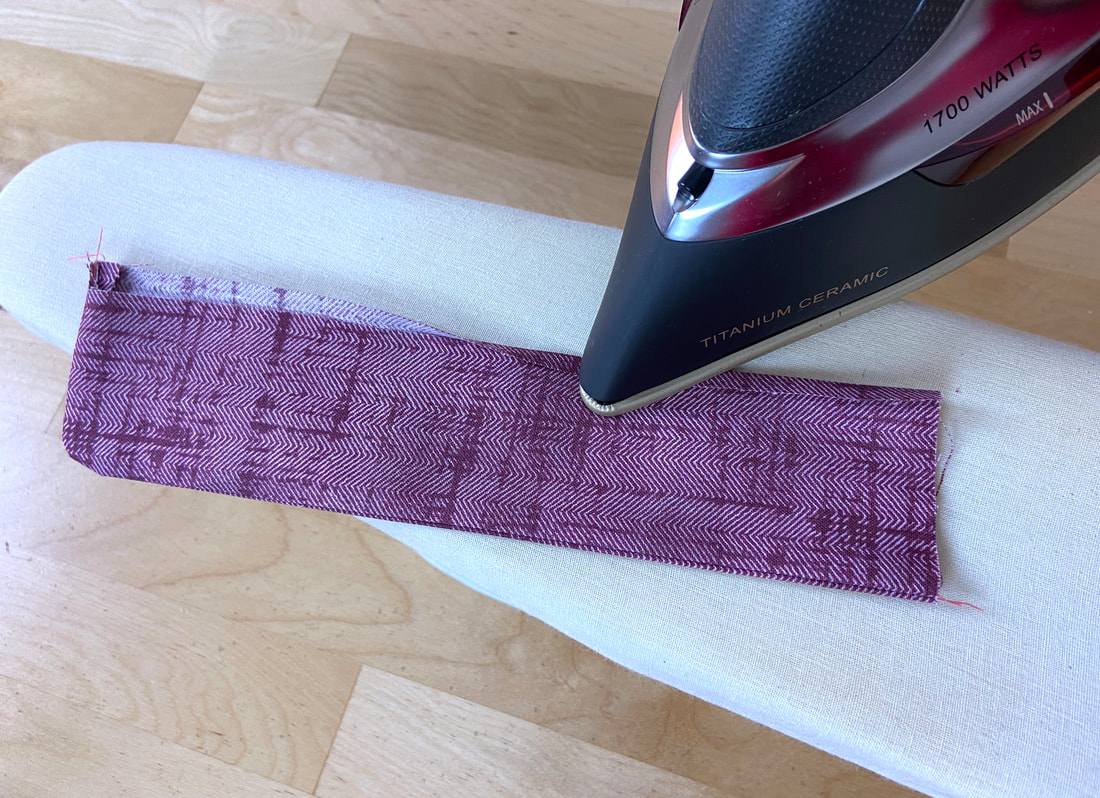
4. Turn the underlay on its face side and iron the finished edge to smooth and flatten it.
|
|
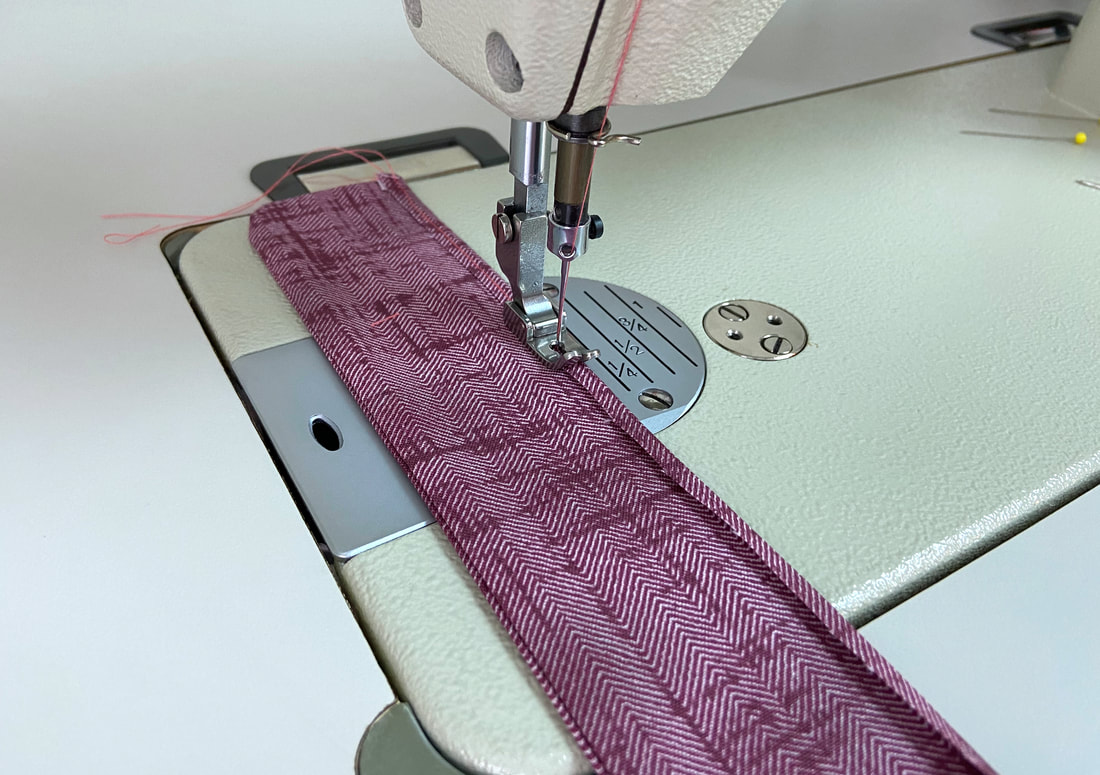
5. Use any technique of your choice to clean-finish the underlay's straight vertical edge. In this instance, one of the edges is trimmed by 1/4" after which the second edge is folded over the trimmed one to encase it. The folded edge is then topstitched to complete the finished application.
|
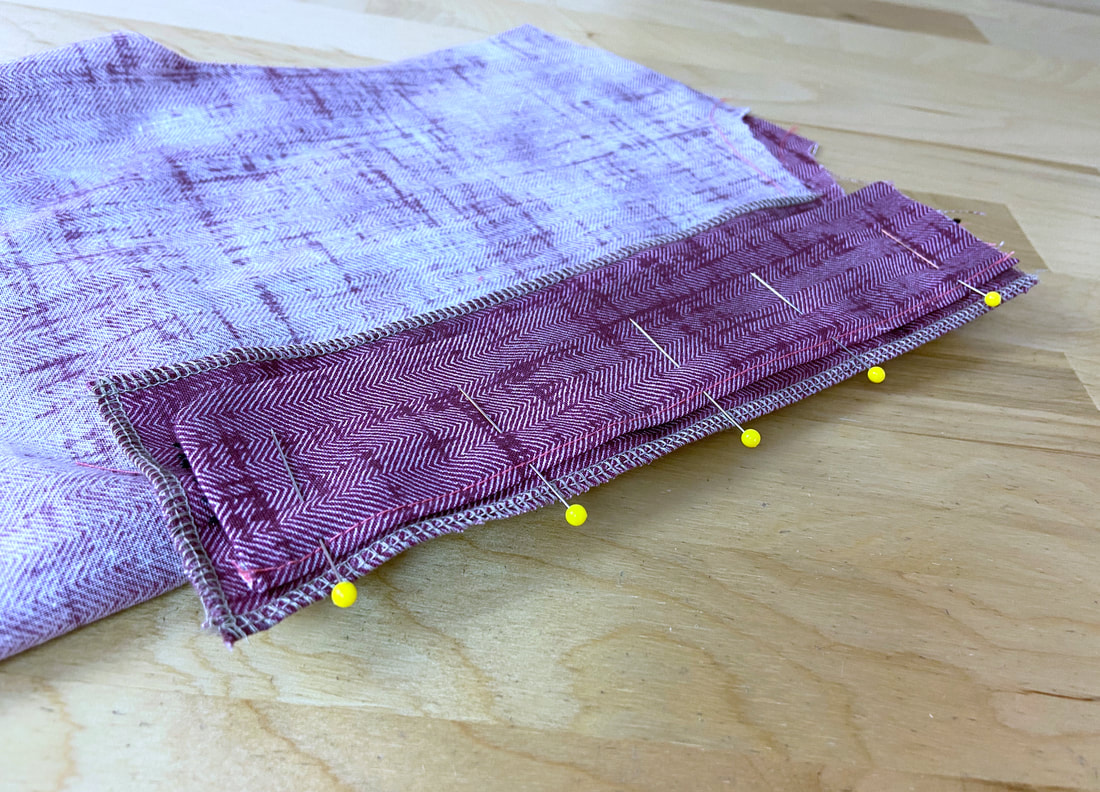
6. On the garment's wrong side, place the underlay on top of the zipper and pin the underlay's vertical edge to the zipper's seam allowance edge as shown. It helps to move all other garment layers away from the seam allowance layer during this process.
|
7. Machine stitch the edges together down the center of the seam allowance. Remove each pin as you approach it.
|
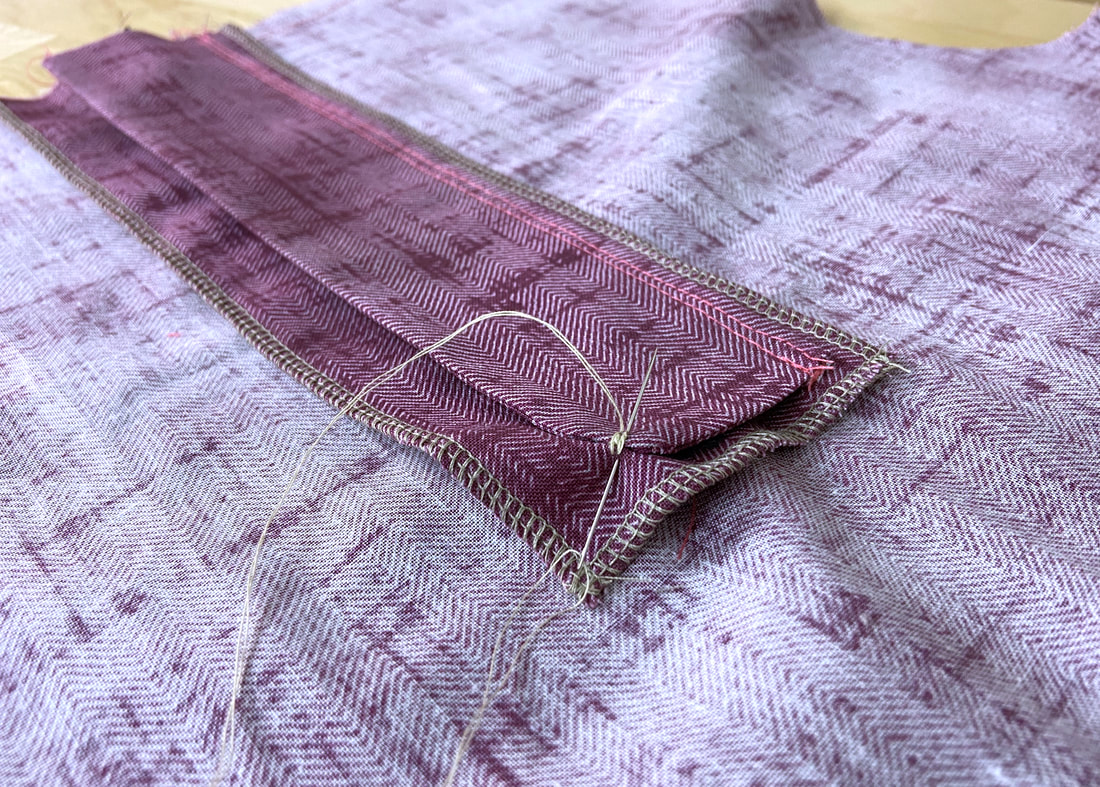
8. To keep the zipper underlay flat and perfectly aligned during the garment's life cycle, tack the curved corner to the seam allowance (or facing layer) underneath. A hand-applied whipstitch should be sufficient to keep the two layers secured. This tack is purely functional and should not be visible on the right side of the garment.
