
Mini Tutorial: How To Sew A Faced Separating Zipper Application
|
1. Start by separately clean-finishing both garment edges housing the zipper. In this example, a serging stitch is applied to encase the raw edges. You can use any technique of your choice as long as it does not create unnecessary thickness and bulk in the finished zipper application.
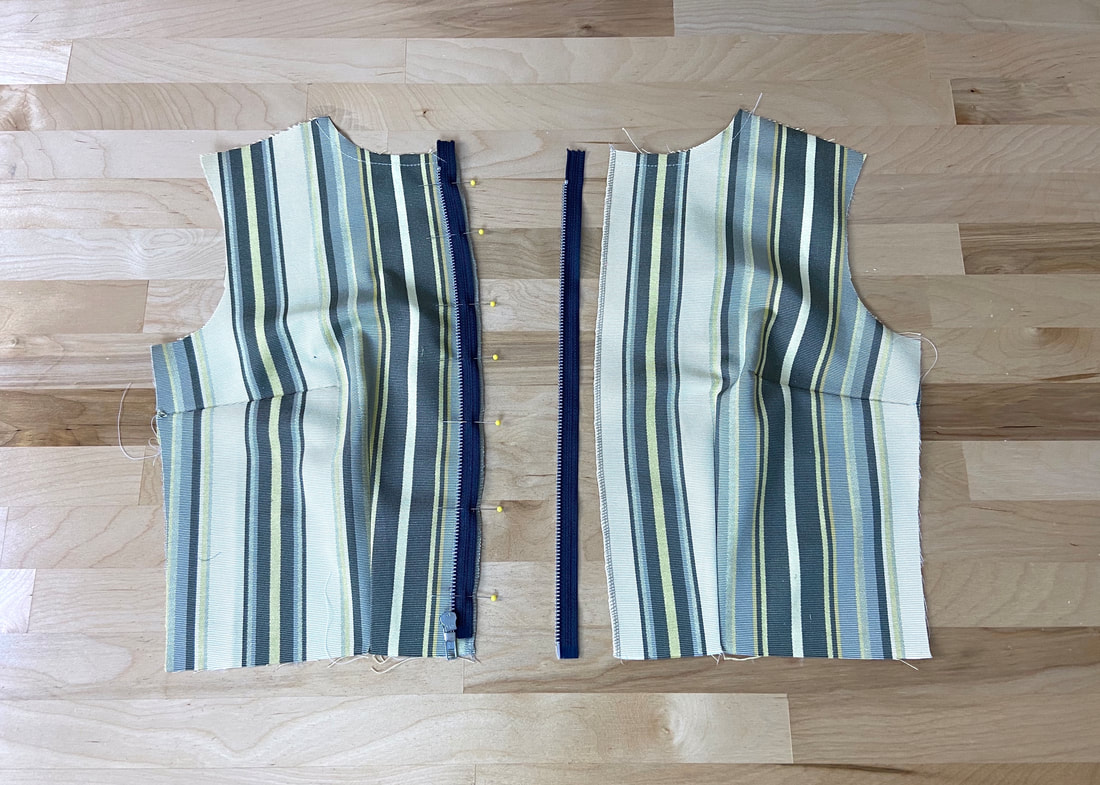
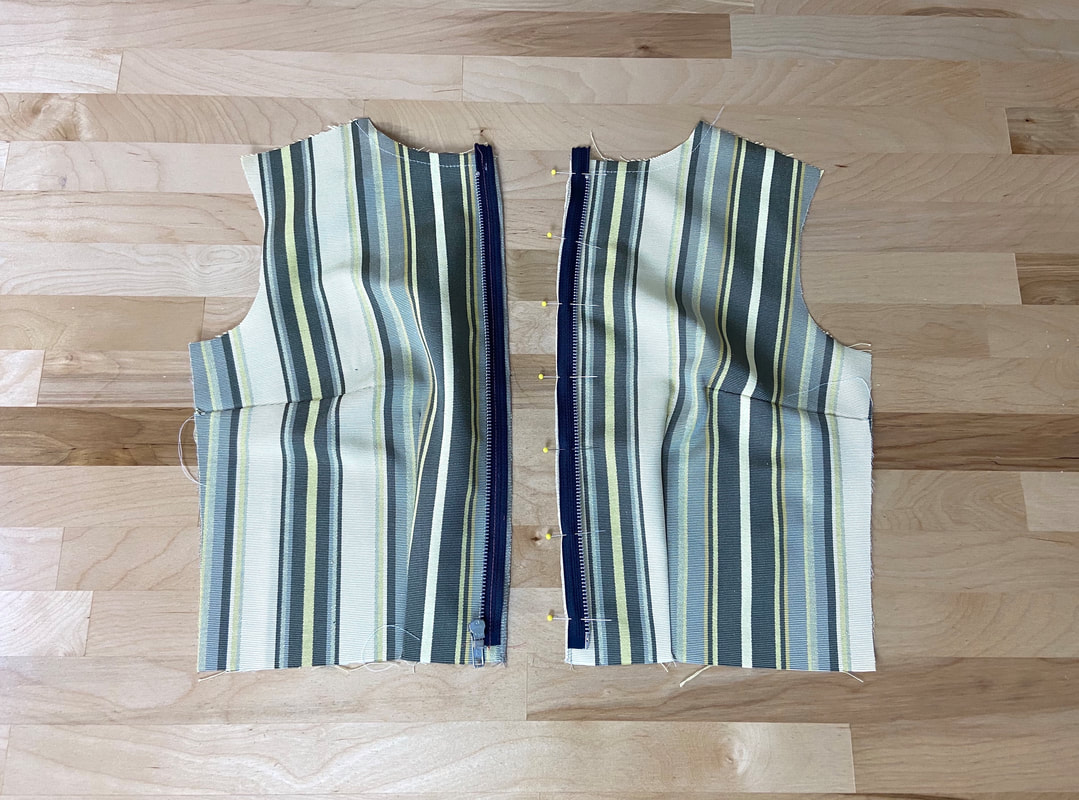
Open and separate the zipper portions and align one of the zipper portions to its corresponding garment edge with face sides touching and edges aligning (if the seam allowance is the same as the zipper tape width). To secure, insert pins perpendicular to the edges.
Open and separate the zipper portions and align one of the zipper portions to its corresponding garment edge with face sides touching and edges aligning (if the seam allowance is the same as the zipper tape width). To secure, insert pins perpendicular to the edges.
|
2. If this is your first time sewing a separating zipper, it may be a good idea to replace the pins with a temporary hand basting stitch as this will provide a lot more stability in the stitching process.
|
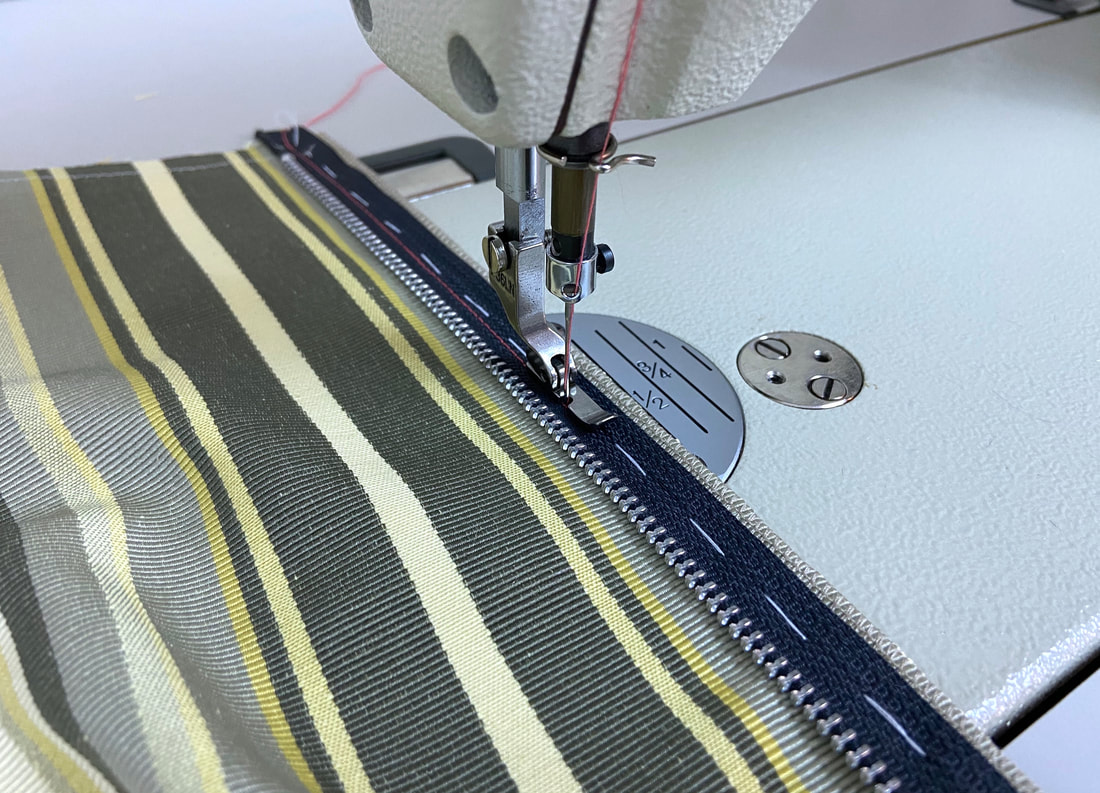
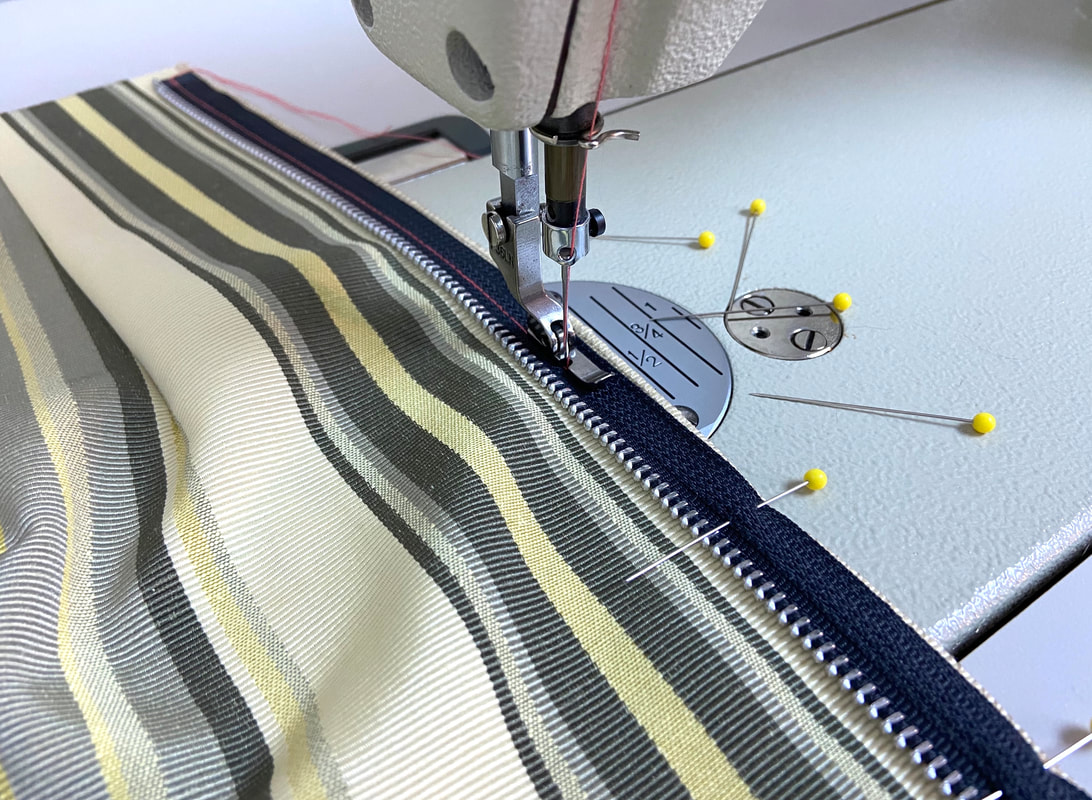
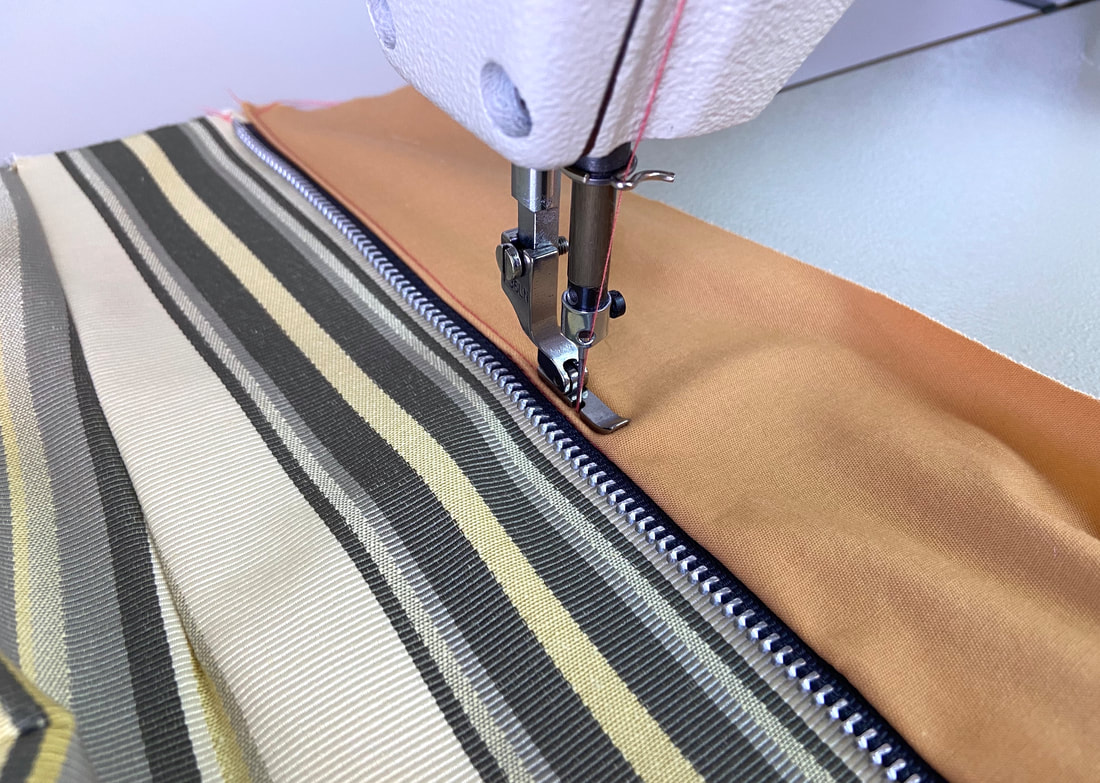
3. Using a zipper foot, machine stitch the zipper tape to the garment layer underneath at about 1/4" from the zipper teeth as pictured above.
|
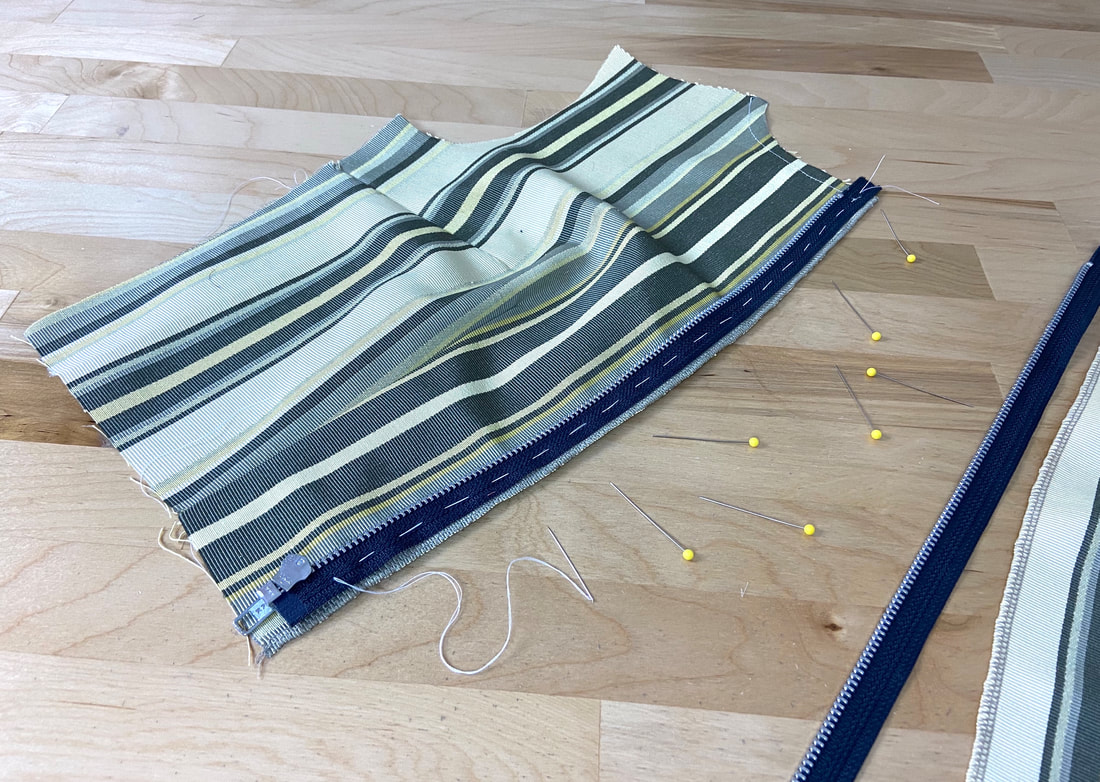
4. Next, close the zipper all the way and flatten the fold created by the stitched garment edge. Lay the closed zipper flat to expose its right side and align the other garment edge with the unstitched zipper tape with face sides are touching. From the zipper tape side, insert pins perpendicularly to secure both edges.
|
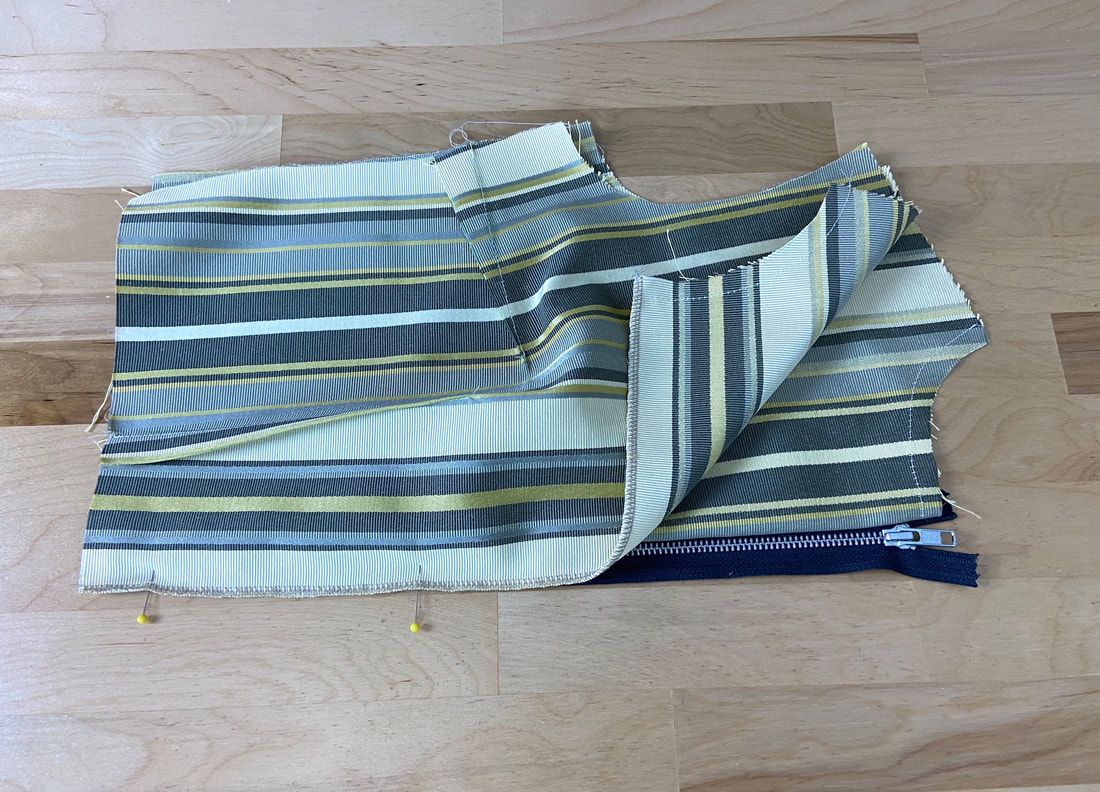
When opening and separating the zipper, both zipper tape portions should align perfectly along the garment's opening edges.
|
5. Machine stitch the zipper to the garment layer underneath, again, at about 1/4" from the zipper teeth. Use a zipper presser foot to stitch next to the zipper teeth as shown.
|
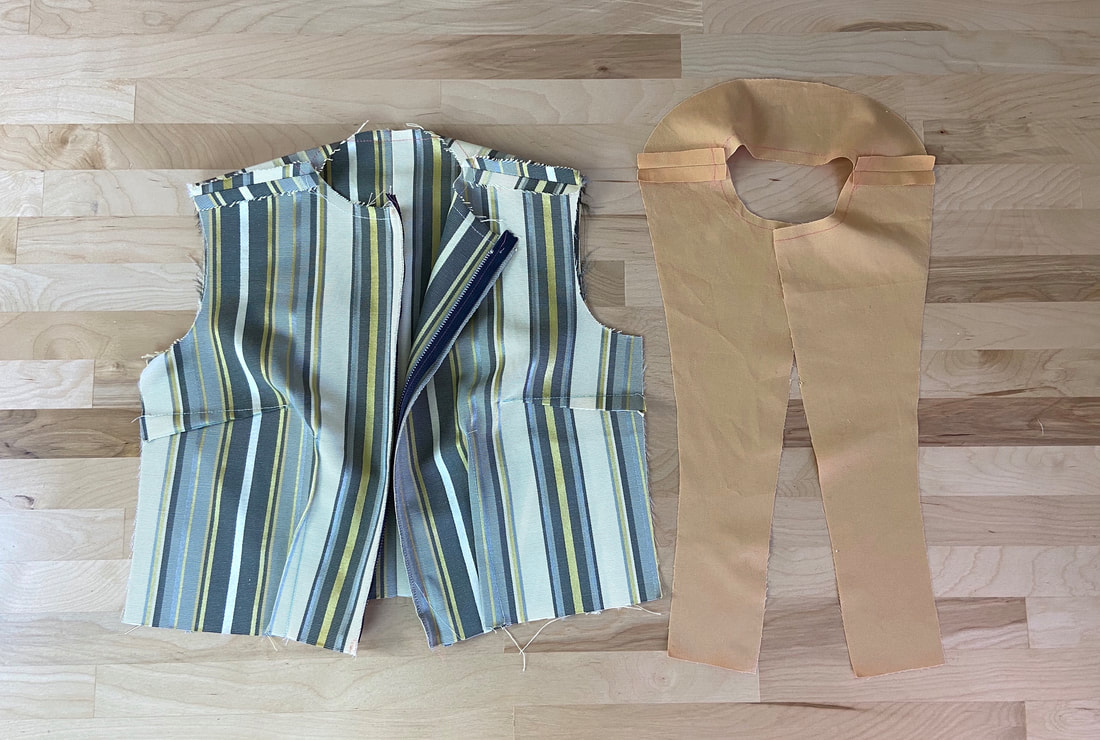
6. Stitch the facing compartment. In this case, the facing will complete both the zipper opening and neckline simultaneously. The facing is constructed of two front pieces and a back neckline piece stitched together at the shoulders.
|
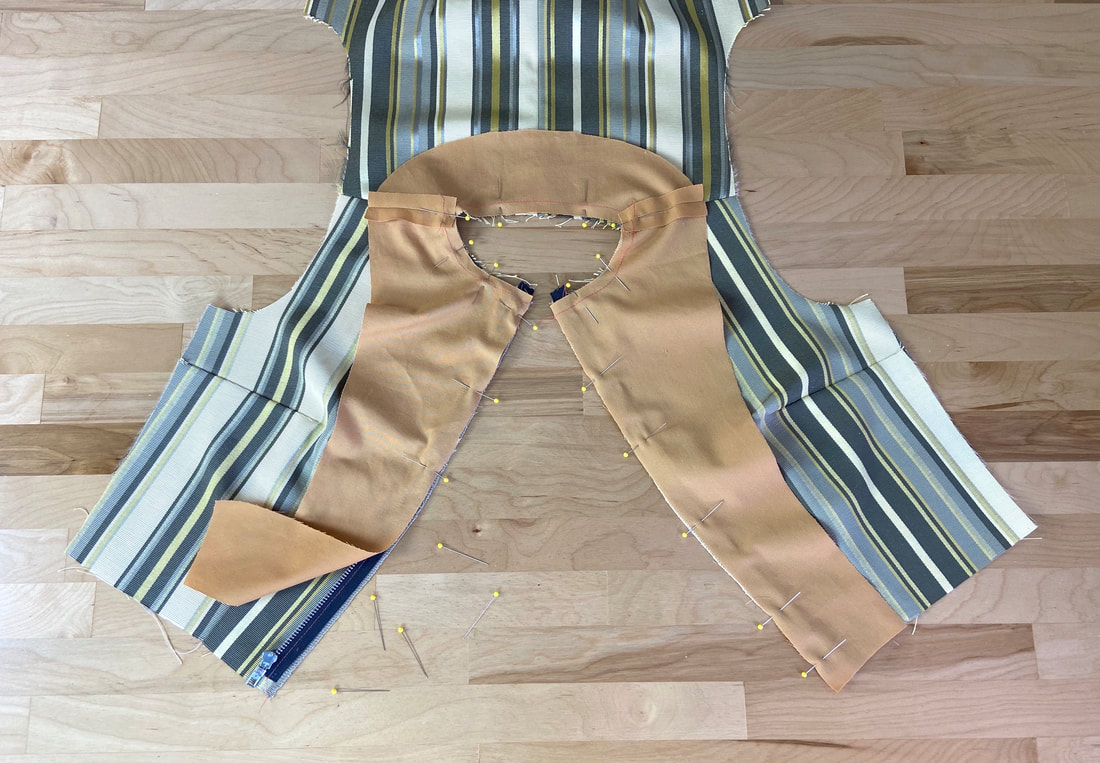
7. Place the facing layer on top of the garment such that all garment opening and neckline edges align. The facing's shoulder seams should perfectly overlap the garment's shoulder seams.
Insert pins perpendicularly along all edges to secure. It may help to hand baste the curved neckline edge for added stability during the stitching process below.
Insert pins perpendicularly along all edges to secure. It may help to hand baste the curved neckline edge for added stability during the stitching process below.
|
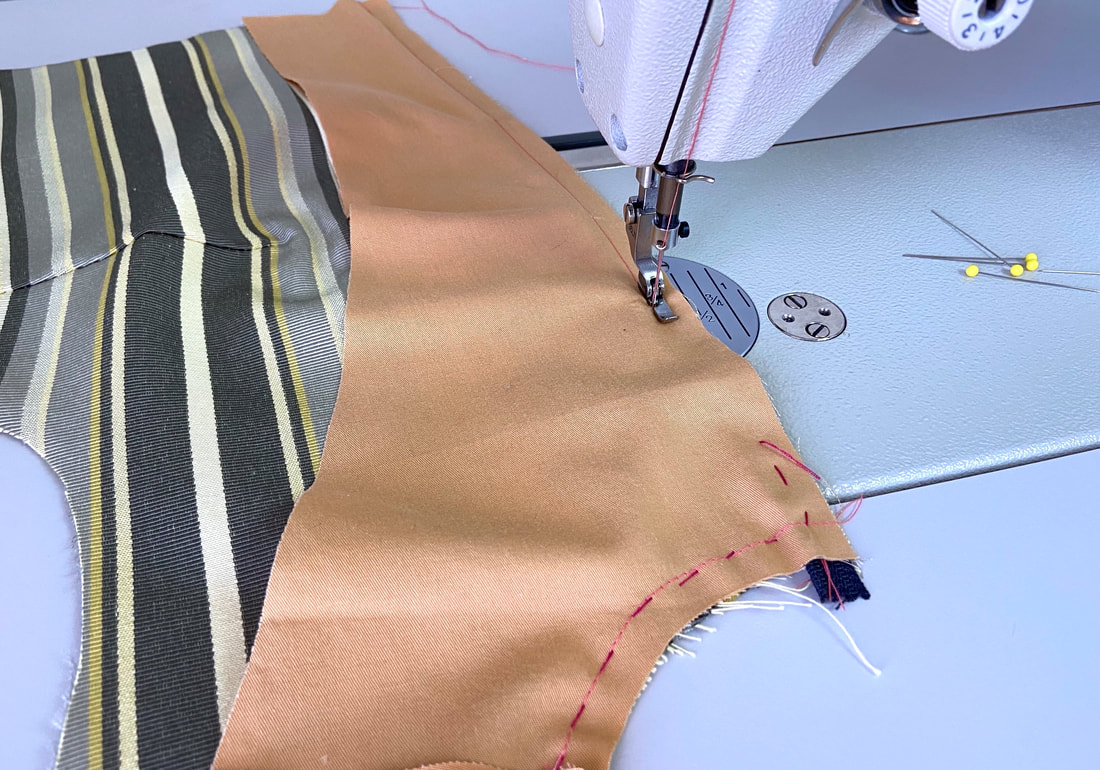
8. Starting with the garment's left opening edge, machine stitch the facing from the bottom moving up toward the neckline. Use a zipper foot to stitch next to the zipper teeth sandwiched in between the two layers.
|
9. When arriving at the neckline edge, pivot the stitch horizontally, and after stitching for a few inches using the zipper foot, switch to a regular presser foot (for extra stability), and continue stitching along the curved neckline edge until you arrive at the other garment opening edge.
|
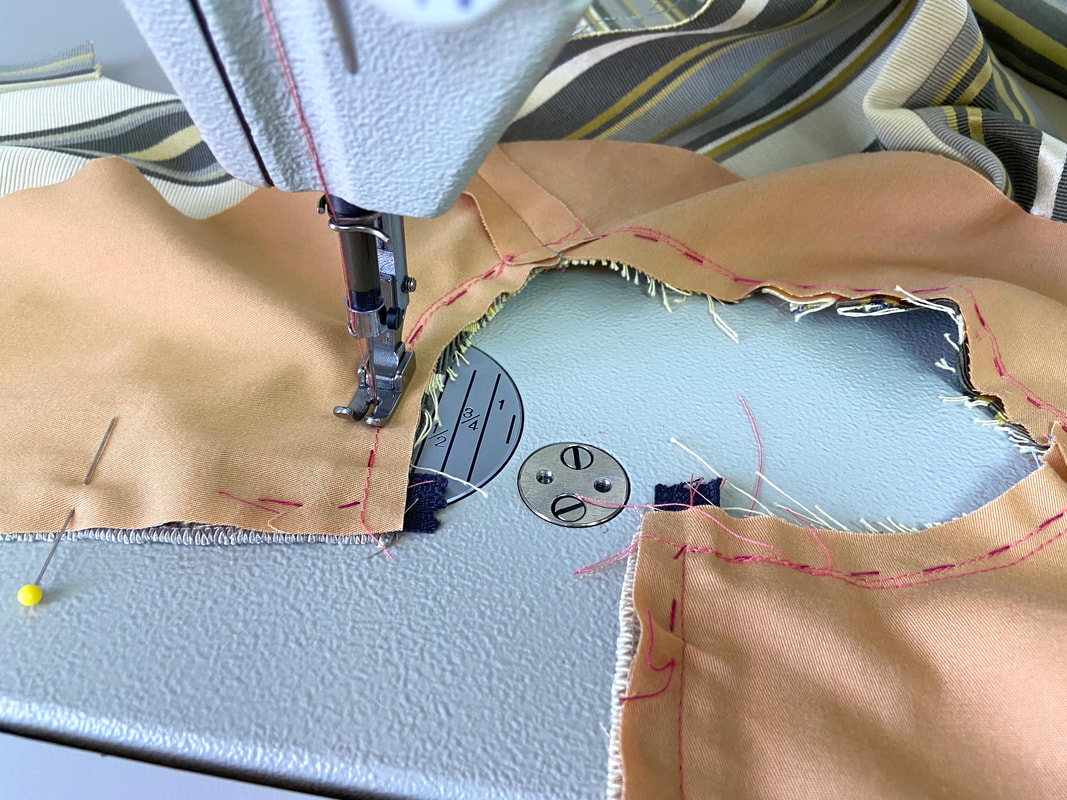
10. Switch to a zipper presser foot again, pivot the stitch at the corner, and continue stitching down until you reach the garment's bottom edge.
|
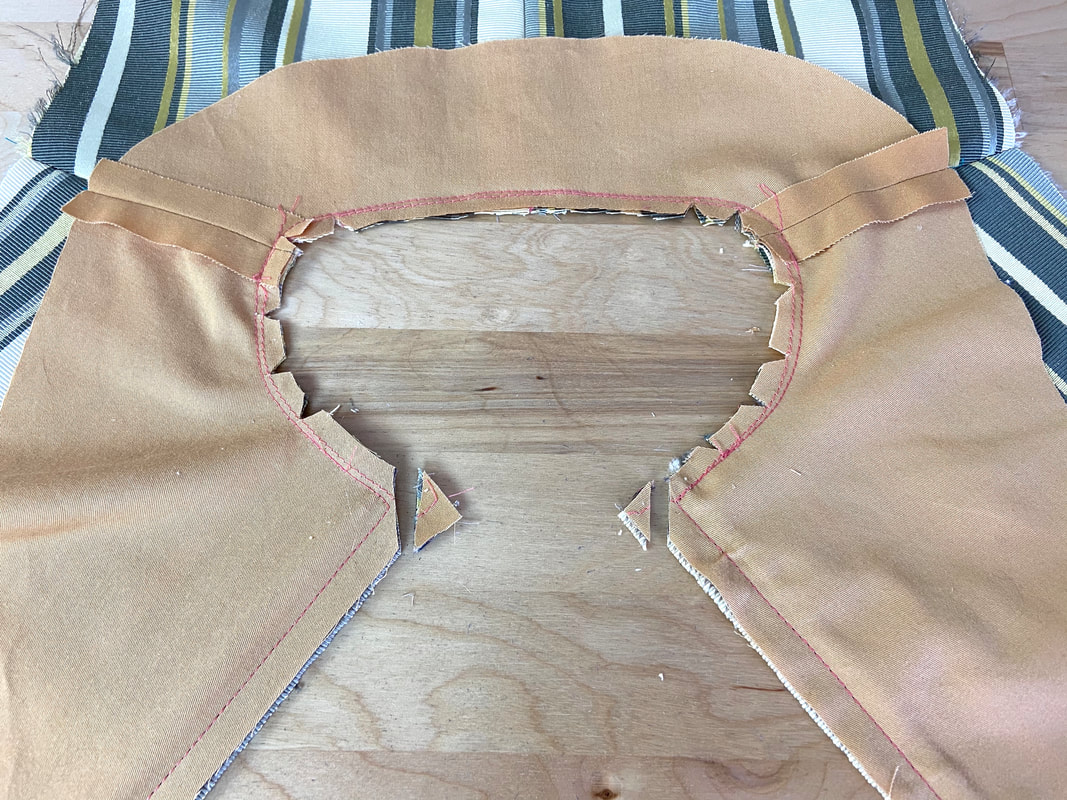
11. To eliminate tension along the curved neckline edge, clip wedge notches into the curved seam allowance. To eliminate additional bulk, clip the seam allowance off diagonally at each neckline-opening corner as shown above.
|
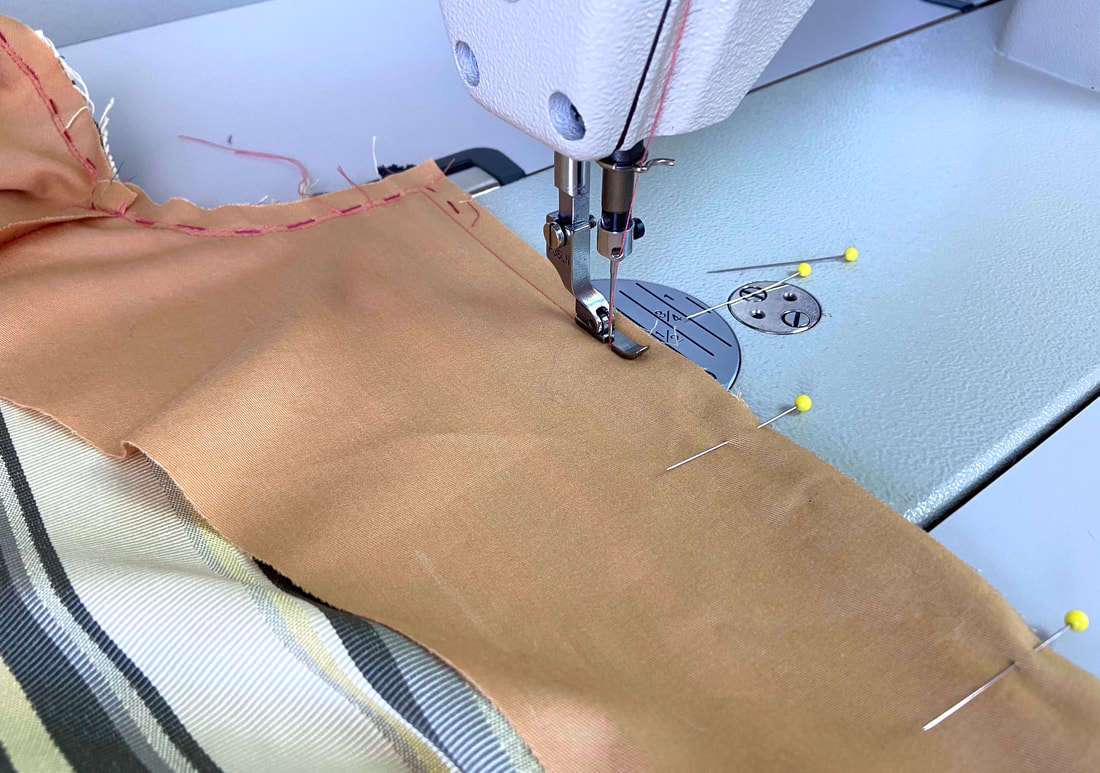
12. Iron the seam with the facing layer and all seam allowance layers pointing away from the garment. Understitch the facing layer next to the facing seam. Understitching will keep the facing layer flat and prevent it from rolling to the outside of the garment during wear or after multiple wash cycles.

|
13. Flip the facing to its final position on the inside of the garment and iron the neckline and zipper opening edges to smooth and flatten the finished edges.

|
When the separating zipper is closed, the hem allowance excess left at the bottom should be equal on both sides of the garment. This excess should be equal to or longer than the hem allowance width.
