
How To Shorten A Fly Front Zipper From The Top
|
Compared to most zipper applications, a fly features a number of unique elements and construction steps. One aspect that sets it apart from other zipper styles is that it requires a much shorter zipper length.
Zippers used for conventional fly applications range anywhere from 4"-6" with the most common length falling somewhere in between. You may find it difficult to find a zipper that is as short as this, especially when considering color matching and finding it in the conventional metal chain style.
Luckily, there is a simple way to shorten any zipper to fit perfectly within your fly application- all you need to worry about is finding the zipper color that fits perfectly with the garment at hand.
|
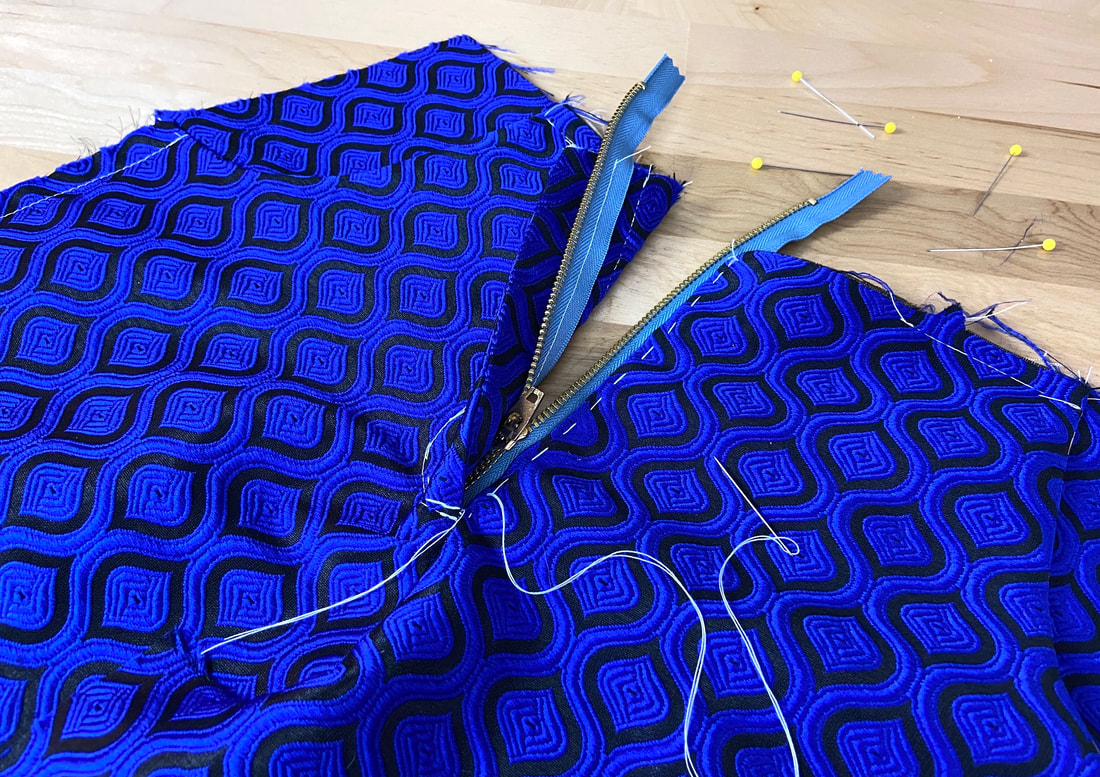
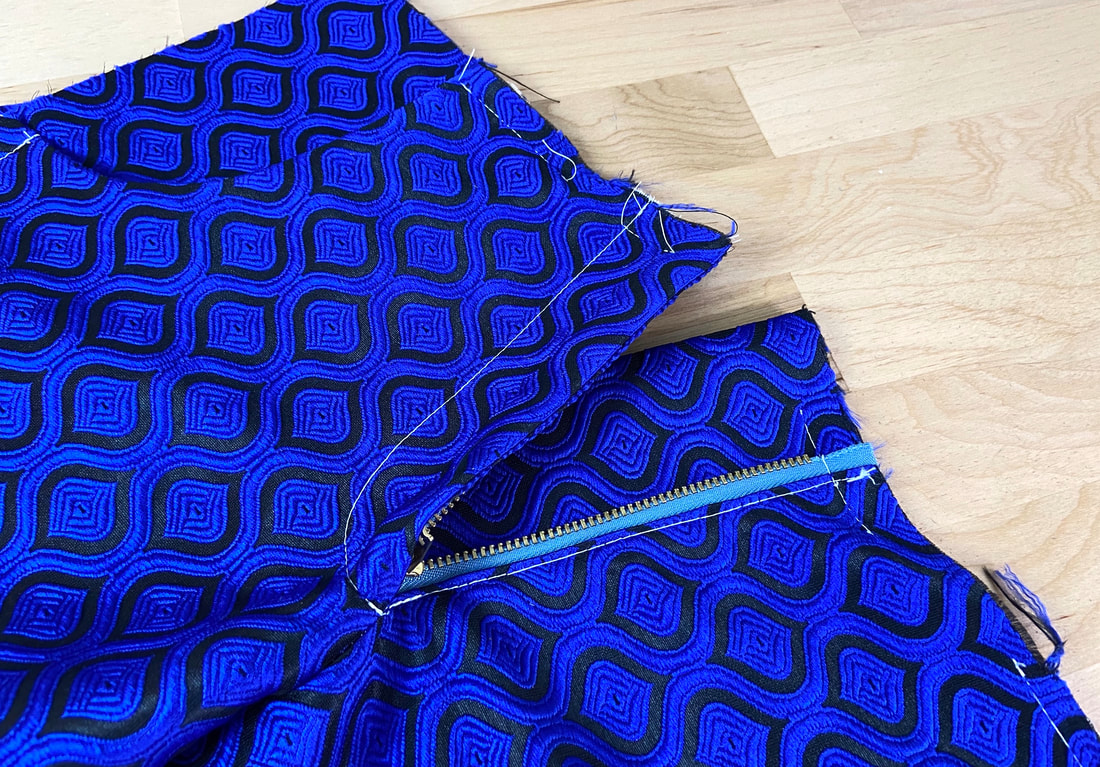
1. Align the zipper from the bottom up, and stitch it to the seam opening, leaving all the unwanted zipper excess at the top. With this placement, shortening the zipper is the last step in the application process and is not done until after the fly is completely stitched and all its components (like the fly shield) are attached.
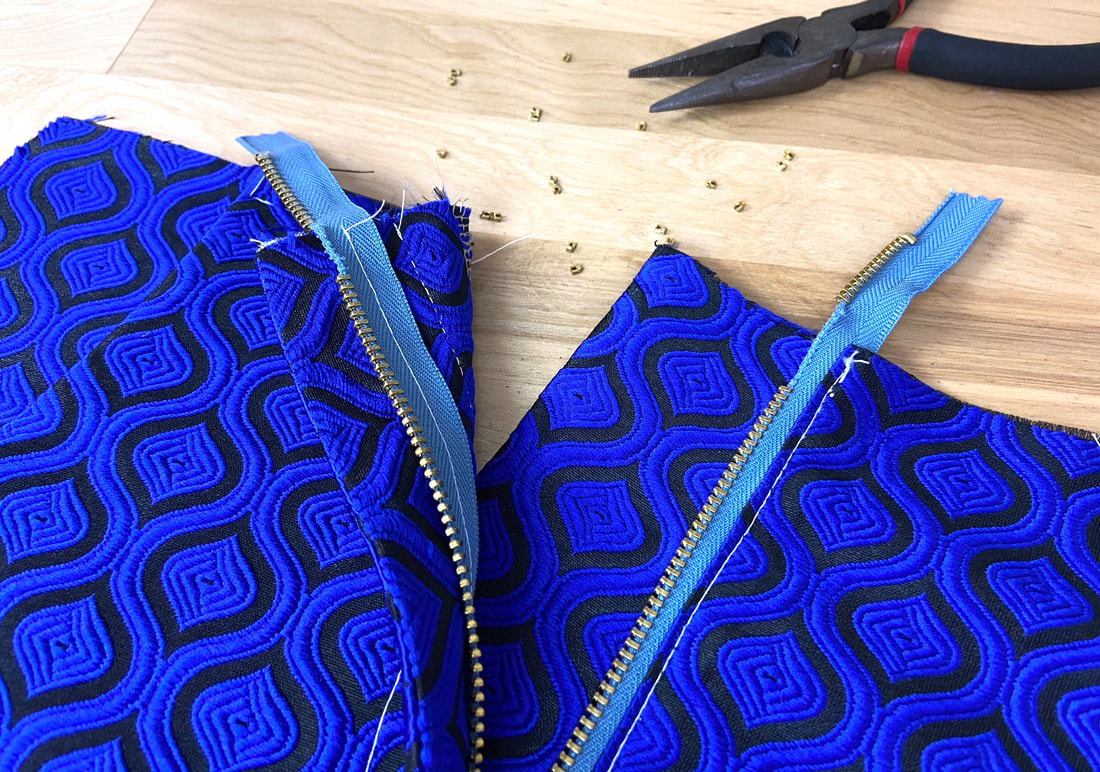
Using a pair of flat nose pliers, pull each metal crimp from the top seam allowance area. In the example shown above, the garment's top horizontal edge has a seam allowance of 1/2" thus the zipper chain is pulled off the zipper tape for an approximate 1/2" portion on each side.
Using a pair of flat nose pliers, pull each metal crimp from the top seam allowance area. In the example shown above, the garment's top horizontal edge has a seam allowance of 1/2" thus the zipper chain is pulled off the zipper tape for an approximate 1/2" portion on each side.
|
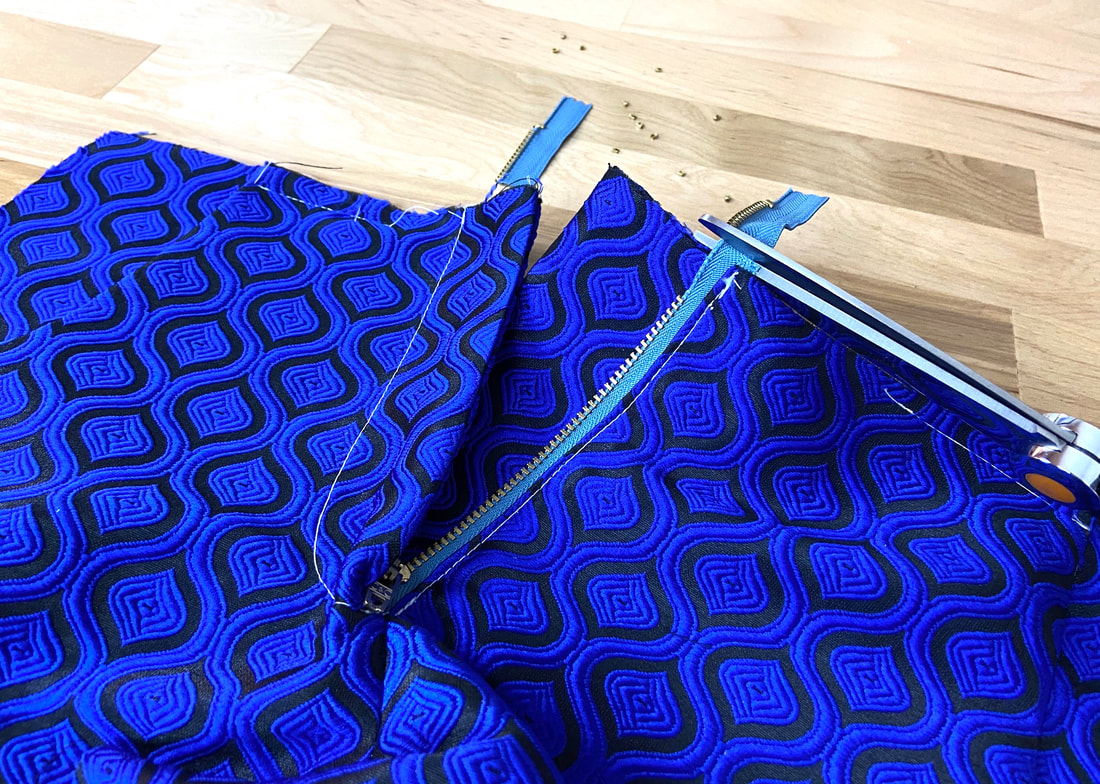
Once enough crimps are removed, trim the excess zipper portion flush with the garment's top raw edge (as shown above). Repeat on both sides of the zipper.
|
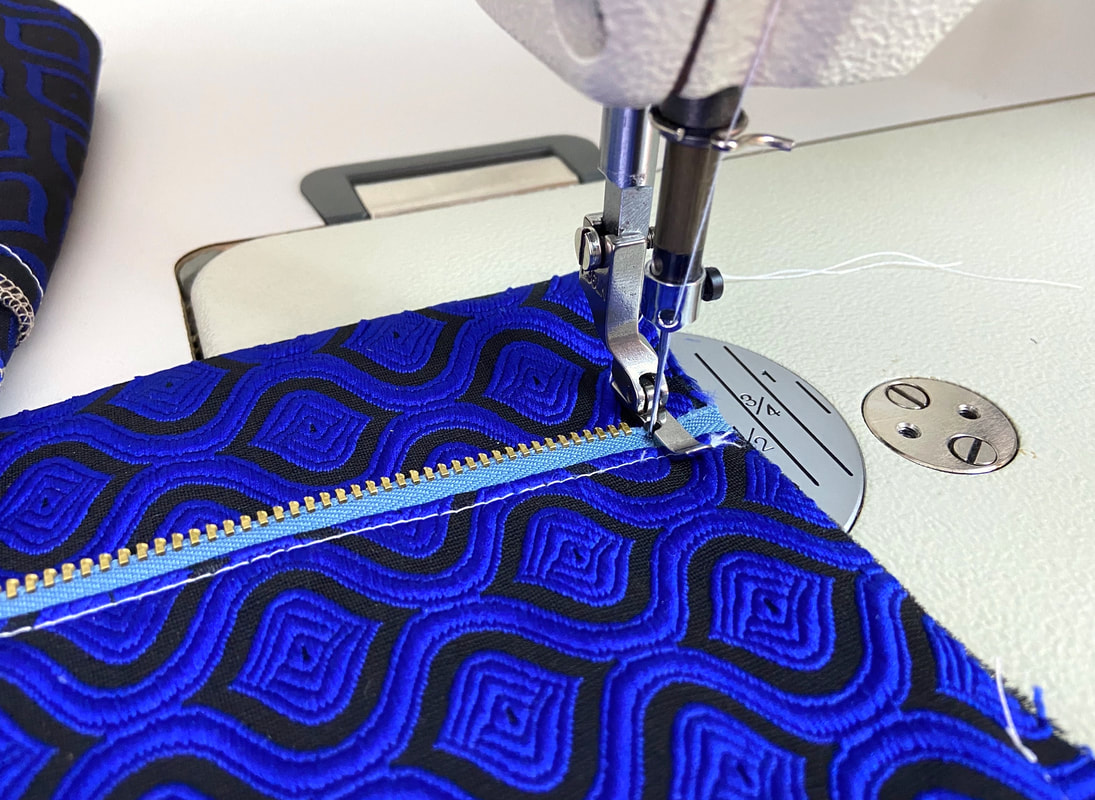
To secure the zipper ends and prevent the slider from coming off the track when the zipper is closed, machine stitch the top portion of each zipper tape next to the zipper teeth. To stitch close to the zipper teeth, you'll have to use a regular zipper presser foot which should (most likely) be provided with your sewing machine kit.
|
Once the zipper is trimmed and secured on each side, the garment can go through its remaining construction steps. In this case, a waistband will be stitched to the garment's top edge which will cleanly and securely encase the top portions of the zipper tape.
