
Mini Tutorial: How To Shorten A Conventional Closed-End Zipper
If you have a closed-end zipper in the perfect color but it is too long for your application at hand, you can easily shorten it at home to the desired length using a few simple steps.
The technique described below can only be used with closed-end zippers, including invisible and regular zippers with both plastic and metal coils/chain.
The technique described below can only be used with closed-end zippers, including invisible and regular zippers with both plastic and metal coils/chain.
|
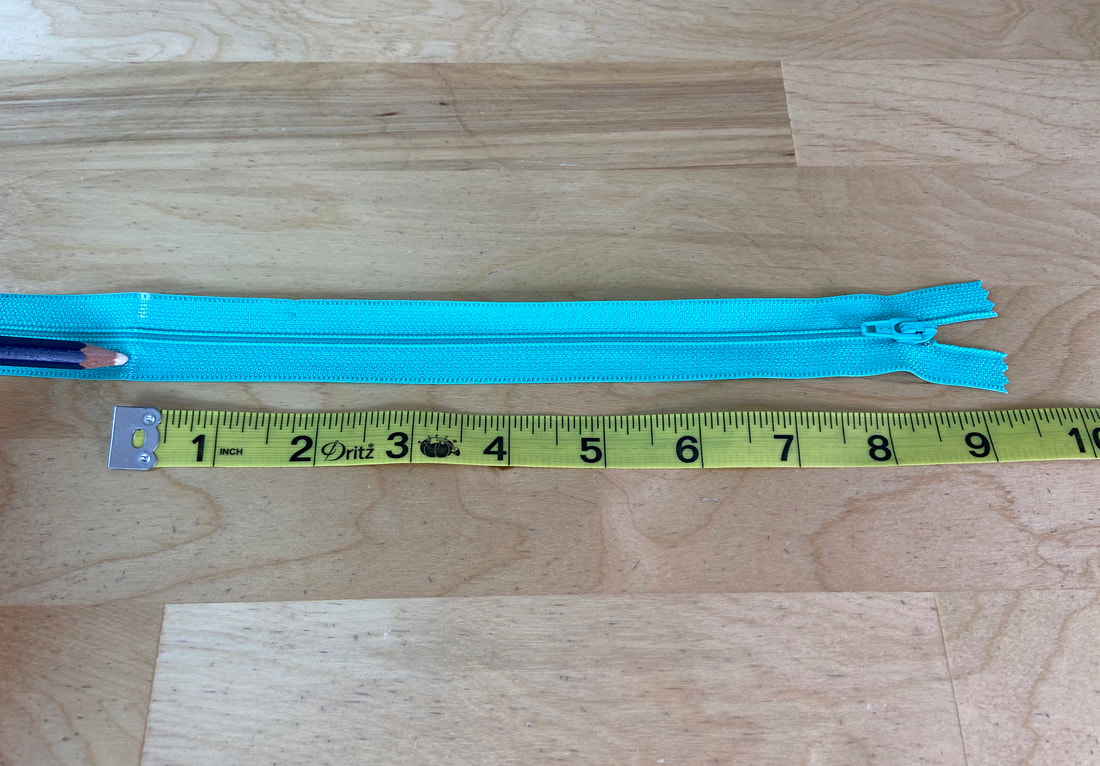
1. Starting from the zipper's top edge, measure the new desired length and mark this location directly on the zipper tape using a quilting pencil or tailor's chalk.
|
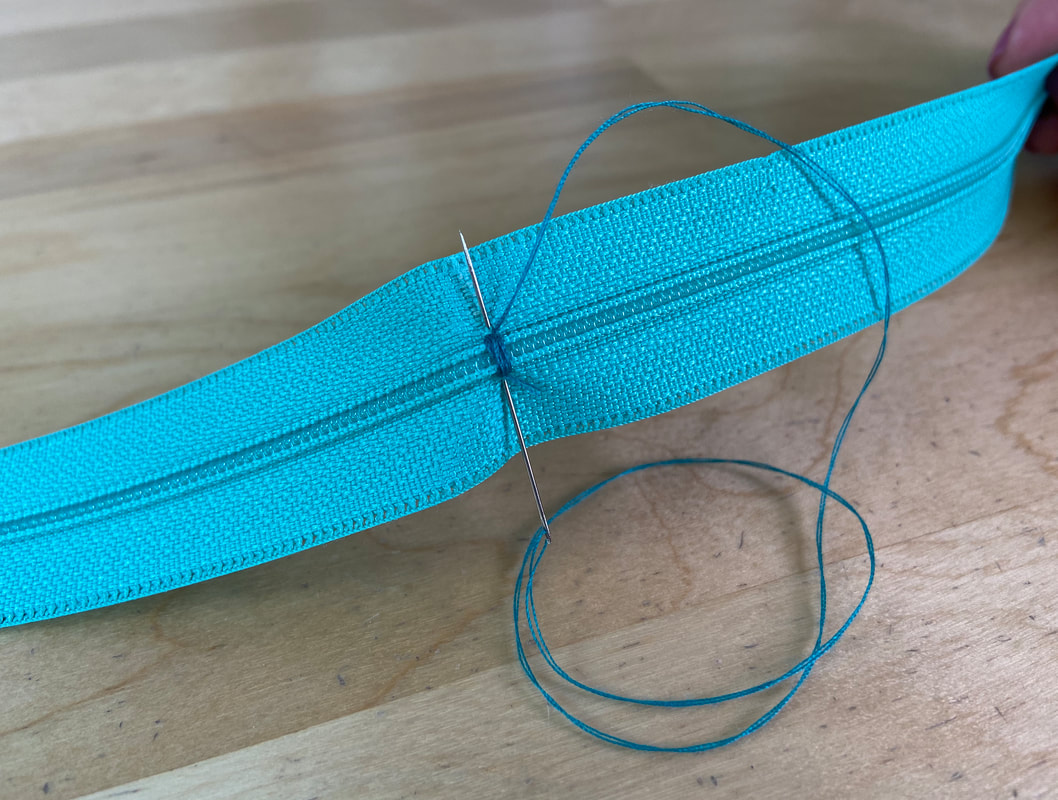
2. Thread a hand sewing needle with matching color thread. Using double thread, stitch on top of the closed zipper coils inserting the needle through both portions of the zipper tape. Stitch in place a few times, overlapping the stitch (as shown above), until the stitch is fully secured.
|
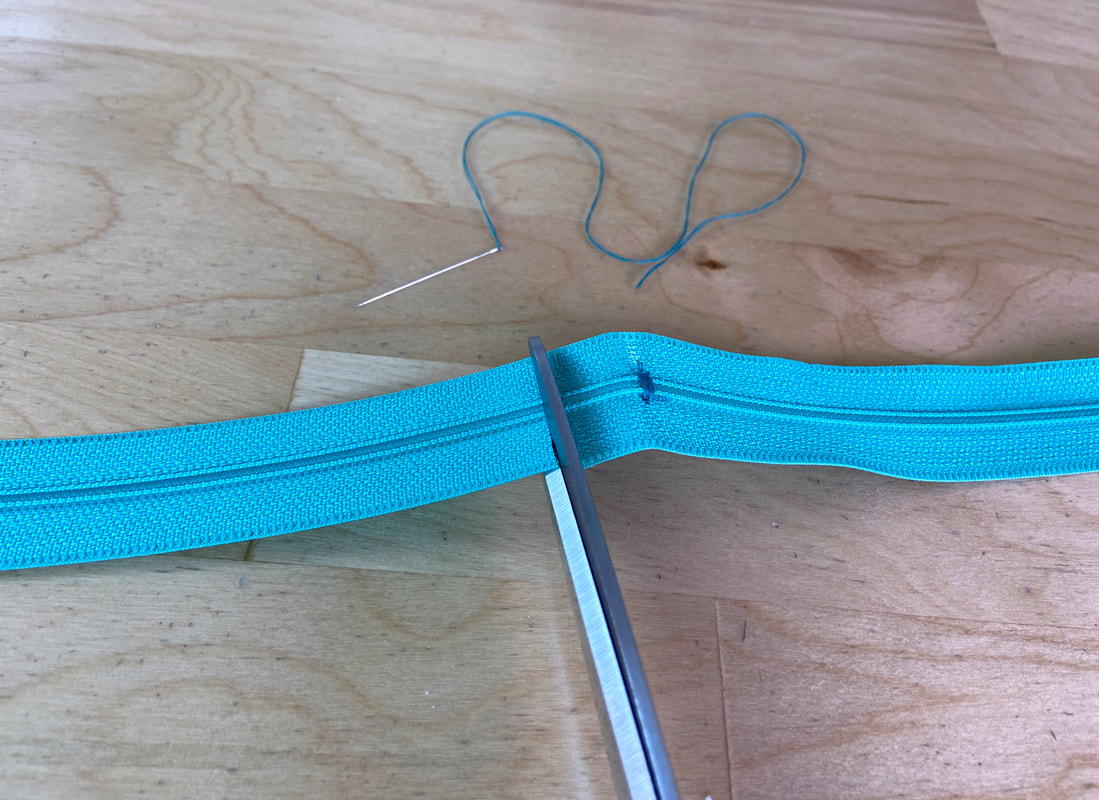
3. Backstitch a few times on the zipper tape to lock the thread. Next, cut the zipper's bottom excess (the portion that is no longer needed) at about 3/4" from the hand-applied stitch.
|
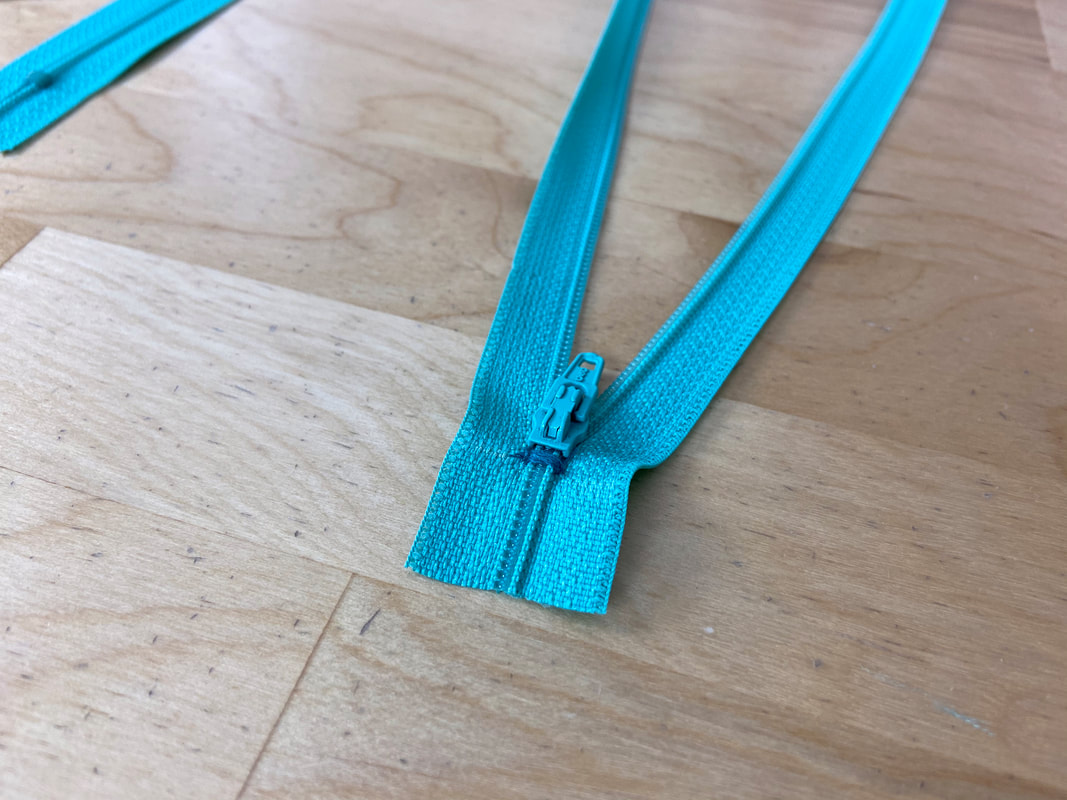
The hand-applied whipstitch serves as an effective bottom stop, allowing the zipper to safely open all the way down without risking the slider coming off the tracks.
