
Mini Tutorial: Sewing A Rectangular Faced Slash Pocket
|
1. Reinforce the wrong side of the garment with interfacing at the desired pocket location.
|
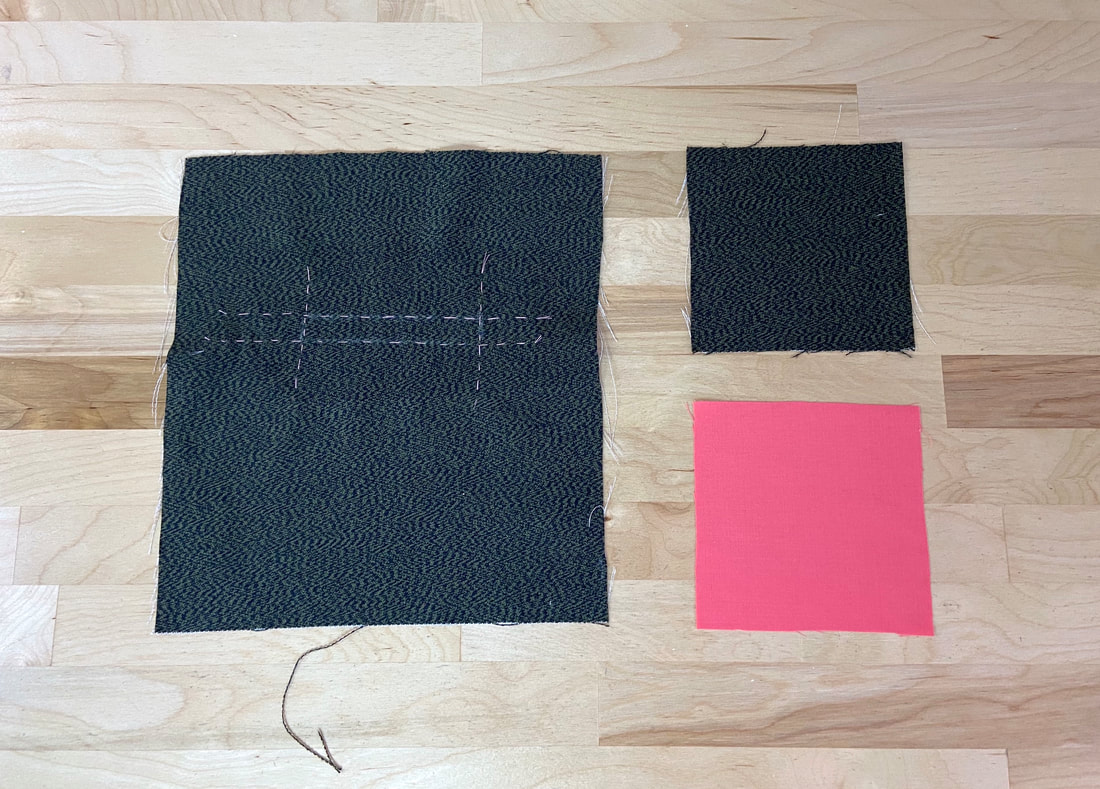
2. Using a hand basting stitch, mark the precise pocket opening. Extend the hand basting by about 1" at each corner as this will facilitate the pocket bag alignment process to follow.
Cut two identical pocket pieces that are 1" wider than the pocket opening. The length should be the desired pocket depth plus the pocket opening height (1/2" in this example) plus an extra 1" to account for seam allowances.
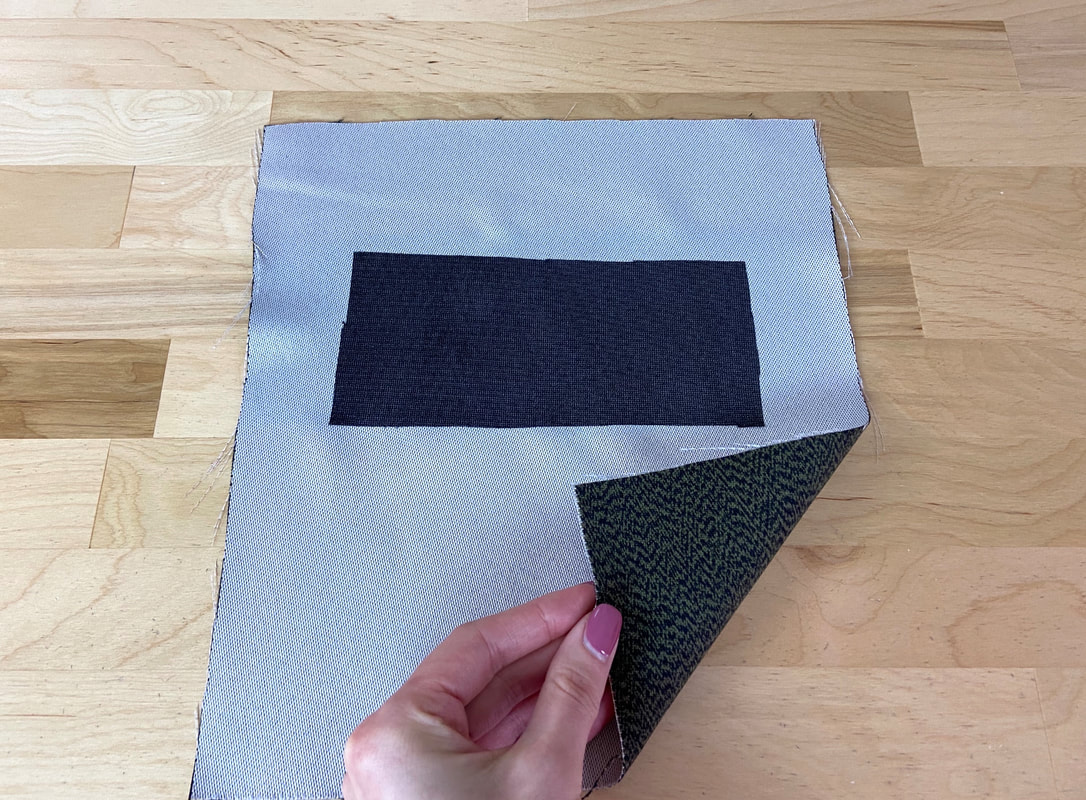
Use the fabrics of your choice for the pocket bag pieces as long as they are strong enough to support the pocket's structure and functionality. In this case, one pocket layer will serve as a facing, and is cut from the same fabric as the garment, while the other is a contrasting fabric. The contrast fabric will be visible on the application's right side providing a decorative element to the garment's overall design.
Cut two identical pocket pieces that are 1" wider than the pocket opening. The length should be the desired pocket depth plus the pocket opening height (1/2" in this example) plus an extra 1" to account for seam allowances.
Use the fabrics of your choice for the pocket bag pieces as long as they are strong enough to support the pocket's structure and functionality. In this case, one pocket layer will serve as a facing, and is cut from the same fabric as the garment, while the other is a contrasting fabric. The contrast fabric will be visible on the application's right side providing a decorative element to the garment's overall design.
|
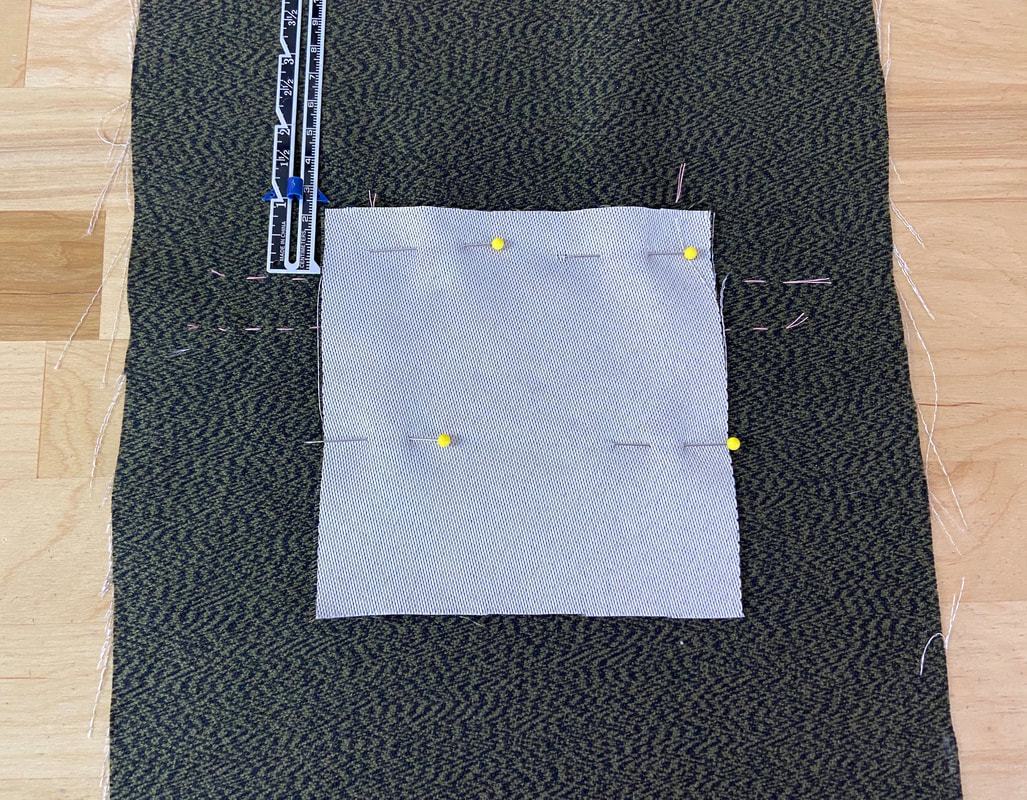
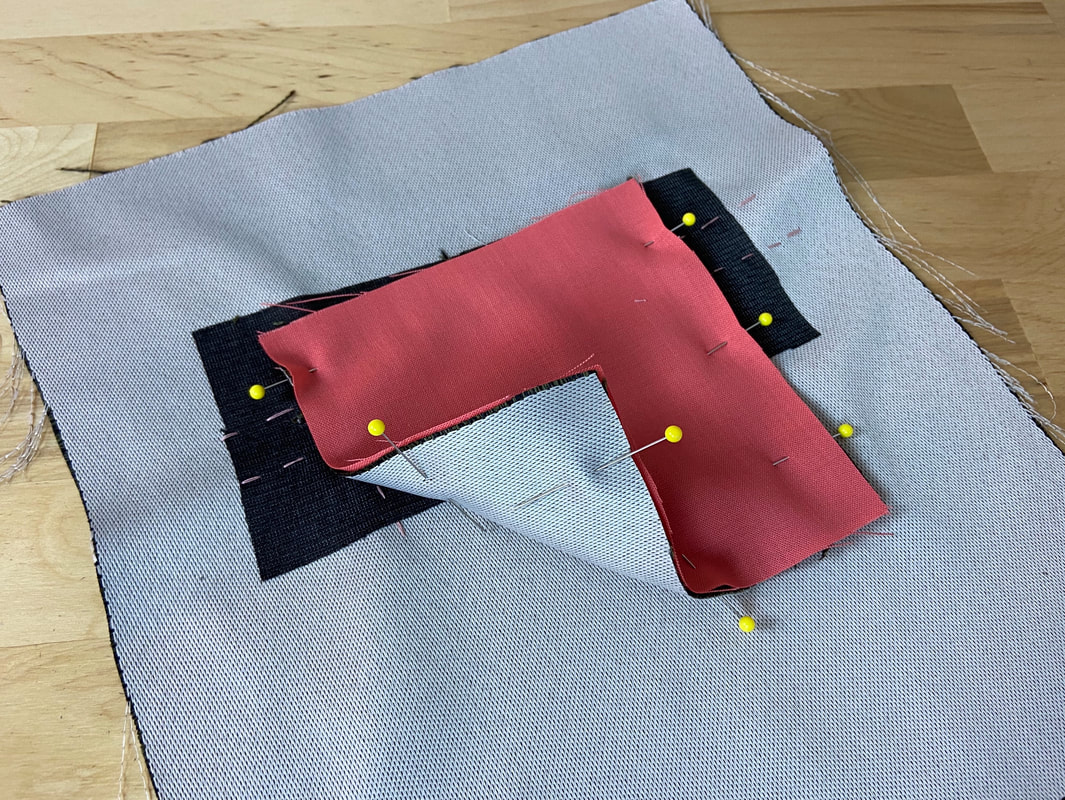
3. Place the pocket facing (same fabric as the garment, in this case) on top of the marked pocket lines with fabric face sides touching. The pocket layer should be centered at the sides, extending from each marked line by 1/2". The pocket layer's top edge is placed at 1" from the top hand basted line (as shown above). The hand baste extensions at each corner provide a great alignment guide given that the actual pocket opening lines are covered by the pocket layer.
Pin the pocket facing to the garment layer underneath. For added stability during the stitching process, hand baste the pocket layer at the top and bottom to prevent it from shifting out of alignment during machine stitching.
Pin the pocket facing to the garment layer underneath. For added stability during the stitching process, hand baste the pocket layer at the top and bottom to prevent it from shifting out of alignment during machine stitching.
|
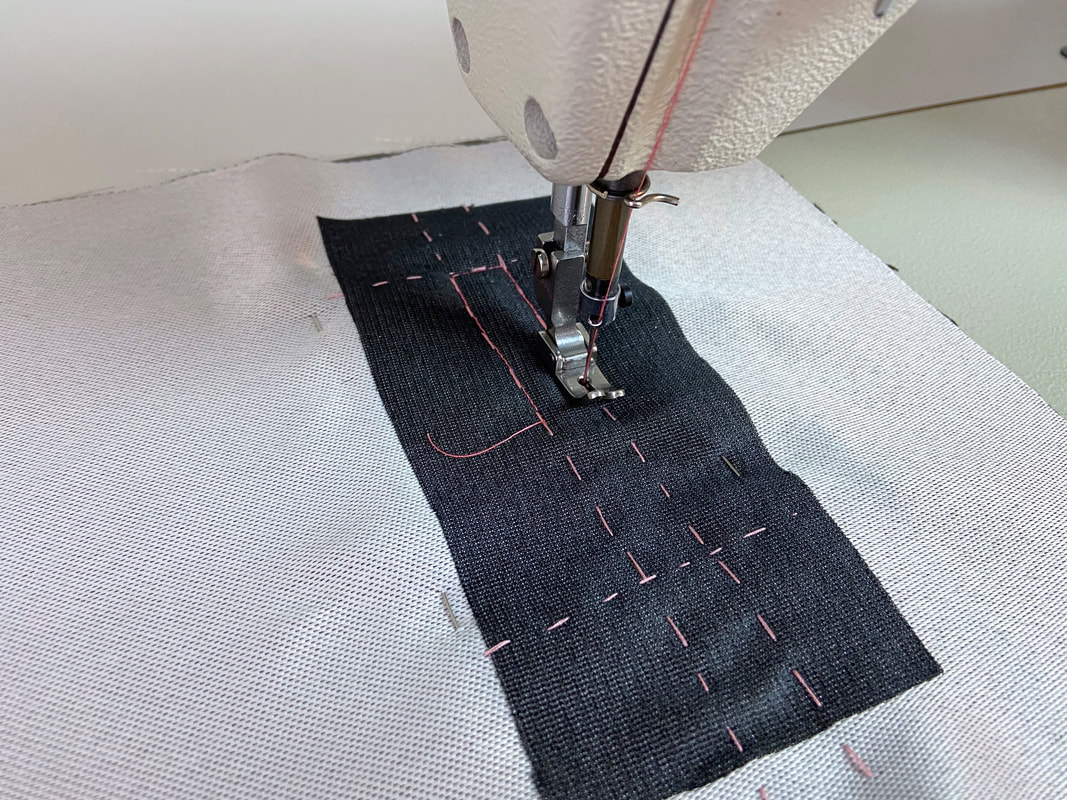
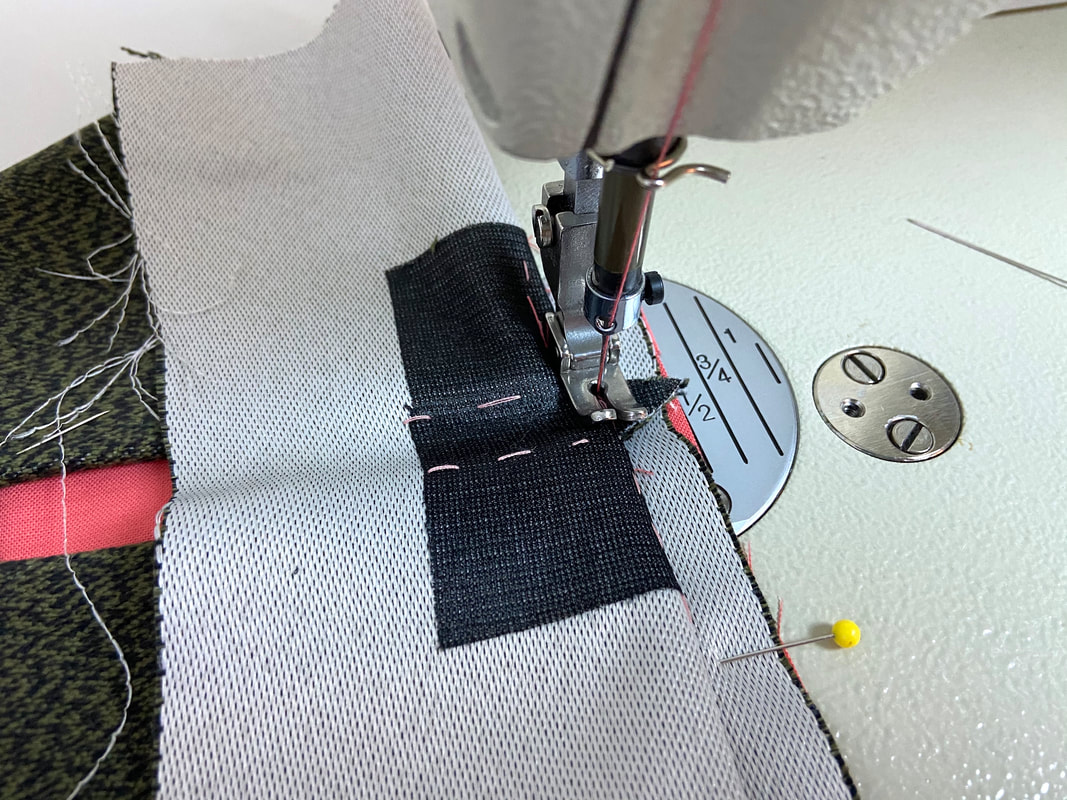
4. From the wrong side of the application, stitch the rectangular pocket opening following the hand basting as a guide. Overlap the start and end of the stitch to lock the threads.
|
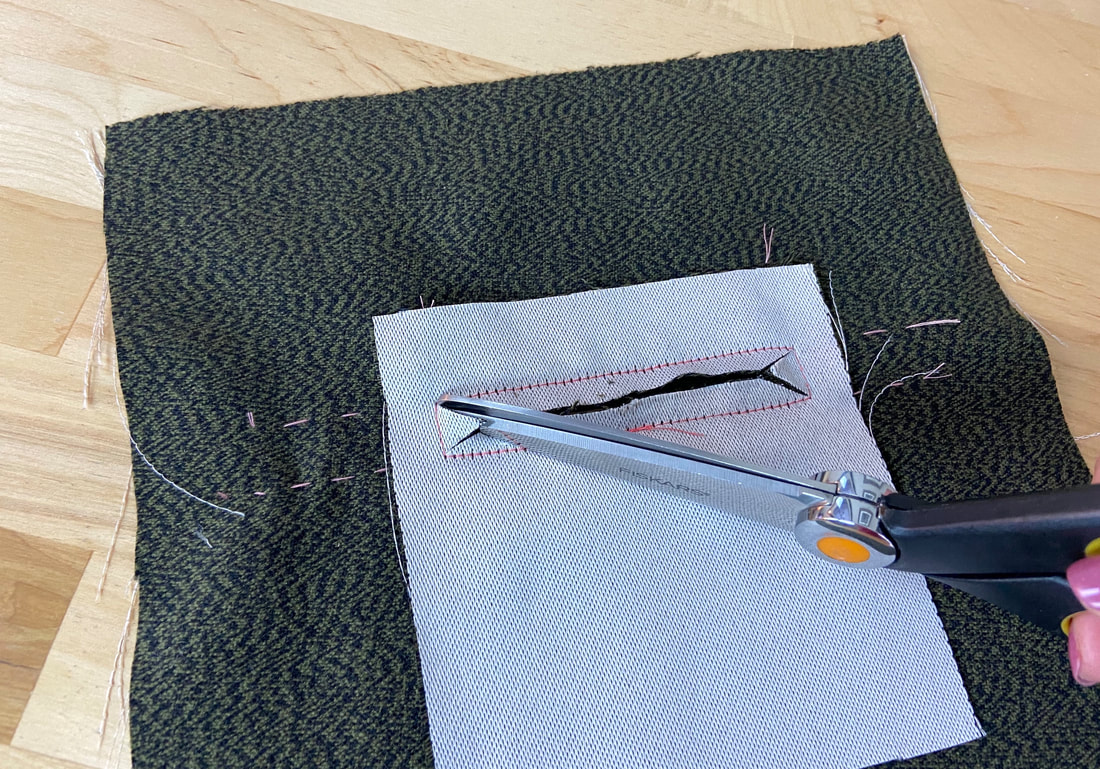
5. Cut down the center of the rectangular pocket opening until you arrive at about 1/2" from each side, then cut into each corner to create a triangle-shaped extension on each side. You should cut as close as you can into the corners but be careful not to accidentally cut the actual stitching.
|
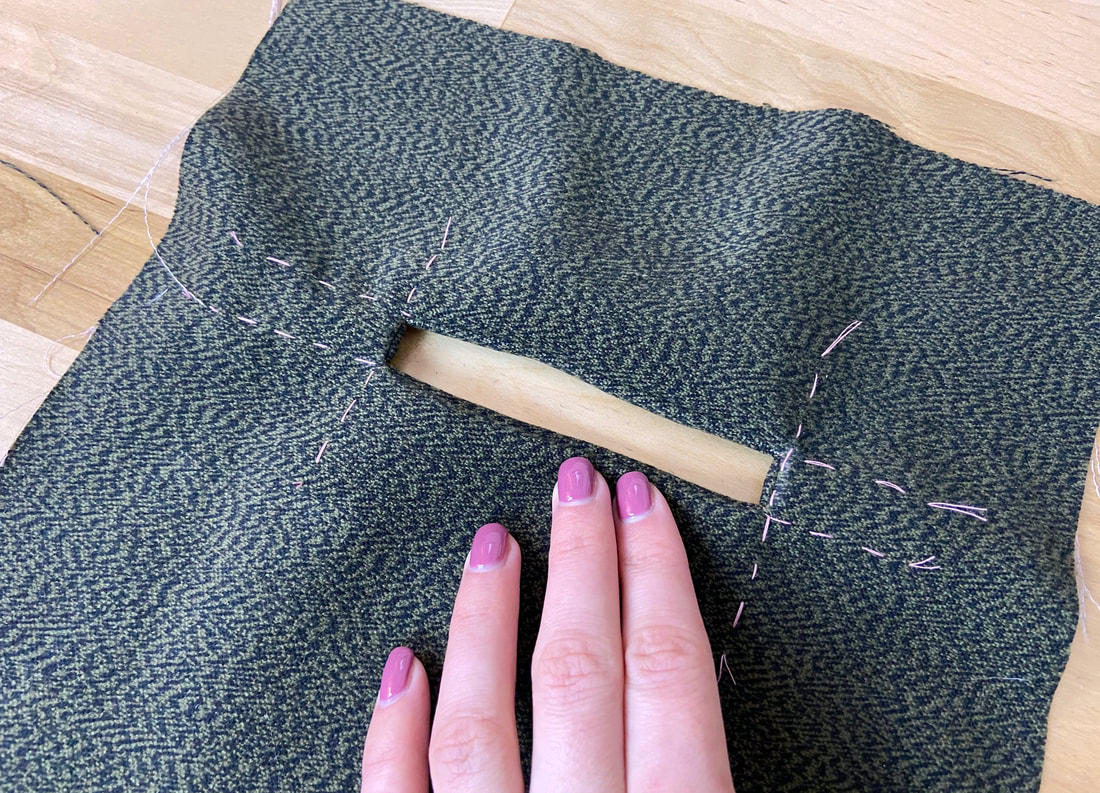
6. Flip the pocket piece to the wrong side of the garment. Doing so will expose the pocket opening's clean-finished edges. Finger press the finished edges to flatten and smooth out the rectangular opening. These edges should lay flat and form well-defined, sharp corners.
|
7. Understitch the top and bottom edges by stitching through the pocket layer and seam allowance layers underneath. Stitch at about 1/8" away form the seamline as shown above. The understitching will keep the lengthwise edges flat and prevent the pocket layer from rolling to the outside of the pocket opening.
|
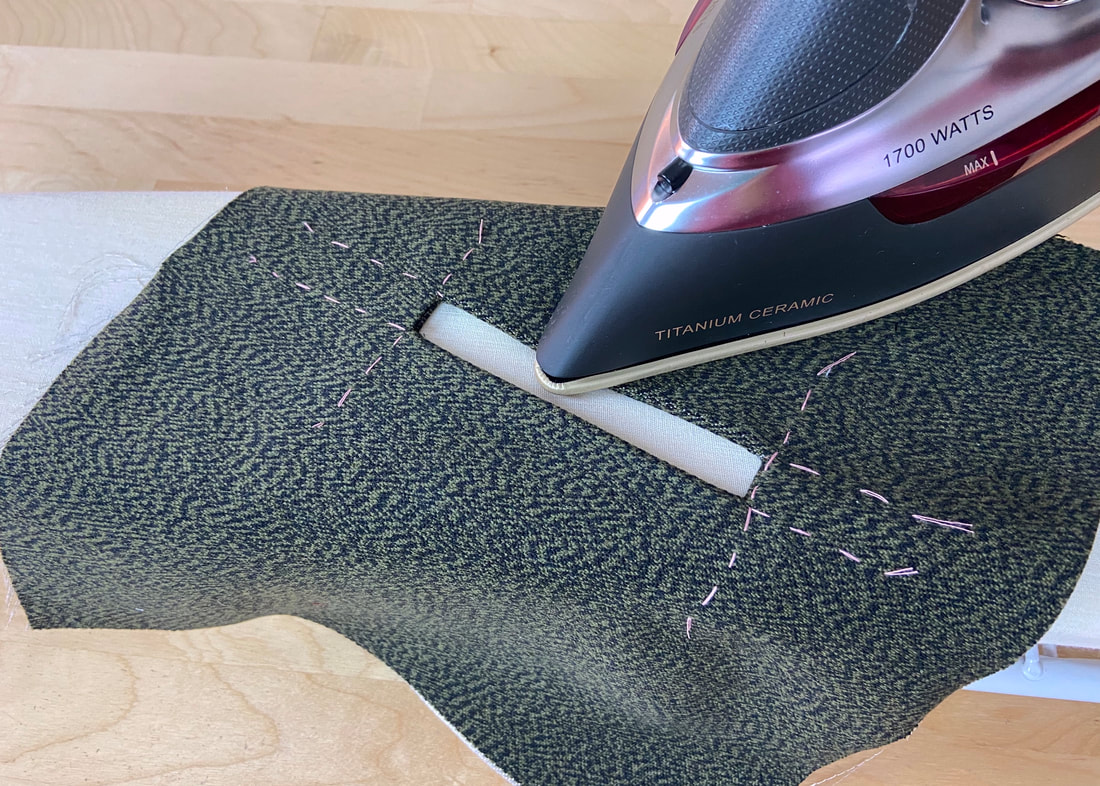
8. Iron the rectangular pocket opening edges.
|
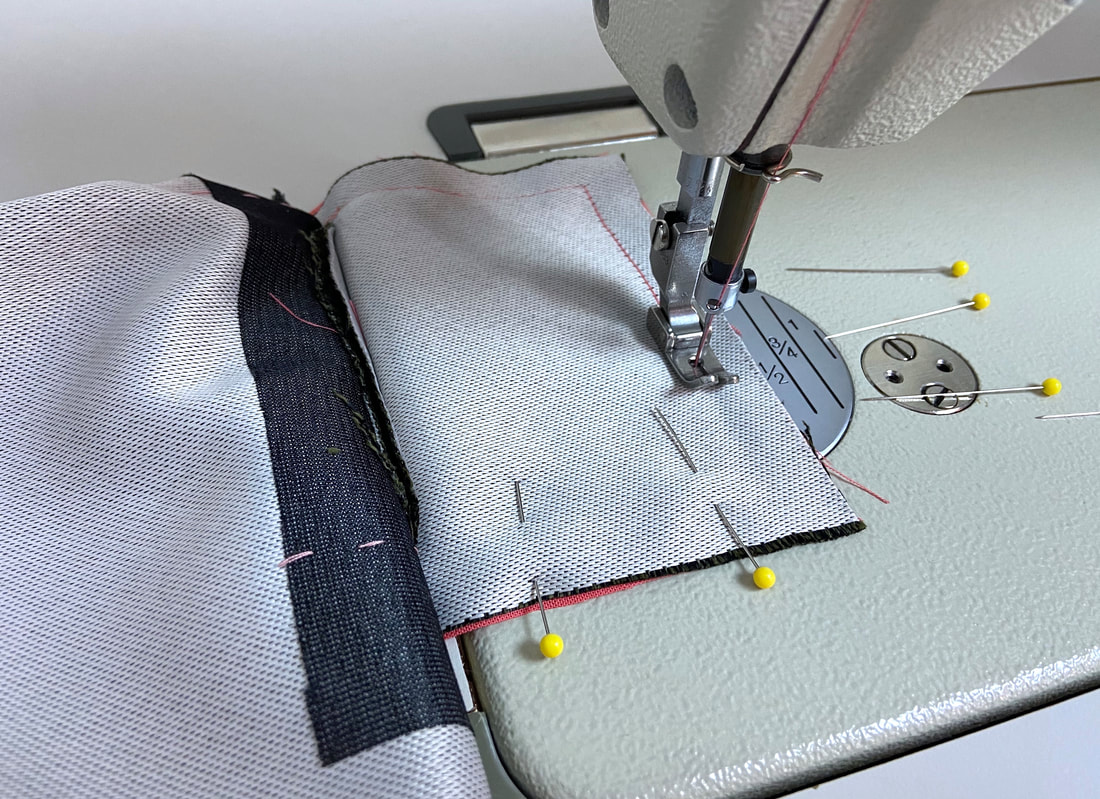
9. On the wrong side of the application, place the second pocket piece on top of the existing (already stitched) one such that all edges align, and insert pins perpendicularly along all edges.
|
|
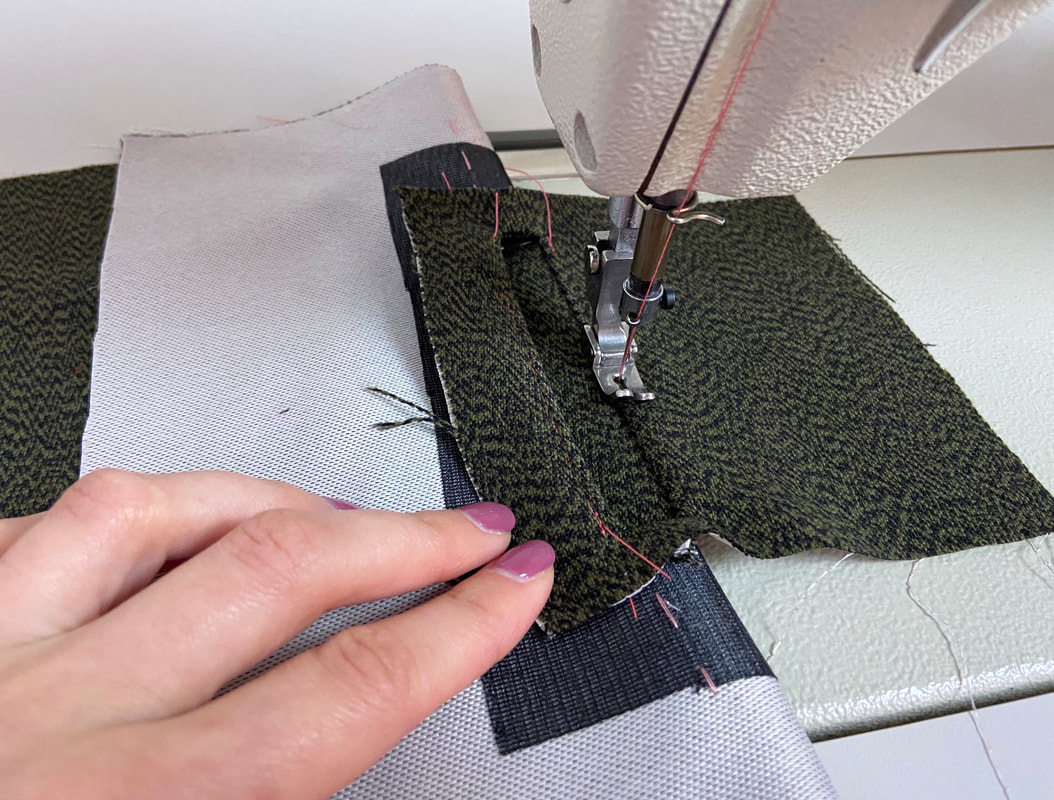
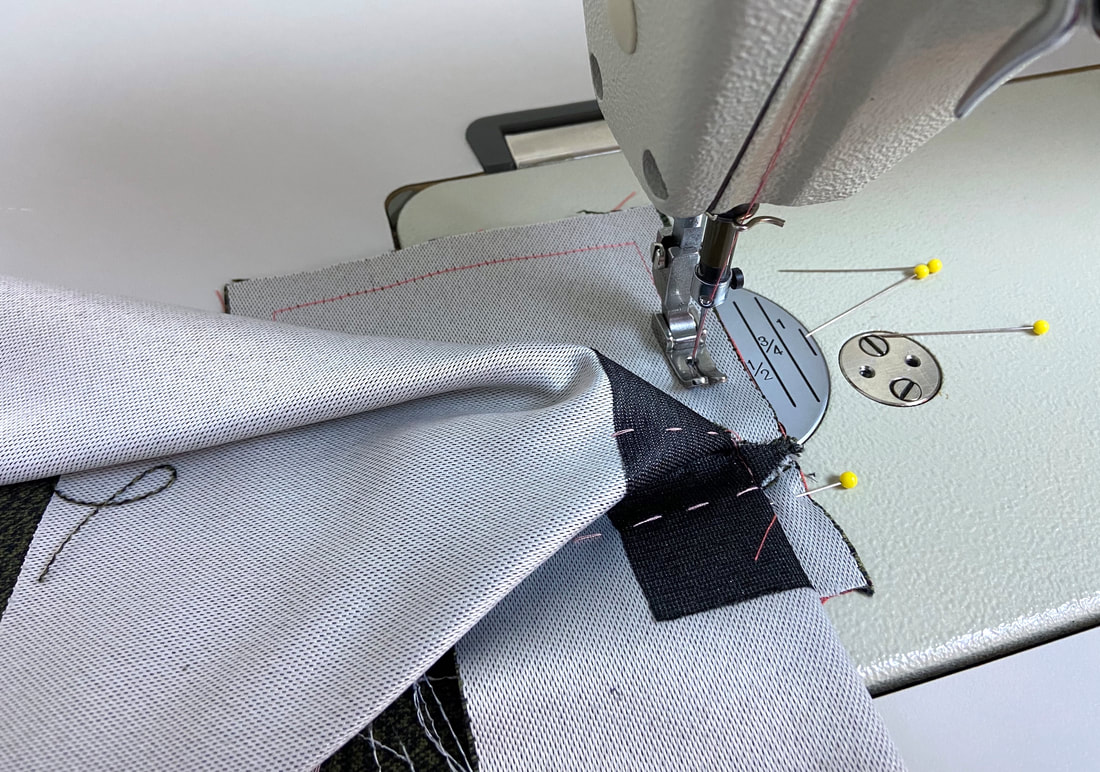
10. Peal the garment layer at the pocket's right side and stitch at the base of the triangle extension and pocket layers underneath as shown. Continue stitching the side of the pocket bag pivoting the stitch along the bottom edge.
|
11. Stitch the pocket bag until you arrive at the other side. To complete the pocket bag, stitch at the base of the other triangle extension.
|
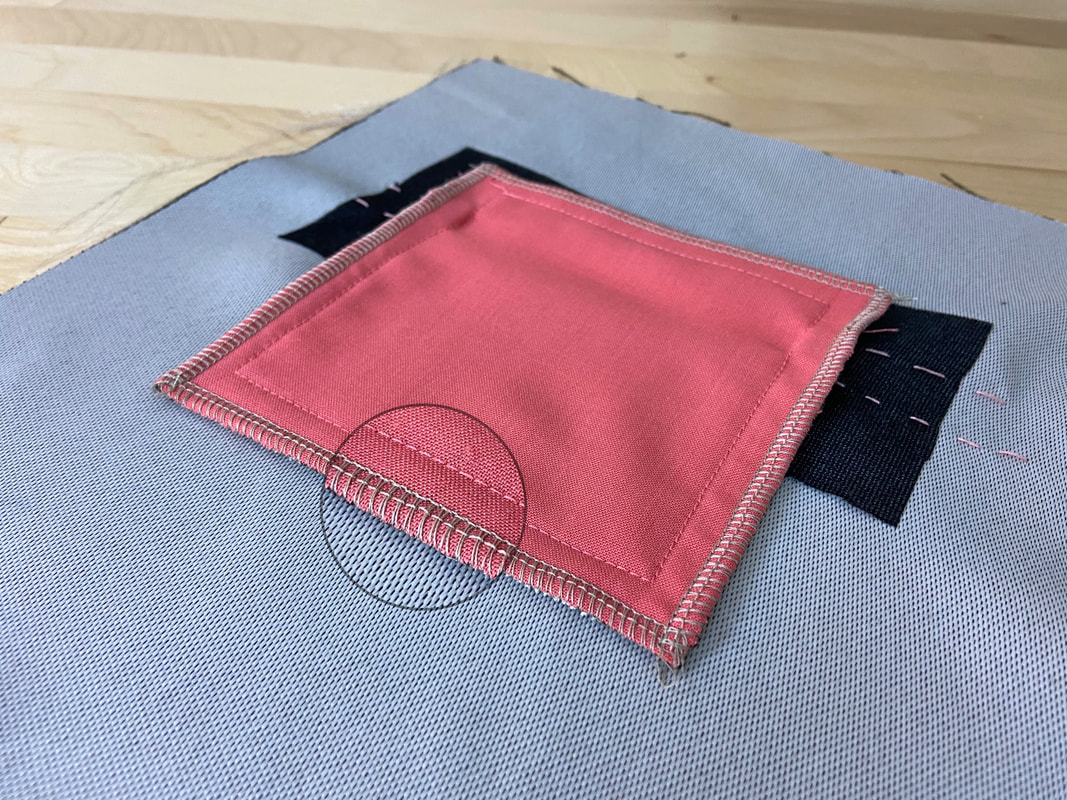
12. Clean-finish all pocket bag edges using the finish of your choice. In this case, the edges are encased with a serging stitch.
|
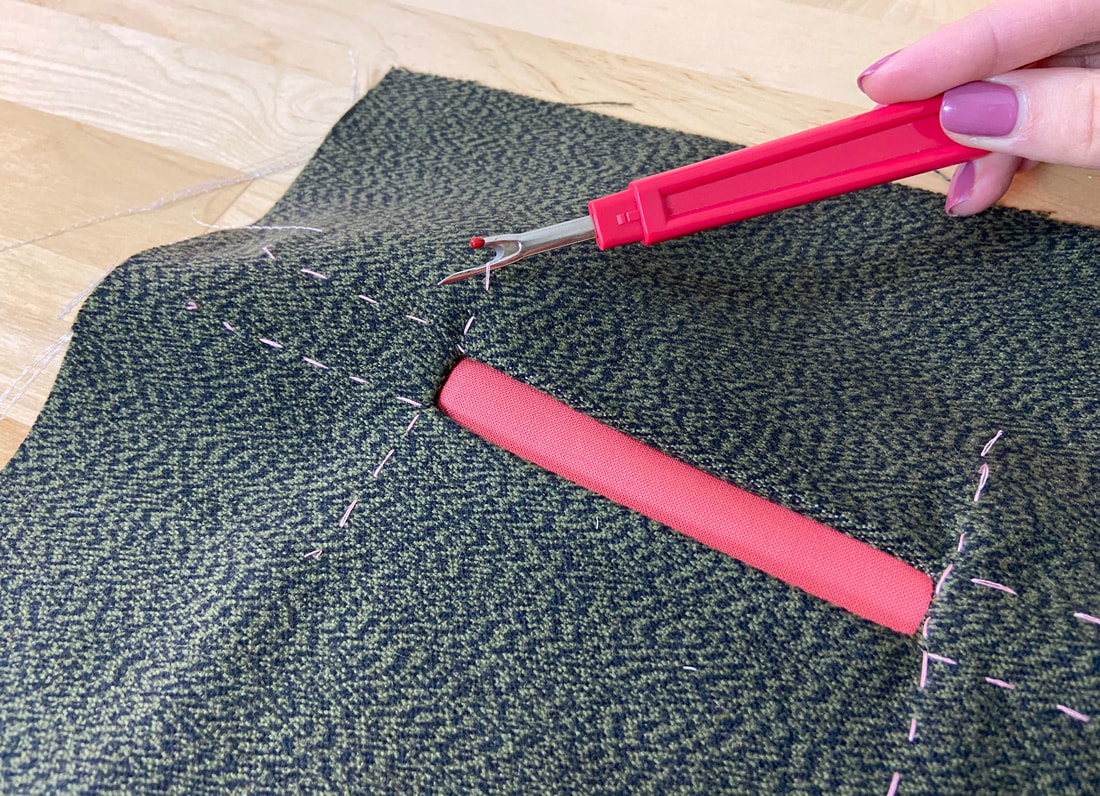
Last but not least, remove all temporary hand basting stitches using a seam ripper.
