
Techniques For Sewing Slash Faced Pockets Of Any Shape
|
To sew slash pockets of any shape, all you have to do is follow a few basic notching and stitch reinforcement techniques. You can achieve a fully functional pocket application regardless of the pocket opening shape.

|
|
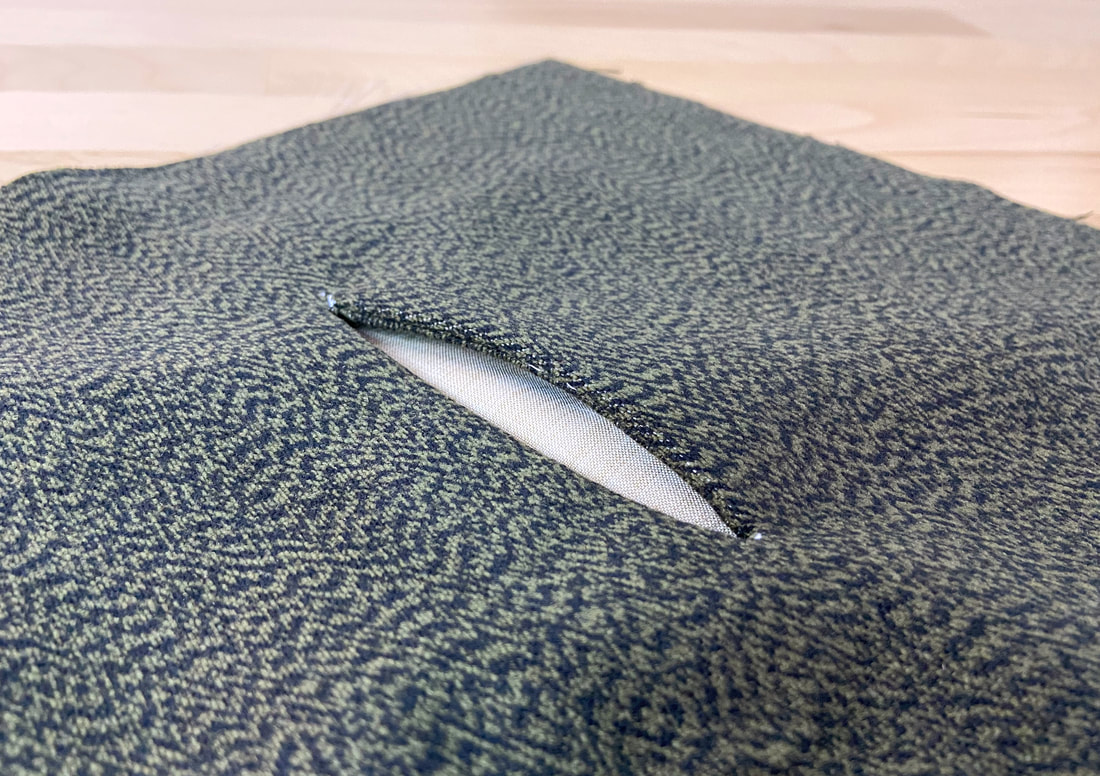
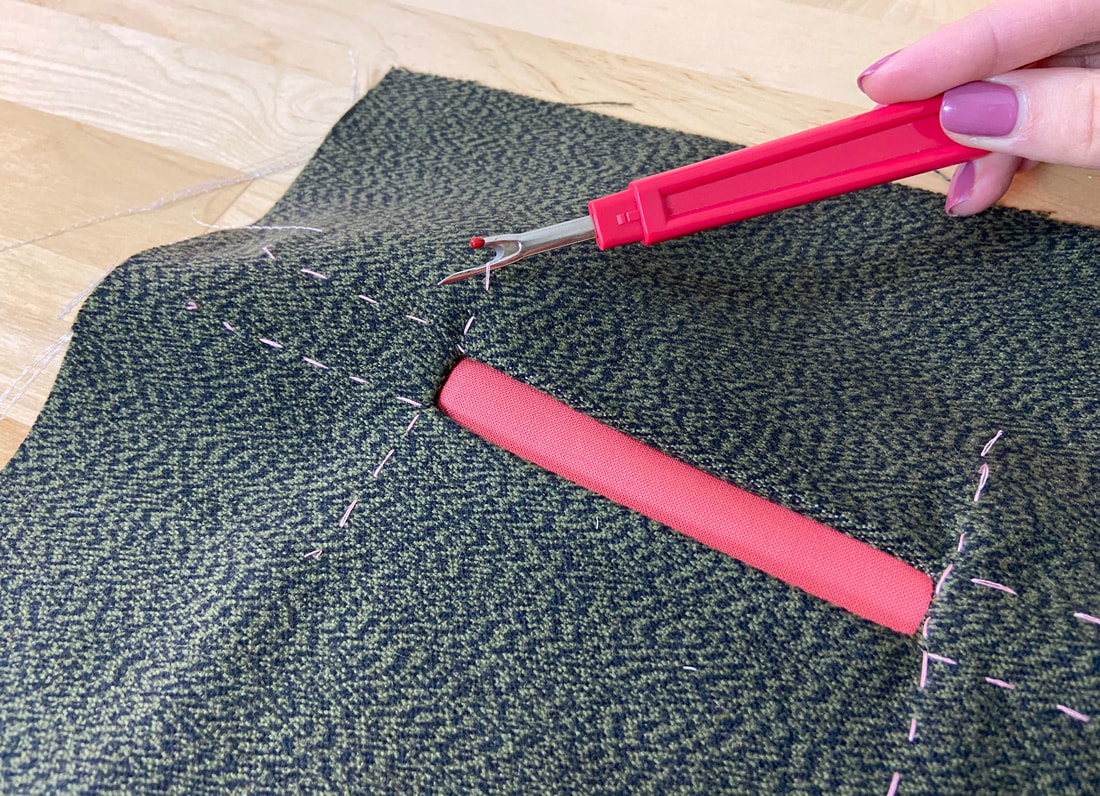
When sewing a plain slash pocket, stitch the pocket opening lines through the pocket piece and garment layer. Reinforce the two sharp corners with an extra layer of stitching applied at a lower stitch setting. Doing so will stabilize and strengthen the pocket opening corners.
When cutting the pocket opening, cut as close as you can into each side corner being careful not to accidentally cut through the stitching. When turning the pocket bag layer to the garment's wrong side and exposing the clean-finished edges, the pocket opening should lay smooth and flat with no tension at the pocket opening corners.
When cutting the pocket opening, cut as close as you can into each side corner being careful not to accidentally cut through the stitching. When turning the pocket bag layer to the garment's wrong side and exposing the clean-finished edges, the pocket opening should lay smooth and flat with no tension at the pocket opening corners.
|
|
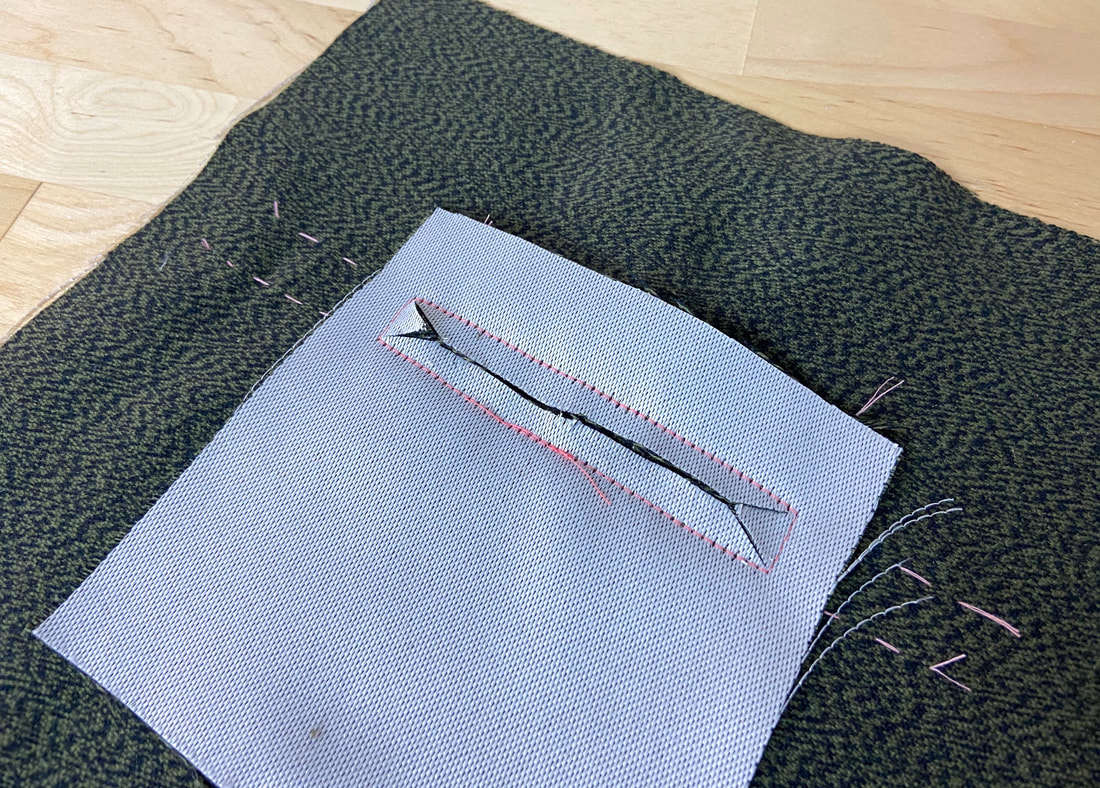
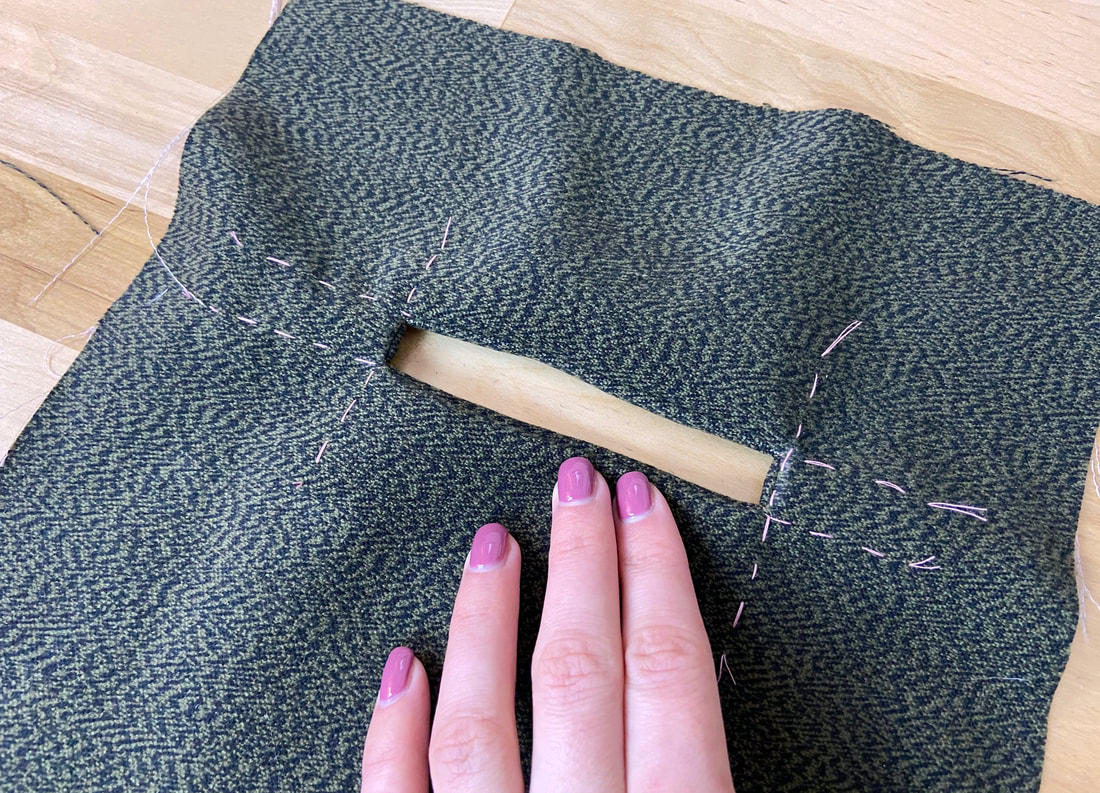
When sewing a rectangular pocket opening, the pocket bag layer is stitched to the garment layer with face sides touching and using a rectangular stitch that follows the desired pocket opening lines.
The stitched rectangle is then cut down the center to about 1/2" from each side. At this point, cut into each corner, as close as you can to the corner stitch being careful not to accidentally cut through it. A triangle-like extension should form on each side.
When the pocket bag layer is flipped to the garment's wrong side (to expose the clean-finished pocket edges), the pocket opening will form a perfect rectangle with sharp, well-defined corners.
|
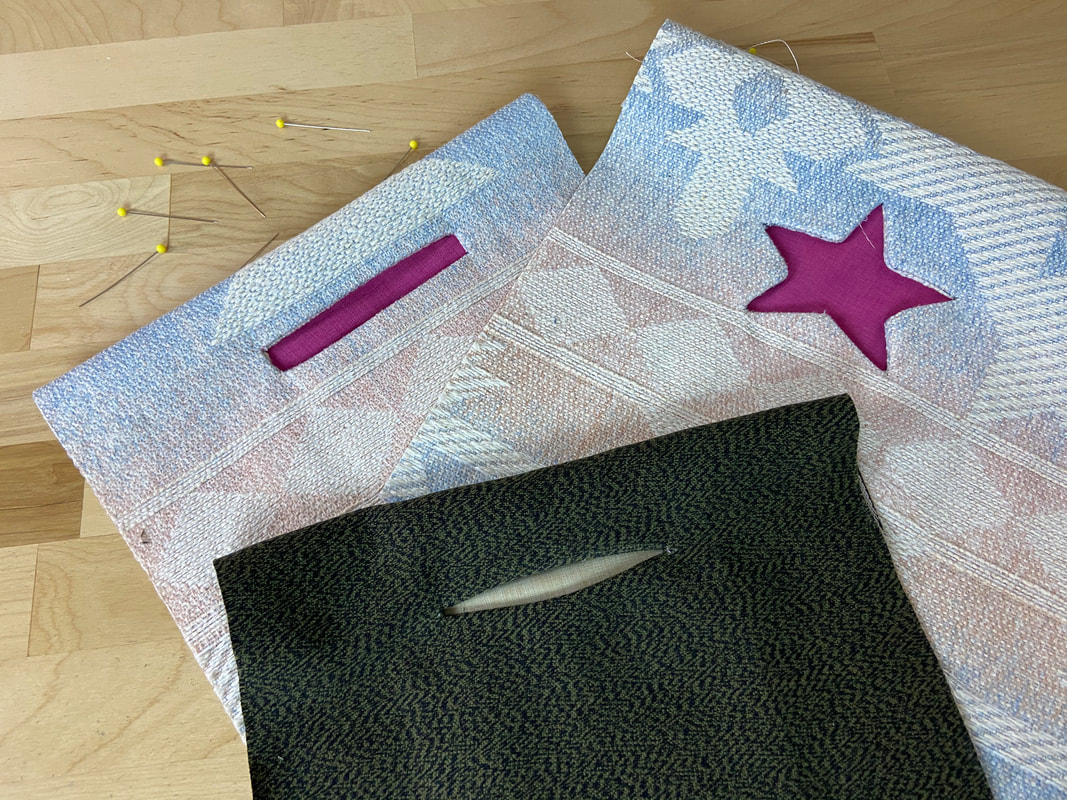
The functional pocket bag is completed with a second pocket layer stitched to the existing one (used to finish the pocket edges). This second pocket layer is visible from the application's right side serving a semi-decorative purpose.
Fabric choice, whether it is the same as the garment or a contrast as shown above, is up to you, as long as it does not negatively effect the pocket's functionality.
Fabric choice, whether it is the same as the garment or a contrast as shown above, is up to you, as long as it does not negatively effect the pocket's functionality.
|
|
Once you understand these basic concepts, you can truly sew a slash pocket of any shape regardless of how complex it is.
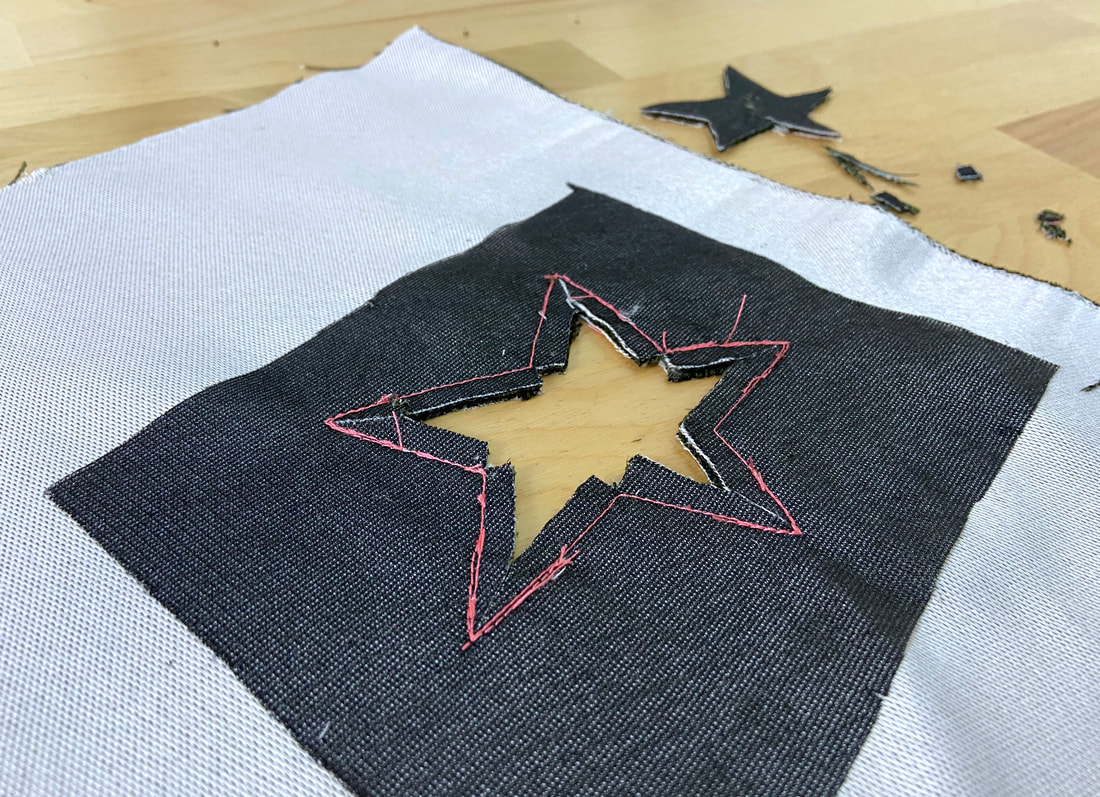
When sewing an irregularly-shaped pocket, chances are you'll have to work with both inner and outer-facing corners. Take the star pocket example shown above: Each of the star's corners are either outer-facing or inner-facing. For best results, these two corners will have to be notched slightly different in the construction process.
Using a fabric pencil or tailor's chalk, start by marking the star lines directly on the fabric. Stitch following the marked lines through the garment and the pocket layer. Reinforce each corner with an extra row of stitching applied at a shorter stitch length: this will stabilize and strengthen the finished pocket corners.
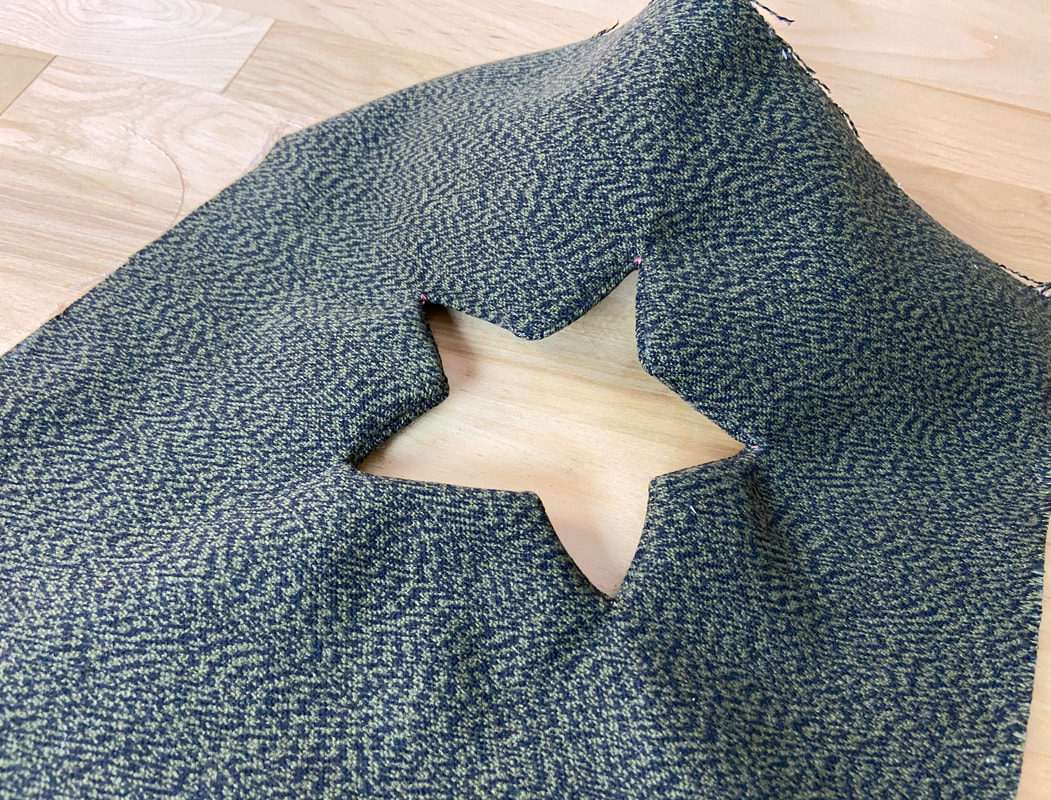
Cut out the excess fabric from the center of the star leaving about 1/4" seam allowance along each line. Slash into each inward-facing corner and clip a wedge notch at each outer-facing corner as shown above. Notching is essential in exposing the star's final clean-finished edges. When complete, each corner should lay flat and maintain an accurate, well-defined shape (as pictured above).
When sewing an irregularly-shaped pocket, chances are you'll have to work with both inner and outer-facing corners. Take the star pocket example shown above: Each of the star's corners are either outer-facing or inner-facing. For best results, these two corners will have to be notched slightly different in the construction process.
Using a fabric pencil or tailor's chalk, start by marking the star lines directly on the fabric. Stitch following the marked lines through the garment and the pocket layer. Reinforce each corner with an extra row of stitching applied at a shorter stitch length: this will stabilize and strengthen the finished pocket corners.
Cut out the excess fabric from the center of the star leaving about 1/4" seam allowance along each line. Slash into each inward-facing corner and clip a wedge notch at each outer-facing corner as shown above. Notching is essential in exposing the star's final clean-finished edges. When complete, each corner should lay flat and maintain an accurate, well-defined shape (as pictured above).
|
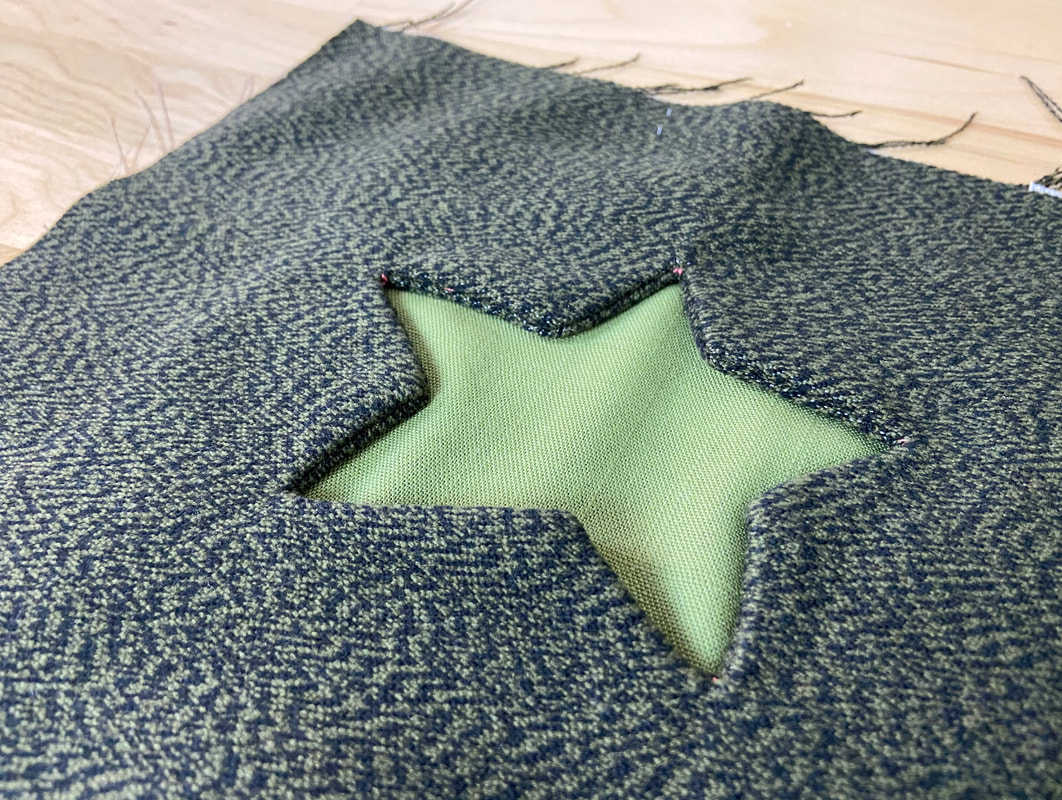
Similar to the rectangular slash pocket outlined above, the star's functional pocket bag is completed by stitching a second pocket bag layer to the one that finishes the pocket opening edges. This fabric will be exposed on the garment's face side and thus should be chosen carefully to complement the rest of the garment design. Again, you can use a contrast fabric or the same fabric as the garment.
