
Mini Tutorial: How To Sew A Double-Welt Bound Slash Pocket

|
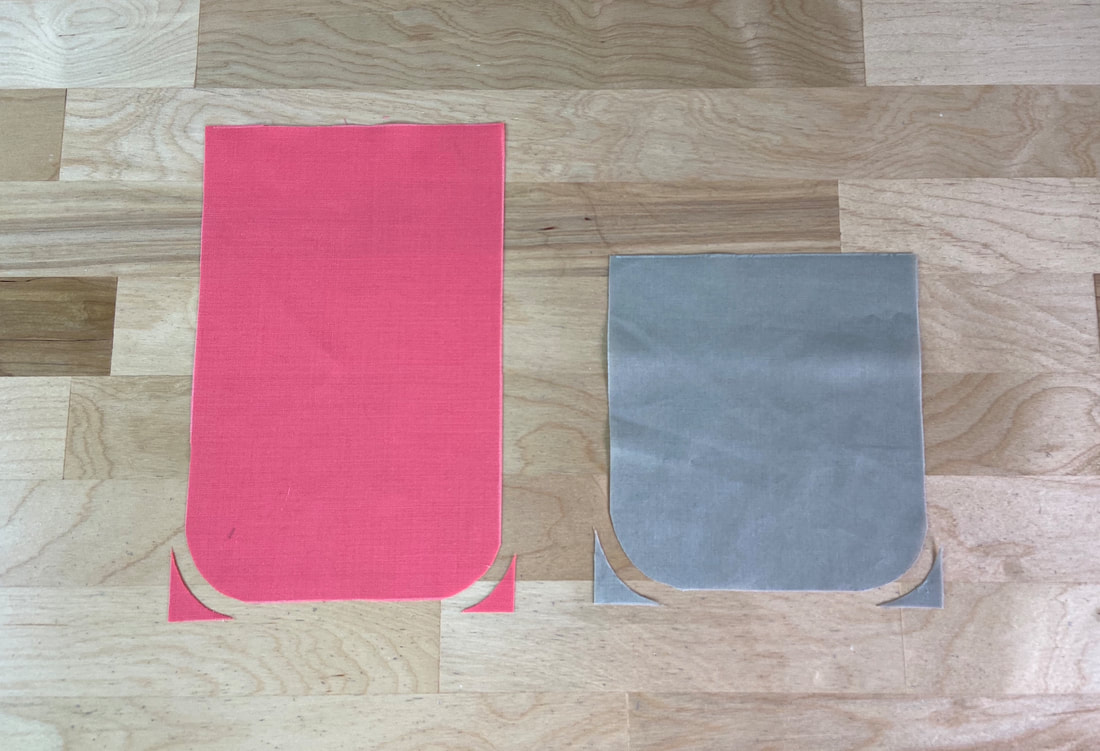
Cut your pocket pieces according to the diagram shown above. The pocket opening in this example is 4"x1". Use the ratio shown above to determine the correct pocket bag measurements.
A bound slash pocket application requires a large pocket piece and a small pocket piece. Both the pocket opening and the pocket bag will be constructed using just these two pieces.
A bound slash pocket application requires a large pocket piece and a small pocket piece. Both the pocket opening and the pocket bag will be constructed using just these two pieces.
|
1. Start by cutting your large and small pocket pieces. You can measure and mark the lines directly on the fabric and cut the pieces following these marks. If desired, curve the bottom edges of each pocket layer- this may help you in the alignment process to follow.
Here is something important to consider: The large pocket piece will be folded onto itself to create the pocket opening "welts". For that reason, you should choose a fabric that will work with your design both functionally and aesthetically. It is common to use the same fabric as the garment for this piece. In this example however, a contrasting color/fabric is used.
In the finished application, the smaller pocket piece is hidden on the inside of the garment and is only used to complete the pocket bag.
|
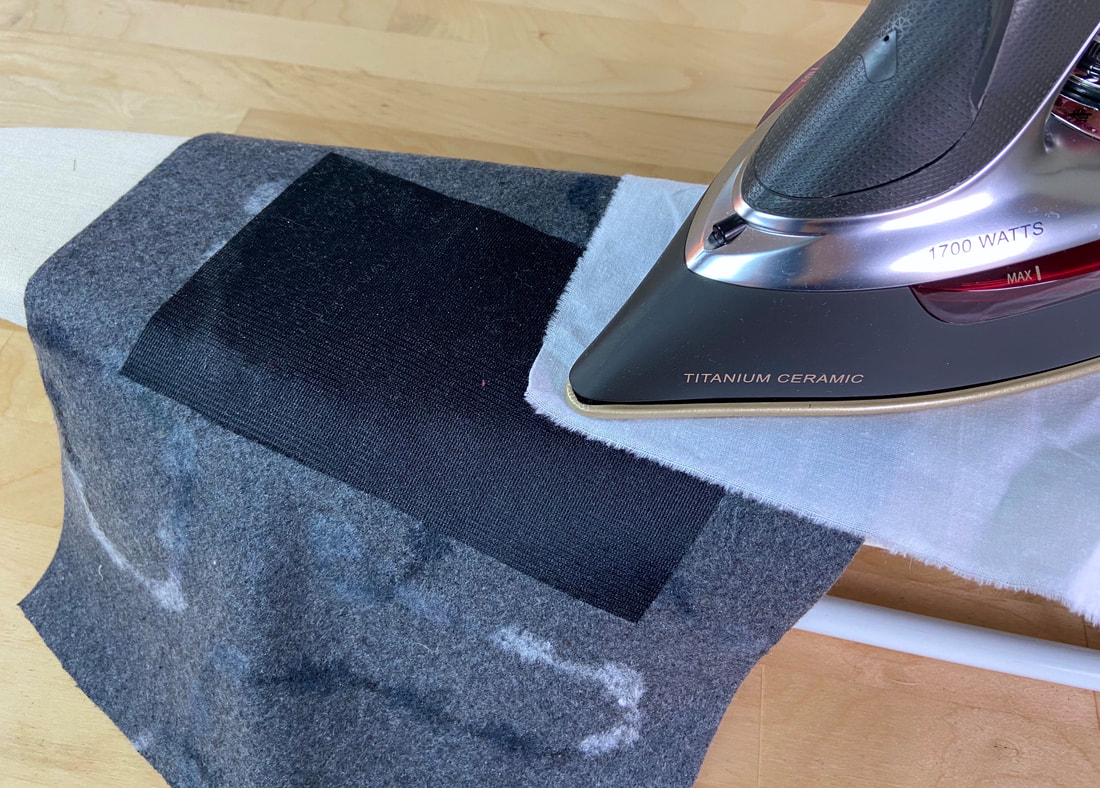
2. Back the wrong the side of the garment with interfacing at the exact slash pocket location.
|
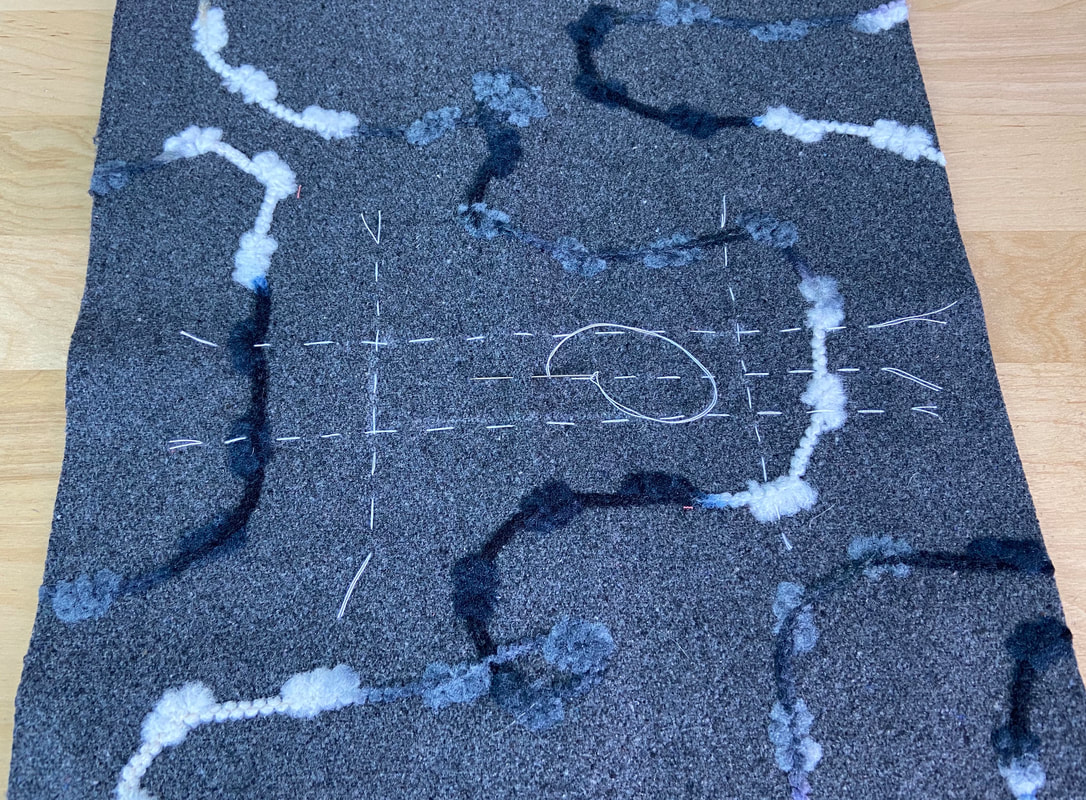
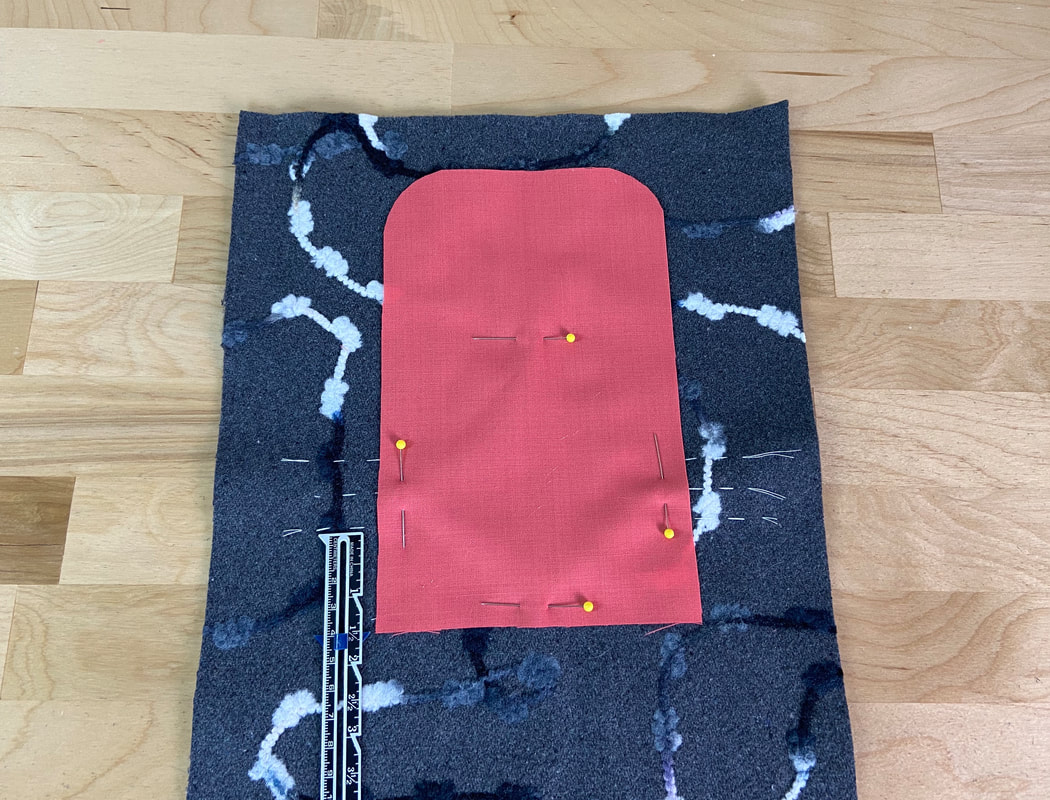
3. On the fabric's face side, mark the exact pocket lines using a hand basting stitch. Extend each stitch line by about 1" at each corner, and mark a lengthwise center line as shown above. The 1" stitch extension will aid in the pocket alignment process to follow.
|
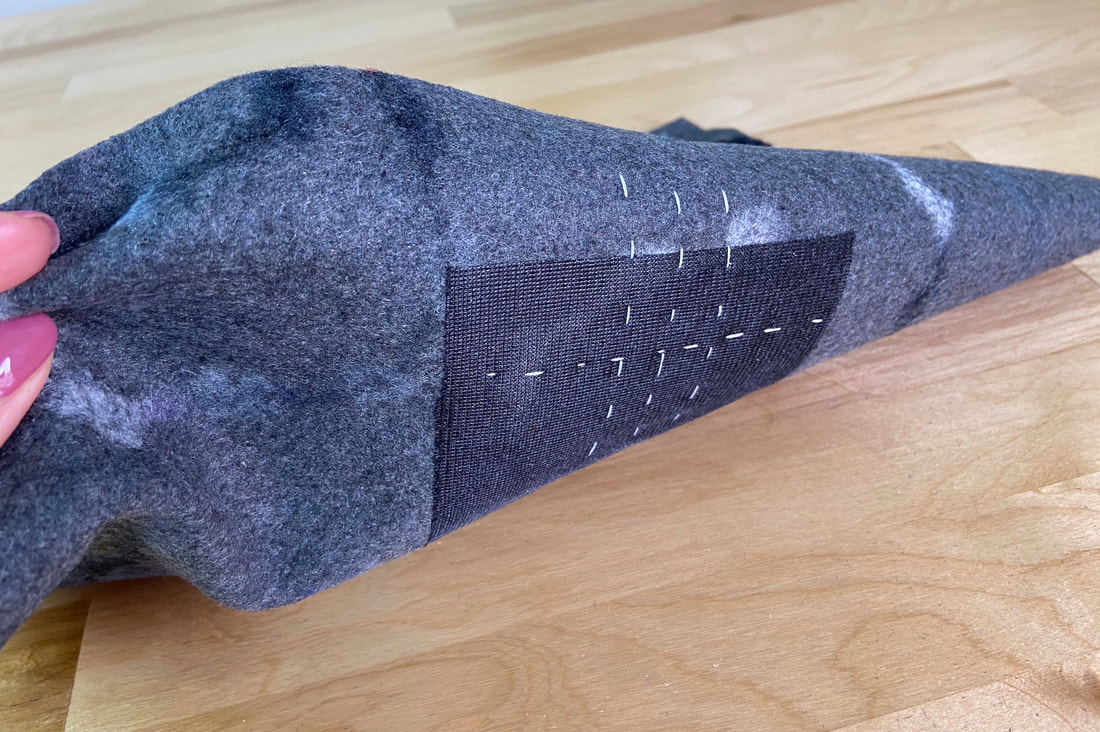
The hand basting stitches should be just as visible on the garment's wrong side as they are on its face side.
|
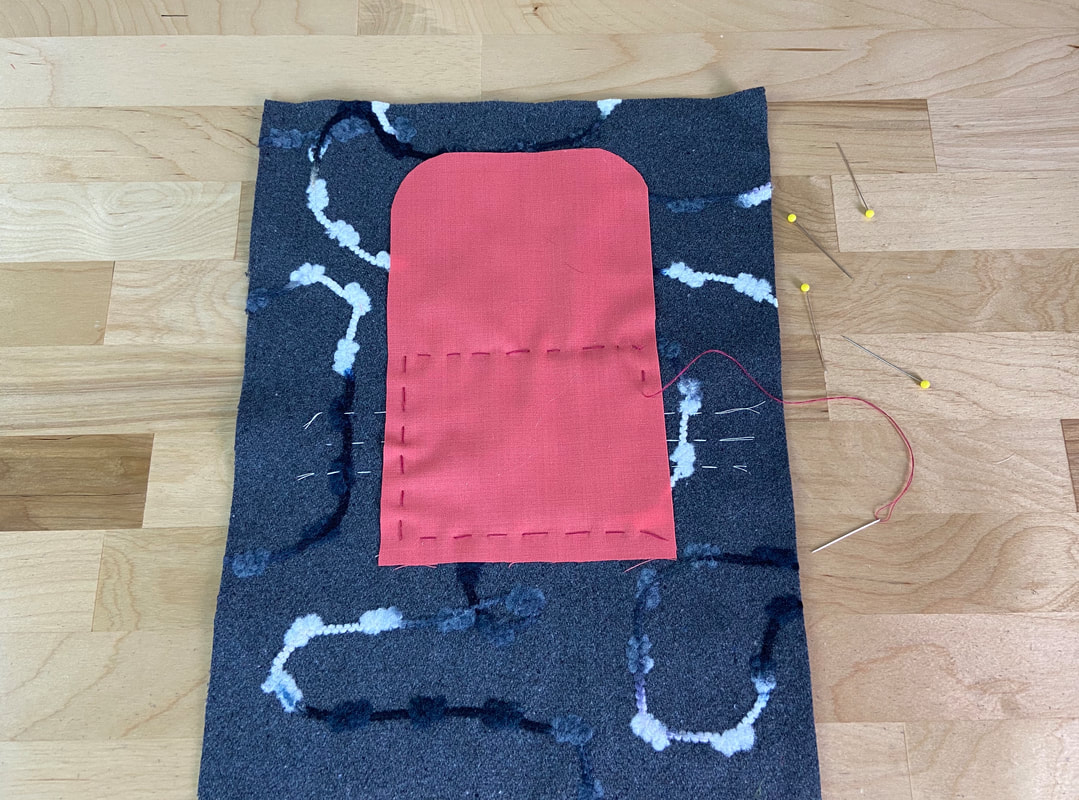
4. From the garment's right side, place the larger pocket layer face down on top of the pocket opening marks such that the top (straight) edge of the pocket piece is placed at 1.5" from the pocket's hand basting line.
|
5. Hand baste the pocket layer to the garment layer underneath. Doing so will secure the layers and prevent them from shifting in the machine stitching process.
|
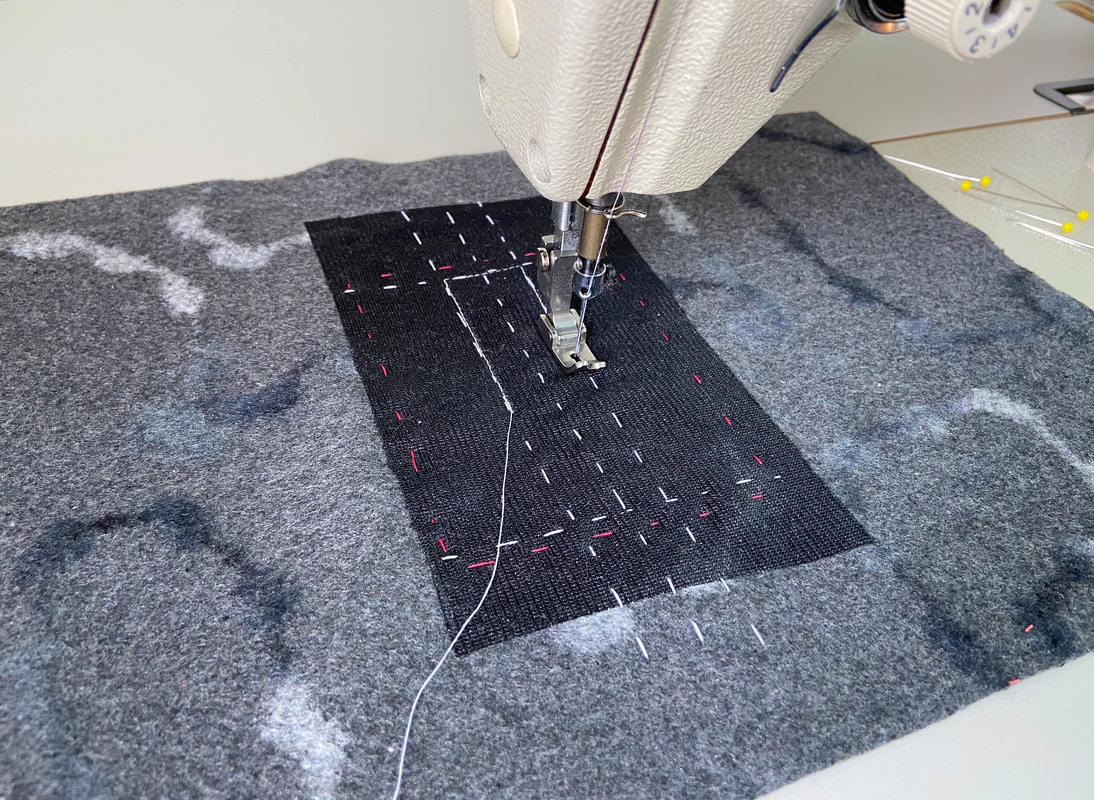
6. From the garment's wrong side, stitch along the pocket's rectangular shape following the basted lines as a guide.
|
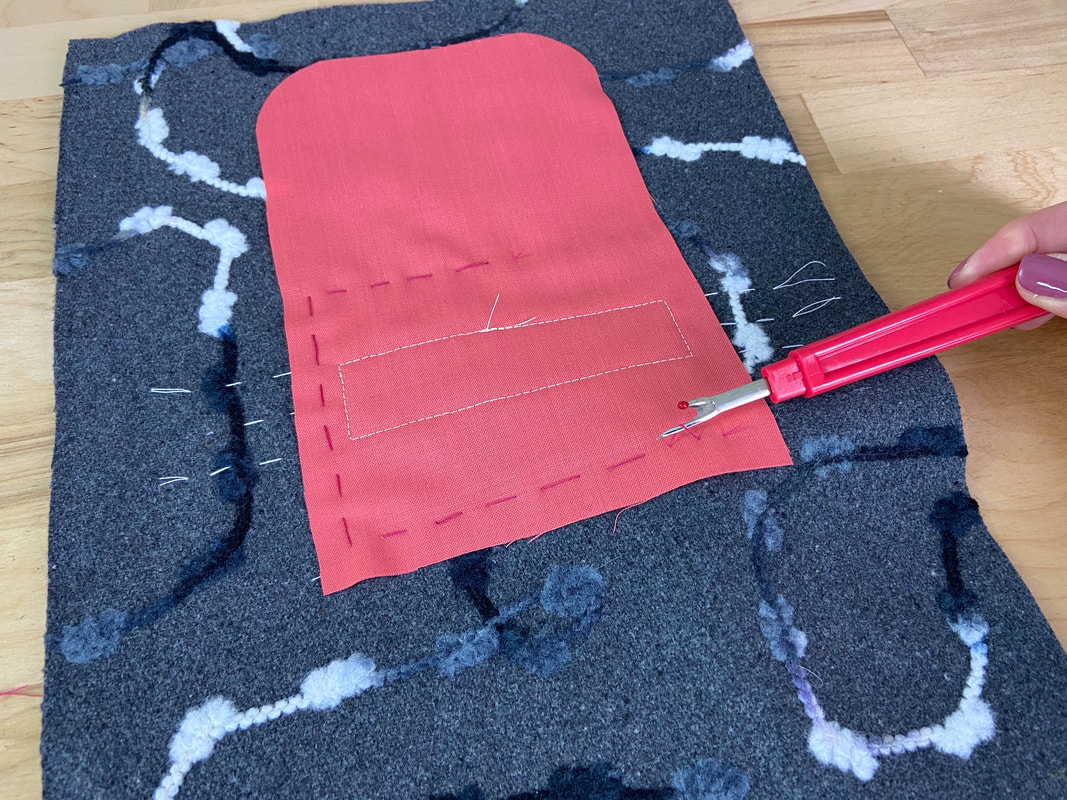
7. As a result, you should have a perfectly stitched rectangle which will eventually, form the slash pocket opening. Once stitched, remove the hand basting applied in Step 5 above using a seam ripper.
Note: To lock the thread, overlap the beginning and end of the machine stitch.
Note: To lock the thread, overlap the beginning and end of the machine stitch.
|
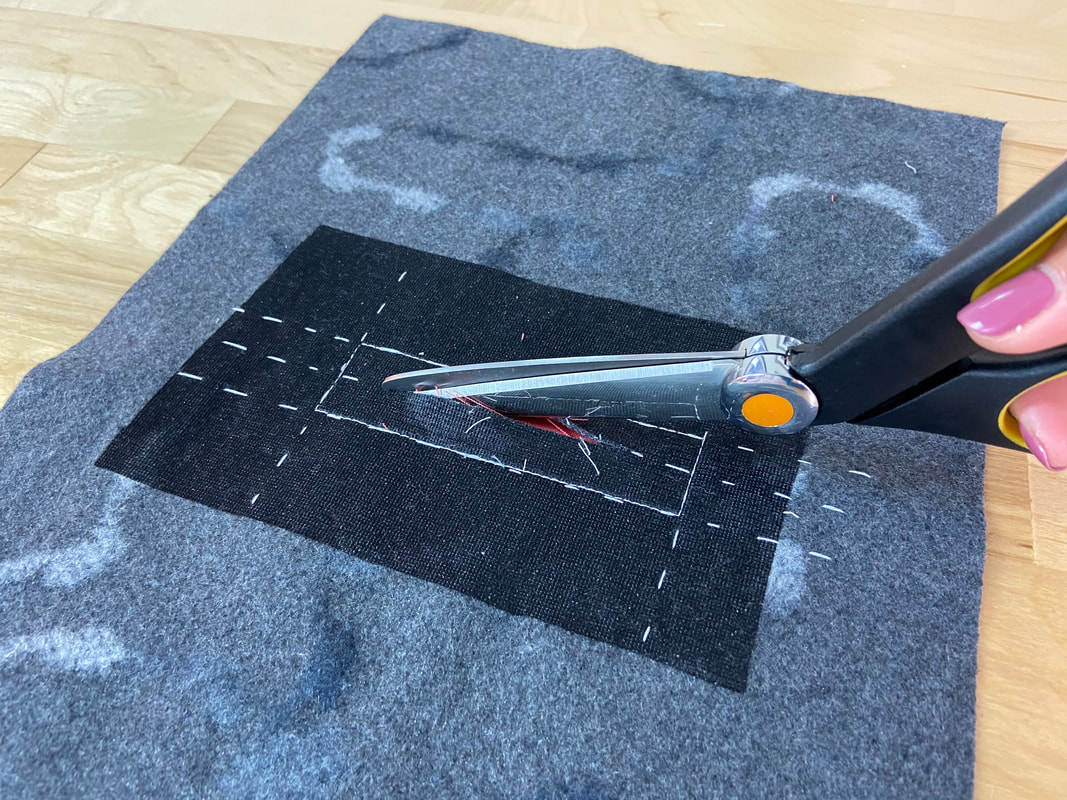
8. From the application's wrong side, slash down the middle of the pocket opening following the hand basting as a guide. Slash up to about 1/2" from each side.
|
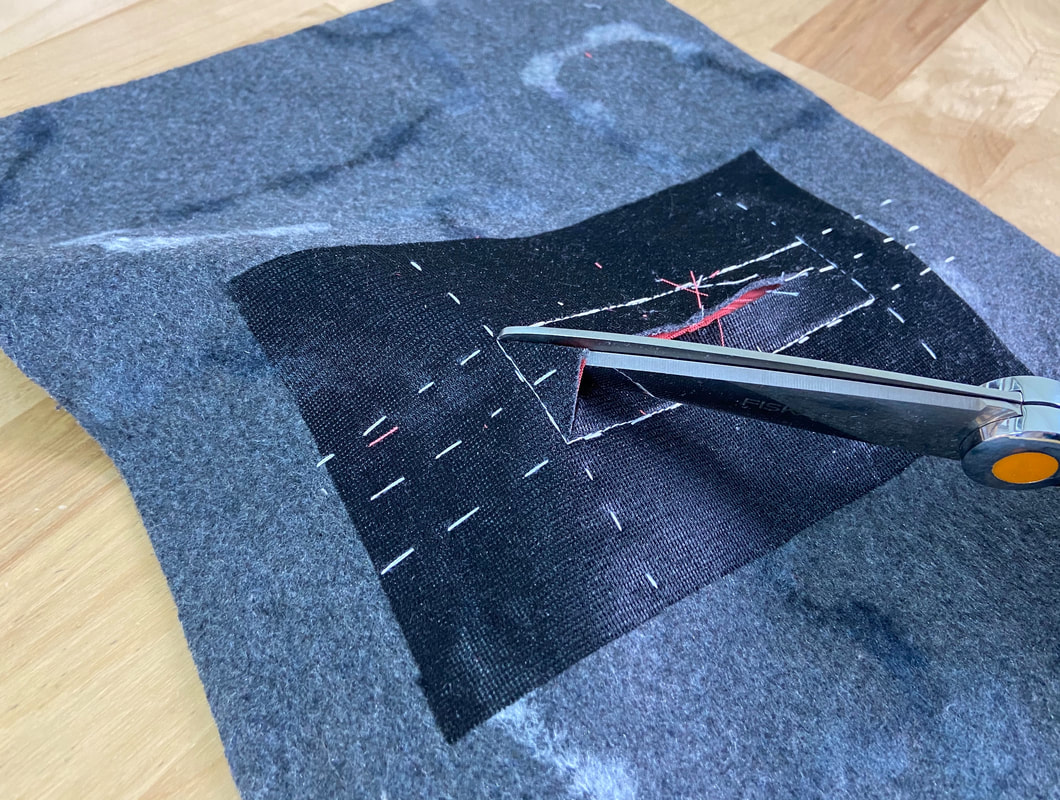
9. Slash into each pocket corner as close to the stitch as possible being careful not to accidentally cut the stitching. As a result, you should have two triangle-shaped extensions on each side of the pocket opening.
|

|
10. Bring the pocket layer to the garment's wrong side and iron the clean-finished edges. The resulting pocket opening should have straight edges with tension-free, well-defined corners. The pocket layer should lay smooth and flat.
|
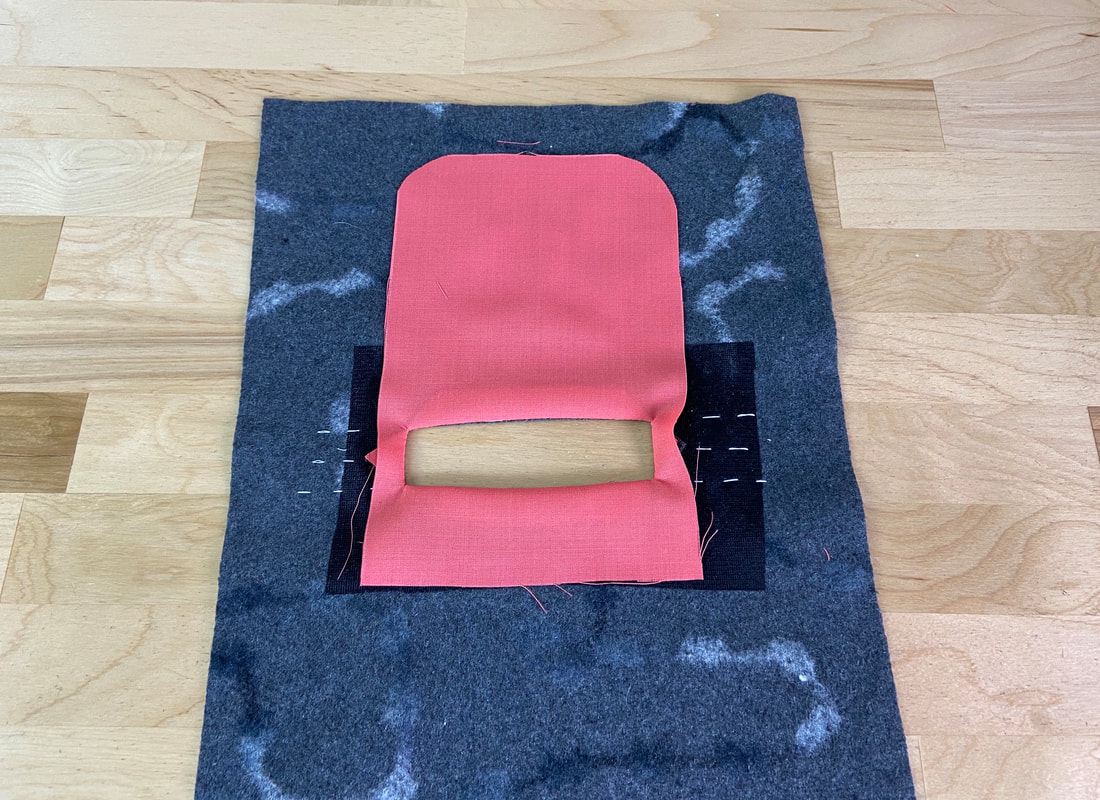
11. To form the pocket opening welts, fold the pocket layer's top and bottom portions such that the resulting folded edges abut at the pocket's center. It helps to first, measure, fold and iron the edges to secure them in place prior to bringing them over the pocket opening. Check the folds from the pocket's face side to ensure they are not only equal in width but also positioned evenly.
|
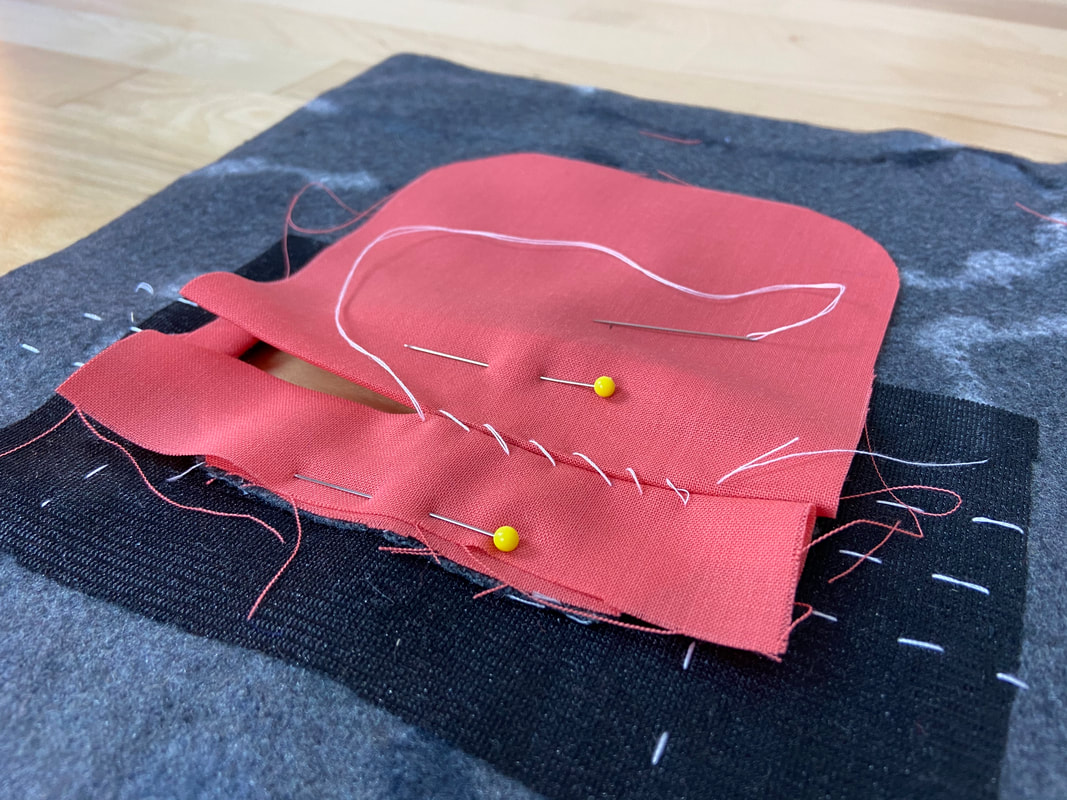
12. It helps to temporarily whipstitch the abutting pocket opening folds closed while continuing the pocket construction process. Doing so will keep the layers flat and smooth, providing more comfort in the stitching process to follow.
|
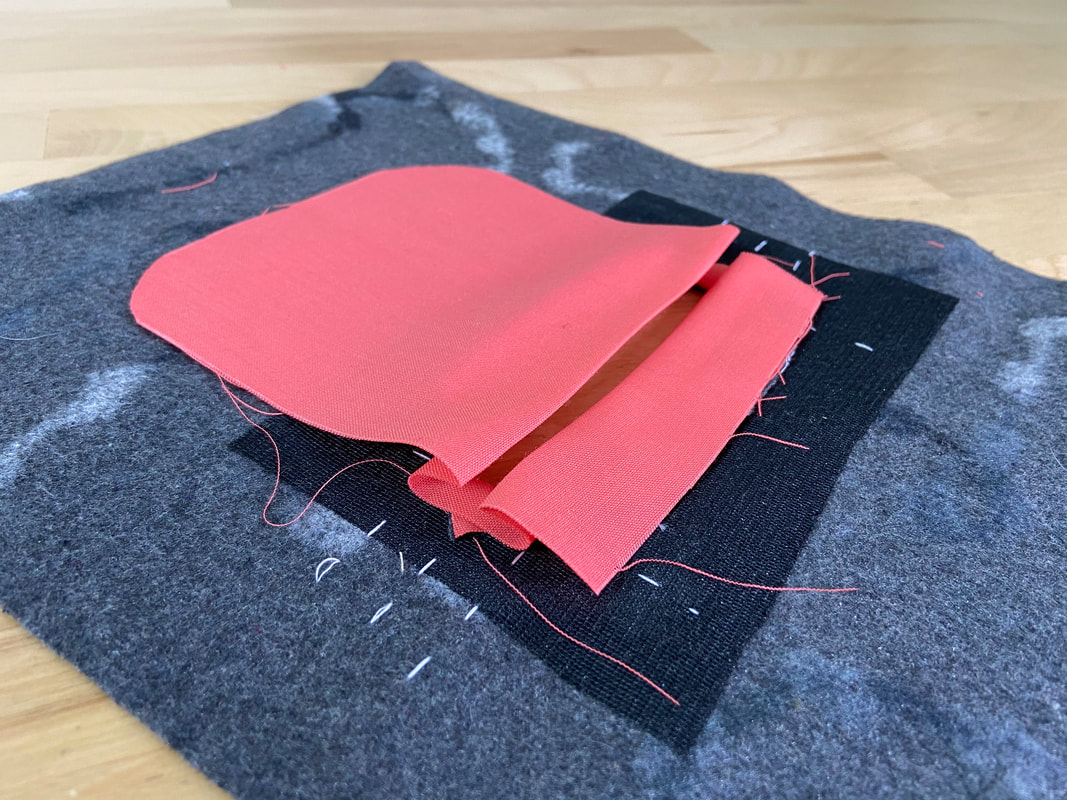
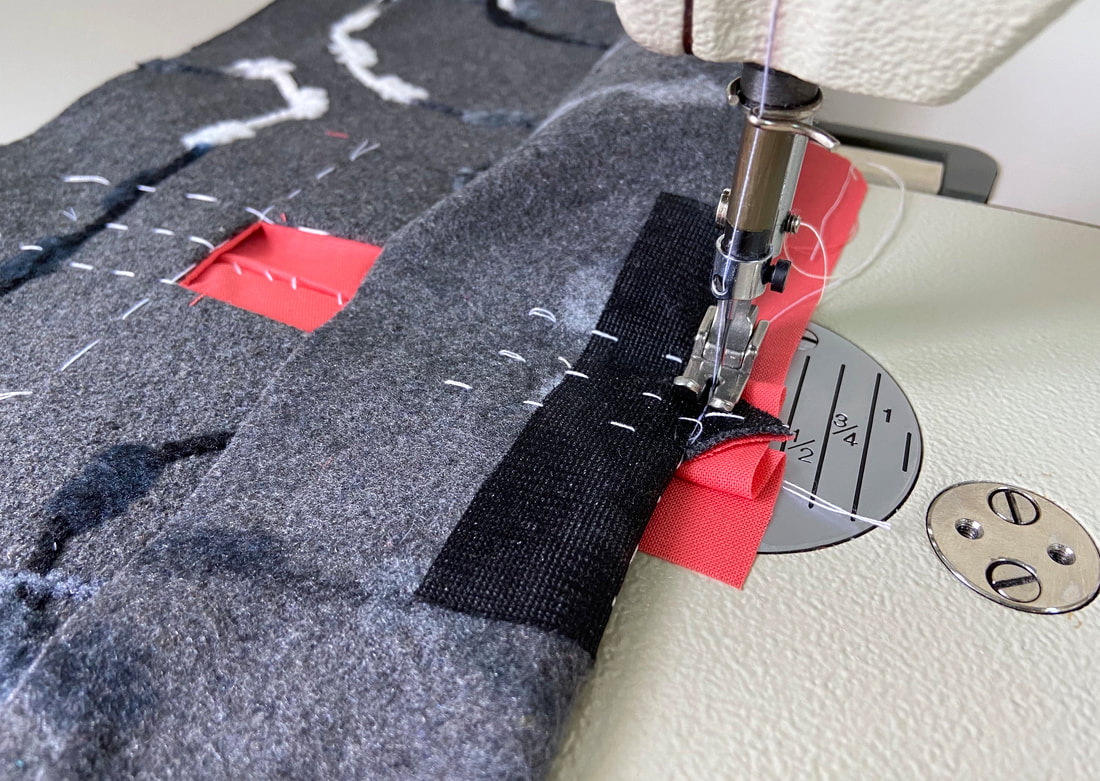
13. Fold the garment layer over to expose the pocket's side triangle extension, and machine stitch at the base of this triangle extension catching the folded pocket edges underneath as pictured above. Repeat on both sides of the pocket opening.
|
14. Next, peal the garment layer back at the top to expose the top seam allowance and pocket layer underneath. Stitch next to the existing stitch following it as a guide.
|
|
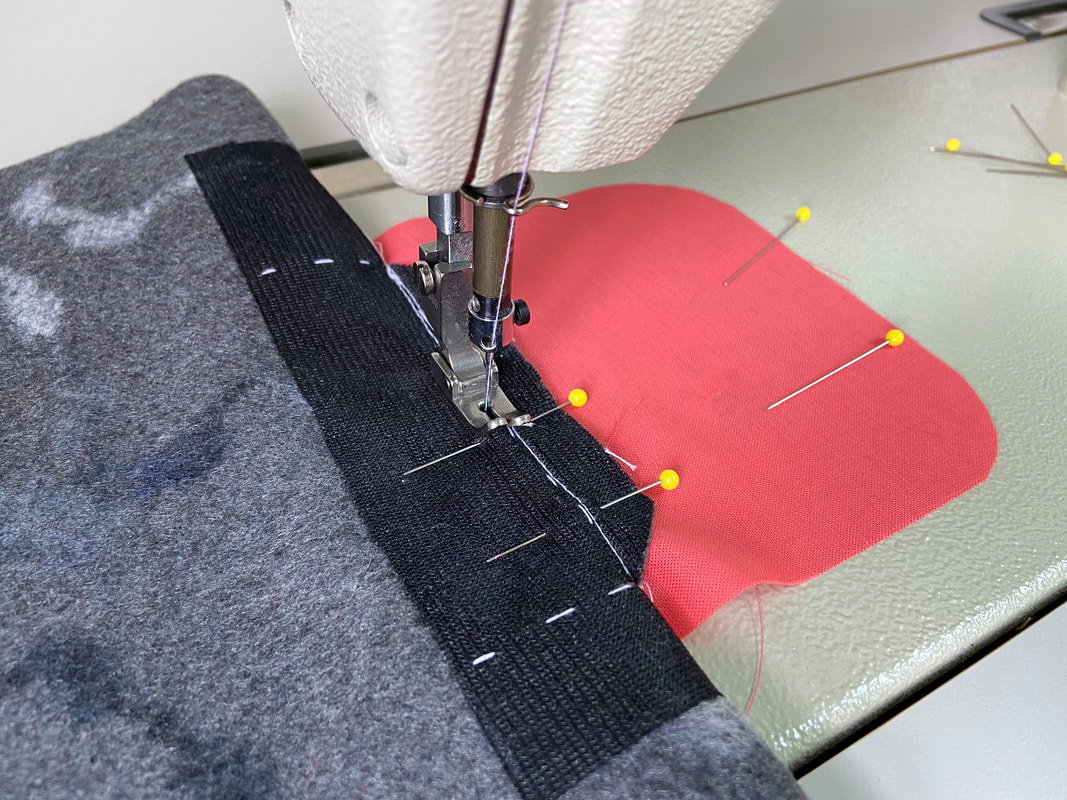
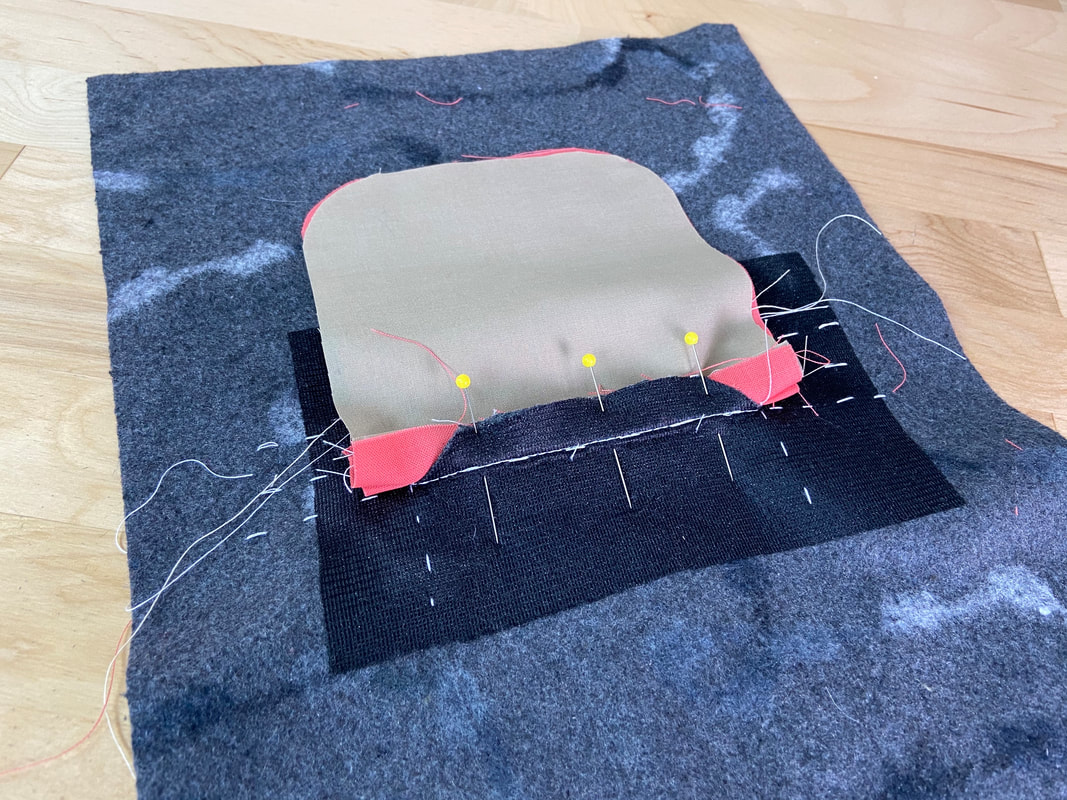
15. Next, place the small pocket piece on top of the already-attached pocket layer such that all edges align. Insert pins through the bottom pocket seam allowance and the straight edge on the smaller pocket piece (as shown).
|
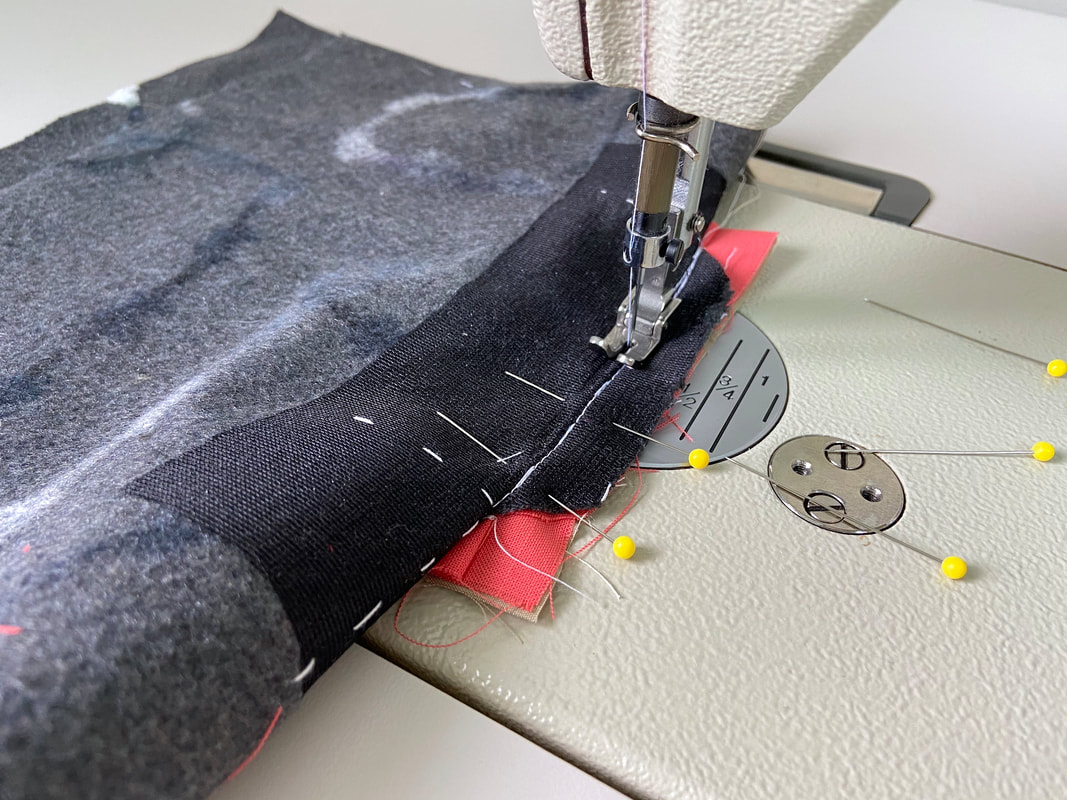
16. Stitch the pocket opening's seam allowance to the smaller pocket layer underneath following the existing stitch as a guide.
|
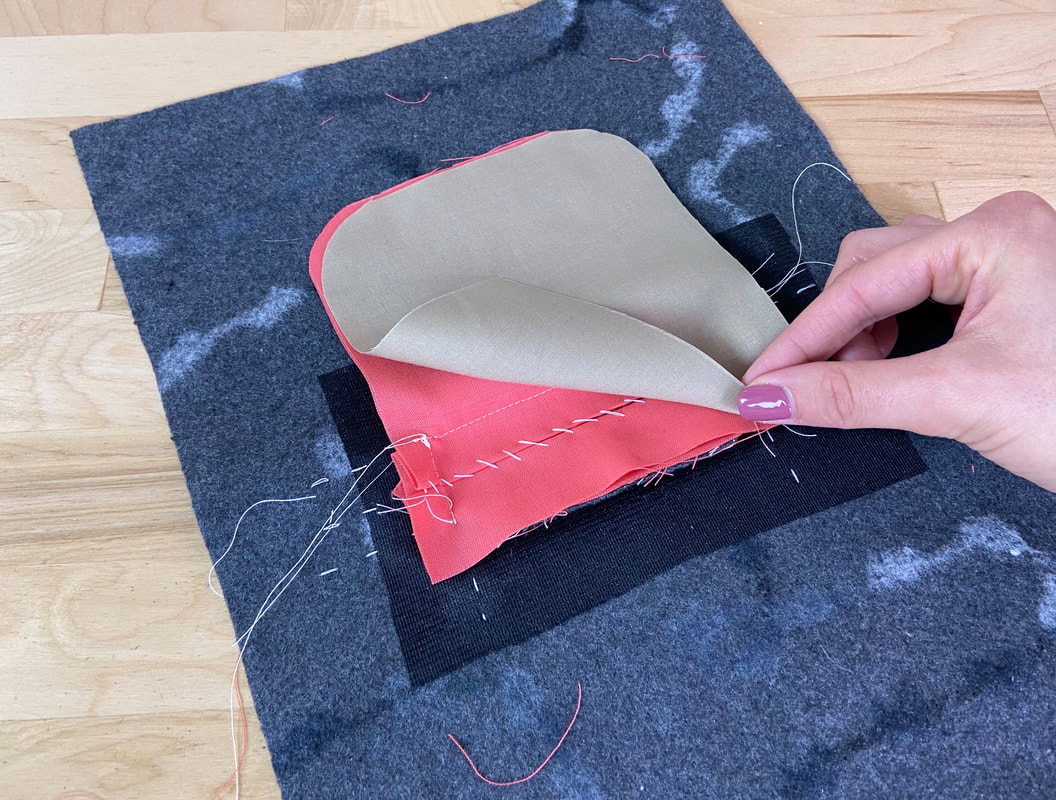
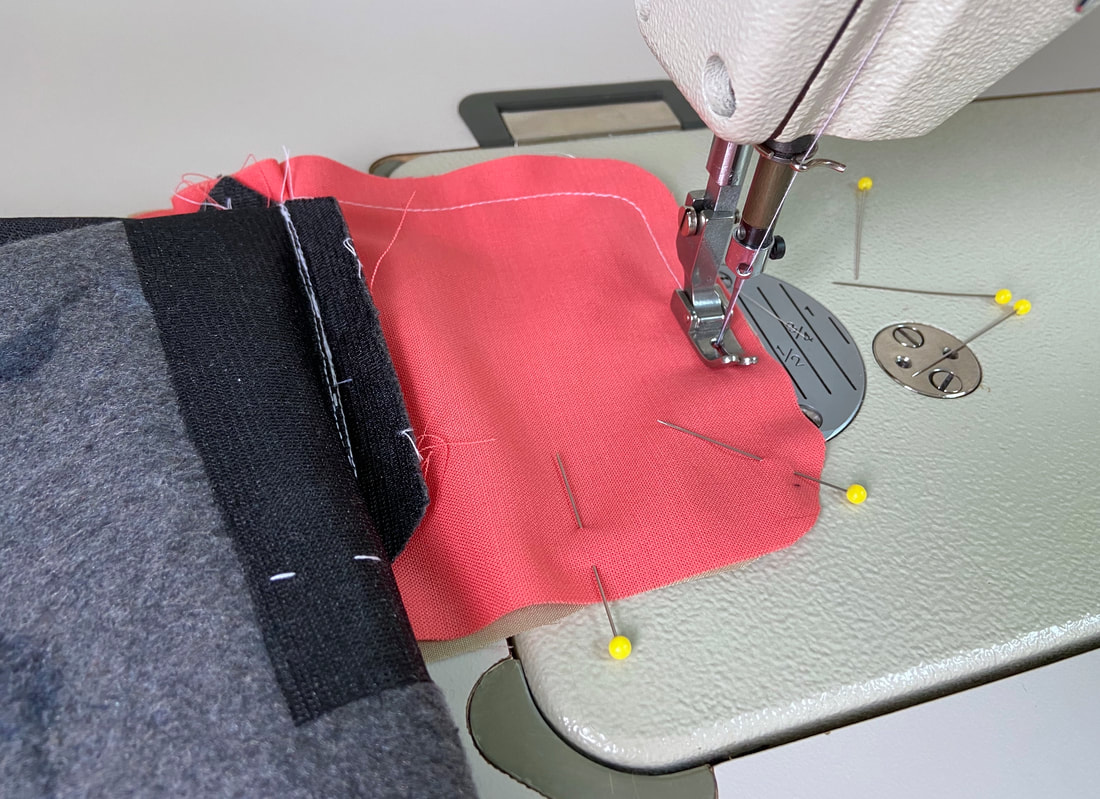
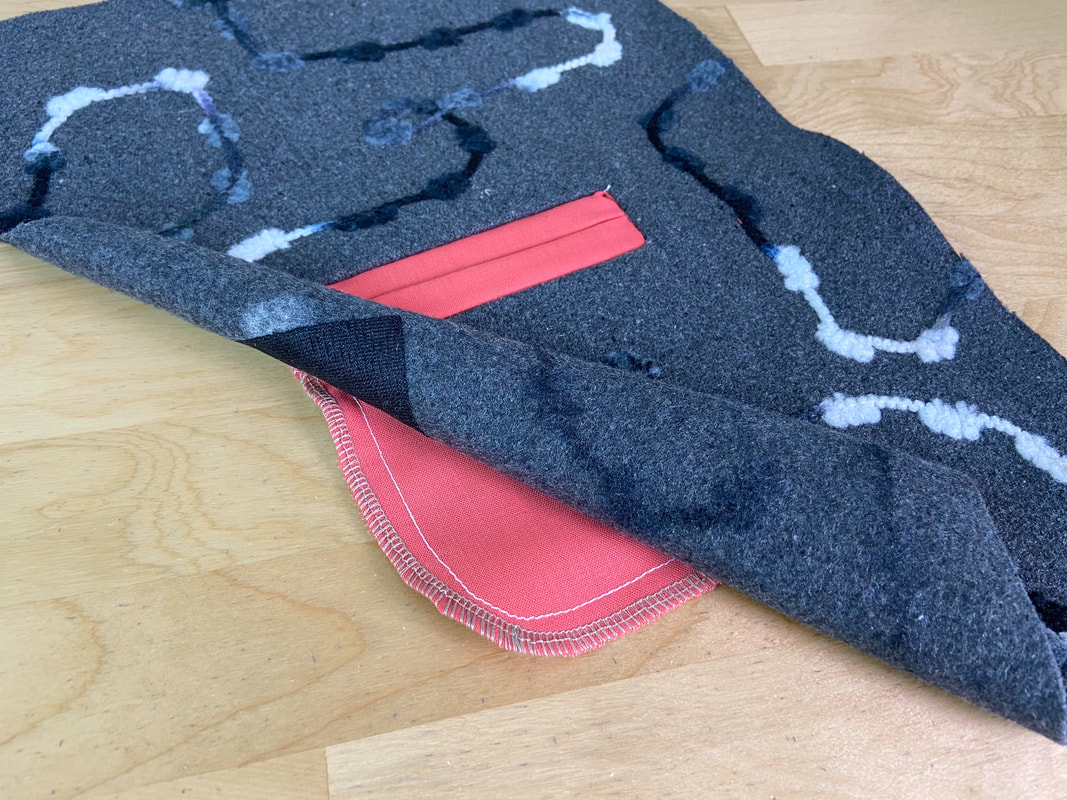
17. To complete the pocket bag, align the two pocket bag edges together and insert pins perpendicular to the edges along the sides and bottom. Machine stitch the pocket bag layers at the designated seam allowance- 1/2" in this case.
|
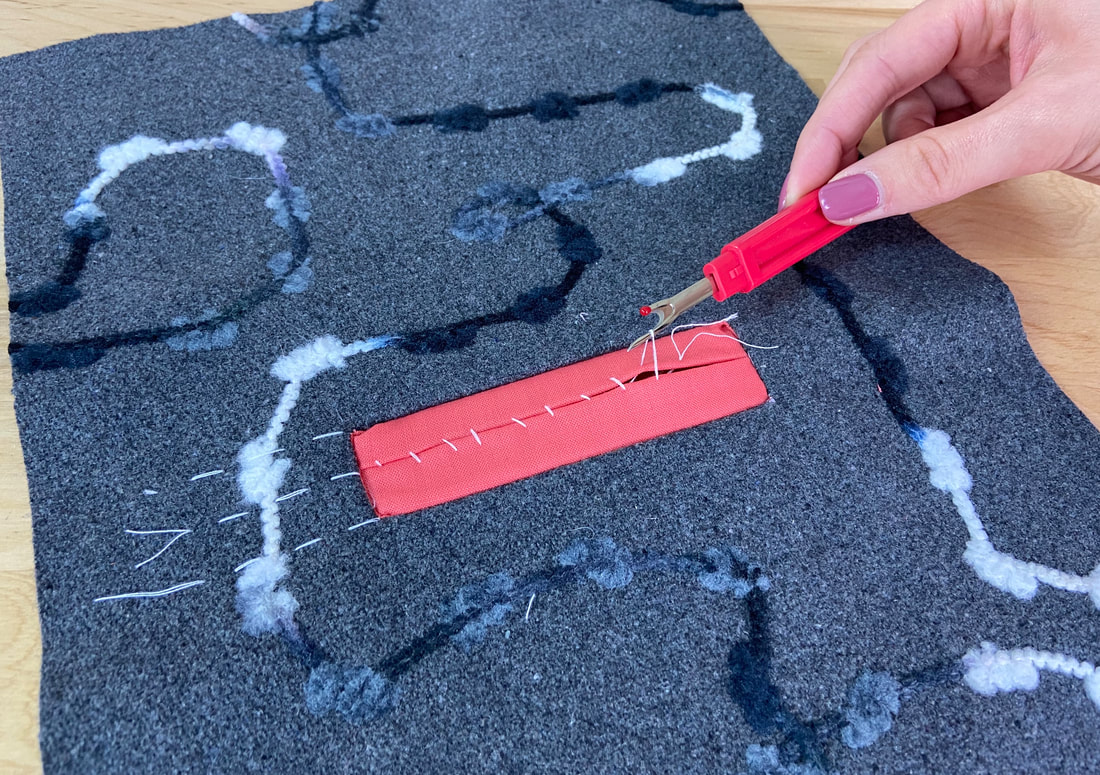
You can now remove the whipstitching using a seam ripper.
|
To complete the bound pocket application, clean-finish the pocket bag edges using an overedge stitch like serging or zigzag, or any other finishing technique of your choice.
