
Dressmaking: Bound Pocket Components and Measurements
|
A bound pocket is a slash pocket application that uses the longer pocket bag layer to form the pocket opening folds (welts). As a result, these folds are the same fabric as the longer pocket bag layer (which is also used to clean-finish the pocket opening edges). For that reason, you should choose your fabric carefully such that it works for both pocket opening and pocket bag.

|
Draft your own pattern set or simply cut your pocket pieces directly from the fabric of your choice using the measurement ratios and pocket components shown above.
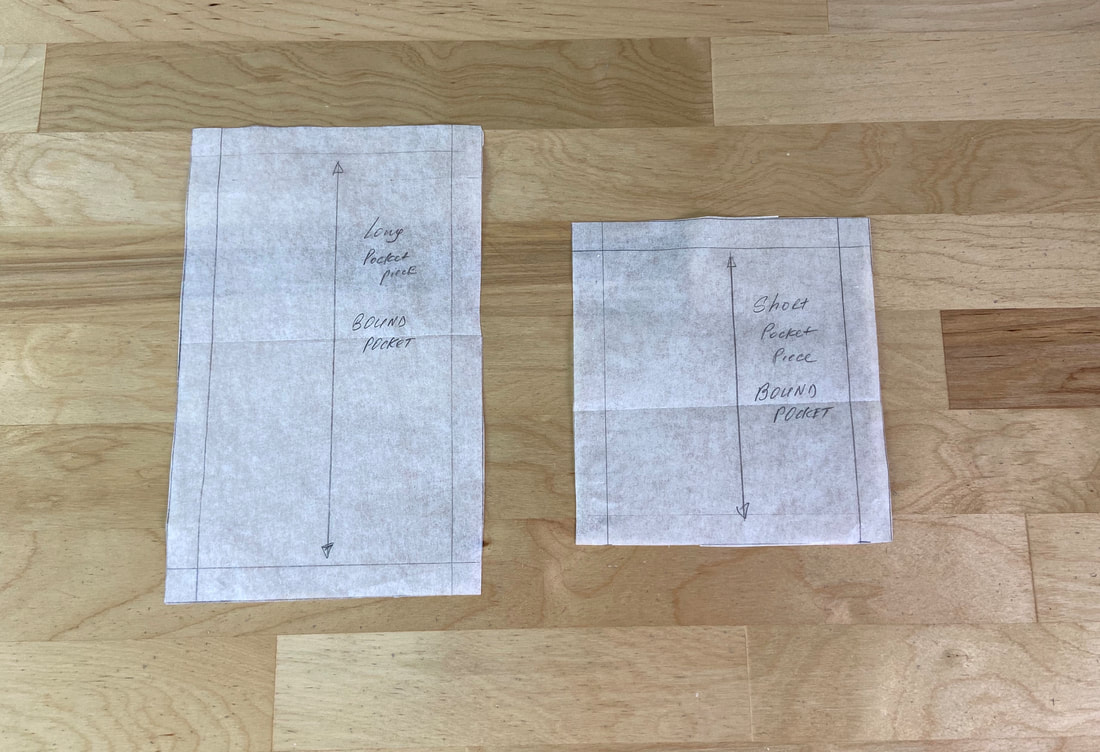
In the diagram pictured above, the pocket opening is marked with dash lines and measures 4"x1".
To sew a bound pocket, you will need two pocket pieces: A larger pocket piece that is 1" wider than the pocket opening and 2.5" longer than the desired pocket depth (4.5" in this case). The short pocket layer is also 1" wider than the pocket opening but only 1.5" longer than the pocket depth.
|
|
Draft your sewing patterns and mark the 1/2" seam allowance along all edges. The seam allowance is already built into the measurements above.
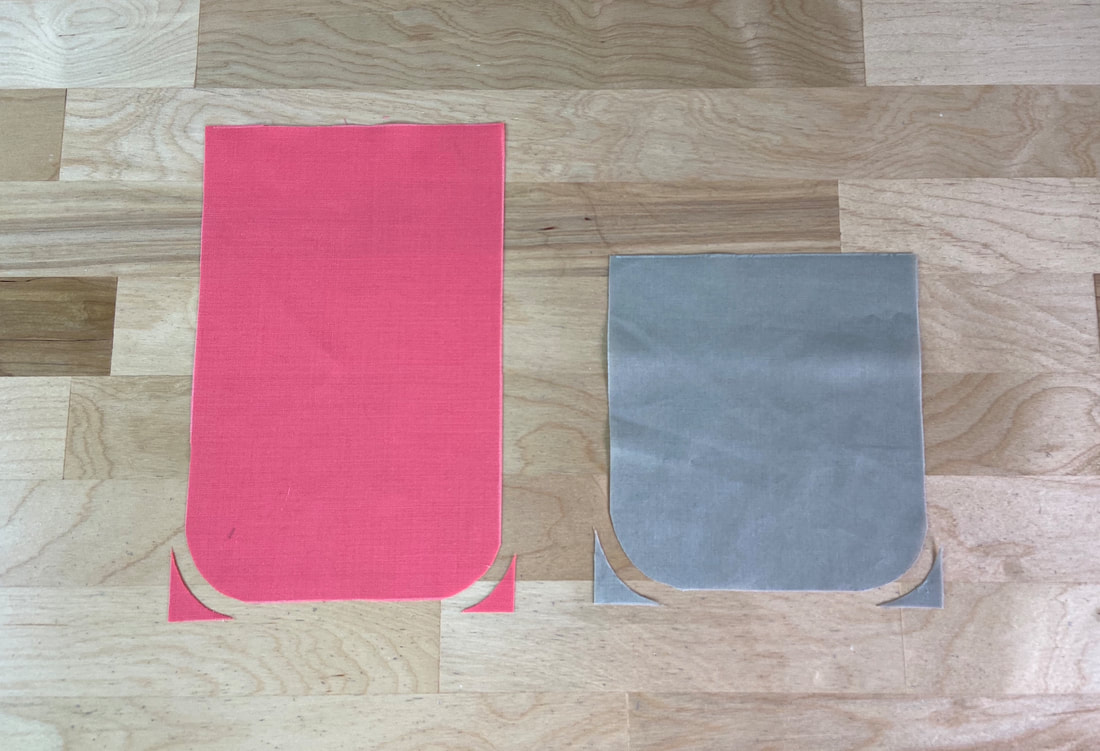
Cut 1 piece of each pocket layer. The large pocket piece will be folded to serve as the pocket opening folds, while the shorter layer will be used to finally complete the pocket bag on the wrong side of the application. It may also help to curve the bottom edge of each pocket piece as this will provide more clarity in the alignment process to follow.
Cut 1 piece of each pocket layer. The large pocket piece will be folded to serve as the pocket opening folds, while the shorter layer will be used to finally complete the pocket bag on the wrong side of the application. It may also help to curve the bottom edge of each pocket piece as this will provide more clarity in the alignment process to follow.
|
|
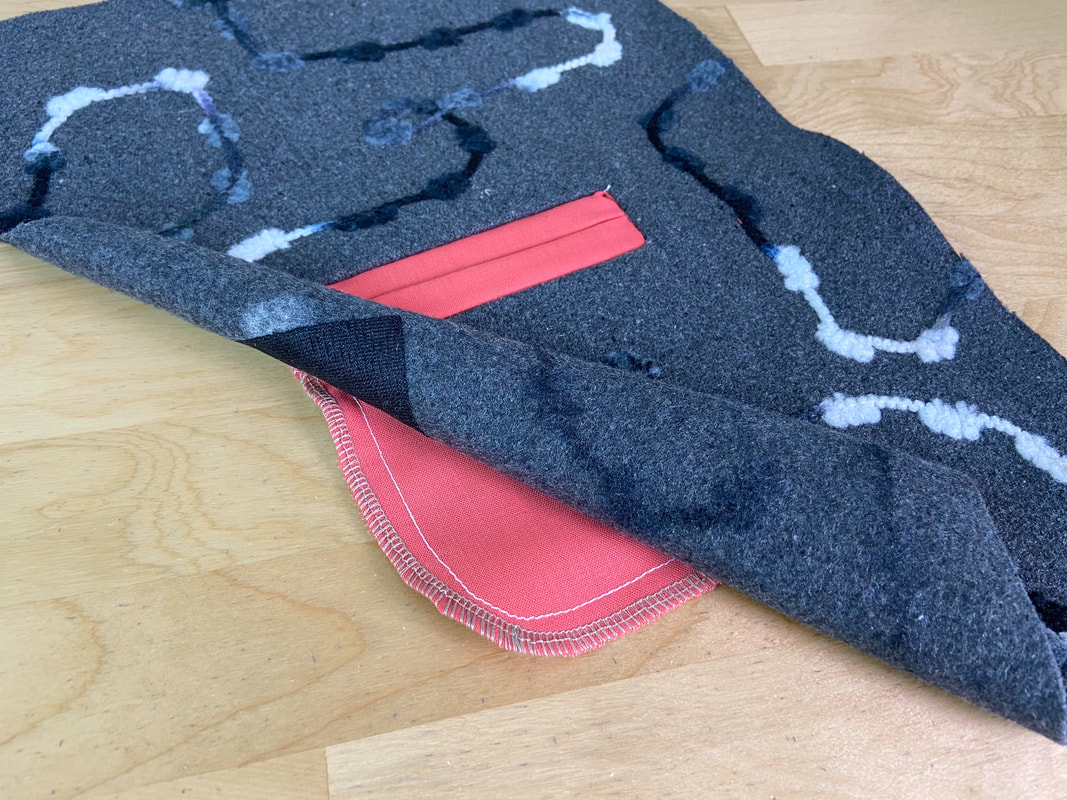
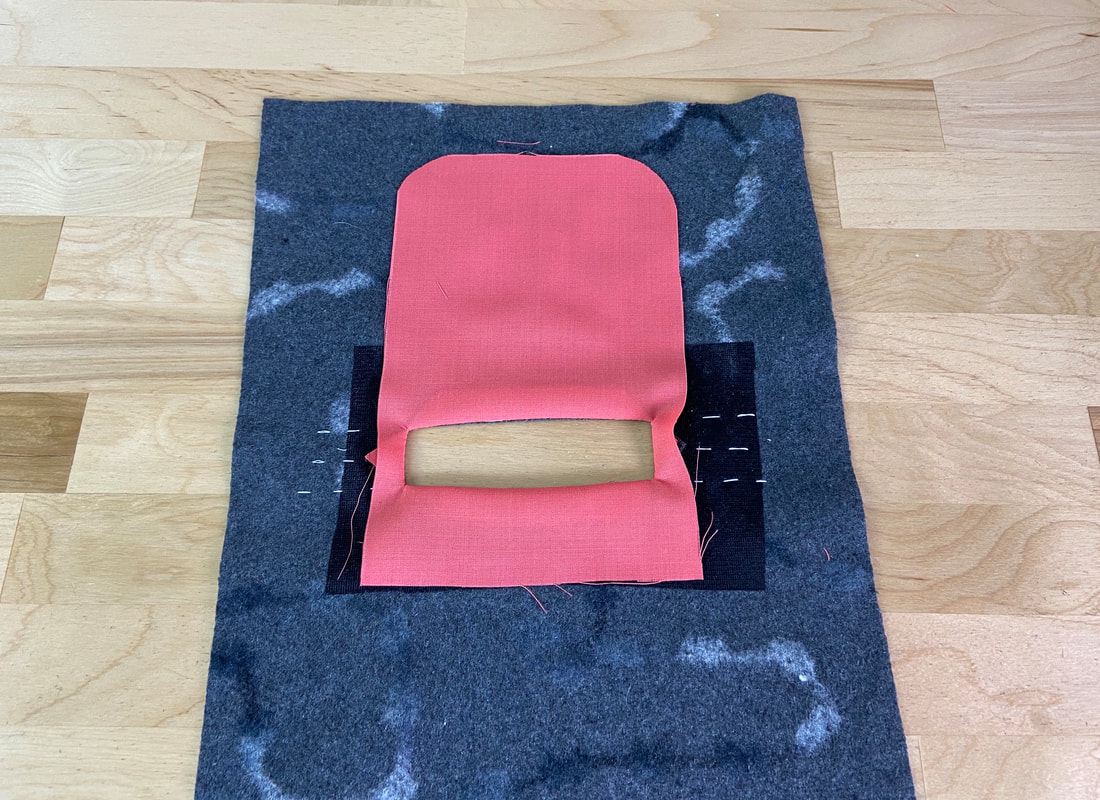
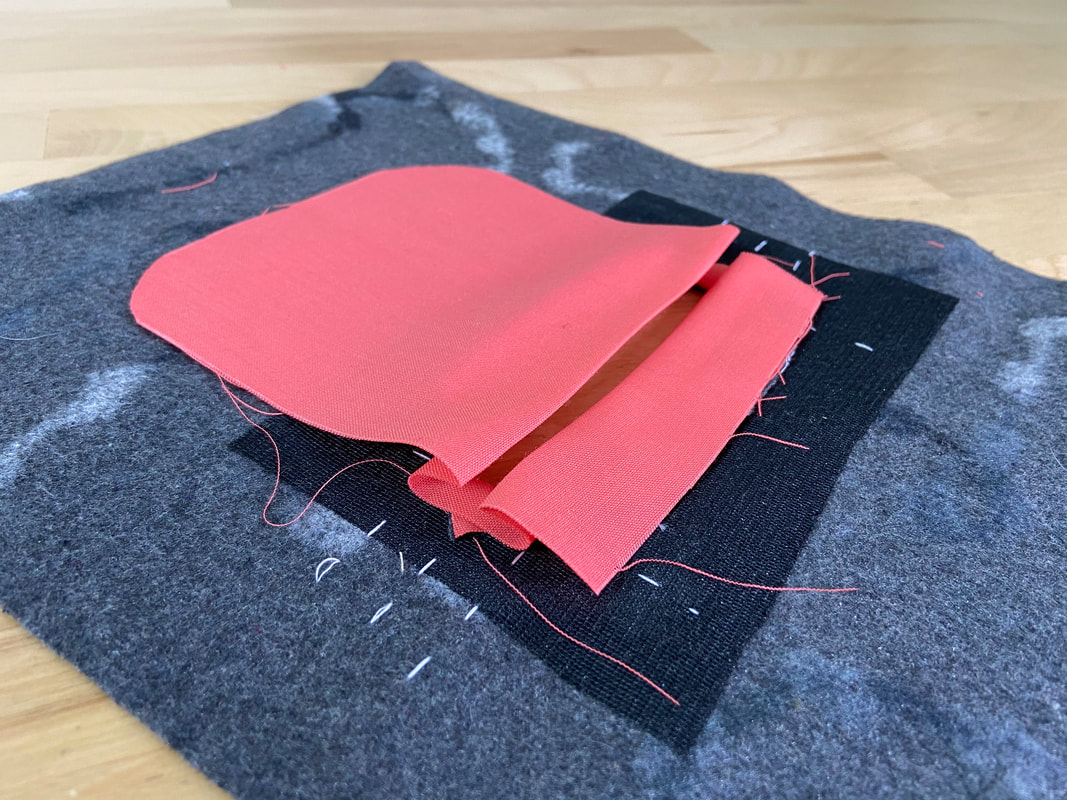
The large pocket piece is stitched to the slash pocket opening first. This layer is then folded from both bottom and top over the opening to create the pocket's welt-like folds.
During this process, the resulting folds should have an equal width and abut at the center of the pocket opening. For that reason, it helps to first, crosscheck the folded edges on the right side of the application before finally securing them by ironing and a hand-applied (temporary) whipstitch (visible in the image below).
During this process, the resulting folds should have an equal width and abut at the center of the pocket opening. For that reason, it helps to first, crosscheck the folded edges on the right side of the application before finally securing them by ironing and a hand-applied (temporary) whipstitch (visible in the image below).
|
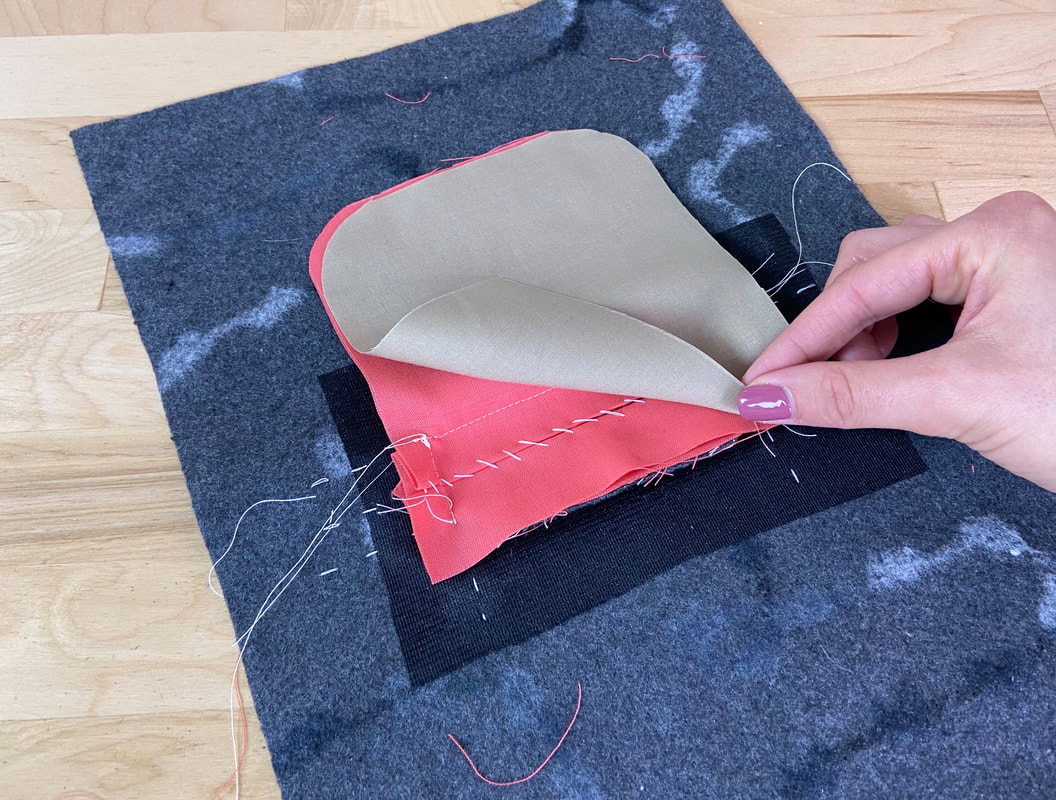
The functional bound application is completed by stitching the remaining smaller pocket piece to the one already attached to the garment. If the dimension ratios are followed correctly, the size of both pocket pieces should be identical at this point with all outer edges matching perfectly.
