
How To Finish Patch Pocket Corners By Mitering
When sewing unlined square patch pockets, you may find yourself struggling a bit with the corner seam allowance.
While square corners can be simply folded in a linear fashion and topstitched, you'll find that this simple approach can often leave some of the seam allowance raw edges poking through at the finished pocket corners.
To avoid this issue and facilitate the alignment and topstitching process, you can use a simple mitering technique to enclose the corner seam allowance prior to aligning and permanently attaching the patch pocket.
|
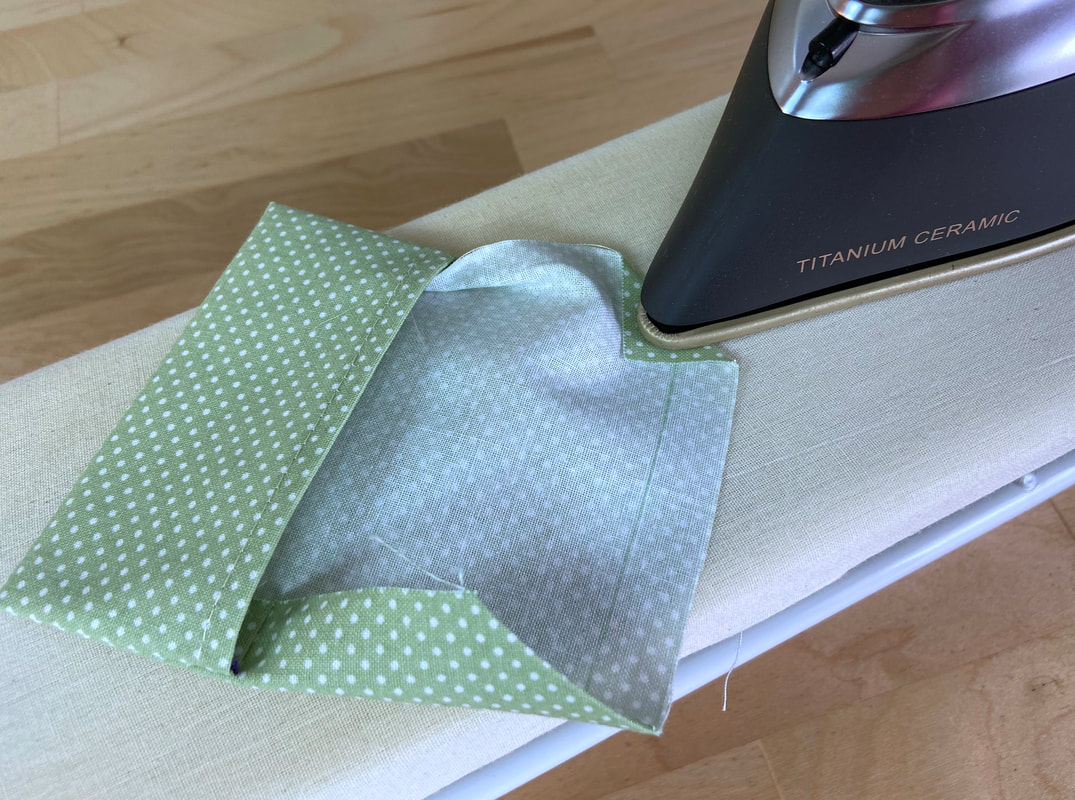
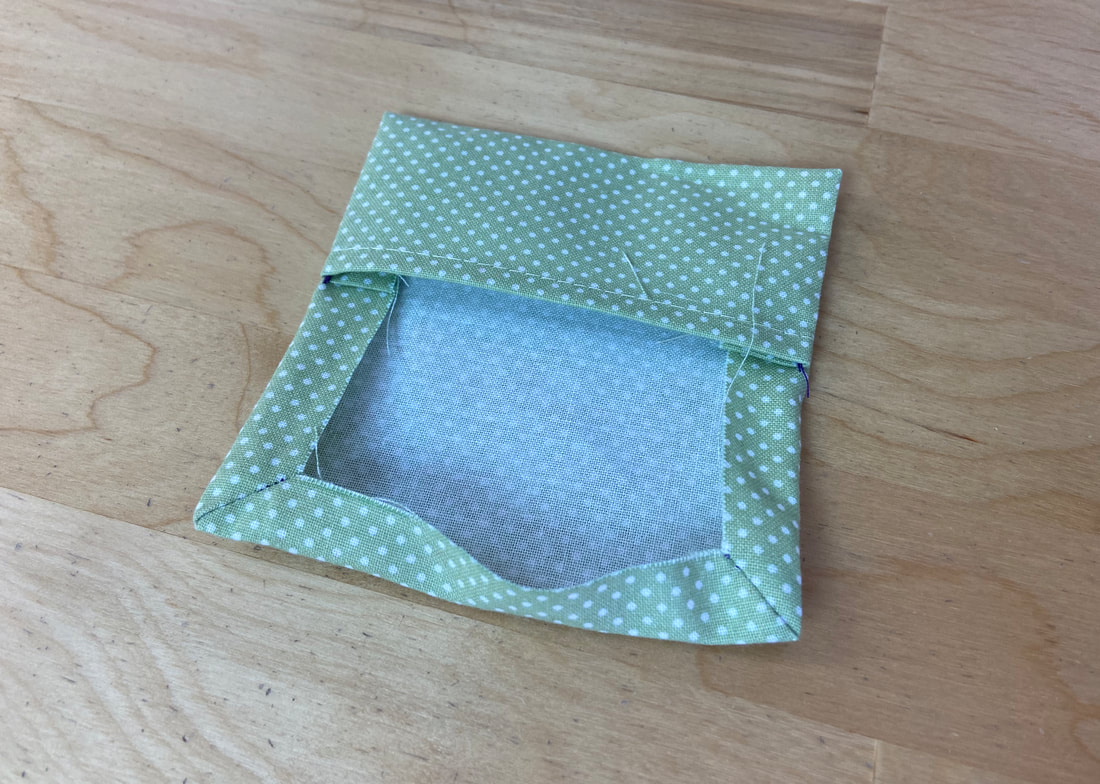
1. For added comfort in the mitering process, clean-finish the top patch pocket edge first. Once that's out of the way, fold and iron the raw fabric corner diagonally toward the wrong side of the pocket. The finished pocket corner should fall on this folded line thus it helps to transfer the pocket's seamlines directly on the pocket layer's wrong side.
As a result, the ironed folded edge should form a visible crease line which will be used in the stitching process below:
As a result, the ironed folded edge should form a visible crease line which will be used in the stitching process below:

|
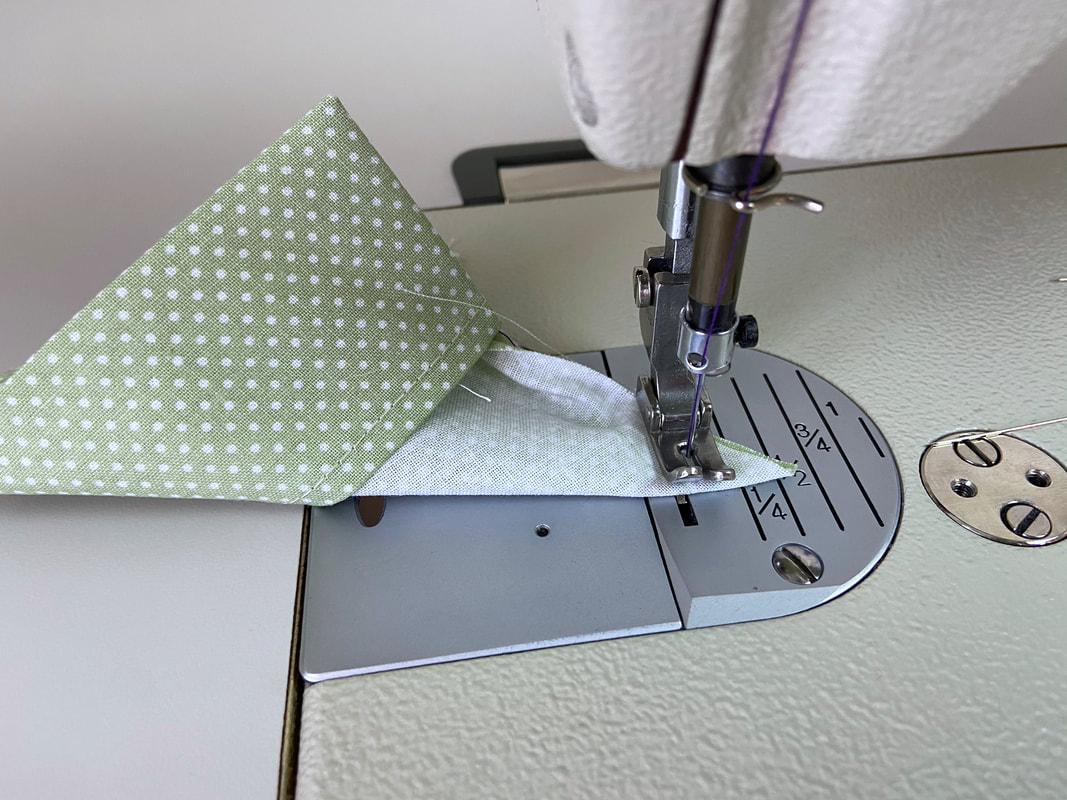
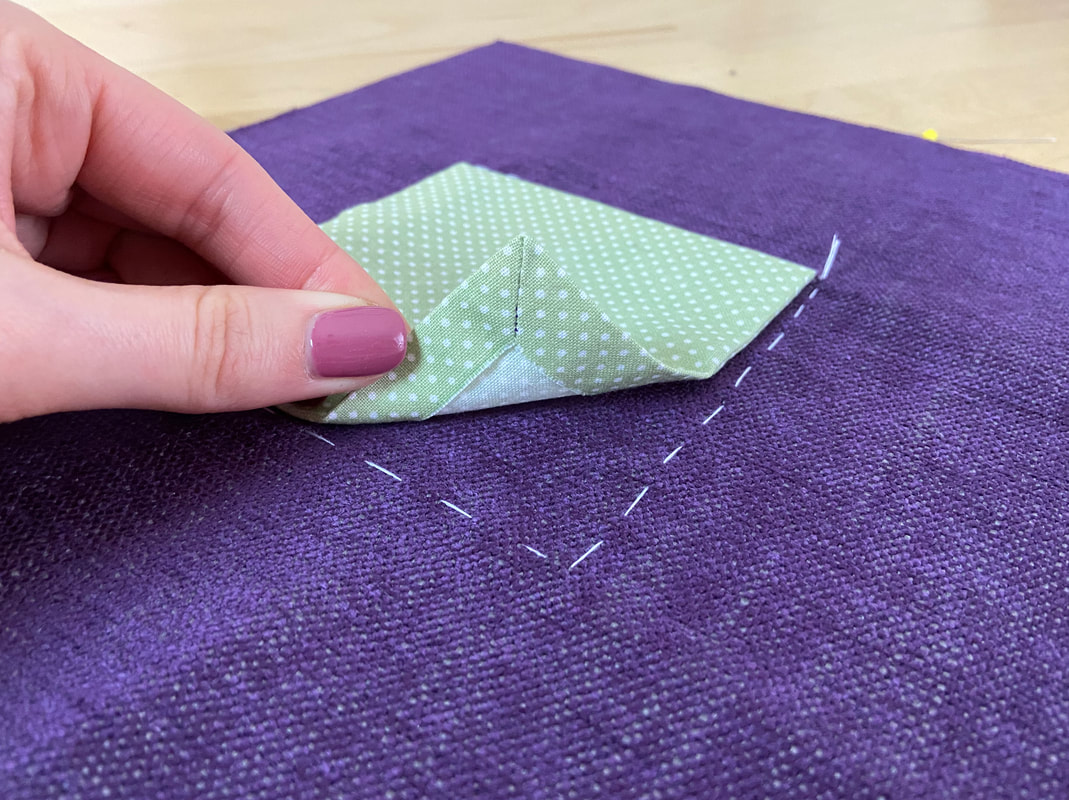
2. Fold the fabric corner with face sides touching such that the diagonal crease line overlaps and matches as shown above. The pocket's horizontal edge should align with its vertical edge. Insert a pin perpendicularly to secure.
|
3. Starting from the fabric raw edges, stitch directly on top of the diagonal crease line toward the folded edge (pocket corner). Backstitching at both ends to stabilize. Repeat on both pocket corners.
|
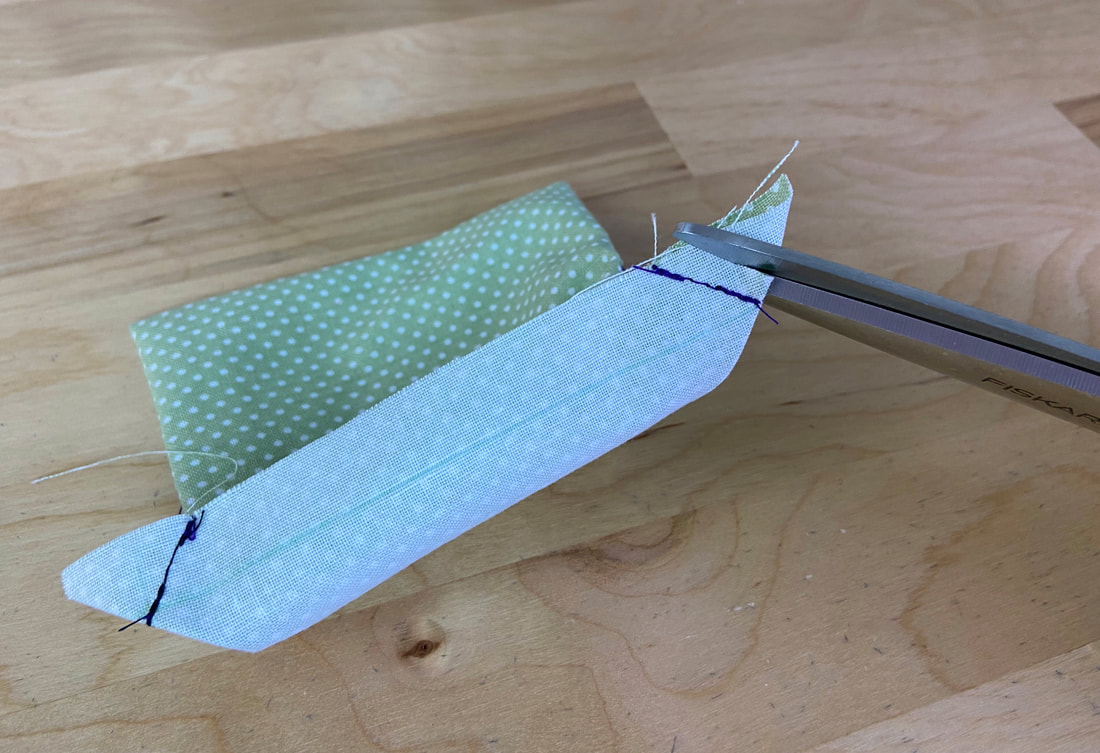
4. Trim the excess seam allowance to about 1/4".
|
5. Trim into the corner and iron the seam allowance open to flatten the seam.
|
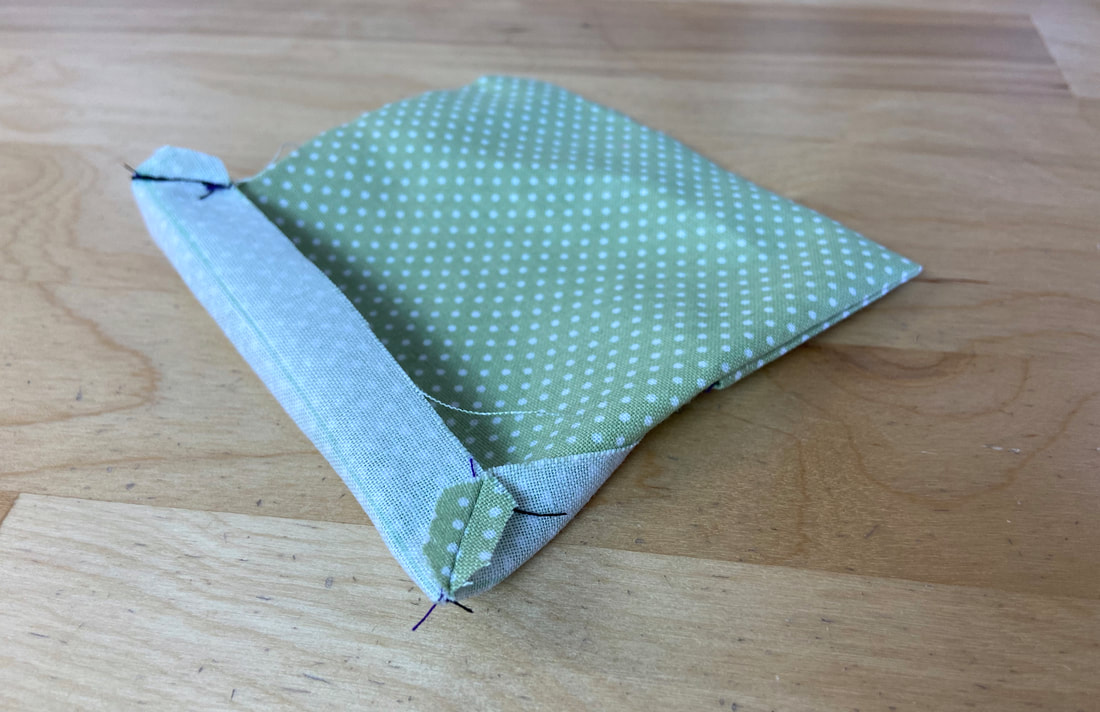
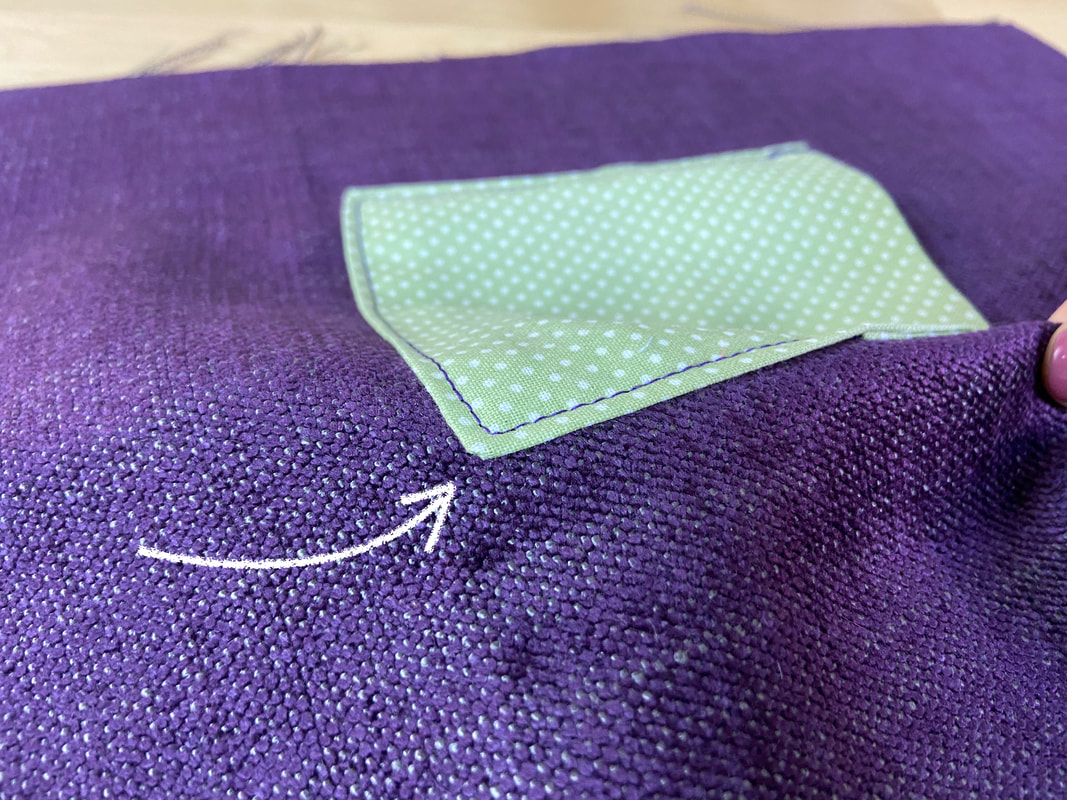
6. Flip the two mitered corners on their face side- the diagonal seams should correspond to the pocket's wrong side. As a result, you should have well-defined, smooth, bulk-less pocket corners.
|
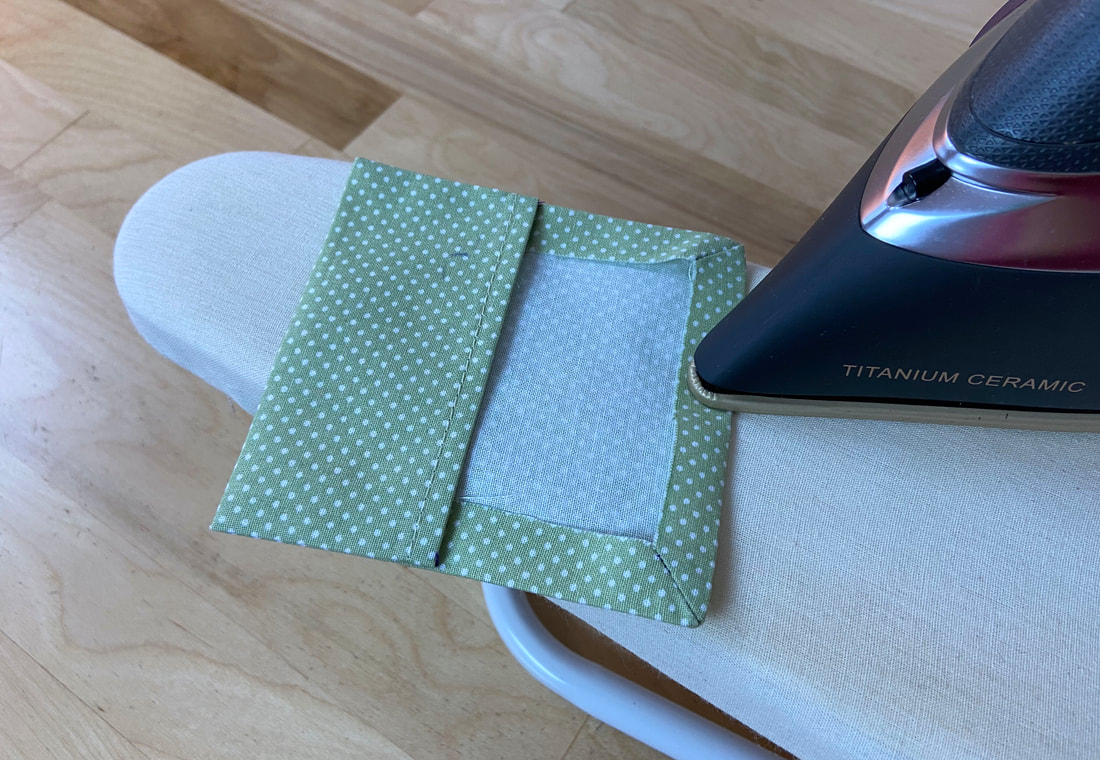
7. Prior to aligning and stitching the patch pocket, iron the finished edges evenly along the pocket's bottom and sides. The seam allowance should be folded and ironed at an even distance throughout.
|
|
The mitered corners will securely encase all raw edges minimizing the risk of fabric fraying and preventing raw edges peeking from the finished pocket's corners.
