
How To Clean-Finish A Patch Pocket's Opening Edge
When sewing a patch pocket, its opening (horizontal edge) should not only look clean, it should also be durable enough to withstand significant use and strain during its lifecycle. This edge is always clean-finished first, prior to topstitching the rest of the edges to the garment.
Below is a common way to finish the opening edge of a single-layer patch pocket using a built in facing extension.
Note: This extension is measured into the length of the pocket layer. Once the extension is folded over the pocket opening, the resulting pocket length should be as desired in the final application. In this tutorial, a 1.5" extension is built into the pocket layer.
|
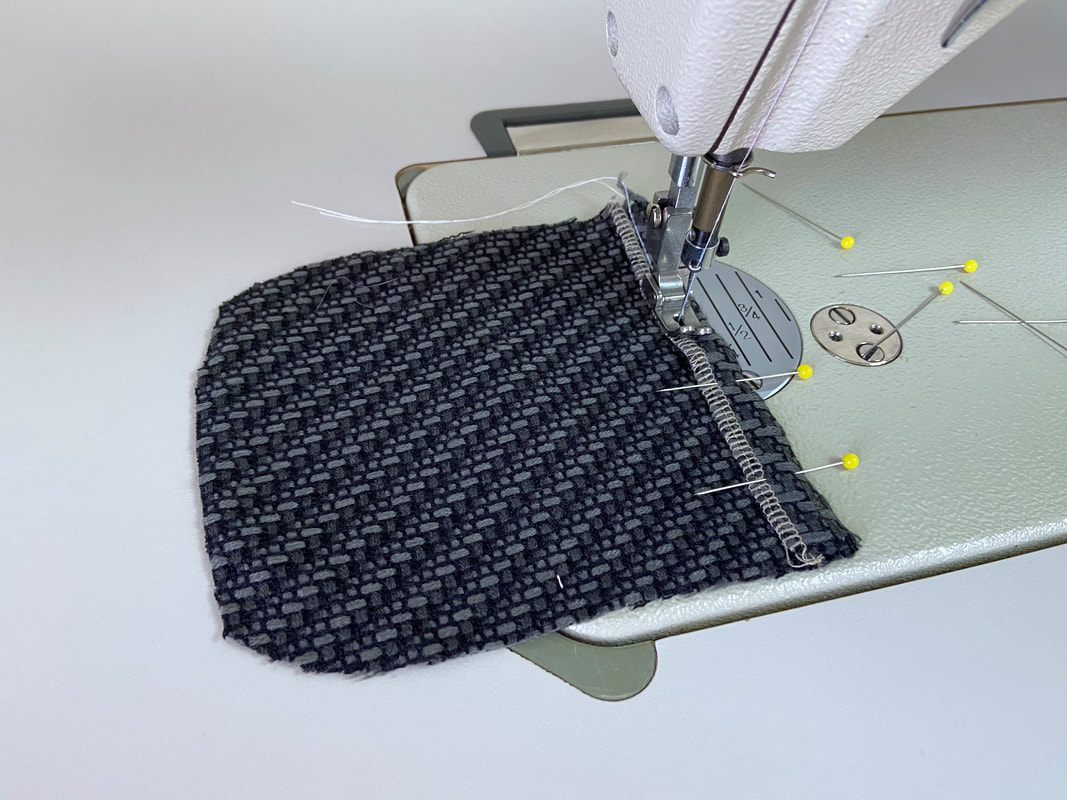
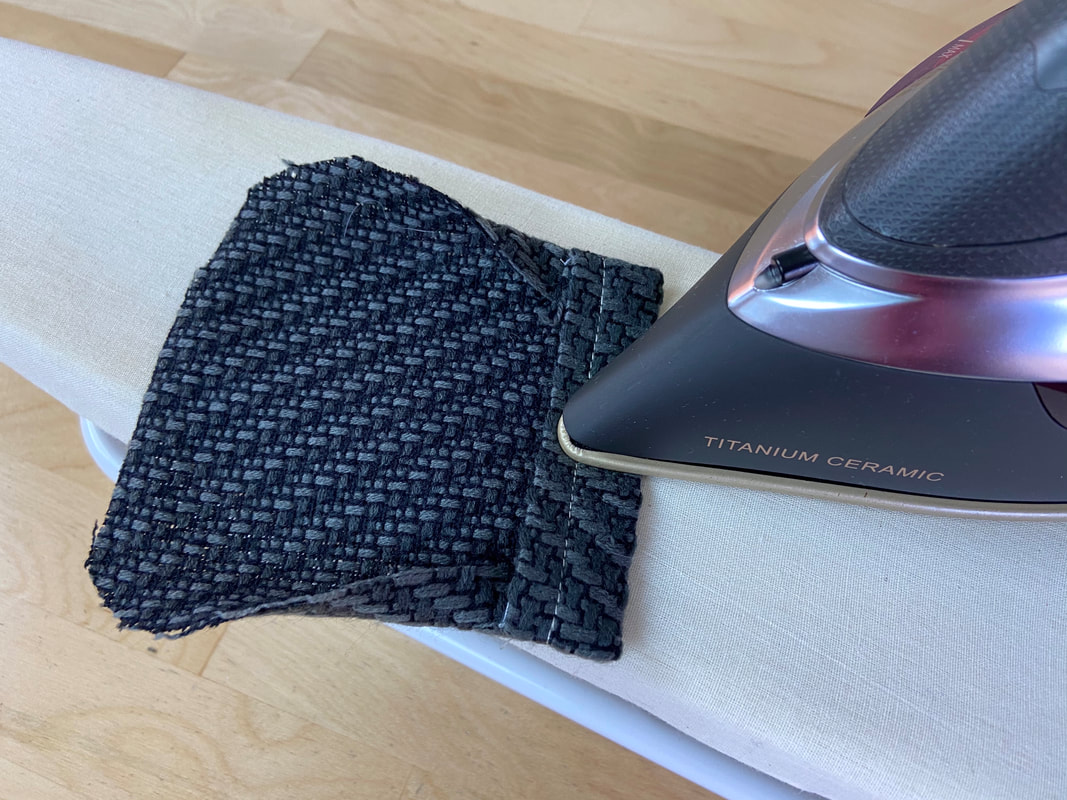
1. Start by applying a serging or zigzag stitch to the pocket's top horizontal raw edge.
Next, fold this edge toward the pocket's wrong side at 1/2", iron and pin it to secure. Working on the pocket's wrong side, topstitch the folded edge down, following the serging/zigzag as a stitching guide.
Remove each pin as you approach it- you should never stitch directly on top of pins.
Next, fold this edge toward the pocket's wrong side at 1/2", iron and pin it to secure. Working on the pocket's wrong side, topstitch the folded edge down, following the serging/zigzag as a stitching guide.
Remove each pin as you approach it- you should never stitch directly on top of pins.
|
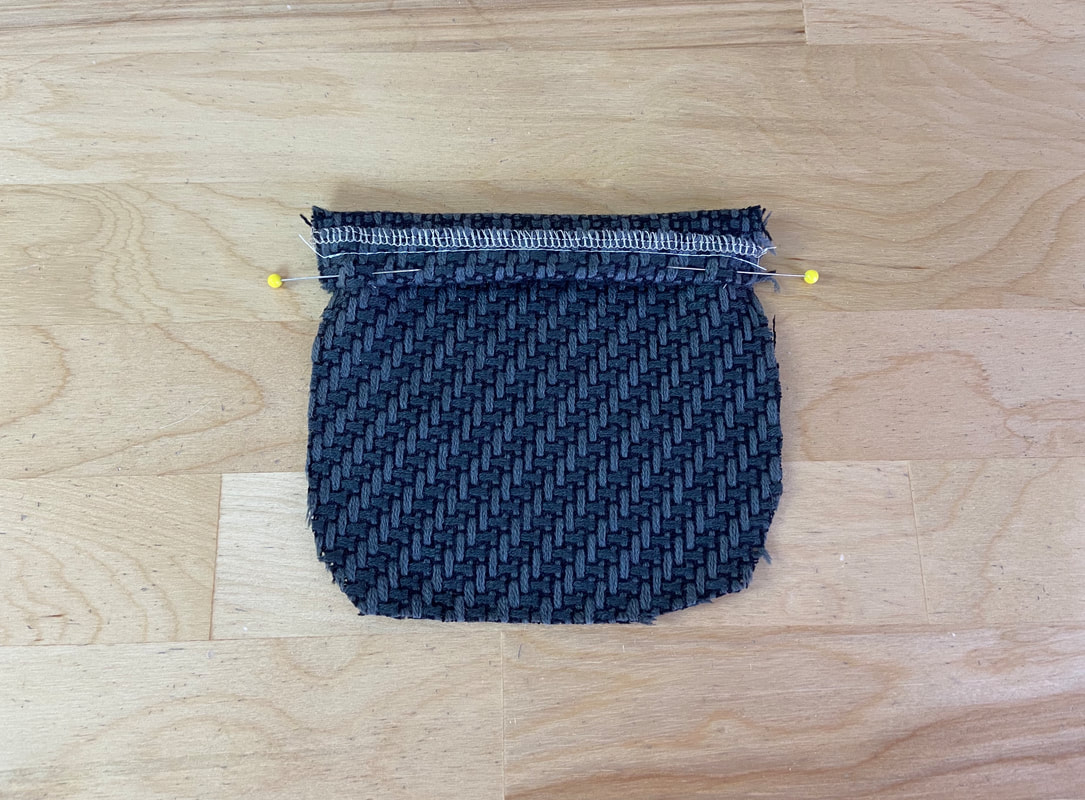
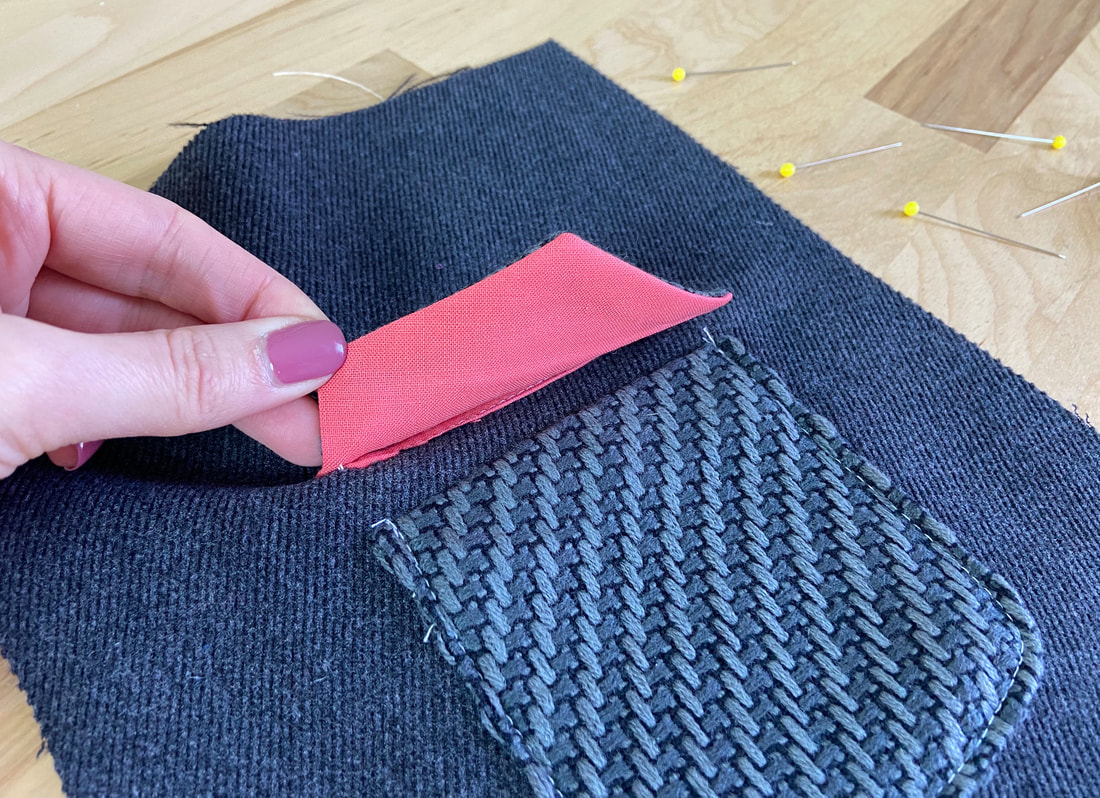
2. Fold the extension at the remaining 1" (1/2" was already folded in the step above) toward the fabric's face side and insert pins perpendicularly at each folded end.
|
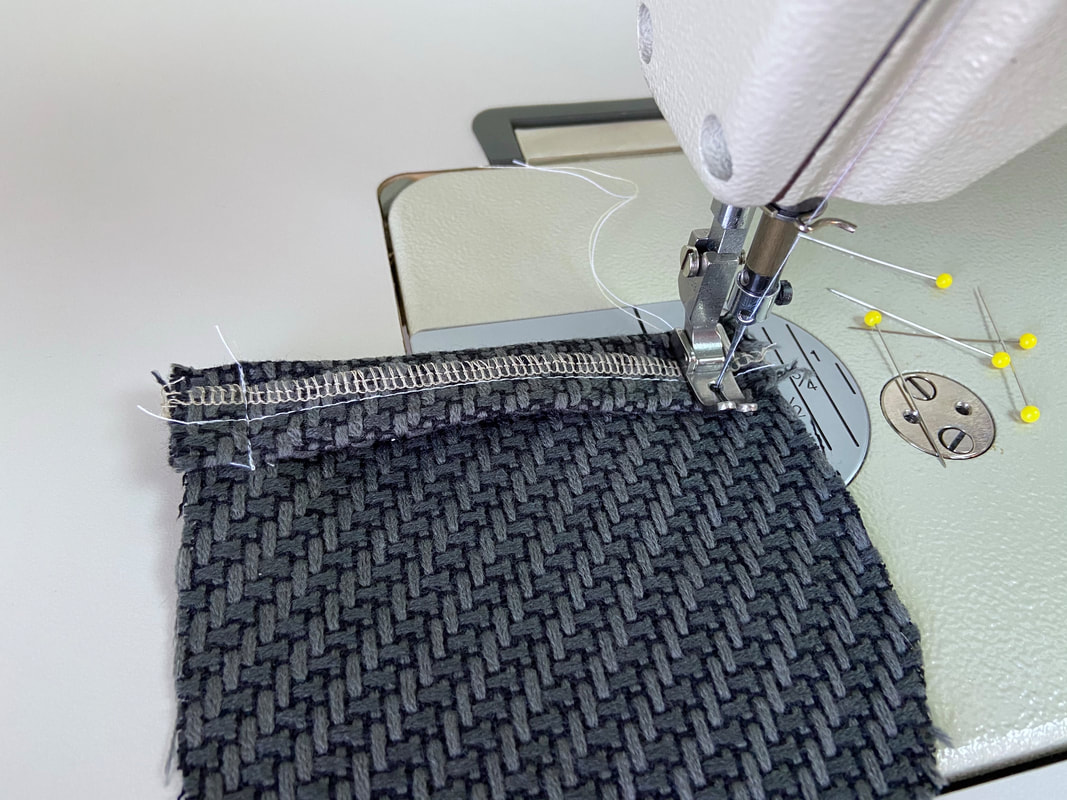
3. Stitch each folded end at the designated seam allowance (1/2" in this case). It helps to backstitch at the beginning and end of your stitches as this will provide added durability and comfort during the remaining application process.
|
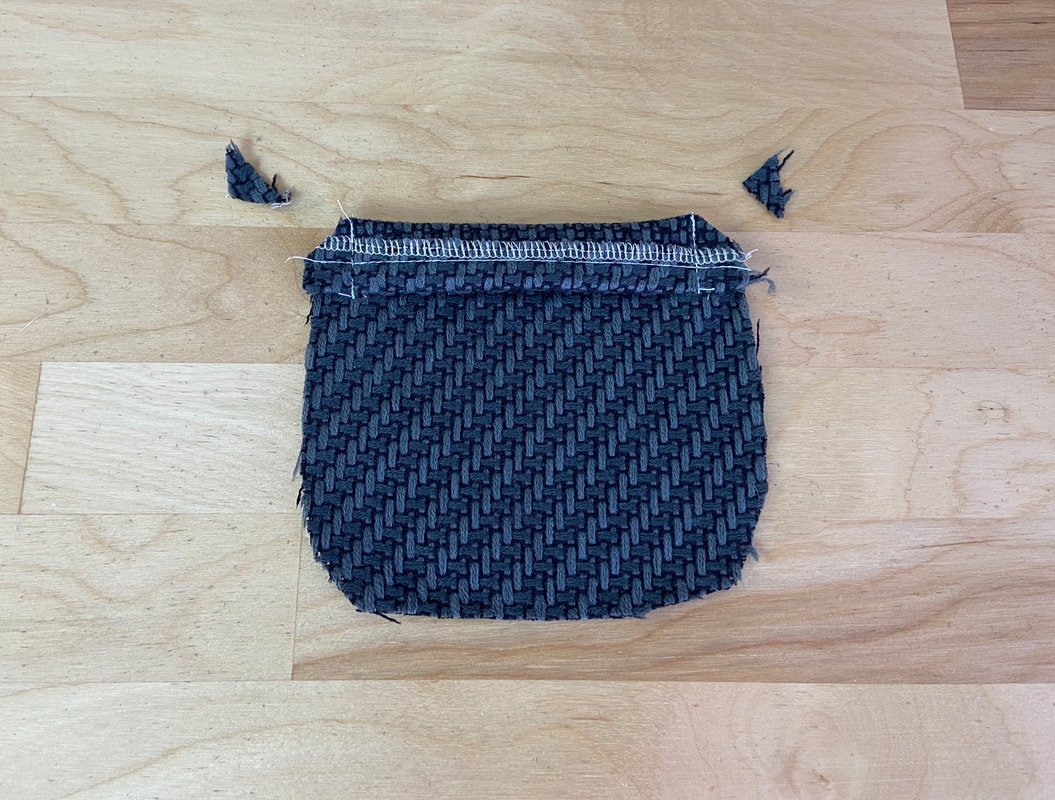
4. To eliminate bulk and thickness at the finished corners, trim the seam allowance excess diagonally at each corner as shown above. Be careful not to accidentally slash through the stitching.
|
5. Turn the folded edge on its right side to expose the clean-finished corners and iron the resulting folded edge. The extension should be folded evenly at a 1" distance throughout.
|
In the finished patch pocket application, the opening edge should be clean and durable, and in this case, have no visible topstitching along its folded edge. This technique securely encases all raw edges, preventing them from poking out or unraveling at the top corners.
