Mini Tutorial: How To Finish Faced Corners At The Hemline By Hand
You'll come across having to finish faced corners at the hemline when working with both lined and unlined open garments (usually open-front). The idea is to clean-finish each bottom corner so that its edges blend smoothly into the rest of the garment's hemline and vertical faced opening.
Perhaps the most intuitive way to handle faced corners is by using a simple folding and hand-applied blind stitching technique. In this case, a slipstitch is used to seal the facing edges for an invisible-stitch application. This is especially true when using matching color thread.
In the example below, un unlined garment is used.
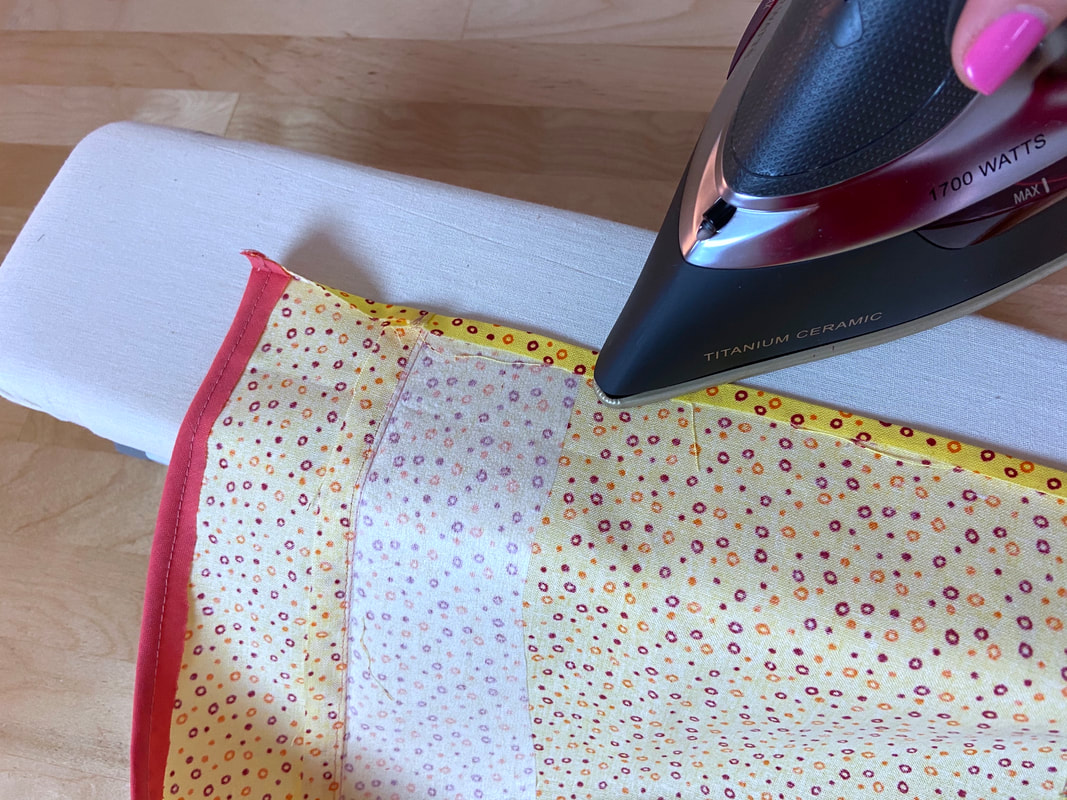
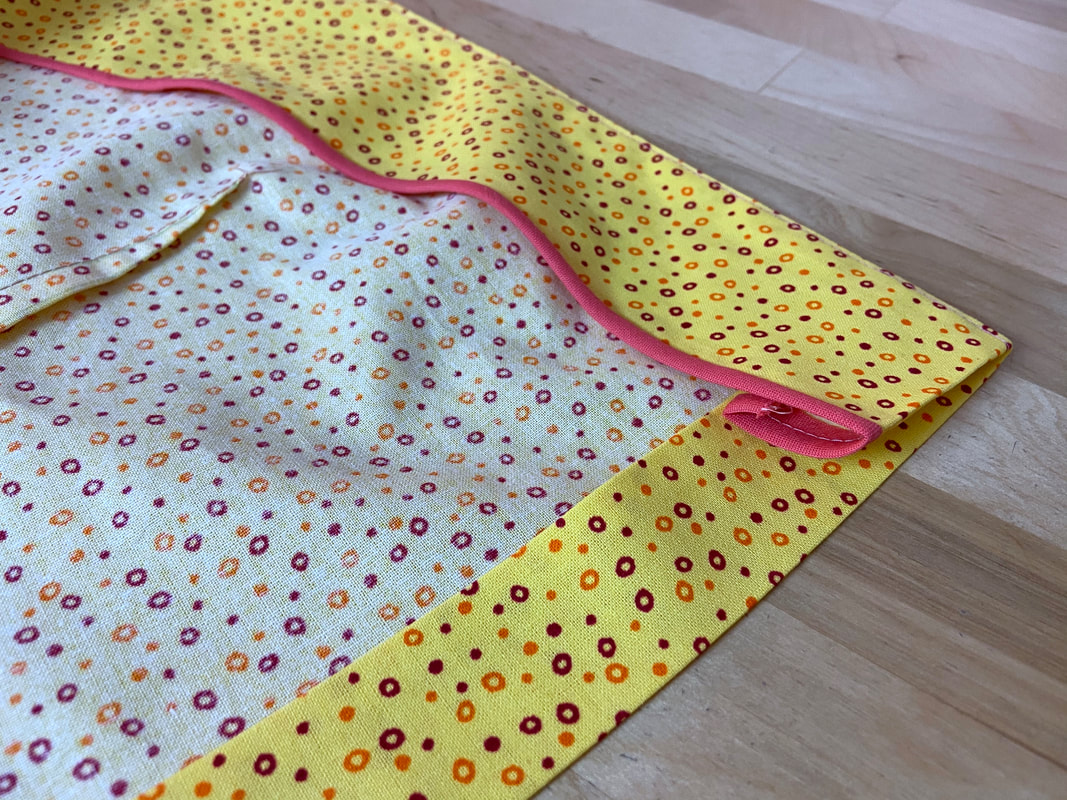
1. Start by extending the facing away from the garment layer and fold the hem allowance edge toward the wrong side of the garment at about 1/4" in. Iron as you fold to crease the fold line. Repeat along the entire edge, including that of the facing.
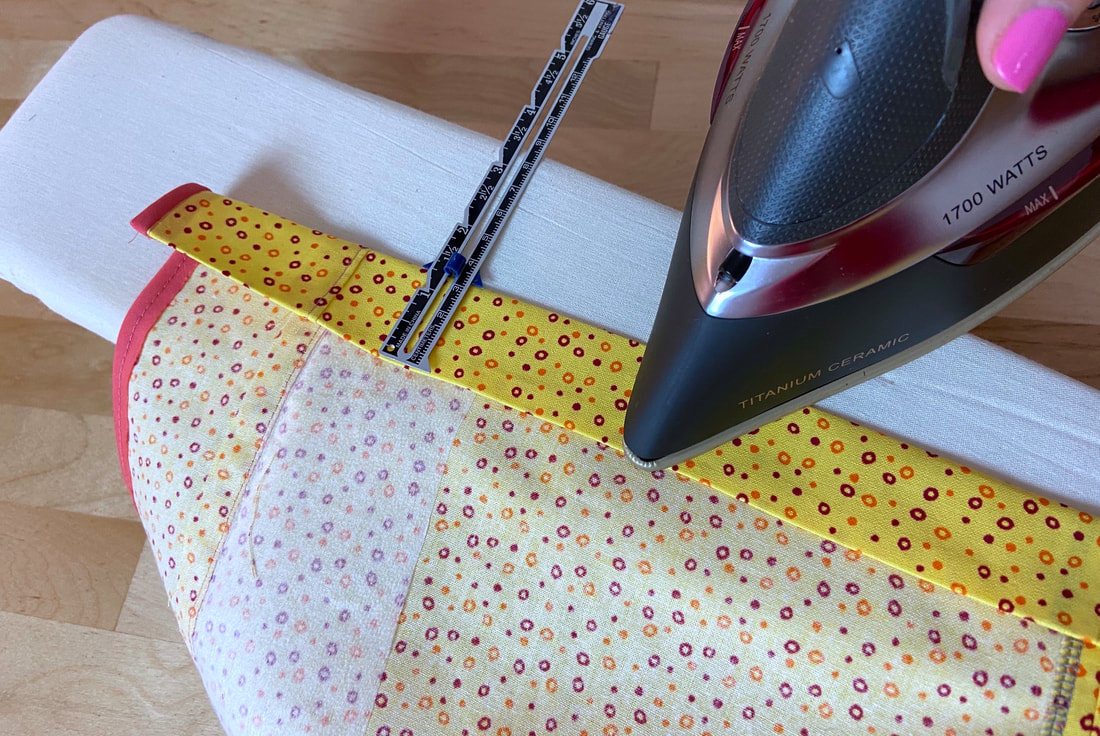
2. Next, fold the hem allowance up at the remaining distance (measure without the 1/4" distance folded in the step above) and iron as you fold to crease the final hemline. When the entire hem allowance portion is folded inward, the resulting fold line corresponds to the garment's designated hemline.
If your hemline is not directly marked on the wrong side of the fabric, use a gage pointer or a ruler to measure as you fold.
If your hemline is not directly marked on the wrong side of the fabric, use a gage pointer or a ruler to measure as you fold.
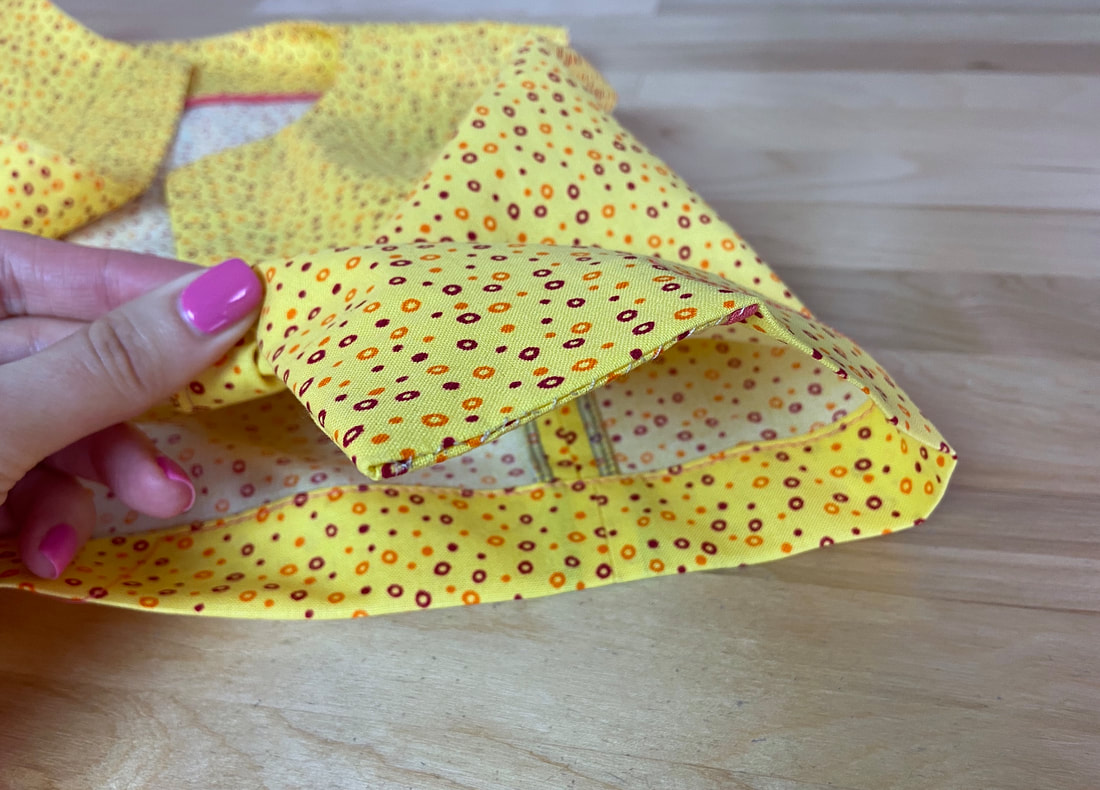
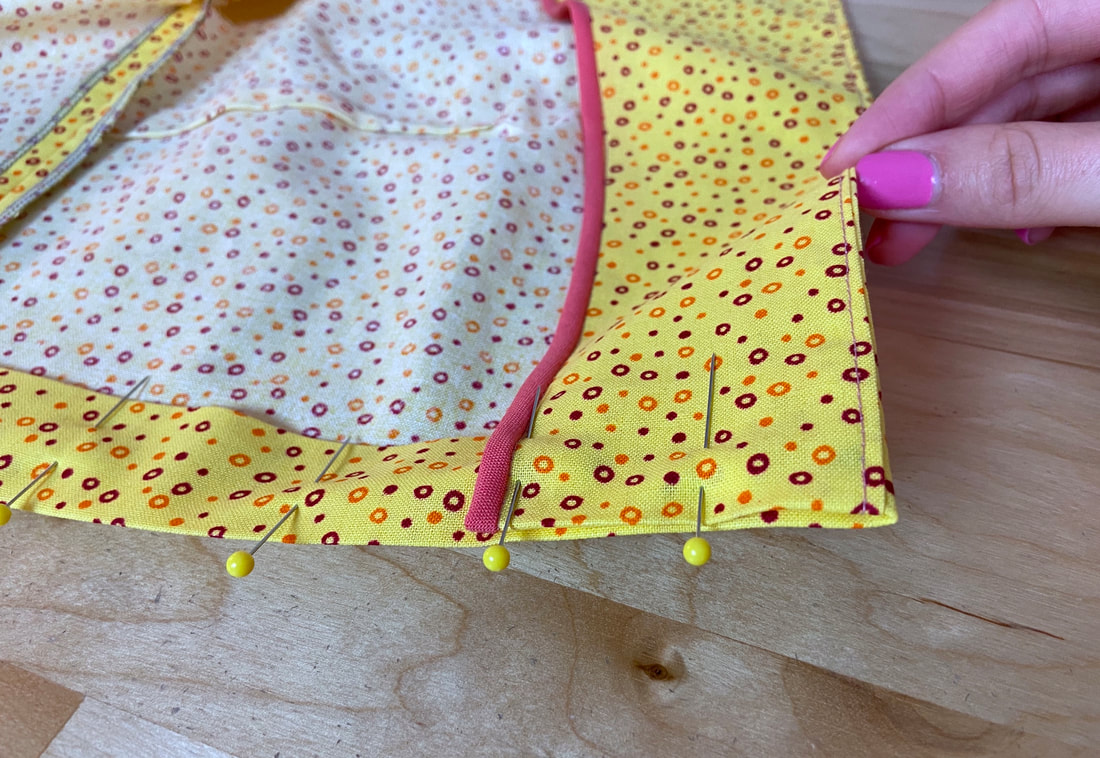
3. Once the entire hem allowance is pressed, bring the front opening facing back in its natural position (on the wrong side of the garment). In this position, all hem allowance layers will be encased on the facing's wrong side, creating a clean, sharp corner.
4. Insert pins perpendicularly through the entire length of the hemline including the facing layers as shown above.
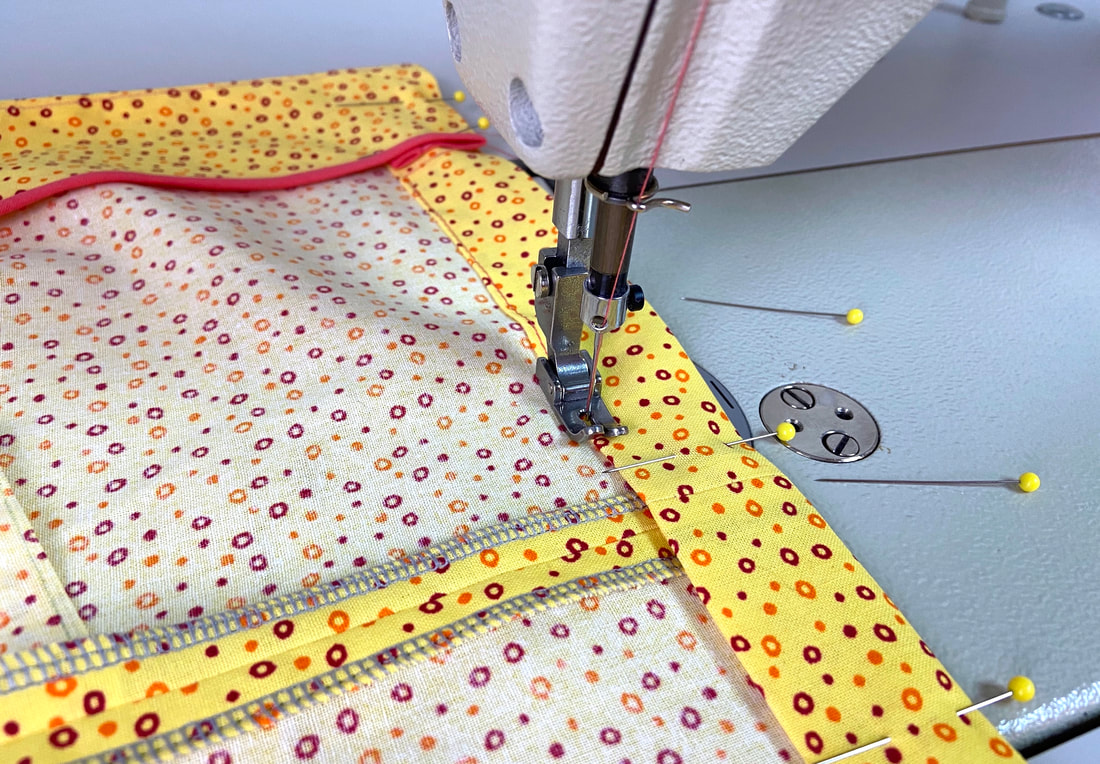
5. Before sealing the faced corner, clean-finish the garment's hem. In this case, the double folded hem allowance is topstitched to permanently encase all raw edges. Begin and stop this stitch at the facing's open edge and not the open edge of the garment.
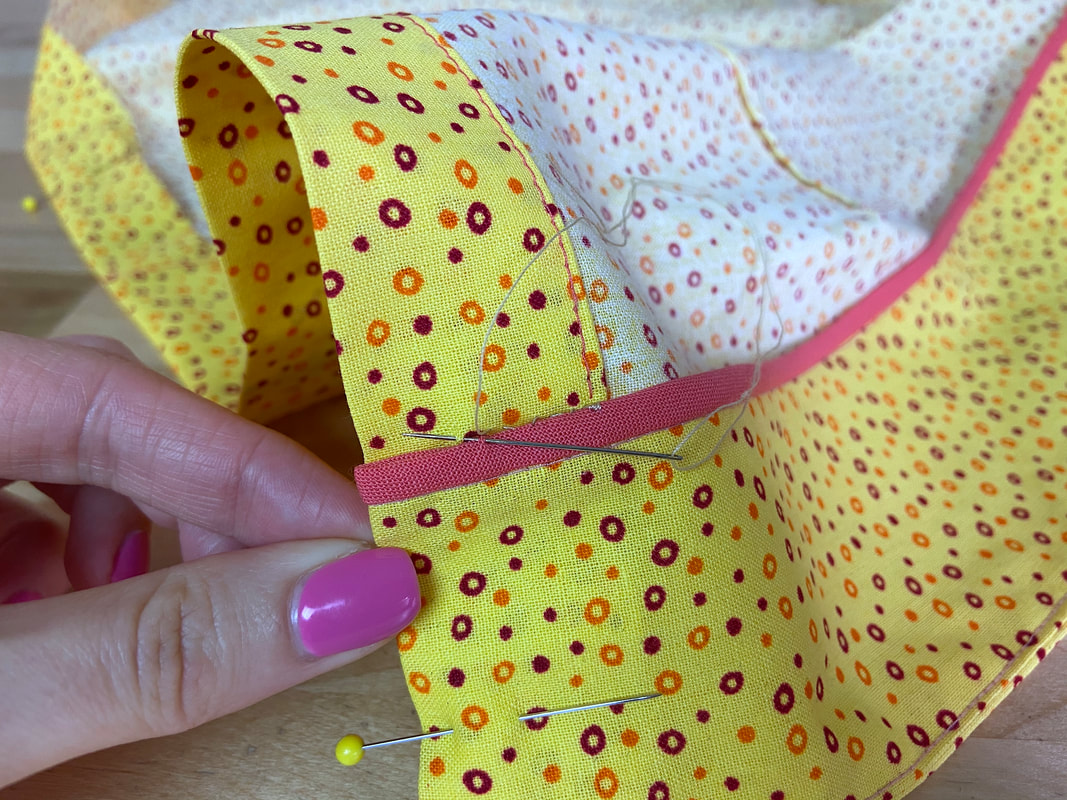
6. To seal the facing unit at the hem, start by slipstitching the facing's vertical open edge to the hem allowance layer underneath. A slipstitch is applied through facing's edge, then catching 1-2 threads from the fabric layer underneath.
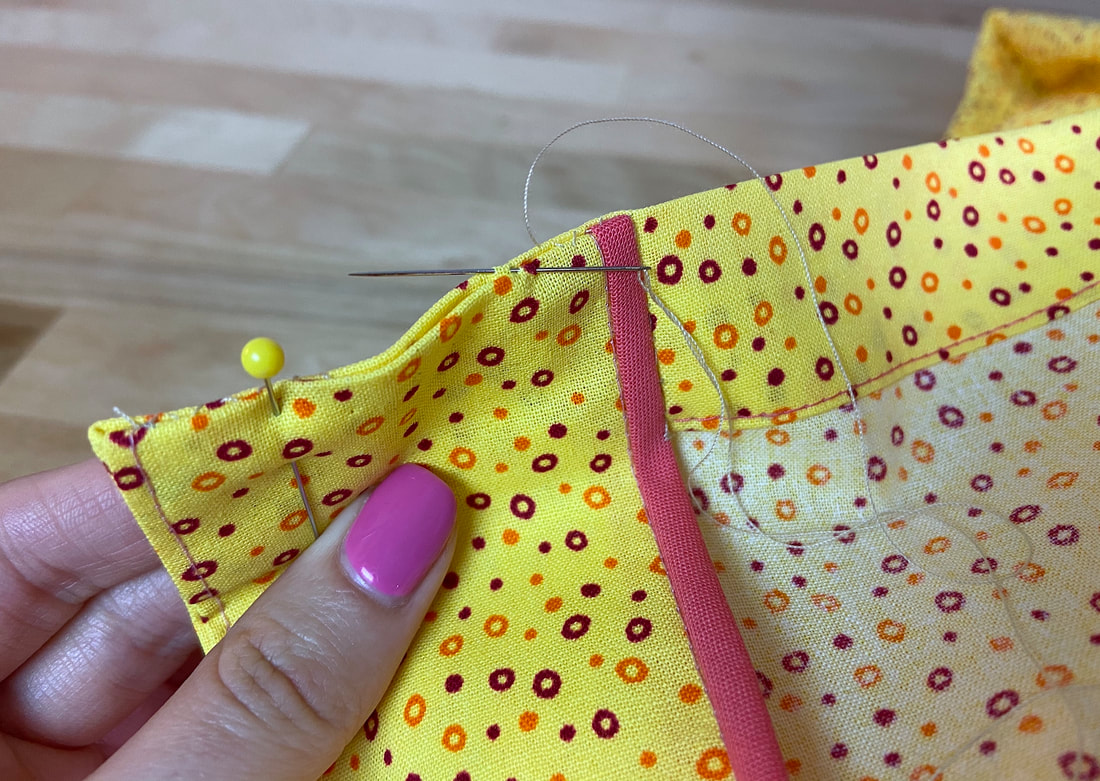
7. To complete the faced hemline, apply another slipstitch to attach the folded edge of the facing to that of the garment's hemline. Continue slipstitching along the entire facing edge alternating the stitches from fold to fold.
Note: When slipstitching two fabric edges together, the resulting stitch is called an even slipstitch.
Note: When slipstitching two fabric edges together, the resulting stitch is called an even slipstitch.
A hand-finished faced corner allows the hemline to be extended downward if the garment requires lengthening at any point in the future.

