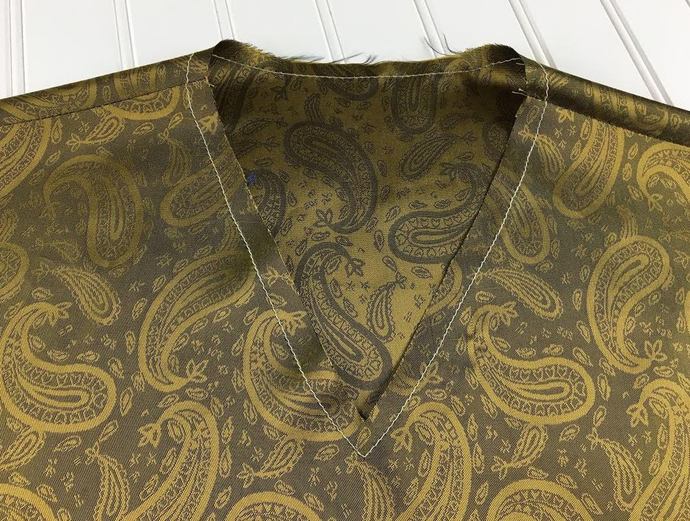
 If you are in the process of learning how to sew, staystitching is definitely a term you've already come across. Just as it sounds, the words stay and stitch combined mean stitching something that has to stay in place. While the meaning of the word is quite clear, understanding the use of staystitching in sewing can be a bit more tricky. In this sewing tutorial, we'll teach you everything you need to know about staystitching: When to use it; how to stitch it; and the areas that staystitching is required on a garment in the sewing process. What Is Staysticthing? Staystitching, used on woven and knit fabrics, is a straight directional machine stitch applied during the sewing process along edges that run the risk of stretching or losing their shape during handling in the sewing process. Staystitching should be applied as a first step in sewing- right after you've unpinned the fabric from the pattern and before you begin sewing or adding interfacing. You will have to staystitch all the vulnerable edges of your fabric pieces. Staystitching is not actually a stitch or "seam" that is visible on the finished garment. It is simply a step used in the construction process in order to keep curved or sensitive edges from loosing their designated shape. Once the garment is complete, the staystitch will either be hidden on the inside of the garment or enclosed in binding, facing or lining.  Here are some areas of a garment that you should never forget to staystitch: -All raw neckline edges (includes curved, V-neck, sweetheart, square etc.) -Along corners (like V-necks) with clipped seam allowance. -Raw fabric edges of curved waistlines on bottoms and tops. -Some bias-cut side seam edges that are prone to stretching and pulling in the sewing process: Staystitching is applied to maintain the grain. -The seam edges of vulnerable/fine fabrics like specialty lace and silk chiffon. -All seams of very stretchy knits or loosely woven fabrics. A staystitch is a directional stitch that uses a regular stitch length. It is usually applied at about 1/4" away from the raw edge. Knit fabric staystitching on all seams is often needed in order to maintain shape and prevent the fabric from over-stretching which can make it very difficult to sew. After staystitching knit fabrics along the seam lines, place the patterns on top to ensure that all the edges match and the fabric didn't lose it's shape in the process. If the edges of the fabric pieces are longer than those of the sewing pattern, gently pull on the staystitching threads to bring the edges back to the original size. Vise versa, if the staystitching has tightened the edges too much, making them shorter than those on the sewing patterns, snip a few stitches with your seam ripper to release tension. Note: Although many find the armhole to be a vulnerable edge due to its curved shape, armholes that will be connected to a sleeve should NOT be staystitched. When you sew a sleeve to the armhole edge, you need to keep the most curved area (under the armhole) slightly stretched while you apply the machine stitch- this will ensure that during use, when you move your arms around, the stitch under the armhole has some stretch for extended durability and comfort. For that same reason, the seam allowance along the armhole should also not be clipped for tension release. To add more movement to a sleeve seam you may trim the seam allowance to a shorter width and clean finish the raw edge properly to achieve the most durability. Staystitching a V-Neckline 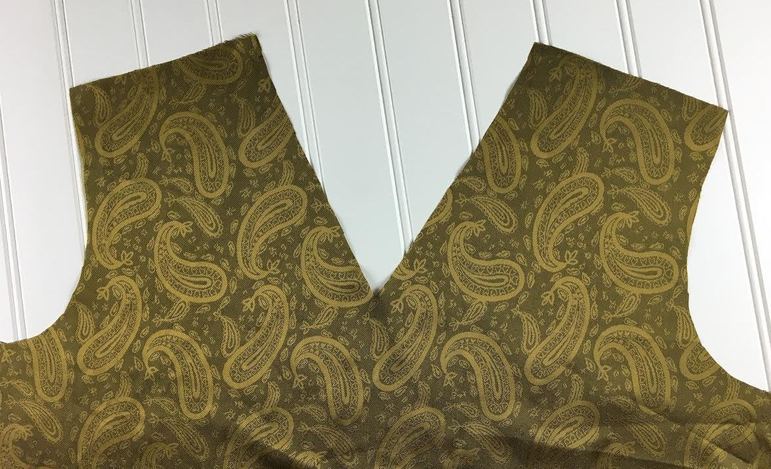 The seam allowance along the V-neckline is 1/2". 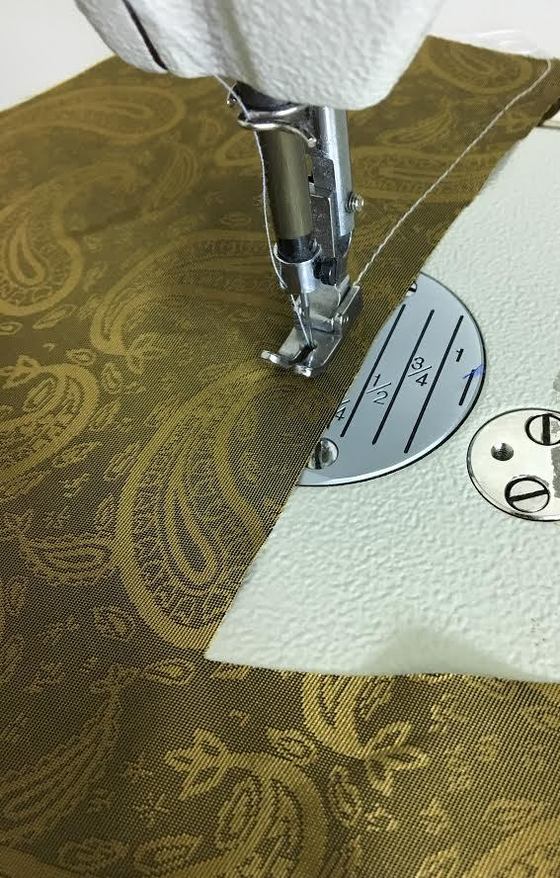 1. Starting at the shoulder seam, begin stitching along the neckline's raw edge at approximately 1/4" away from it. Staystitching should not be visible on the finished garment so you should always make sure that you're not stitching right on the seam line but at a shorter length above. 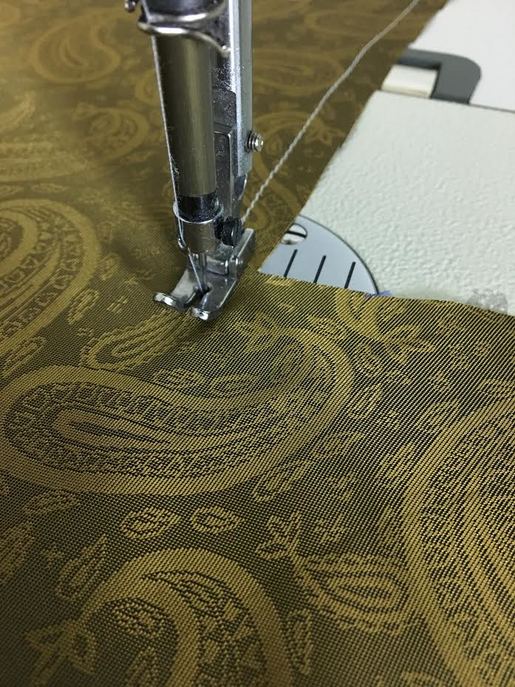 2. Continue stitching along the edge until you arrive at the V shape. Insert your needle parallel to the V-neck's angle as shown above. 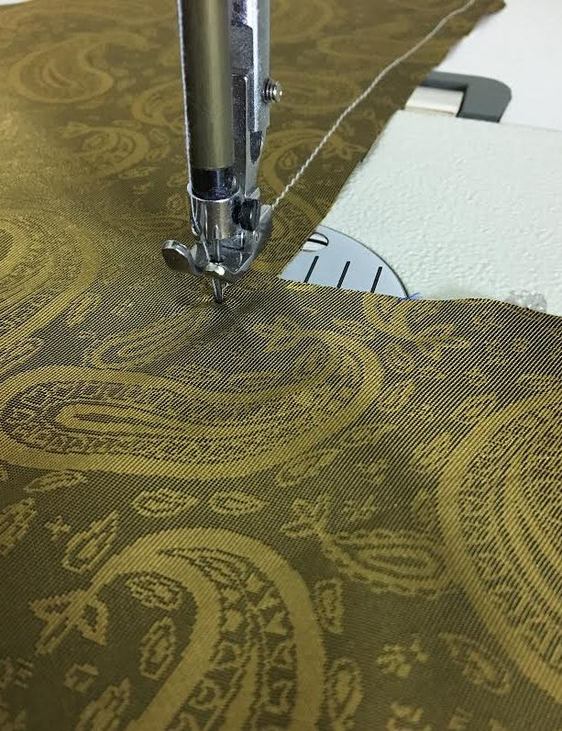 3. Keeping the sewing machine needle inserted, lift the presser foot. 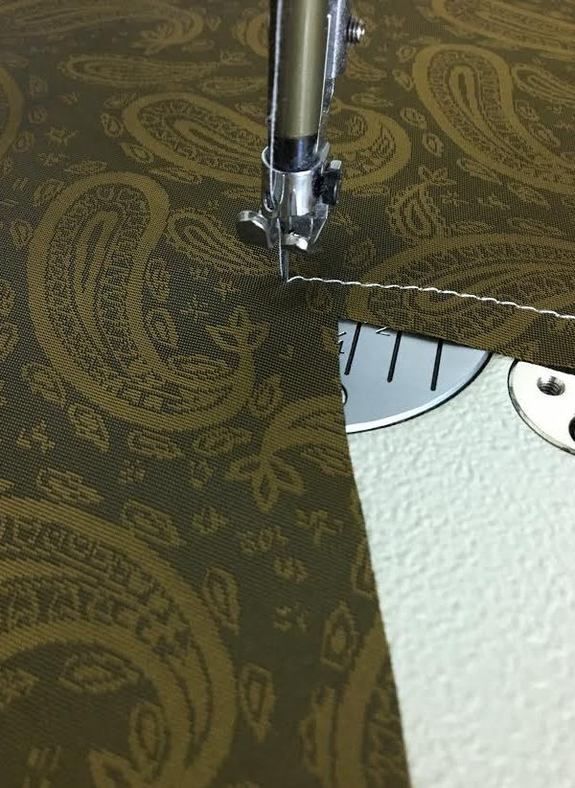 4. While the presser-foot is in the up right position, shift the whole neckline (keeping the needle inserted in the fabric) so that the other straight side of the V-neck is now aligned with the seam allowance guide. 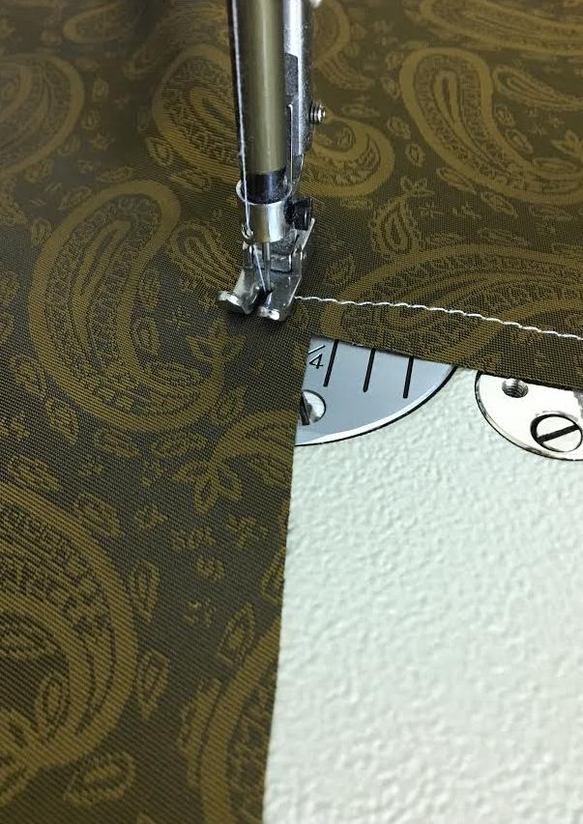 5. Drop the presser foot. 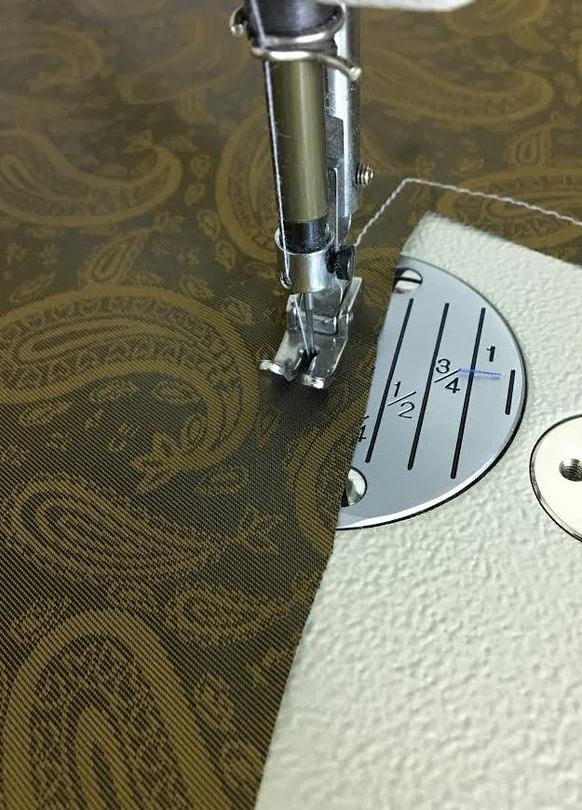 6. Begin straight stitching at the same seam allowance towards the other shoulder seam. 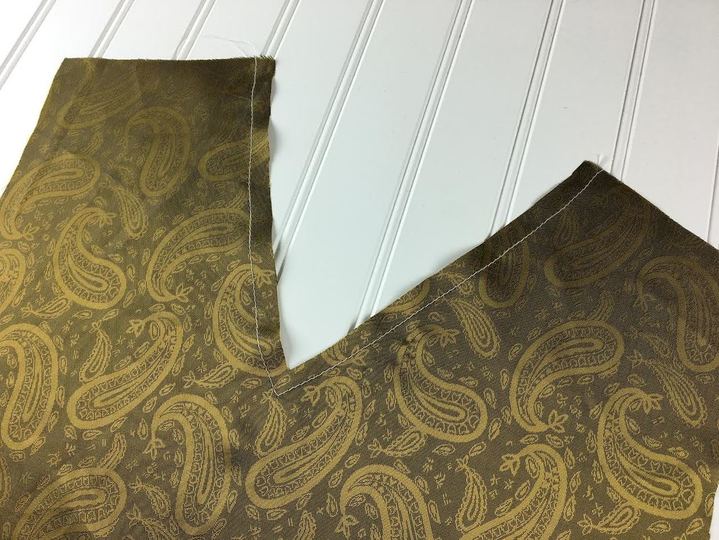 The final staystitch should be distributed at the same length from the edge along the entire neckline as shown above. The staystitch will stabilize the V-neckline and prevent it from stretching, especially at the more vulnerable V shape. Staystitching Along a Round Neckline 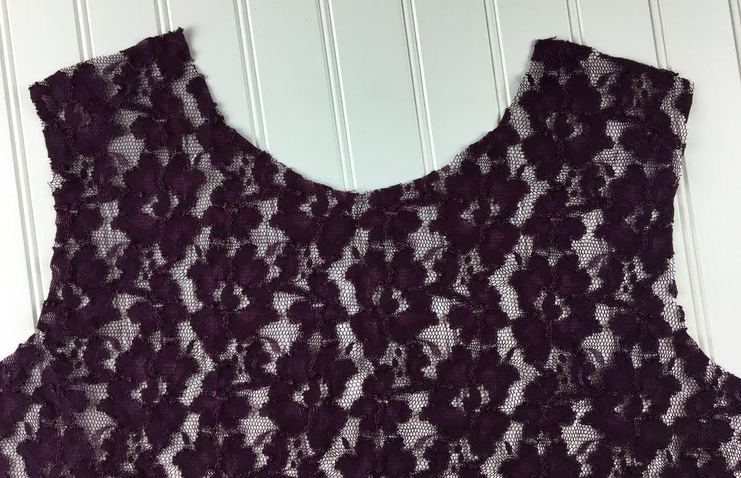 The seam allowance along the curved neckline above is 1/2" 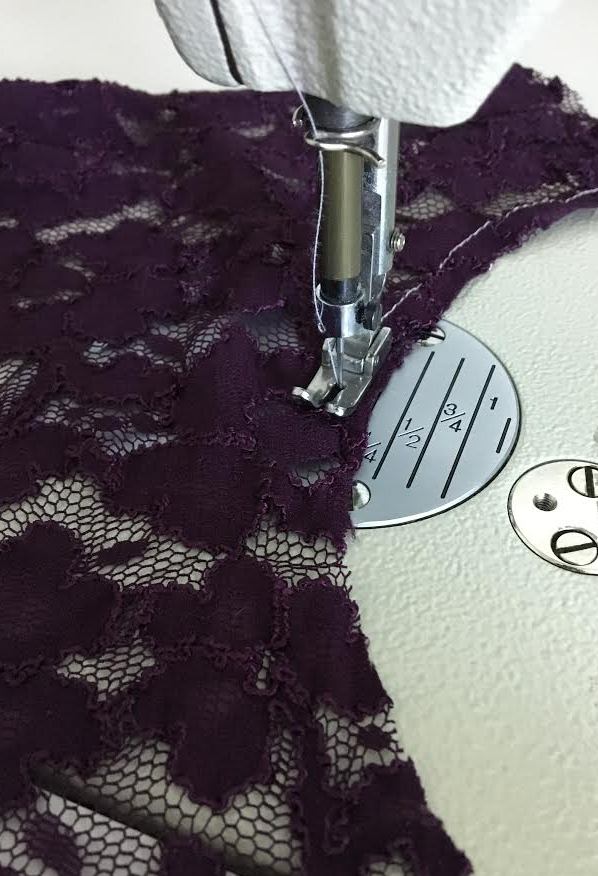 Just like the V-neckline, stitch away from the raw edge at approximately 1/4". Round necklines can be a little more challenging to staystitch for a sewing beginner because of the curved edge. Take your time and make sure the staystitch remains evenly distributed throughout.  On stretchier fabrics (like the stretch lace in our tutorial), be careful not to pull on the neckline while staystitching. Allow the fabric to naturally feed under the presser foot. Remember that your sewing machine already has the capability to pull the fabric at the appropriate speed and tension necessary for the stitch on its own. 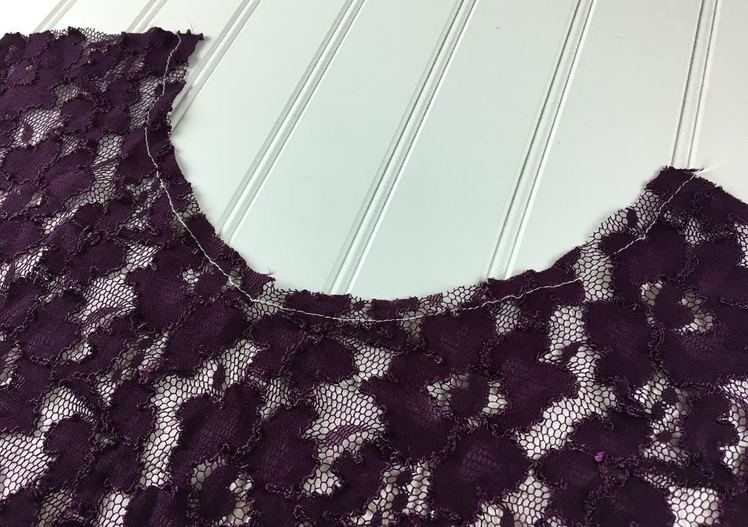 
0 Comments
Leave a Reply. |
The Blog:A journey into our design process, sewing tutorials, fashion tips, and all the inspiring people and things we love. 
Doina AlexeiDesigner by trade and dressmaker at heart. I spend most of my days obsessing over new fabrics and daydreaming new ideas. 
Sadie
Executive Assistant & Client Relations Manager Archives
November 2019
Categories
All

|

-
Sewing Tutorials
-
Basics
>
- Aligning Pattern Grainlines To Fabric
- Preparing Fabrics For Sewing
- Pinning Sewing Patterns To Fabric
- Placing Sewing Patterns On Fabric For Cutting
- Rotary Cutters or Fabric Scissors?
- Cutting The Sewing Patterns
- What Are Notches And How To Use Them In The Sewing Process
- Transferring Notches From Pattern To Fabric
- Transferring Seamlines to Fabric
- Staystitching
- Backstitching: A Complete Guide
- Hand Basting: A Complete Guide
- Sewing Continuous Bias Binding
- Darts >
-
Sewing Seams
>
- The Basics Of Seams And Seam Allowance
- How To Sew A Straight Seam
- Sewing Curved Seams
- Sewing Corner Seams
- Trimming And Grading Seam Excess
- Notching/Clipping Seam Allowance for Tension Release
- Sewing Topstitched Seams
- Sewing Corded Seams
- Sewing A Slot Seam
- Sewing A Gathered Seam
- Sewing Bias Seams
- Sewing Seams With Ease
- Sewing Seams With Crossing Seamlines
- Sewing Unlike Fabric Seams
- How To Iron Seams: Ironing Tools And Conventions
- Sewing With Knit Fabrics
- Understanding Stitch Length And Tension
- Sewing Unique Fabric Seams
-
Seam Finishes
>
- Seam Finishing Techniques - Overview
- Applying A Pinked Seam Finish
- Applying A Bias Bound Seam Finish
- Serging And Zigzag Seam Finishes
- Sewing A Self-Bound Seam Finish
- Sewing A French Seam Finish
- Sewing A Hong Kong Seam Finish
- Sewing A Mock French Seam Finish
- Sewing A Turned-and-Stitched Seam Finish
- Sewing Overcast Hand-Applied Seam Finishes
- Sewing A Flat Felled Seam
- Sewing A Hairline Seam Finish
-
Hem Finishes
>
- Garment Hem Finishes: Overview
- Sewing A Double Fold Hem Finish
- Sewing A Single Fold Hem Finish
- Sewing Bound Hem Finishes
- Sewing An Exposed Double Layer Bound Hem
- Sewing A Folded-Up Bound Hem with Pre-folded Binding
- Sewing A Hong Kong Hem Finish
- Sewing A Band Hem Finish
- Sewing A Bias Faced Hem Finish
- Sewing A Twill Tape Hem Finish
- Sewing A Rolled Hem Finish
- Sewing A Shaped Hem Facing
- Using Fusible Hem Tape And Webbing
- Finishing A Lace Fabric Hem
- Finishing A Leather Hem
- Sewing Faced Hem Corners
- How To Finish Lining At The Hem
- Finishing Fabric Corners by Mitering >
- Interfacing A Hemline: Lined And Unlined Examples
-
Sewing Pockets
>
- Curved Patch Pocket With Flap
- Unlined Square Patch Pockets
- Lined Patch Pockets: Two Ways
- Extension On-Seam Pockets
- Separate On-Seam Pocket
- Front Hip Pockets
- Bound Double Welt Pocket
- Double Welt Pocket With Flap
- Self-Welt Pocket (Using Single Fabric Layer)
- Slanted Welt Pocket (Hand-Stitched)
- Faced Slash Pockets: Overview >
-
Sewing Zippers
>
- Sewing Zippers: General Information
- Sewing A Centered Zipper
- Sewing A Lapped Zipper
- Sewing An Invisible Zipper
- Sewing A Fly Front Zipper
- Sewing A Closed-End Exposed Zipper (No Seam)
- Sewing An Exposed Separating Zipper
- Sewing Hand Stitched Zipper Applications
- Sewing A Zipper Underlay
- Sewing A Placket-Enclosed Separating Zipper
- Sleeveless Finishes >
-
Neckline Finishes
>
- Sewing A Neck Shaped Facing
- Sewing An All-In-One Neck Facing
- Neck And Garment Opening Combination Facings >
- Sewing A Bias Faced Neckline Finish
- Sewing A Band Neckline Finish
- Bound Neckline Finishes: Overview >
- Sewing A Semi-Stretch Strip Band Neckline
- Ribbed Neck Band And Classic Turtleneck
- Decorative Neckline Finishes >
- Finishing Facing Edges >
-
Extras
>
- A Complete Guide on Interfacing
- Sewing Bound Spaghetti Straps
- Sewing Spaghetti Straps To A Faced Neckline
- Sewing Ruffles: Overview
- Patterning And Sewing A Circle Ruffle
- Sewing A Gathered Heading Ruffle
- Sewing Double Layer Gathered Ruffles
- Sewing A Gathered Ruffle Into A Seam
- Sewing A Gathered Ruffle To A Fabric Edge
- Sewing A Fabric Surface Slit
- Sewing A Slit Seam
- Hand-Applied Straight Stitches
- Hand-Applied Blind Stitches
- Hand-Applied Overedge Stitches
- Hand-Applied Tack Stitches
- Hand-Applied Decorative Stitches
-
Basics
>
- Custom Bridal
- Custom Apparel
- About
- Blog
 RSS Feed
Services |
Company |
|
